So you want to complete all 20 Wild Zones in Pokémon Legends: Z-A? I respect the ambition, but let me be real with you—this is a massive undertaking. Between time-exclusive spawns, hidden rooftop Pokémon, aggressive Alpha encounters, and zones that don’t unlock until post-game, you’re looking at hours of methodical exploration.
I’ve spent way too much time hunting down every single Pokémon across all these zones, and I’ve learned which ones are genuinely tricky versus which ones just seem difficult. Let me break down everything you need to know about Wild Zone completion in Z-A.
Wild Zone System Overview: What You Need to Know
Total Wild Zones: 20 (most Pokémon games have never had this many!)
Initial access: Only 6 zones available at the start (Wild Zones 1-6)
Progressive unlocks: 14 zones unlock as you progress through the main story
Final unlock: Wild Zone 20 opens at the start of post-game (after Main Mission 37)
Average Pokémon per zone: 6-8 regular Pokémon + 1-2 Alpha Pokémon (Wild Zone 20 is the massive exception with 15 regular + rotating Alphas)
Critical Completion Tips
Time management matters: Many Pokémon only spawn during day or night. You’ll need to visit zones at different times. Check our time-change guide for quick switching.
Vertical exploration is key: Some zones extend onto rooftops with completely different spawns. If you’re stuck at 80% completion, climb to the nearest rooftop and survey the area.
Alpha Pokémon don’t count: You do NOT need Alpha Pokémon for 100% zone completion, but they’re excellent for Seeds of Mastery farming and team-building.
Use the interactive map: The game has a full interactive map for tracking your progress. Use it religiously to identify missing Pokémon.
Wild Zones 1-6: Early Game Access (Main Mission 3)
These six zones unlock together at the beginning of Main Mission 3, giving you a decent exploration area from early game.
Wild Zone 1 – Beginner Friendly
Unlock requirement: Main Mission 3 start
Total Pokémon: 7 regular + 1 Alpha
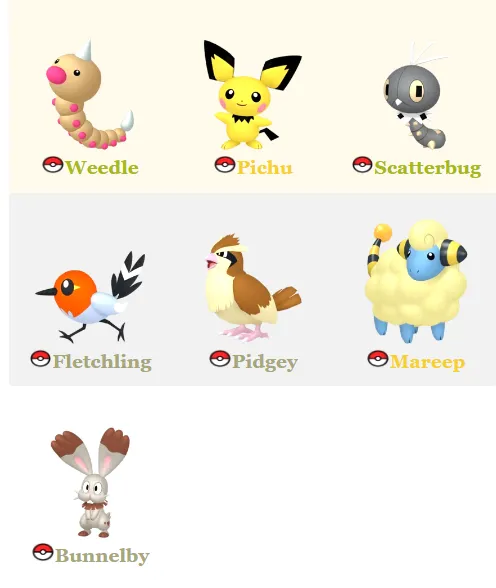
Full roster:
- Weedle
- Pichu
- Scatterbug
- Fletchling
- Pidgey
- Mareep (featured in our Shiny Mareep mission guide)
- Bunnelby (check our Big Ol’ Bunnelby guide)
Alpha Pokémon: Alpha Pidgey
Why it matters: This is where most players learn the zone completion mechanics. It’s straightforward with no rooftop complexity, making it perfect for understanding spawn patterns.
Wild Zone 2 – Water Introduction
Unlock requirement: Main Mission 3 start
Total Pokémon: 6 regular + 3 Alphas
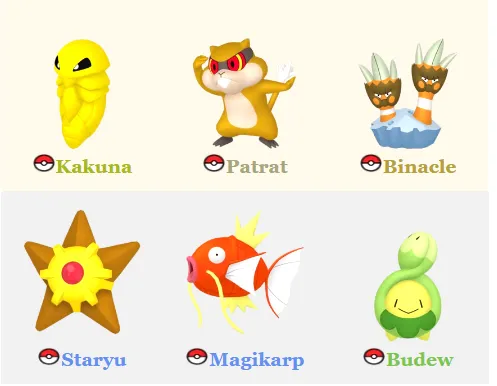
Full roster:
- Kakuna
- Patrat
- Binacle
- Staryu (night only)
- Magikarp
- Budew
Alpha Pokémon: Alpha Patrat, Alpha Staryu, Alpha Magikarp
Time-exclusive alert: Staryu only spawns at night. This is your first lesson in time management for zone completion.
Detailed guide: Wild Zone 2 Complete Guide
Wild Zone 3 – Fairy Introduction
Unlock requirement: Main Mission 3 start
Total Pokémon: 6 regular + 1 Alpha
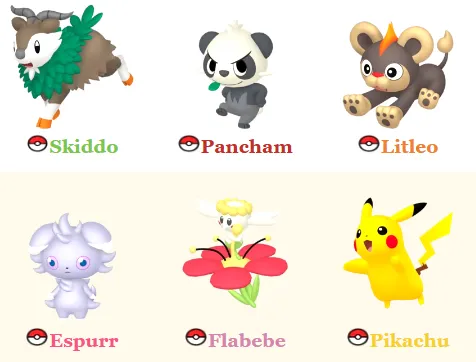
Full roster:
- Skiddo
- Pancham
- Litleo
- Espurr
- Flabébé (full details in our Flabébé locations guide)
- Pikachu (see our Pikachu guide)
Alpha Pokémon: Alpha Litleo
Notable: Pikachu is relatively rare here, so stock up on Poké Balls if you’re hunting for one.
Wild Zone 4 – Ghost Types
Unlock requirement: Main Mission 3 start
Total Pokémon: 6 regular + 2 Alphas
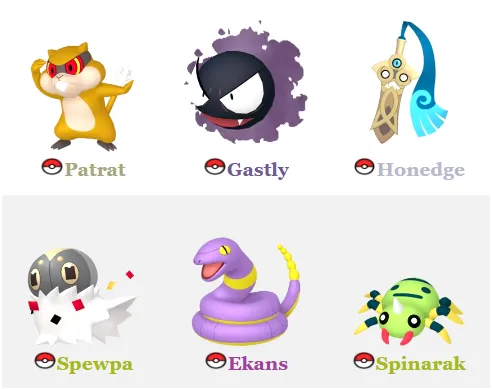
Full roster:
- Patrat
- Gastly
- Honedge (night only)
- Spewpa (see our Spewpa museum locations guide)
- Ekans
- Spinarak
Alpha Pokémon: Alpha Gastly, Alpha Spinarak
Time-exclusive alert: Honedge only spawns at night. Don’t miss it!
Detailed guide: Wild Zone 4 Complete Guide
Wild Zone 5 – Abra Chaos
Unlock requirement: Main Mission 3 start
Total Pokémon: 7 regular + 2 Alphas
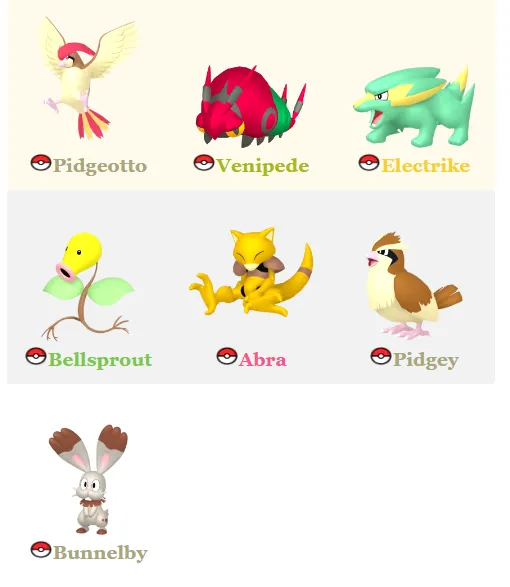
Full roster:
- Pidgeotto
- Venipede
- Electrike
- Bellsprout
- Abra (notoriously difficult to catch – see our Abra catching guide)
- Pidgey
- Bunnelby
Alpha Pokémon: Alpha Whirlipede, Alpha Bellsprout
Frustration warning: Abra teleports constantly. Bring Quick Balls or accept that you’ll chase it for a while.
Wild Zone 6 – Diverse Spawns
Unlock requirement: Main Mission 3 start
Total Pokémon: 7 regular + 4 Alphas
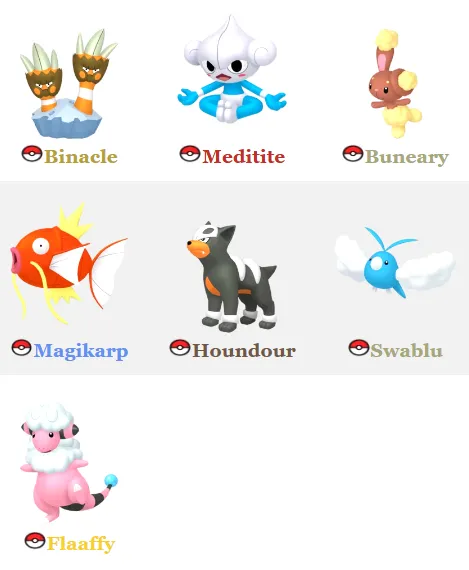
Full roster:
- Binacle
- Meditite (day only)
- Buneary
- Magikarp
- Houndour
- Swablu
- Flaaffy
Alpha Pokémon: Alpha Binacle, Alpha Magikarp, Alpha Houndour, Alpha Houndoom
Time-exclusive alert: Meditite only spawns during the day.
Detailed guide: Wild Zone 6 Complete Guide
Wild Zones 7-10: Mid-Game Zones (Main Mission 9)
These four zones unlock together after completing Main Mission 9 and obtaining your Mega Ring by defeating Rogue Mega Absol. Check our Rogue Mega battles guide if you’re stuck.
Wild Zone 7 – The Audino Problem
Unlock requirement: Main Mission 9 start
Total Pokémon: 7 regular + 1 Alpha
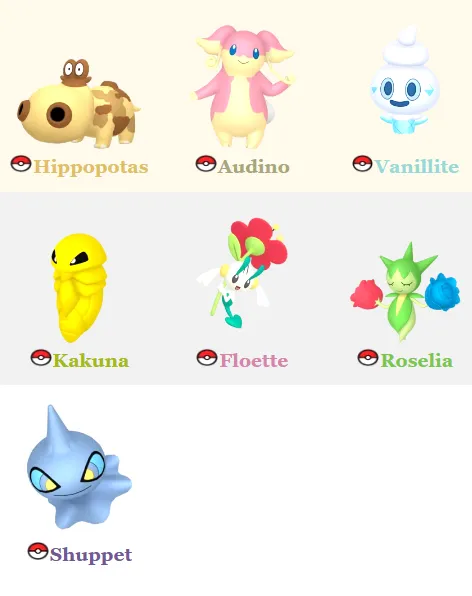
Full roster:
- Hippopotas (day only, aggressive swarms)
- Audino (EXTREMELY skittish – runs away permanently!)
- Vanillite (useful for Ice Beam mission)
- Kakuna
- Floette
- Roselia
- Shuppet (night only)
Alpha Pokémon: Alpha Fletchinder
Critical warning: Audino will run away and despawn if you fail to catch it quickly. Use stealth + Fighting-type moves or Quick Balls. This is the most frustrating catch in the entire zone.
Detailed guide: Wild Zone 7 Complete Guide
Wild Zone 8 – Ground Central
Unlock requirement: Main Mission 9 start
Total Pokémon: 6 regular + 2 Alphas
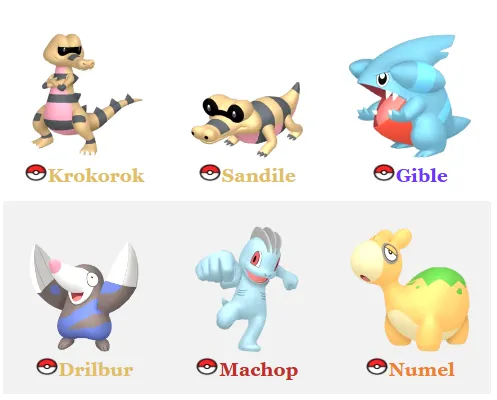
Full roster:
- Krokorok
- Sandile
- Gible (pseudo-legendary!)
- Drilbur
- Machop
- Numel
Alpha Pokémon: Alpha Krokorok, Alpha Camerupt
Notable: Gible is a pseudo-legendary that evolves into Garchomp. Worth investing in for late-game content.
Detailed guide: Wild Zone 8 Complete Guide
Wild Zone 9 – Vertical Challenge
Unlock requirement: Main Mission 9 start
Total Pokémon: 6 regular + 2 Alphas
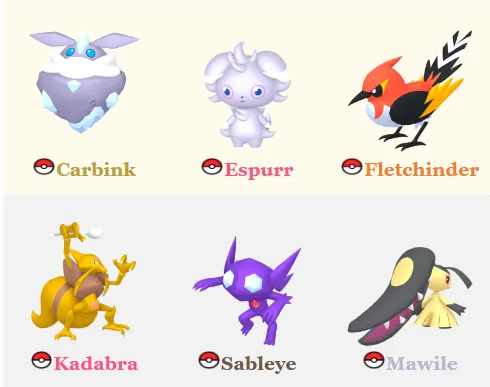
Full roster:
- Carbink (rooftop spawns)
- Espurr (rooftop spawns, runs quickly)
- Fletchinder (rooftop spawns)
- Kadabra (split spawns – see our Kadabra guide)
- Sableye
- Mawile
Alpha Pokémon: Alpha Meowstic, Alpha Manectric
Verticality warning: This zone is ALL about rooftop exploration. Missing ladders means missing Pokémon.
Detailed guide: Wild Zone 9 Complete Guide
Wild Zone 10 – The Carvanha Pool
Unlock requirement: Main Mission 9 start
Total Pokémon: 7 regular + 3 Alphas
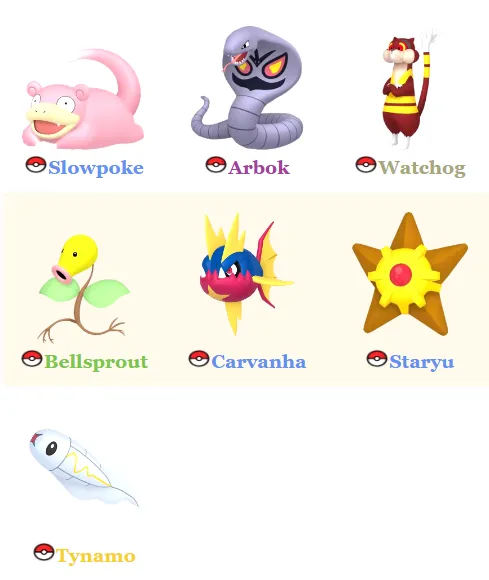
Full roster:
- Slowpoke
- Bellsprout
- Carvanha (highly aggressive, swarms you!)
- Staryu
- Tynamo (hidden near exit – easy to miss!)
- Arbok (rooftop spawns)
- Watchog (rooftop spawns)
Alpha Pokémon: Alpha Sharpedo (Level 42), Alpha Watchog (Level 41), Alpha Arbok (Level 50 – strongest in zone)
Danger zone: The Carvanha pool will wreck unprepared teams. Bring Electric-types with Thunderbolt.
Hidden reward: Night Slash TM near Alpha Arbok spawn (wash away purple sludge)
Detailed guide: Wild Zone 10 Complete Guide
Wild Zones 11-13: Mid-Late Game (Main Mission 14)
These three zones unlock at the start of Main Mission 14.
Wild Zone 11 – Water Focus
Unlock requirement: Main Mission 14 start
Total Pokémon: 6 regular + 2 Alphas
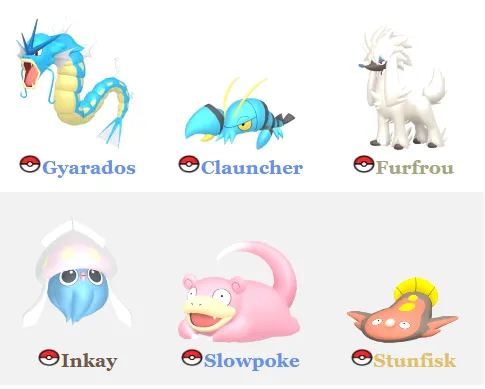
Full roster:
- Gyarados
- Clauncher
- Furfrou
- Inkay (see our Inkay evolution guide)
- Slowpoke
- Stunfisk
Alpha Pokémon: Alpha Slowbro, Alpha Clawitzer
Evolution note: Inkay requires the famous “hold your Switch upside down” evolution method.
Wild Zone 12 – Ice Beam Central
Unlock requirement: Main Mission 14 start
Total Pokémon: 8 regular + 2 Alphas
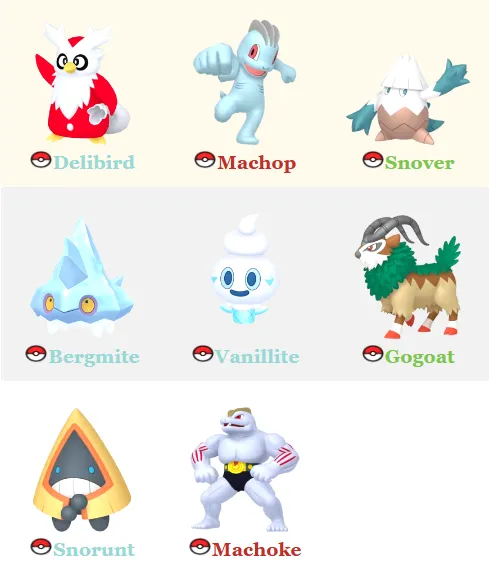
Full roster:
- Delibird
- Machop
- Snover
- Bergmite
- Vanillite
- Gogoat
- Snorunt
- Machoke
Alpha Pokémon: Alpha Abomasnow, Alpha Avalugg
Mission tie-in: This is where you get Ice Beam for Main Mission 19. Vanillite often already knows the move.
Wild Zone 13 – Bug Paradise
Unlock requirement: Main Mission 14 start
Total Pokémon: 6 regular + 2 Alphas
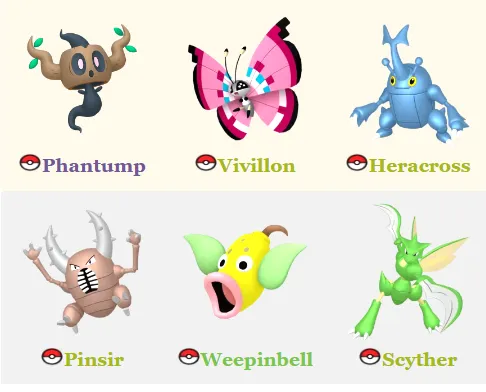
Full roster:
- Phantump (night only)
- Vivillon (day only)
- Heracross
- Pinsir
- Weepinbell (day only)
- Scyther (night only)
Alpha Pokémon: Alpha Trevenant, Alpha Weepinbell
Time management: This zone has FOUR time-exclusive spawns. You’ll need to visit during both day and night to complete it.
Wild Zones 14-15: Late Mid-Game (Main Mission 20)
These two zones unlock at the start of Main Mission 20.
Wild Zone 14 – Steel & Ground
Unlock requirement: Main Mission 20 start
Total Pokémon: 7 regular + 1 Alpha
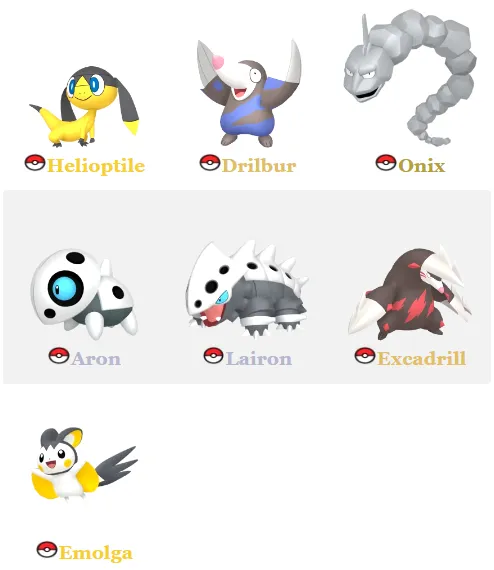
Full roster:
- Helioptile (day only)
- Drilbur
- Onix
- Aron
- Lairon
- Excadrill
- Emolga
Alpha Pokémon: Alpha Excadrill
Evolution opportunity: Aron and Lairon are both present, giving you access to the full Aggron evolution line.
Wild Zone 15 – Poison & Ghost
Unlock requirement: Main Mission 20 start
Total Pokémon: 7 regular + 3 Alphas
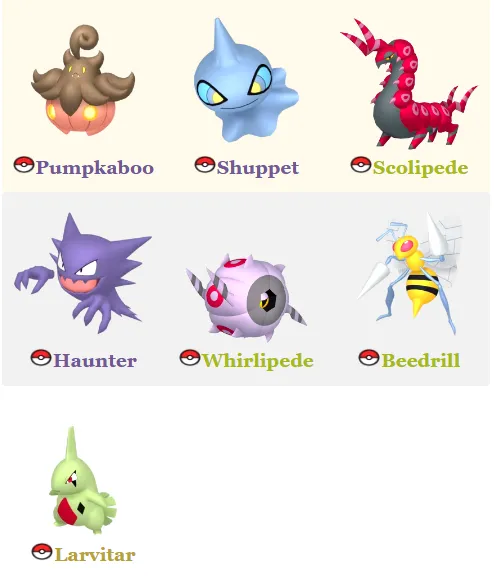
Full roster:
- Pumpkaboo
- Shuppet (night only)
- Scolipede (day only)
- Haunter (night only)
- Whirlipede (day only)
- Beedrill
- Larvitar (pseudo-legendary!)
Alpha Pokémon: Alpha Gourgeist, Alpha Banette, Alpha Beedrill
Notable: Larvitar is a pseudo-legendary that evolves into Tyranitar. Absolutely worth catching for competitive teams.
Wild Zones 16-17: Late Game (Main Mission 24)
These two zones unlock at the start of Main Mission 24.
Wild Zone 16 – Starter Territory
Unlock requirement: Main Mission 24 start
Total Pokémon: 7 regular + 1 Alpha
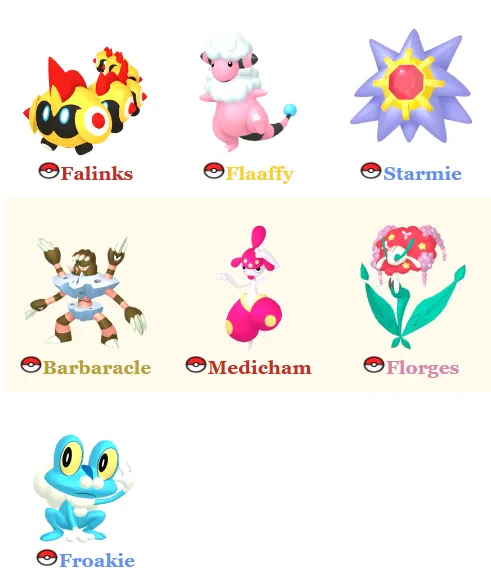
Full roster:
- Falinks
- Flaaffy
- Starmie (night only)
- Barbaracle (night only)
- Medicham (day only)
- Florges
- Froakie (Kalos starter!)
Alpha Pokémon: Alpha Ampharos
Starter alert: Froakie is one of the Kalos starters and spawns here in the wild. Great for team diversity.
Wild Zone 17 – Another Starter
Unlock requirement: Main Mission 24 start
Total Pokémon: 6 regular + 2 Alphas
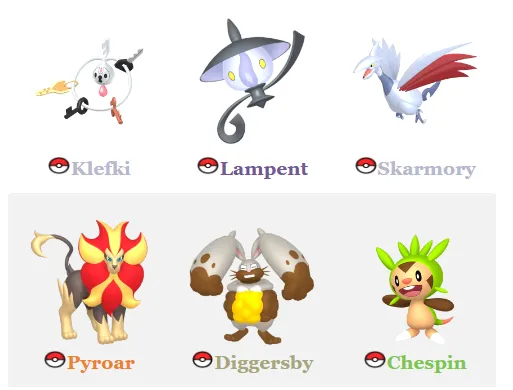
Full roster:
- Klefki (day only)
- Lampent (night only)
- Skarmory
- Pyroar
- Diggersby
- Chespin (Kalos starter!)
Alpha Pokémon: Alpha Pyroar, Alpha Mawile
Starter alert: Chespin is the second wild Kalos starter available.
Wild Zones 18-19: Very Late Game (Main Mission 30)
These two zones unlock at the start of Main Mission 30.
Wild Zone 18 – Dragon Den
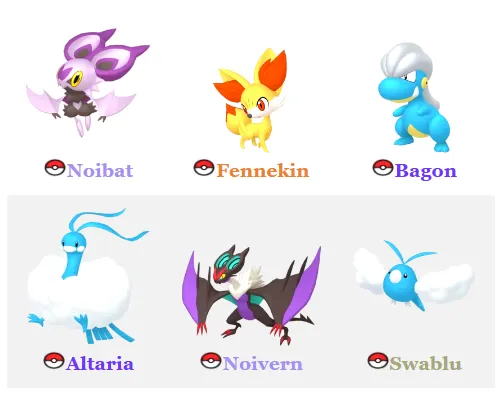
Unlock requirement: Main Mission 30 start
Total Pokémon: 6 regular + 2 Alphas
Full roster:
- Noibat (night only)
- Fennekin (Kalos starter!)
- Bagon (pseudo-legendary!)
- Altaria (day only)
- Noivern (night only)
- Swablu (day only)
Alpha Pokémon: Alpha Lopunny, Alpha Salamence
Pseudo-legendary alert: Bagon evolves into Salamence, one of the strongest Dragon-types in the game. Alpha Salamence is also available here.
Starter alert: Fennekin is the third and final wild Kalos starter.
Wild Zone 19 – Eevee Paradise
Unlock requirement: Main Mission 30 start
Total Pokémon: 7 regular + 2 Alphas
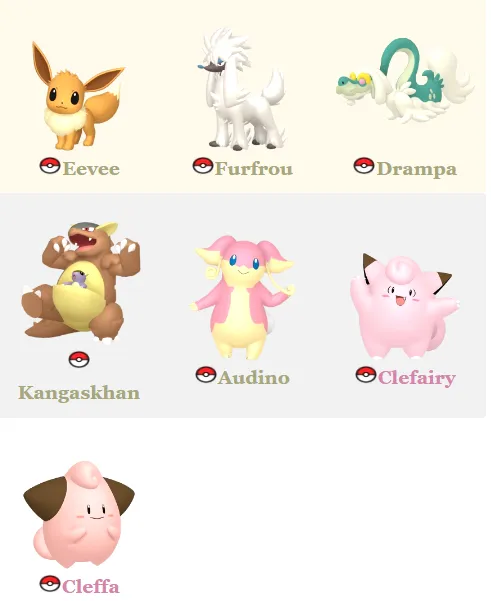
Full roster:
- Eevee (see our Eevee & Eeveelutions guide)
- Furfrou
- Drampa (day only)
- Kangaskhan
- Audino
- Clefairy (night only – check our Cleffa evolution guide)
- Cleffa (night only)
Alpha Pokémon: Alpha Furfrou, Alpha Clefable
Eevee central: This is the best place to catch Eevee for all eight Eeveelutions. Stock up!
Wild Zone 20: Post-Game Monster (After Main Mission 37)
Wild Zone 20 is unlike anything else in the game. It’s massive, contains 15 regular Pokémon, and features a rotating pool of 68 different Alpha Pokémon. Yes, you read that correctly.
Unlock requirement: Complete Main Mission 37 (post-game access)
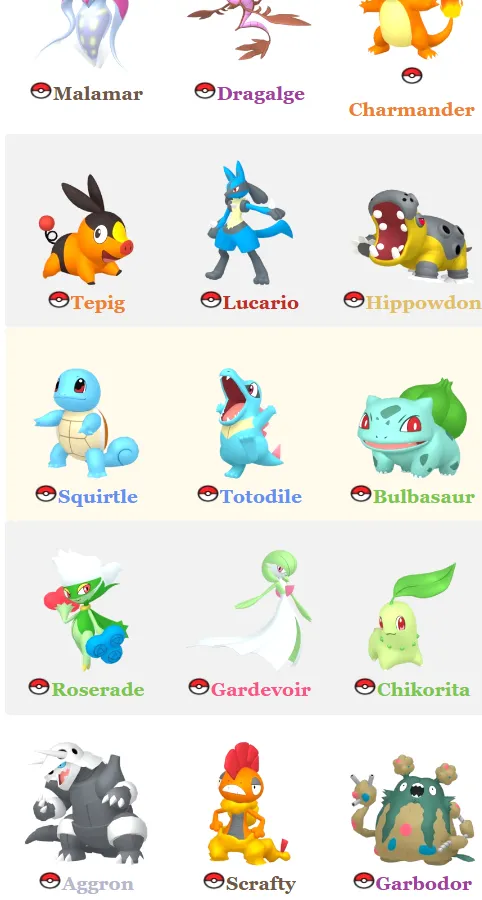
Total Pokémon: 15 regular
Full roster:
- Malamar
- Dragalge
- Charmander (Kanto starter!)
- Tepig (Unova starter!)
- Lucario
- Hippowdon
- Squirtle (Kanto starter!)
- Totodile (Johto starter!)
- Bulbasaur (Kanto starter!)
- Roserade
- Gardevoir
- Chikorita (Johto starter!)
- Aggron
- Scrafty
- Garbodor
Alpha Pokémon: 68 different species (only 2 spawn at a time)
The Alpha rotation system:
This is Wild Zone 20’s unique mechanic. Instead of having fixed Alpha spawns, the zone features a rotating pool of 68 different Alpha Pokémon, but only two are present at any given time.
How to rotate Alphas:
- Catch or defeat the two currently spawned Alphas
- Wait 5 minutes in real-time, OR
- Use fast travel to force a respawn
- Two new random Alphas will spawn from the pool
Complete Alpha pool includes:
- All Eeveelutions (Vaporeon, Jolteon, Flareon, Leafeon, Glaceon, Sylveon)
- Pseudo-legendaries (Dragonite, Tyranitar, Garchomp, Goodra, Metagross)
- Mega Evolution candidates (Absol, Lucario, Gardevoir, Gallade, Altaria, Heracross, Pinsir)
- Fully evolved starters and their lines
- High-tier competitive Pokémon
Why Wild Zone 20 matters:
This zone is essential for:
- Completing your Pokédex (access to all starter lines)
- Alpha Pokémon farming for Seeds of Mastery
- Building competitive teams with high-stat Alphas
- Mega Evolution collection
Pro tip: Set up a farming route. Catch two Alphas, fast travel out and back, catch two more. Repeat for efficient Seeds of Mastery farming.
100% Completion Strategy Guide
Time Management System
Create a day/night checklist:
- Visit each zone during daytime
- Note which Pokémon you caught
- Return at night for time-exclusives
- Use benches near Pokémon Centers to swap quickly
Zones with heavy time requirements:
- Wild Zone 13 (4 time-exclusives)
- Wild Zone 18 (4 time-exclusives)
- Wild Zone 15 (3 time-exclusives)
Rooftop Exploration Checklist
Zones with significant rooftop spawns:
- Wild Zone 9 (Carbink, Espurr, Fletchinder, Kadabra)
- Wild Zone 10 (Arbok, Watchog, Alpha Arbok)
- Multiple other zones—always look for ladders!
Pro tip: If you’re at 85-95% completion in a zone, you probably missed a rooftop spawn.
Resource Preparation
Before attempting 100% completion:
- Stock 200+ Ultra Balls minimum
- 50+ Quick Balls (for skittish Pokémon like Audino, Espurr, Abra)
- 30+ Dusk Balls (great for night catches and rooftop shadows)
- Healing items (Hyper Potions, Full Restores)
- Status healers (Antidotes, Paralyze Heals)
Team Composition for Zone Completion
Ideal completion team:
- Electric-type (for Water/Flying types, Carvanha pools)
- Fighting-type (for Normal-types, Watchog, Audino)
- Psychic-type (for Poison-types, purple sludge clearing)
- Status move user (Sleep, Paralysis for difficult catches)
- Rock-type (for Flying/Fire types, Alpha Fletchinder)
- Fast Pokémon with False Swipe (to weaken without KO)
Difficult Catches to Prepare For
Most frustrating Pokémon:
- Audino (Wild Zone 7) – Runs permanently, use Quick Balls or stealth
- Abra (Wild Zone 5) – Teleports constantly, Quick Balls recommended
- Espurr (Wild Zone 9) – Fast runner, stealth approach essential
- Kadabra (Wild Zones 9, 10) – Teleports, trade evolution required for full dex
Hidden/Easy to miss:
- Tynamo (Wild Zone 10) – Near exit, past obvious stairs
- Staryu (Wild Zone 2) – Night only
- Honedge (Wild Zone 4) – Night only
- Meditite (Wild Zone 6) – Day only
Evolution Considerations for Completion
While catching Pokémon completes zones, evolving them completes your Pokédex. Key evolution guides:
Special evolutions:
- Complete Special Evolutions Guide
- Inkay/Malamar Evolution
- Ralts Evolution Line
- Eevee & All Eeveelutions
- Cleffa Evolution Line
Friendship mechanics:
Related Gameplay Systems
Combat optimization:
Team building:
Mission help:
Resource gathering:
- Tiny Mushrooms Guide
- Colorful Screws Guide
- Master Ball Guide
- How to Remove Vines/Thorns
- Clear Purple Sludge Guide
My Honest Take on Wild Zone Completion
Completing all 20 Wild Zones is one of the most satisfying grinds in Pokémon Legends: Z-A, but it’s also genuinely time-consuming. I spent probably 30+ hours just on zone completion alone, not counting the time invested in evolving everything for full Pokédex completion.
What I loved:
- Progressive unlocks keep exploration fresh throughout the game
- Rooftop verticality adds genuine complexity to navigation
- Wild Zone 20’s Alpha rotation system is brilliant for post-game content
- Time-exclusive spawns add strategy without being tedious (benches help)
What frustrated me:
- Audino in Wild Zone 7 running away permanently is bad design
- Abra’s teleport spam gets old fast
- Some rooftop ladders are genuinely hard to spot
- Wild Zone 20’s 68 rotating Alphas means RNG farming for specific ones
Worth it? Absolutely, especially if you’re a completionist. The sense of progression from struggling with Wild Zone 1 to farming Alpha Garchomp in Wild Zone 20 is incredibly rewarding.
Ending Notes
Completing all 20 Wild Zones in Pokémon Legends: Z-A is a marathon, not a sprint. Start with the early zones to learn mechanics, pay attention to time-exclusives, always check rooftops, and save Wild Zone 20 for when you’re ready to commit to serious Alpha farming.
The game respects your time more than previous Pokémon titles—benches for time-swapping, fast travel for respawns, and buyable evolution stones all help. But it still demands thoroughness and attention to detail.
My recommendation: Complete zones as they unlock rather than saving them all for post-game. This naturally paces your progression and ensures you’re not overwhelmed by 14 incomplete zones after finishing the story.
And seriously—use Quick Balls on Audino. Trust me on this.
For official game information, visit the Pokémon Legends website or grab the game from Nintendo’s store.
Now get out there and complete those Wild Zones, trainer!