T.E.D.D., the beloved (and slightly unhinged) bus driver from Black Ops 2’s Tranzit, has returned—but this time, he’s not driving. Instead, he’s issuing challenges that test your skills under pressure while offering some of the best loot in Black Ops 7 Zombies. These timed trials represent a risk-versus-reward system that can dramatically accelerate your progression through higher rounds.
But here’s the thing: T.E.D.D. Tasks aren’t just “complete and collect” objectives. They require preparation, strategy, and quick decision-making to maximize rewards. Let me break down everything you need to know to dominate these challenges and walk away with legendary-tier loot every single time.
What Are T.E.D.D. Tasks?
T.E.D.D. Tasks are timed objective challenges that spawn periodically throughout your Zombies match on Ashes of the Damned. Think of them as mini-trials that test specific skills—whether that’s accuracy, equipment usage, or pure survival instinct—in exchange for valuable rewards.
Core Mechanics:
- Random spawn locations across major map landmarks
- Cost 500 Essence to activate
- Approximately 2-minute time limit to complete
- Performance-based rewards (Bronze, Silver, Gold, Legendary)
- Purple-eyed zombie waves spawn continuously during the trial
- Reward chest appears at completion containing tier-appropriate loot
The genius of T.E.D.D. Tasks is that they force you to temporarily abandon your normal strategy. Suddenly, you can’t just camp in your favorite spot with your Pack-a-Punched AR—you need to adapt to whatever challenge T.E.D.D. throws at you.
When and Where T.E.D.D. Tasks Spawn
Understanding the spawn pattern helps you plan your rounds around these lucrative opportunities.
Spawn Timing
First Appearance: After completing Round 9 Subsequent Spawns: Approximately every 4 rounds thereafter Typical Pattern: Rounds 9, 13, 17, 21, 25, 29, etc.
The 4-round interval isn’t rigidly fixed—sometimes tasks appear slightly earlier or later depending on various factors. However, you can generally predict when the next task will spawn and position yourself accordingly.
Spawn Locations
T.E.D.D. Tasks spawn exclusively at major landmarks, never in transit zones or remote areas. The possible locations are:
- Janus Towers Plaza (central hub location)
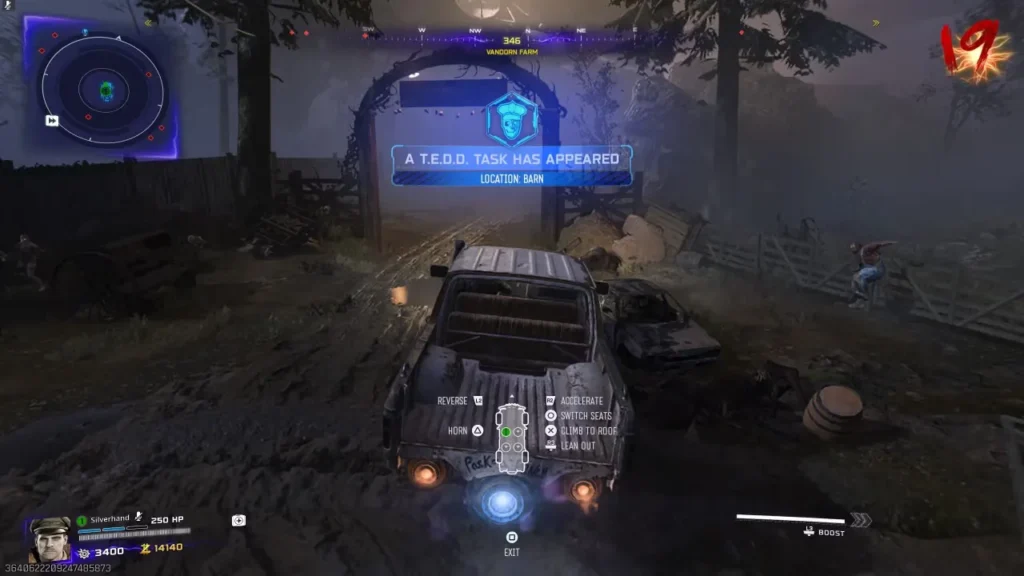
- Vandorn Farm (agricultural area)
- Blackwater Lake (waterfront zone)
- Ashwood (residential/commercial district)
- Exit 115 (highway exit area)
- Zarya Cosmodrome (industrial/space facility)
Why This Matters: You never have to worry about a task spawning somewhere inaccessible or dangerous to reach. All spawn points are within established safe zones with nearby resources and escape routes.
How to Find Active Tasks
When a T.E.D.D. Task spawns, the game provides multiple indicators:
HUD Alert: A notification appears on your screen reading: “A T.E.D.D. Task Has Appeared” with the specific location name listed below.
Minimap Marker: Check the top-left minimap—a distinctive icon shows both the direction and approximate distance to the active task.
Visual Indicator: Look to the sky for a swirling portal effect marking the exact location. This is visible from significant distances across the map.
Pro Tip: If you’re mid-combat when a task spawns, finish your immediate engagement before rushing to the location. The task doesn’t despawn quickly, so you have time to prepare properly.
How to Activate and Complete T.E.D.D. Tasks
Once you’ve located the task, here’s the exact process:
Activation
- Approach the T.E.D.D. Task marker (swirling portal location)
- Interact with the task prompt (should cost 500 Essence)
- Read the challenge objective displayed on your HUD
- Mentally prepare for the specific challenge type
Important: Make sure you have 500 Essence before attempting to activate. Running to a task only to realize you’re broke wastes precious time.
Challenge Execution
Timer: Approximately 2 minutes from activation Enemy Spawns: Continuous waves of purple-eyed zombies Objective Types: Varies randomly (detailed in next section) Failure Condition: Time expires before completing objective
Purple-Eyed Zombies: These aren’t your standard Dark Aether zombies. Purple-eyed variants during T.E.D.D. Tasks are often more aggressive and spawn in higher density than normal rounds. Treat them as a constant threat, not just background enemies.
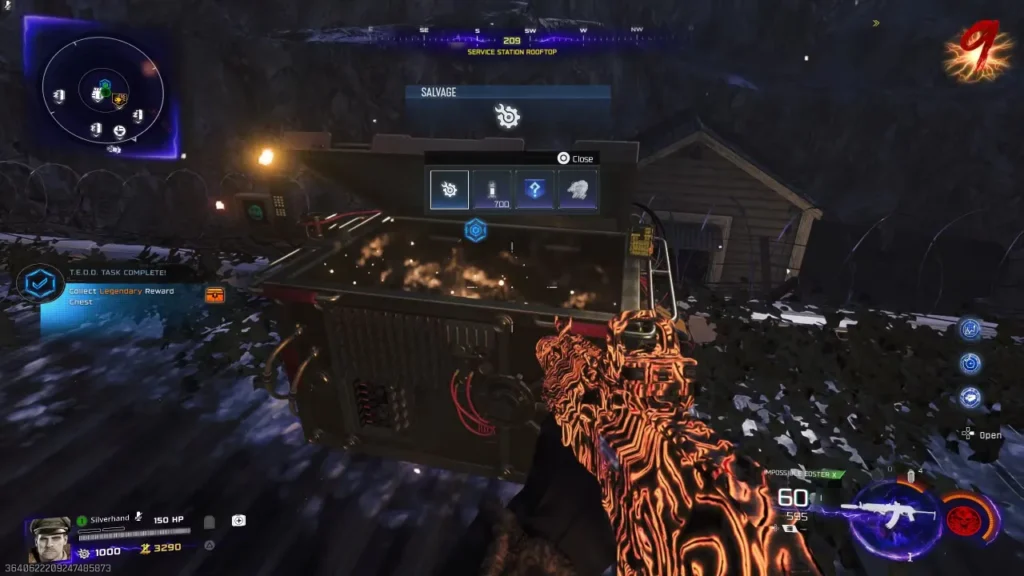
Completion and Rewards
Upon Successful Completion:
- The timer stops
- Remaining zombies despawn or die automatically
- A golden reward chest appears at the task location
- Interact with the chest to claim your loot
Reward Tiers: Your performance determines the quality of rewards:
- Bronze Tier: Minimal completion, basic rewards
- Silver Tier: Average completion, decent rewards
- Gold Tier: Strong completion, good rewards
- Legendary Tier: Perfect or near-perfect completion, best rewards
The exact requirements for each tier vary by challenge type, but generally: speed, efficiency, and minimal damage taken contribute to higher tier achievement.
T.E.D.D. Task Challenge Types
The randomized nature means you need to be versatile. Here are the common challenge types you’ll encounter:
Critical Kill Challenges
Objective: Eliminate X number of zombies with critical hits (headshots/weak points) Difficulty: Medium Requirements: Accurate aim, precision weapons
Strategy:
- Use weapons with good sights and low recoil
- Aim deliberately—rushed shots miss critical spots
- Deadshot Daiquiri perk makes this trivial if you have it
- High fire rate weapons give more opportunities for crits
Best Weapons:
- Assault rifles with optics
- Marksman rifles (M8A1 excels here)
- Tactical rifles
- Any sniper rifle
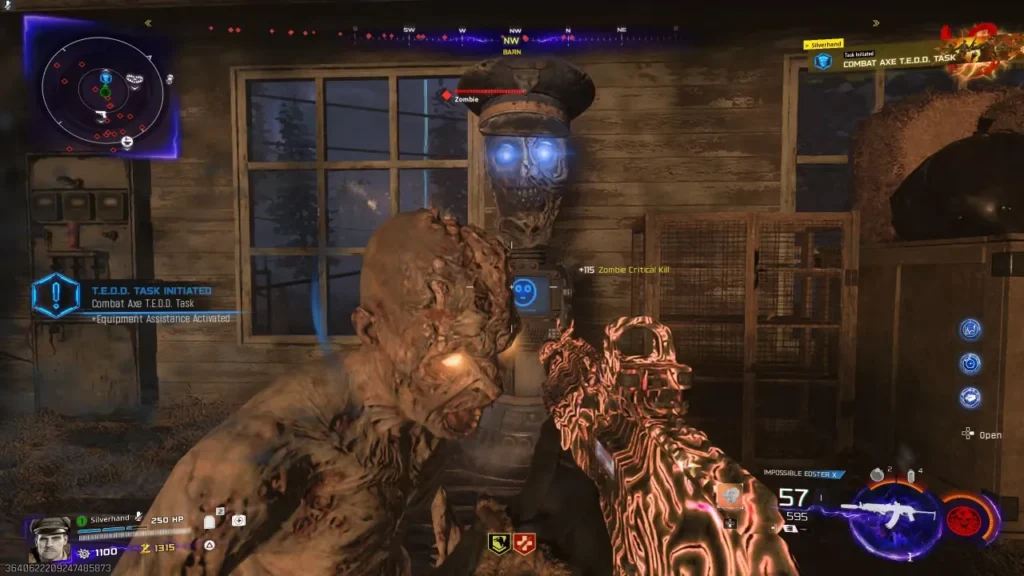
Equipment Kill Challenges
Objective: Eliminate X zombies using specific equipment (Combat Axes, grenades, etc.) Difficulty: Medium to Hard Requirements: Sufficient equipment stock, good aim/timing
Common Variants:
- Combat Axe kills: Retrieve axes after throws, aim for groups
- Lethal grenade kills: Cook grenades for maximum effect
- Tactical equipment uses: Usually stun-based objectives
Strategy:
- Stock up on required equipment BEFORE the task spawns (if possible)
- Train zombies into tight groups for multi-kills
- For Combat Axes: aim low to increase retrieval chances
- Crafting Tables nearby can resupply mid-challenge
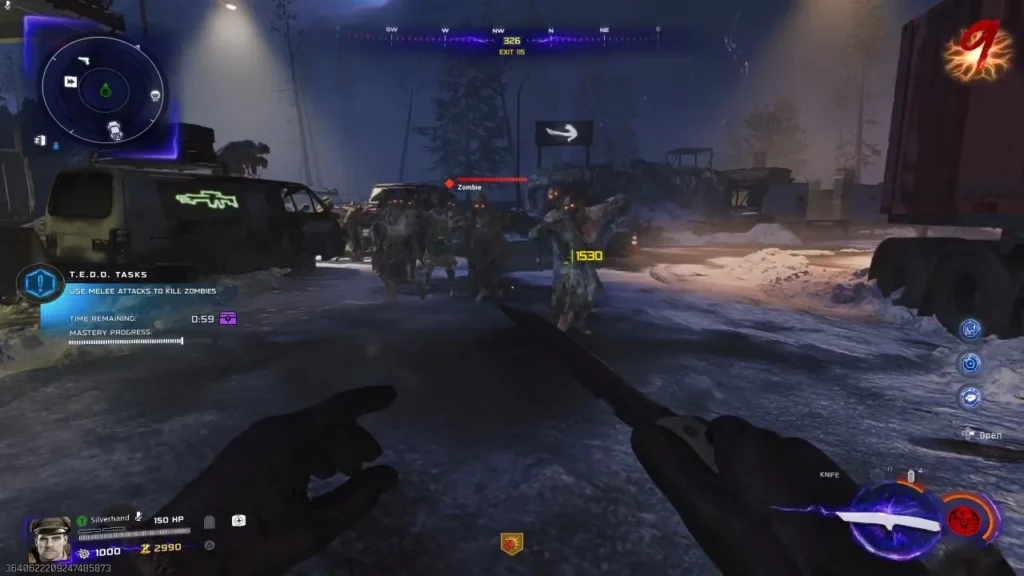
Melee Kill Challenges
Objective: Eliminate X zombies using melee attacks Difficulty: Easy to Medium (usually provides Melee Macchiato buff) Requirements: Aggression, good positioning
Melee Macchiato Auto-Grant: Most melee challenges automatically provide the Melee Macchiato perk temporarily, dramatically increasing melee damage. This makes the challenge much more manageable than it sounds.
Strategy:
- Stay mobile—standing still means getting surrounded
- Knife while moving in circles (training)
- Use doorways and choke points to funnel zombies
- Don’t be greedy—better to take fewer kills safely than wipe
Pro Tip: Even with Melee Macchiato, higher rounds make this challenging. Consider using Juggernog and Stamin-Up for survivability and mobility.
Survival/Defense Challenges
Objective: Defend a specific location or survive in an area for a set duration Difficulty: Medium to Hard Requirements: Area control, ammo management
Strategy:
- Identify all entry points immediately
- Use explosives to control chokepoints
- Keep moving within the defense zone
- Don’t tunnel vision—watch all angles
- Field Upgrades like Trophy System help immensely
Rapid Elimination Challenges
Objective: Kill X zombies as quickly as possible Difficulty: Easy to Medium Requirements: High damage output, efficient weapons
Strategy:
- Use your best, fully upgraded weapon
- Wonder Weapons excel here if available
- Ammo mods with area effects (Napalm Burst, Dead Wire) speed completion
- Train zombies into groups for multi-kills
- Don’t conserve ammo—finish fast for better tier
Special Weapon Challenges
Objective: Eliminate zombies using specific weapon types (pistols only, shotguns only, etc.) Difficulty: Varies greatly by weapon type Requirements: Having the correct weapon class available
Strategy:
- Always carry diverse weapon types as backups
- If you don’t have the required type, hit Wall Buys quickly
- Pack-a-Punched versions of restricted weapons still count
- Weapon class restrictions can be brutal in high rounds
Reward Breakdown by Tier
Understanding what each tier provides helps you decide how much effort to invest:
Bronze Tier Rewards
Typical Contents:
- Small amounts of salvage (150-300)
- Basic equipment refills
- Common rarity weapon upgrades (rare)
When Bronze is Acceptable:
- Very early game (Round 9-15) where any salvage helps
- Time constraints prevent higher tier attempts
- You’re low on resources and any reward helps
Silver Tier Rewards
Typical Contents:
- Moderate salvage amounts (300-600)
- Equipment and tactical refills
- Occasional rare tools
- Small Essence bonuses
When Silver is Acceptable:
- Mid-game when you need quick resources
- Challenge type doesn’t favor your current loadout
- Playing it safe to avoid death
Gold Tier Rewards
Typical Contents:
- Substantial salvage (600-1,200)
- Quality equipment and scorestreaks
- Weapon upgrade tools (uncommon to rare)
- Decent Essence bonuses
- Occasional Mystery Perk
Target Tier: Gold should be your minimum target for most tasks. The reward jump from Silver to Gold is significant and worth the extra effort.
Legendary Tier Rewards
Typical Contents:
- Large salvage amounts (1,200-2,000+)
- Epic/Legendary weapon upgrade tools
- Mystery Perks (always one you don’t have)
- High-tier equipment and scorestreaks
- Maximum Essence bonuses
Priority Target: Legendary tier is worth pursuing aggressively. The Mystery Perk alone can be game-changing, especially if you’re working toward permanent perks.
Mystery Perk Mechanic: When you receive a Mystery Perk from a Legendary completion, it will ALWAYS be a perk you don’t currently have. This makes Legendary completions incredibly valuable for rounding out your perk collection quickly.
For more on salvage economy and why these rewards matter, check our dedicated farming guide.
Strategic Approach to T.E.D.D. Tasks
Simply completing tasks isn’t enough—you need to maximize efficiency and rewards.
Pre-Task Preparation
Before Round 9:
- ✅ Have at least one Pack-a-Punched weapon ready
- ✅ Purchase essential perks (Juggernog, Speed Cola minimum)
- ✅ Stock equipment from Crafting Tables
- ✅ Maintain 500+ Essence reserve for task activation
- ✅ Know the map layout and task spawn locations
Loadout Diversity: Carry weapons from different classes when possible. Having both an AR and a shotgun, for example, gives you flexibility when challenges demand specific weapon types.
During Task Execution
Focus Priority:
- Understand the objective completely before engaging
- Ignore regular strategy—adapt to the challenge requirements
- Speed matters—faster completion usually equals better tier
- Efficiency over style—don’t showboat, just complete it
- Survival first—dead players get zero rewards
Resource Management:
- Use ammo liberally—tasks are worth the investment
- Don’t hesitate to use equipment or Field Upgrades
- Legendary rewards often refund what you spend
Post-Task Recovery
After Collection:
- Immediately heal and repair armor if damaged
- Restock ammo from nearby Wall Buys or Ammo Caches
- Plan route to next safe area or objective
- Begin preparing for next task (roughly 4 rounds away)
Advanced Tactics and Optimization
Perk Synergies for Tasks
Certain perks dramatically improve task performance:
Deadshot Daiquiri:
- Makes critical kill challenges nearly automatic
- Essential for headshot-focused objectives
- Worth purchasing specifically for tasks
Speed Cola:
- Faster reloads reduce downtime
- Critical for rapid elimination challenges
- Generally useful across all task types
Stamin-Up:
- Mobility for defense challenges
- Escape option when overwhelmed
- Training efficiency improvement
Juggernog:
- Survivability buffer for mistakes
- Mandatory for melee challenges
- General safety net
For complete perk optimization, see our best perk augments guide.
Weapon Loadout Recommendations
Ideal Primary: High-capacity AR with good accuracy
- M8A1 for precision challenges
- Dravec 45 for versatility
- Any returning BO2 weapon you’re comfortable with
Ideal Secondary: Close-range option or specialized tool
- Shotgun for crowd control
- Ray Gun if available
- Coda 9 pistol for backup DPS
Alternative: Wonder Weapon if you’ve acquired one
- Most wonder weapons trivialize task challenges
- Save ammo specifically for tasks
- Pair with regular weapon for non-task rounds
Field Upgrade Usage
Strategic Field Upgrade deployment can secure Legendary completions:
Energy Mine:
- Place before starting defense challenges
- Damages and slows purple-eyed zombies
- Provides breathing room in tight situations
Healing Aura:
- Emergency recovery during melee challenges
- Saves runs when you overextend
- Allows more aggressive play
Frenzied Guard:
- Temporary invulnerability for risky plays
- Useful for equipment gathering mid-challenge
- Taunt effect controls enemy positioning
GobbleGum Assistance
Certain GobbleGums pair beautifully with tasks:
Anywhere But Here (if available): Emergency escape if overwhelmed during task.
Alchemical Antithesis (if available): Refills ammo mid-challenge—critical for ammo-intensive tasks.
Arsenal Accelerator (if available): Faster scorestreak charging—useful if task allows scorestreak usage.
Solo vs. Co-op Task Strategies
Solo Play Advantages
Full Control:
- All rewards go to you
- Execute strategy at your pace
- No coordination required
- Easier to predict zombie behavior
Solo-Specific Tips:
- Quick Revive is essential (self-revive during tasks saves runs)
- Conservative approach to avoid death
- Can’t rely on teammates for revives
- Time your tasks for optimal round moments
Co-op Play Advantages
Divided Workload:
- Split objectives (one player gets melee kills while others protect)
- Revive safety net if someone goes down
- Combined firepower for rapid elimination challenges
- Multiple perspectives for defense challenges
Co-op-Specific Tips:
- Designate roles BEFORE starting (“You get axe kills, I’ll cover”)
- Communicate constantly (call out threats, progress)
- Don’t compete for kills in objective-based tasks
- One player should focus solely on objective, others provide support
Coordination Example: For Combat Axe challenges in co-op, one player throws axes while teammates slow zombies with stuns and cover fire. This is far more efficient than everyone competing for axe kills.
Common Mistakes to Avoid
Starting Unprepared: Don’t activate tasks without checking your ammo, armor, and health. Two minutes isn’t enough time to recover from starting disadvantaged.
Ignoring the Objective: It’s easy to fall into normal zombie-killing patterns and forget the specific challenge requirement. Stay focused on what counts.
Being Too Conservative: Bronze tier rewards aren’t worth the 500 Essence activation cost. Go for Gold minimum, Legendary ideal.
Tunnel Vision: Focusing so hard on the objective that you ignore the environment and get trapped is a common fail state.
Poor Resource Investment: Using a valuable GobbleGum or Wonder Weapon on an easy task wastes resources better saved for difficult challenges.
Not Completing Tasks: Some players skip T.E.D.D. Tasks entirely. This is leaving massive value on the table—rewards easily justify the 500 Essence cost and 2 minutes invested.
T.E.D.D. Tasks in Your Overall Strategy
These challenges integrate into your broader Zombies approach:
Progression Acceleration
Early Game (Rounds 9-20): Tasks provide salvage for critical weapon rarity upgrades earlier than normal farming allows.
Mid Game (Rounds 21-35): Mystery Perks from Legendary completions accelerate your perk collection dramatically.
Late Game (Rounds 36+): Continued salvage income and equipment refills maintain your loadout without excessive farming.
Easter Egg Integration
T.E.D.D. Tasks can make or break Easter egg attempts:
- Provide necessary resources for boss fights
- Offer perk opportunities without spending Essence
- Supply equipment for specific egg steps
- Generate salvage for last-minute weapon upgrades
High Round Support
For players pushing Round 50+:
- Consistent resource replenishment
- Prevents resource starvation over extended play
- Breaks up monotony of high-round training
- Provides progression even in late-game stalemate rounds
Special Considerations and Edge Cases
Task Spawning During Critical Moments
If a task spawns while you’re:
- Mid Easter egg step: Complete current step first, task can wait
- Training large horde: Kill horde safely, then approach task
- Low on resources: Perfect timing—tasks often provide what you need
- Exfiling: Ignore task, focus on extraction
Failed Tasks
What Happens:
- No rewards (chest doesn’t spawn)
- 500 Essence is lost
- No penalty beyond lost opportunity
- Next task spawns on normal schedule
Damage Control: Learn from failures. Was the challenge type unfamiliar? Did you lack necessary equipment? Preparation prevents repeated failures.
Multiple Players in Different Tasks
In co-op, only one task spawns at a time. All players must participate in the same task—you can’t split up to do separate challenges simultaneously.
Performance Tips
Long sessions with frequent task completions can strain systems. Optimize performance using our settings guide and troubleshooting tips.
Frame drops during critical tasks can mean the difference between Legendary and failure.
Integration with Prestige Planning
When considering whether to prestige, remember that task completion proficiency carries over. The skills you develop handling tasks under pressure translate to better overall Zombies gameplay regardless of level.
Check our prestige rewards guide to understand how prestiges interact with Zombies progression.
Final Thoughts: Embrace the Challenge
T.E.D.D. Tasks represent some of the best risk-versus-reward gameplay in Black Ops 7 Zombies. They force you out of comfortable routines, test your versatility, and reward skilled execution with resources that would otherwise require significantly more grinding.
The T.E.D.D. Task Mindset:
✅ Always complete tasks—500 Essence cost is negligible compared to rewards
✅ Target Legendary tier—the effort difference between Gold and Legendary is minimal, rewards are massive
✅ Prepare before Round 9—first task sets the tone for your resource curve
✅ Adapt your strategy—challenges require flexibility, not stubbornness
✅ View tasks as opportunities—not interruptions, but accelerators
Every 4 rounds, T.E.D.D. offers you a deal: invest 500 Essence and 2 minutes of focused effort in exchange for rewards that dramatically boost your survival chances. The players who consistently nail Legendary completions progress faster, survive longer, and complete Easter eggs more reliably than those who ignore or half-ass these challenges.
So the next time that notification pops up—”A T.E.D.D. Task Has Appeared”—don’t groan. Get excited. This is your chance to prove your skills, earn exceptional rewards, and inch closer to whatever goal drives your Zombies sessions.
Now get out there and show T.E.D.D. what you’re made of. Those Legendary rewards aren’t going to earn themselves.
For more Black Ops 7 Zombies strategies, explore our guides on beginner tips, exfil strategies, and complete level unlocks.