The Echoes in the Shrine quest is one of the first major exploration challenges you’ll encounter in Where Winds Meet, hidden conveniently near the Merchant Caravan Gathering area just after your introductory mission. This early dungeon—also known as the General’s Statue Dungeon—teaches you fundamental mechanics you’ll use throughout your journey while rewarding you with the valuable Cloud Steps Mystic Skill.
If you’re looking for hidden dungeons and secret abilities, this is exactly the type of content Where Winds Meet excels at. The dungeon combines environmental puzzles, fire arrow mechanics, and a boss fight—all wrapped in the atmospheric exploration that defines the Wuxia experience.
Let me walk you through every step of completing this dungeon, from finding the entrance to claiming the General’s Treasure.
Check our full Where Winds Meet Walkthrough, Weapons, Quest and Skill Guide
Finding and Starting Echoes in the Shrine in WWM
Location: General’s Shrine in Qinghe
You’ll naturally visit the General’s Shrine area during the introductory main mission while pursuing Ruby. After you find Ruby and speak with her near the dancing horse, take some time to explore the surrounding area—the dungeon entrance is hidden nearby.
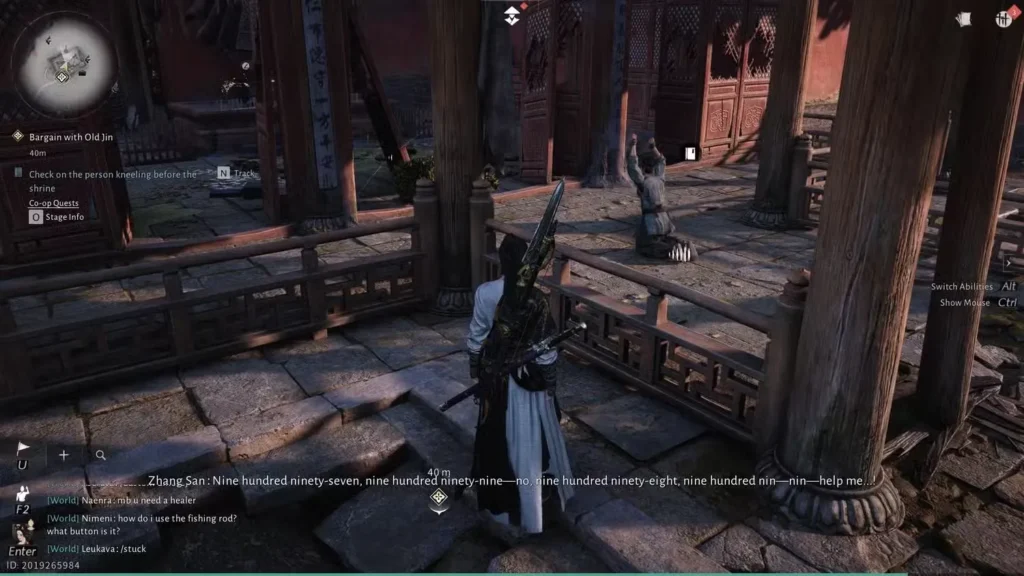
Quest trigger: Look for a man bowing at the shrine entrance. Speak with him to officially start the Echoes in the Shrine quest.
Critical dialogue clue: The man mentions something about bowing to the General “a thousand times.” Don’t take this literally—it’s actually three times, and you’ll need to remember this later when you reach the General’s Statue itself.
Why This Quest Matters for Exploration
This early dungeon exemplifies Where Winds Meet’s approach to rewarding thorough exploration. Hundreds of opportunities like this are scattered throughout Qinghe, waiting for players who:
- Pay attention to environmental clues
- Talk to Wayfarers and NPCs
- Check maps frequently for hidden markers
- Experiment with abilities in suspicious locations
If you enjoy this type of content, you’ll want to explore every corner of the world—similar to how the Echoes of Old Battles quest rewards curiosity with powerful abilities.
Finding the Hidden Entrance
Breaking Through with Power Slam
The dungeon entrance isn’t obvious—it’s concealed beneath a cracked floor section.
Location: Look for the broken slab of rocks next to the shrine’s entrance on the left side.
How to reveal the entrance:
- Jump into the air above the cracked section
- Press Q while airborne to perform a Power Slam
- The ground shatters, revealing the hidden access
This Power Slam mechanic is crucial throughout Where Winds Meet for finding secret areas. If you see cracked or damaged floor sections anywhere in your travels, try slamming through them—you’ll often find hidden dungeons, treasure rooms, or shortcuts.
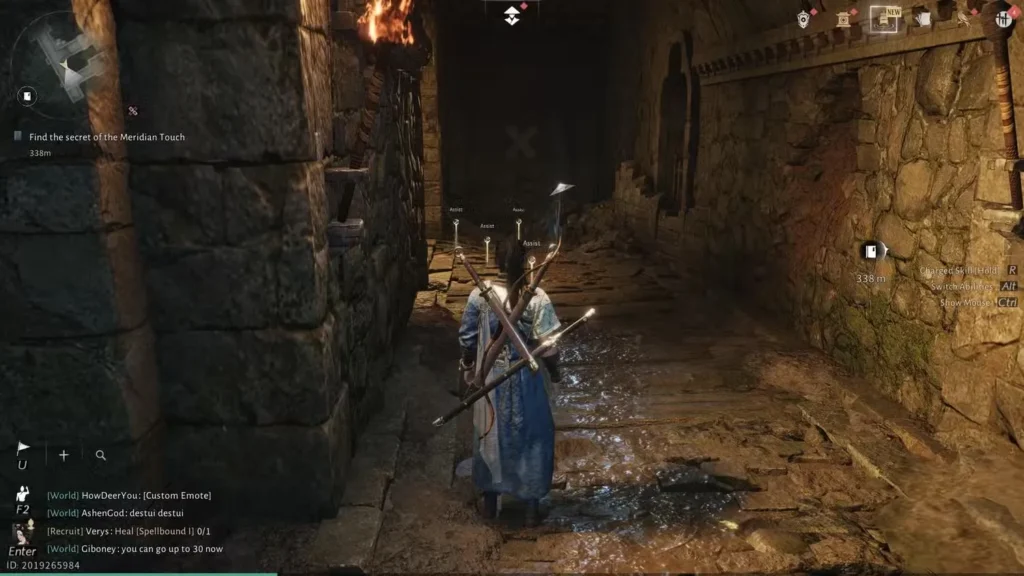
What’s below: Drop down into the revealed passage to find a room containing hundreds of arrows, armor pieces, and an Investigation spot. Interact with the investigation point to learn more about the Sect operating in this region.
Collecting Fire Arrows (Essential for Progression)
Before proceeding deeper, you need to gather the fire arrows you’ll use extensively throughout this dungeon.
The open chest: Continue forward from the investigation spot to find an open chest containing Quivers with approximately 120 Fire Arrows. Collect these immediately—they’re mandatory for solving puzzles ahead.
Using Fire Arrows
If you haven’t used elemental arrows yet, here’s how:
- Draw your bow
- Hold Alt and use Mouse Scroll (PC) to cycle arrow types
- Select Fire Arrows
- Aim and shoot
First puzzle: Your first fire arrow target is the overgrown hedges blocking the path ahead. Shoot them with a fire arrow to burn through the obstruction and open the passage.
This mechanic appears frequently in Where Winds Meet dungeons—fire arrows clear vegetation, trigger mechanisms, and eliminate enemies strategically.
Navigating the Dungeon Passages
Lighting the Way
Descend through the newly opened passage and look for a lamp on the wall. Hit it with an arrow or melee attack to illuminate the area, making navigation easier.
Hidden enemy: An enemy lurks in one of the corners of the hallway. Eliminate them before proceeding to avoid being ambushed while solving puzzles.
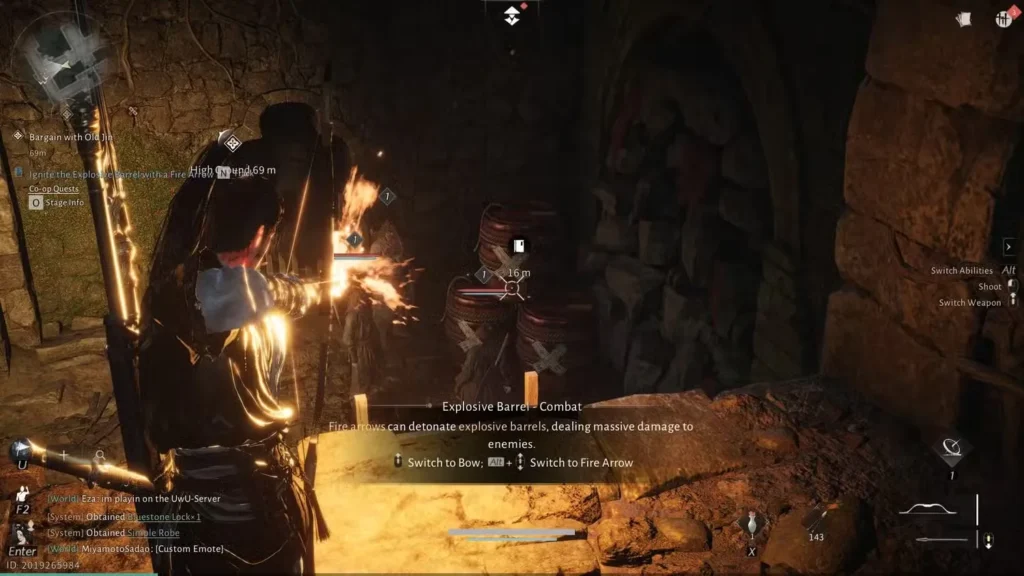
The Explosive Jars Encounter
Continue forward until you see three enemies conversing about their misdeeds. Conveniently, they’re standing near three red explosive jars.
Strategic elimination:
- Equip your fire arrows
- Aim at the explosive jars (not the enemies directly)
- Fire at a jar to trigger a chain explosion
- All three enemies are eliminated efficiently
This introduces you to explosive jar mechanics that appear throughout dungeons in Where Winds Meet. Always look for these red containers near enemy groups—they’re tactical tools, not just decorations.
Checkpoint and Bridge Puzzle
After clearing the enemies, proceed forward to activate a Checkpoint in the hallway. This creates a respawn point if you die or fall.
The chasm puzzle:
Looking to the left side of the passage, you’ll see a chasm that’s too wide to jump across normally. The solution is hidden above you.
How to lower the bridge:
- Look upward at the dark ceiling
- Spot the overgrown hedge obscuring the bridge mechanism
- Shoot it with a fire arrow
- The bridge descends, creating a path across
Crossing carefully: Walk across the wooden plank carefully. If you fall, you’ll respawn at the checkpoint but lose some health and waste resources. Take your time—there’s no timer.
The Lever Mechanism
At the end of the bridge, you’ll find a small room with a Lever Mechanism. Interact with it to open the door leading to the next major section of the dungeon.
Obtaining the Cloud Steps Mystic Skill
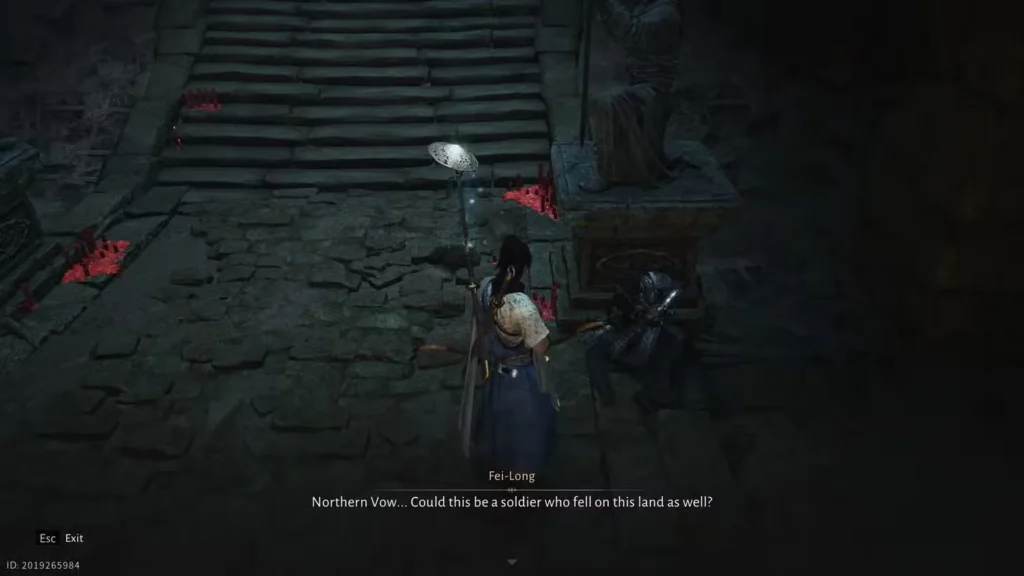
Investigation Point and Corpse
In the next room, several enemies stand near an investigation point. Defeat them first, then investigate the corpse to gather crucial information and obtain the Cloud Steps manual.
What Cloud Steps Does
Cloud Steps is a Mystic Art that provides significant mobility benefits:
Exploration uses:
- Perform a fast jump covering greater distances
- Sometimes allows mid-air strafing
- Cross large gaps that normal jumps can’t reach
Combat uses:
- Stun enemies when landing near them
- Create distance for strategic positioning
- Escape dangerous situations quickly
How to equip it: Open your Mystic Skills menu and equip Cloud Steps to one of your unlocked skill slots. This ability becomes essential for both exploration and combat throughout your journey.
Preparing for the Boss Fight
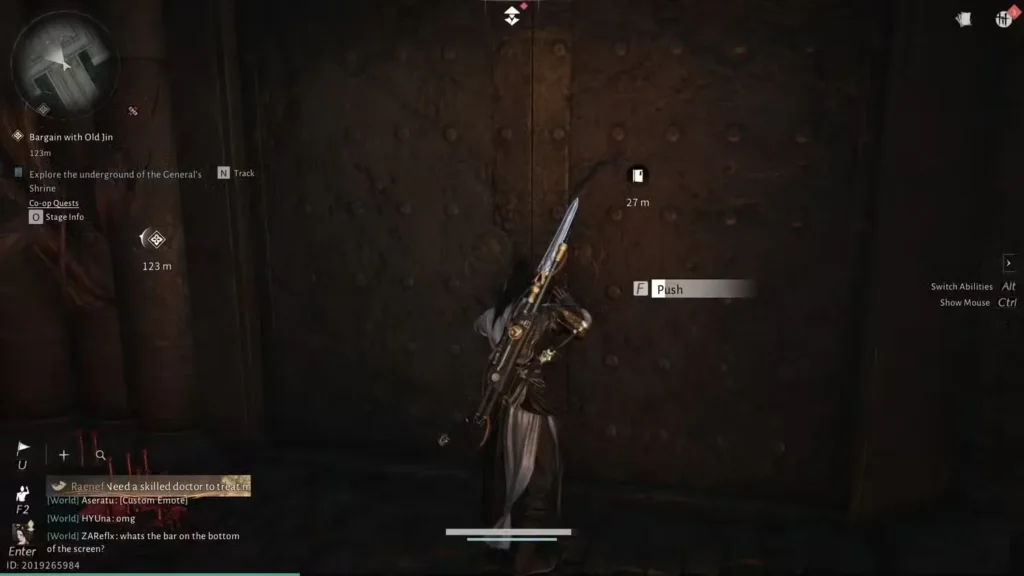
Climbing to the Arena
From the corpse investigation room, climb the stairs and push through the door to enter the main arena.
Clearing the Arena
The large room contains several enemies and more explosive jars scattered around. Use your fire arrows strategically:
- Shoot explosive jars to eliminate groups of enemies
- Target the enemy perched on the balcony—shooting him down forces a direct confrontation
- Clear all standard enemies before the boss spawns
This prepares the arena for the upcoming boss battle, preventing you from fighting multiple threats simultaneously.
Boss Fight: Arena Champion
Once you’ve eliminated the standard enemies, the boss fight begins. While this boss can seem intimidating as an early-game challenge, it follows predictable patterns you can exploit.
Boss Attack Patterns
Red attacks (Unblockable):
- Telegraphed with red visual indicators
- Must dodge these—blocking won’t work
- Roll to the side when you see red glow
Yellow attacks (Blockable):
- Telegraphed with yellow visual indicators
- Parry these to stun the boss
- Creates openings for counterattacks
Standard attacks:
- Regular melee strikes without color coding
- Can be blocked or dodged normally
- Deal moderate damage if they connect
Boss Strategy
The key to this fight is recognizing and responding to the color-coded telegraphs:
- Watch for color indicators on the boss’s attacks
- Dodge red attacks by rolling sideways
- Parry yellow attacks to stun and punish
- Use your preferred weapon’s abilities during stun windows
- Manage your stamina—don’t exhaust yourself dodging unnecessarily
Difficulty consideration: If you’re struggling, remember you can adjust the difficulty at any time from the Journey Menu without penalty. This boss is designed to teach you color-coded combat mechanics, not wall your progression.
Post-Boss Rewards
After defeating the boss, collect the treasure:
Balcony chests: There’s one chest on each side of the balconies flanking the arena. Don’t forget these—they contain valuable materials and equipment.
Solving the General’s Statue Puzzle
With the boss defeated and balcony chests looted, it’s time for the dungeon’s signature puzzle.
The Praying Mat
Look for the praying mat (grass mat) positioned in front of the General’s Statue at ground level.
How to make the statue move:
- Walk onto the praying mat
- Wait for the “Bow” prompt to appear
- Press the interact key (F on PC, R2 on PlayStation)
- Let the progress bar complete
- Repeat two more times for a total of three bows
Remember the NPC’s clue about bowing “a thousand times”? It was metaphorical—three bows show proper respect and complete the puzzle.
For more details on how the bowing mechanic works throughout the game, the system appears in multiple quests and puzzles.
Claiming the General’s Treasure
After completing three bows, the General’s Statue automatically moves, revealing a hidden compartment behind it.
Treasure chest contents:
- Valuable equipment
- Materials and consumables
- Echo Jade currency
- Potential rare items
This is your primary reward for completing the dungeon—open it before proceeding to the exit.
Exiting the Dungeon
Final Balcony Collection
Before leaving, climb to the balconies one more time to ensure you’ve collected both side chests. It’s easy to miss one during the boss fight chaos.
The Exit Path
- From the balconies, push through the door to the next room
- Follow the winding path through the hallways
- Find the ladder at the end of the passage
- Climb the ladder
- Push open the doors at the top
Completion notification: Once you exit through the final doors, you’ll receive a notification confirming you’ve completed the Echoes in the Shrine dungeon.
Rewards Summary
Completing this dungeon grants you:
Cloud Steps Mystic Skill:
- Essential mobility ability
- Used for exploration and combat
- Enables reaching previously inaccessible areas
Equipment and materials:
- Boss drops
- Balcony chest contents
- General’s Treasure chest rewards
Experience and progression:
- Quest completion experience
- Combat skill development
- Understanding of dungeon mechanics
Knowledge for future exploration:
- Fire arrow puzzle mechanics
- Power Slam for hidden entrances
- Color-coded boss combat patterns
- Bowing mechanic for puzzles
Tips for Smooth Completion
Before entering:
- Stock up on healing items
- Ensure you have a bow equipped
- Consider your difficulty setting
During exploration:
- Collect ALL 120 fire arrows from the initial chest
- Light lamps as you go for better visibility
- Use explosive jars strategically to conserve resources
- Don’t rush across bridges—fall damage and respawn health loss add up
For the boss fight:
- Clear all standard enemies first
- Learn the color-coded telegraph system here—it appears throughout the game
- Use Cloud Steps immediately after obtaining it for mobility advantages
- Collect both balcony chests before moving on
Statue puzzle:
- Remember: three bows, not a thousand
- Wait for each bow animation to complete fully
- Face the statue while bowing for proper interaction
Why This Dungeon Matters
The Echoes in the Shrine serves as an excellent introduction to Where Winds Meet’s dungeon design philosophy. It teaches you:
- Environmental puzzle-solving with fire arrows and hidden mechanisms
- Power Slam exploration for finding secret entrances
- Color-coded combat that appears in later boss fights
- Cultural interactions like bowing to show respect
- Reward structure for thorough exploration
The dungeon is short enough to complete in one session but packed with enough variety to showcase what you’ll encounter throughout Qinghe. The Cloud Steps ability alone makes it mandatory for anyone serious about exploration—you’ll use this skill constantly when discovering hidden areas and solving puzzles like the wall puzzle in Echoes of Old Battles.
External Resources
For more information about Where Winds Meet:
- Official website: Where Winds Meet Game
- Steam page: Where Winds Meet on Steam
- PlayStation: Where Winds Meet on PS Store
- Game information: Where Winds Meet – Wikipedia
Final Thoughts
The Echoes in the Shrine dungeon exemplifies what makes Where Winds Meet’s exploration so satisfying. A casual conversation with an NPC leads to discovering a hidden entrance, which opens into a puzzle-filled dungeon that teaches you essential mechanics while rewarding you with a powerful ability.
The Cloud Steps skill you obtain here becomes fundamental to your exploration toolkit—you’ll use it to reach countless hidden areas throughout your journey. The boss fight teaches color-coded combat patterns you’ll encounter repeatedly in more challenging encounters. Even the simple act of bowing to the statue introduces cultural mechanics that appear in various quests.
For an early-game dungeon accessible shortly after the tutorial, it packs remarkable value both in immediate rewards and long-term skill development. If you walked past the General’s Shrine without exploring, you’d miss one of the game’s best teaching moments—and a mobility skill that makes the entire world more accessible.
That’s the beauty of Where Winds Meet’s design: the most valuable discoveries often hide just off the main path, waiting for curious players willing to talk to NPCs, investigate suspicious floor cracks, and explore beyond objective markers.