Golden Coast is massive. With Chapter 7 Season 1 bringing a completely new island to Fortnite, players now have dozens of POIs (Points of Interest) to choose from when they surf in on that tsunami wave. But here’s the thing: not all landing spots are created equal.
Some locations offer better loot density, others give you tactical advantages like high ground or quick escape routes, and a few are just more fun to fight in. After spending time exploring the new map and testing different drop zones, I’ve put together this ranked list of the best landing spots you should prioritize.
Whether you’re playing solo, hunting for that Victory Umbrella, or grinding Ranked mode for the Felinos skin, choosing the right landing spot can make or break your match. Let’s break down the top eight locations on Golden Coast.
1. Battlewood Boulevard – The Ultimate Hot Drop
Location: South-central area of the map
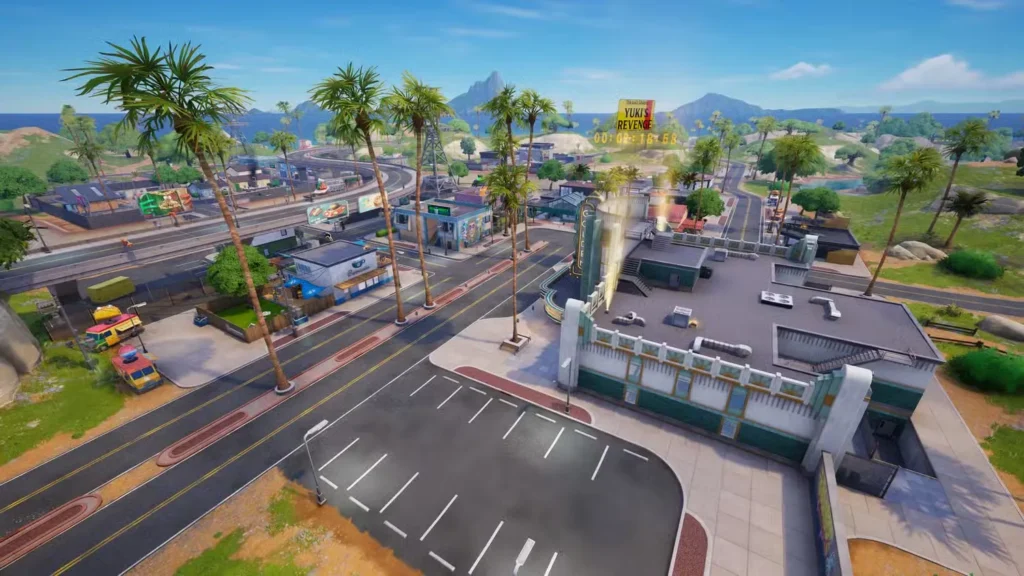
If you want action immediately, Battlewood Boulevard is your spot. This is hands-down the largest POI on the Chapter 7 map, and it shows. You’ve got shopping centers, a movie theater, highway overpasses, explorable sewers, and residential areas all packed into one massive zone.
Why It’s Great
- Loot density is insane – enough for multiple squads to gear up without leaving empty-handed
- Variety of combat environments – fight in tight indoor spaces, open highways, or underground tunnels
- Central map position – easy rotation to anywhere on the island
- Vehicle spawns everywhere – quick escapes if things go south
- The theater is legitimately fun to fight in with its vertical layout
The Downsides
The size works against you sometimes. You might spend half the early game just running around looking for enemies or the next circle. It’s also a popular drop, so expect competition—especially when the Battle Bus returns on December 4.
Best For
Aggressive players who want immediate action and squads who can split up to loot efficiently. If you’re working on those Ranked elimination quests, this is elimination farming territory.
2. Wonkeeland – Controlled Chaos
Location: Northwest corner of the map
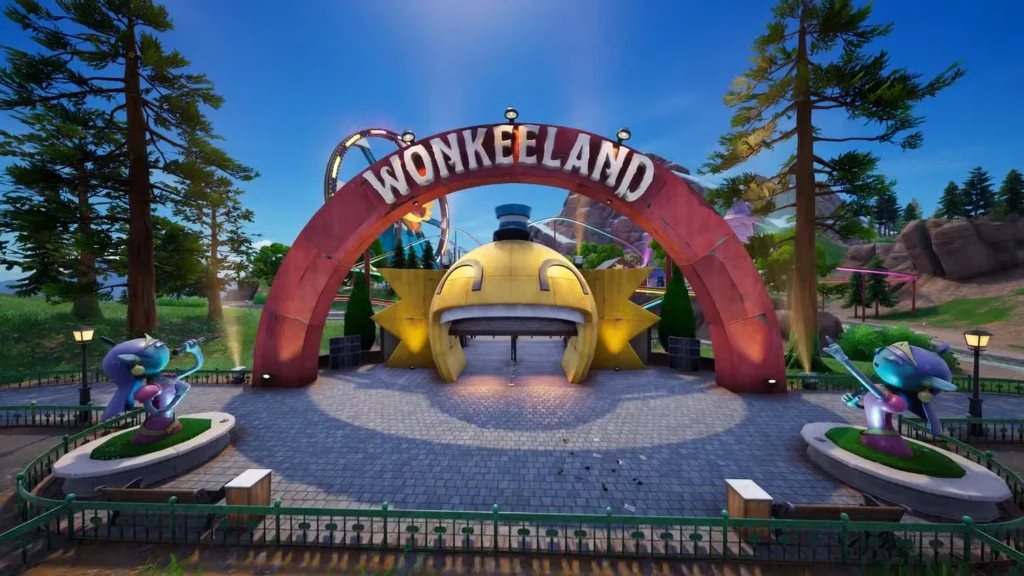
Wonkeeland is what happens when Fortnite decides to build a theme park as a warzone. You’ve got rollercoasters, a Ferris wheel, water slides, shooting minigames, and grind rails everywhere—all of which can actually help you in combat.
Why It’s Great
- Tactical mobility – grind rails and rollercoasters provide quick rotations and high ground
- Health and shield bonuses – riding certain attractions actually restores your stats
- Verticality – easy to hold high ground positions against teams below
- Multiple escape routes – grind rails let you bail quickly if overwhelmed
- Fun factor – honestly, it’s just enjoyable to fight here
The Strategy
Control the Ferris wheel and upper platforms early. The elevation advantage lets you spot enemies easily, and the grind rails give you instant escape options. Just watch for third parties—this place can get messy fast with multiple squads rotating through.
Best For
Players who like fast-paced combat with mobility options. Great for both solos and squads. If you can secure this POI early, you’ll have solid loot and positioning for mid-game rotations.
3. Sandy Strip – Vegas Vibes, Solid Loot
Location: East side of the map
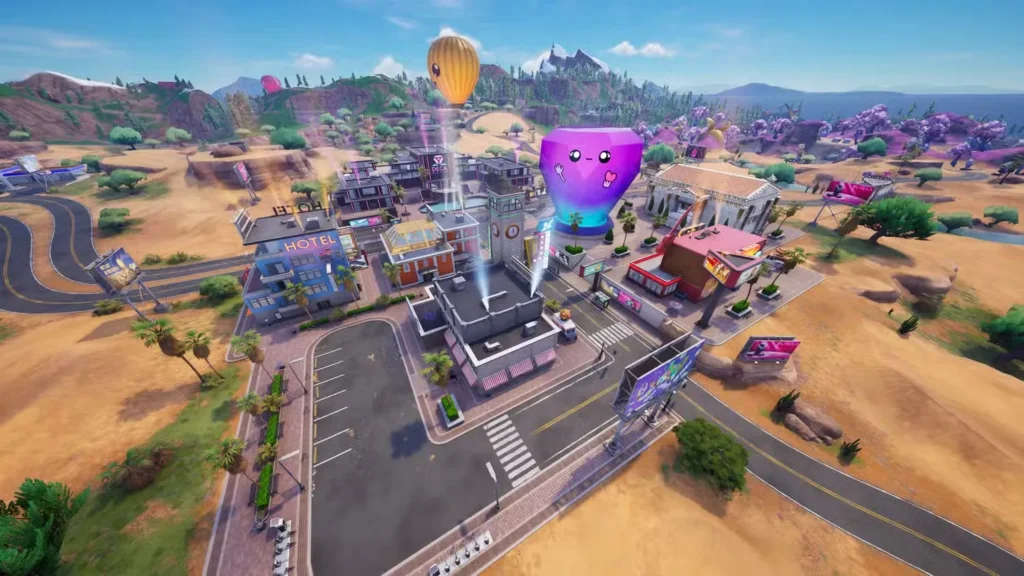
Sandy Strip is Golden Coast’s answer to Las Vegas, complete with a giant Sphere landmark that you can’t miss. It’s flashy, it’s got decent loot, and it offers some unique advantages that make it worth considering as a primary drop.
Why It’s Great
- The Bride NPC gives you free Gold Bars at the start of the match
- Abundant vehicle spawns – easy rotations to other POIs
- High-rise buildings with destructible windows for shooting from cover
- The clock tower (reminiscent of Tilted Towers) provides excellent high ground
- Eastern positioning makes it a natural staging ground for mid-game rotations
The Trade-Off
It’s a popular drop zone because of its recognizable landmarks. You’ll almost always have company here, so come ready to fight immediately. The buildings offer good defensive positions, but you need to secure them fast before someone else does.
Best For
Players who want a balance between action and loot. The free Gold from the Bride NPC is clutch for hiring allies or buying items later. If you’re hunting boss locations and Mythic weapons, this is a solid staging point.
4. Tiptop Terrace – High Ground Heaven
Location: Northern edge of the map
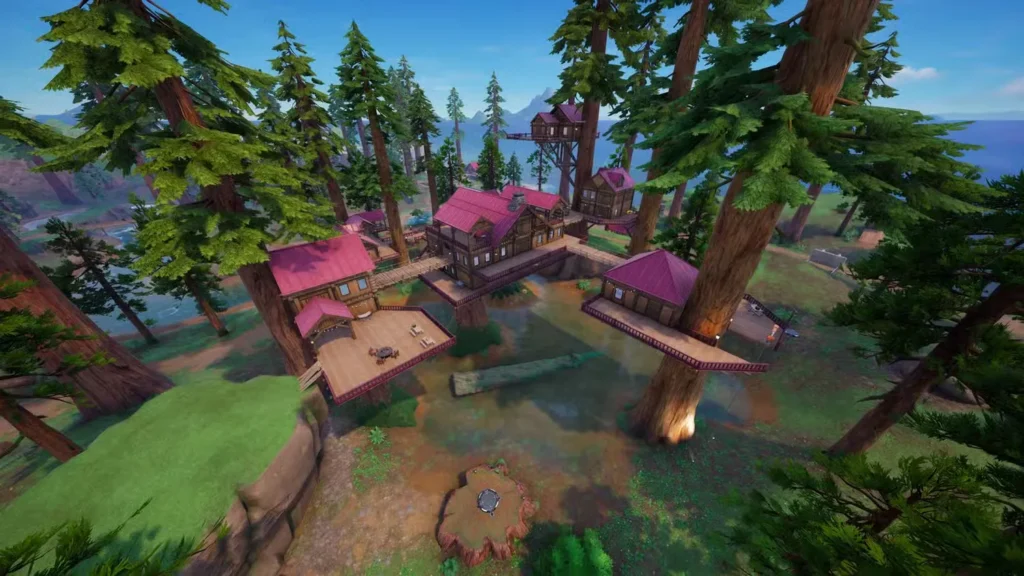
If you believe in the Obi-Wan Kenobi philosophy of “it’s over, I have the high ground,” then Tiptop Terrace is your dream landing spot. This elevated POI sits on the northern edge of Golden Coast and offers natural defensive advantages.
Why It’s Great
- Elevation advantage – naturally positioned above surrounding areas
- Jump Pad for quick escapes or repositioning
- Dense building layout with plenty of loot
- Bridges connecting structures create interesting combat flow
- Edge-of-map location means fewer directions to watch for enemies
The Strategy
Land on the highest buildings first, secure the loot, then control the bridges. The Jump Pad is your emergency exit if things get overwhelming. In squads, you can easily split up across buildings while maintaining line-of-sight support for teammates.
Best For
Defensive players and squads who like controlling territory. It’s somewhat isolated, which means fewer third parties but also longer rotations to circle. Factor in Wingsuits for smoother transitions to the next zone.
5. Ripped Tides – Muscle Beach Madness
Location: Southwest corner of the map
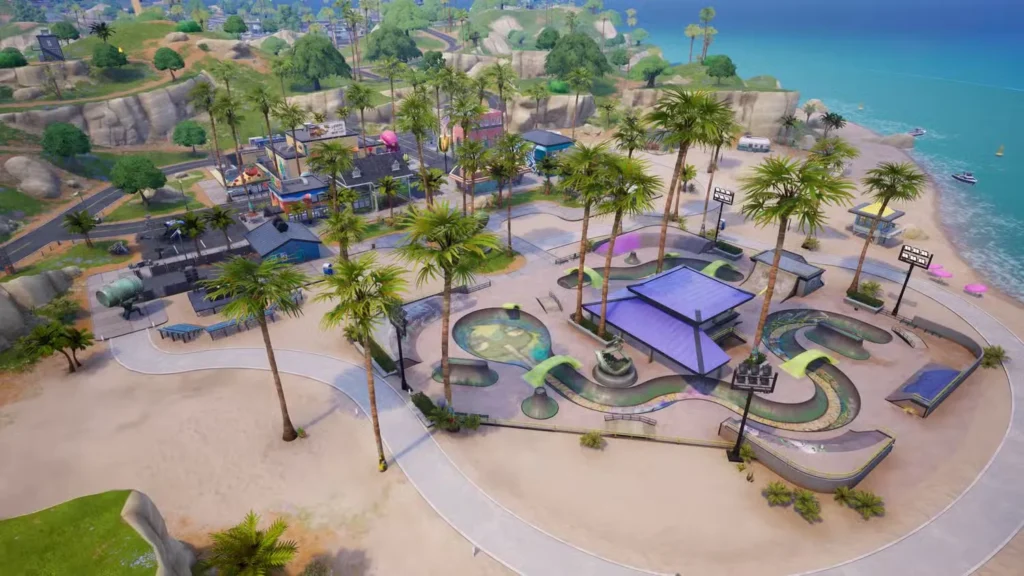
Ripped Tides is Golden Coast’s version of Muscle Beach—a beachside gym area with tight quarters and respectable loot spawns. It’s also home to the destroyed Battle Bus remains, which is a cool environmental detail.
Why It’s Great
- Common boss spawn location – chance for early Mythic weapons
- Tight building layout keeps combat close-quarters and intense
- Low elevation minimizes height disadvantages
- Southwest position works well for certain circle rotations
- Pay respects to the Bus Driver at the wreckage (for emotional support)
The Quirks
There are weight-lifting interactive objects scattered around that aren’t always worth the time investment. Focus on looting buildings first, then worry about lifting virtual weights if you’re bored waiting for the next circle.
Best For
Players who enjoy close-range combat and shotgun battles. The tight quarters favor aggressive CQC playstyles. If you can defeat the boss here early, you’ll have a significant advantage heading into mid-game.
6. Painted Palms – The Silent Studio
Location: Northeast desert area
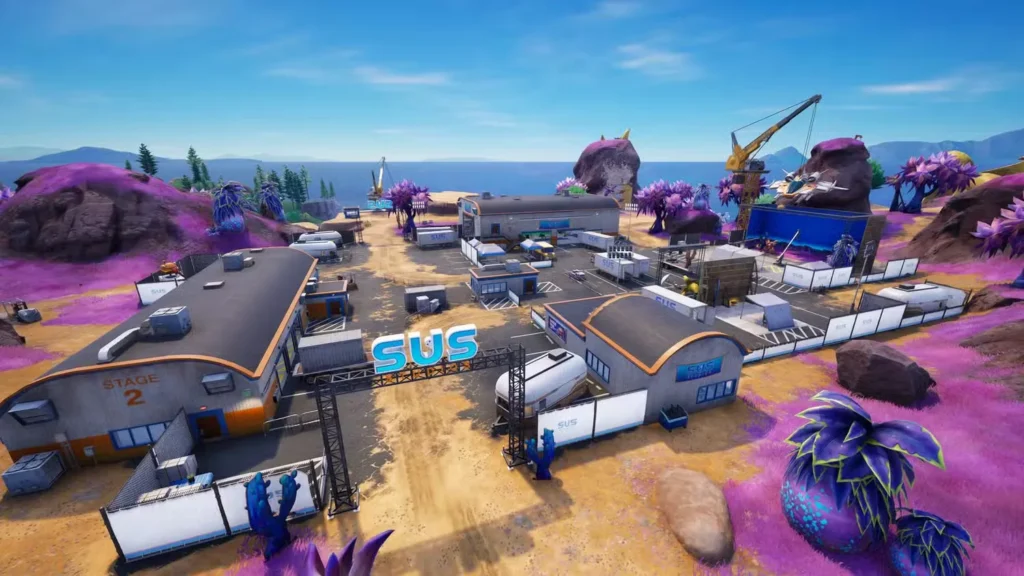
Painted Palms is an abandoned movie studio set in the desert, and it’s one of the more unique POIs on the map. It’s also one of the quieter landing spots, which can be a blessing or a curse depending on your playstyle.
Why It’s Great
- Miles Cross NPC can be hired for backup firepower
- Interactive hangar doors can be closed to trap enemies or create defensive positions
- Stage buildings offer interesting vertical combat spaces
- Fewer players land here – good for peaceful looting
- Mechanical traps – closing doors on enemies deals instant elimination damage
The Strategy
Learn the door mechanics. You can lock down entire sections of the studio, forcing enemies into killzones. Just don’t accidentally trap yourself—standing in a closing door means instant elimination for you too.
Best For
Players who prefer a calmer start before rotating into action. Perfect for completing survival-focused quests like the Ranked Top 10 placement challenges. The hireable NPC is especially valuable in solos.
7. Humble Hills – Not So Humble
Location: Southwest area of the map
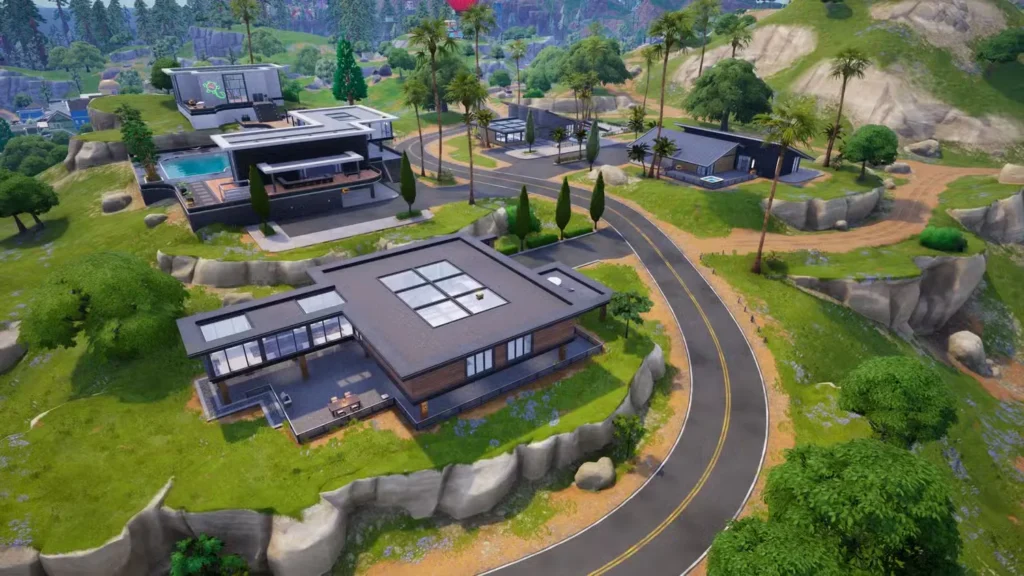
Don’t let the name fool you—Humble Hills features large, spacious homes with solid loot distribution. It’s a great spot for squads who want to spread out during the looting phase while staying close enough to support each other.
Why It’s Great
- Large homes with good loot spawns
- Cat Holloway NPC available for hire (if you have Gold)
- Open sightlines – hard to get surprised by third parties
- Nearby hill for elevation advantage and scouting
- Vehicle spawns for quick rotations
- Excellent for squads – enough buildings for everyone
The Trade-Off
If the loot RNG isn’t in your favor, you might walk away with mediocre gear. The openness that protects you from surprise attacks also means you’re exposed when rotating. Always grab a vehicle or Wingsuit before leaving.
Best For
Squads who want a methodical start. The open design favors coordinated team play over solo chaos. Good for practicing squad communication and positioning.
8. Bumpy Bay – Suburban Starter
Location: Western edge of the map
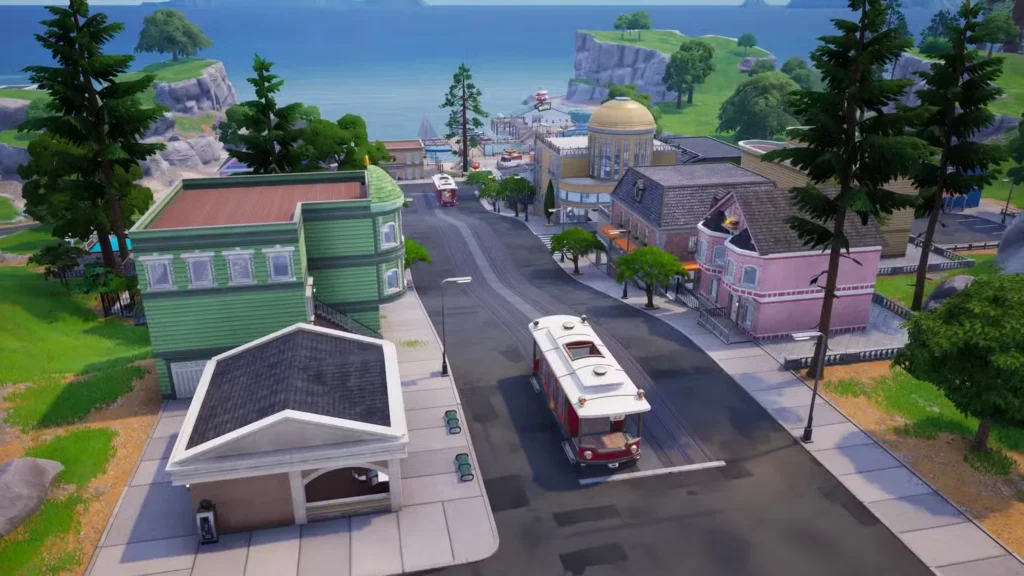
Bumpy Bay is your standard suburban neighborhood—nothing flashy, but consistently solid. It’s the kind of landing spot that won’t blow your mind but rarely disappoints either.
Why It’s Great
- Consistent loot spawns across residential buildings
- Carter Wu NPC can be hired for assistance
- Rooftop access for high ground advantages
- Tight corners create interesting chase scenarios
- Western position offers breathing room from central map chaos
- Relaxed pace – good for warming up or completing challenges
The Reality
It’s safe. Maybe too safe. You won’t get the best loot on the island here, and you won’t get the most action. But if you need a reliable starting point that won’t immediately get you eliminated, Bumpy Bay delivers.
Best For
Players who want a calm early game before rotating to action. Perfect for completing looting challenges, warming up, or just getting your bearings on the new map.
How to Choose Your Landing Spot
Your ideal landing spot depends on several factors:
Your Playstyle
- Aggressive fighters: Battlewood Boulevard, Wonkeeland, Sandy Strip
- Tactical players: Tiptop Terrace, Ripped Tides
- Survival-focused: Painted Palms, Bumpy Bay, Humble Hills
Your Objectives
- Grinding eliminations for Ranked quests: Hot drops like Battlewood or Sandy Strip
- Working on Top 10 placements: Edge-of-map spots like Painted Palms or Bumpy Bay
- Hunting bosses and Mythics: Ripped Tides, plus check boss spawn rotations
Squad Size
- Solos: Smaller, controllable POIs like Painted Palms or Ripped Tides
- Duos: Mid-sized locations like Sandy Strip or Tiptop Terrace
- Squads: Large areas like Battlewood Boulevard or Humble Hills
Tsunami vs. Battle Bus
Remember, until December 4 when the Battle Bus returns, you’re limited by where the tsunami spawns you. After December 4, you’ll have a 50/50 chance of either deployment method, giving you more control over landing spot selection.
Pro Tips for Landing Success
Always have an exit strategy. No matter where you land, know where the nearest vehicles, Wingsuits, or grind rails are located. Getting caught without mobility options in Chapter 7 is a death sentence.
Watch for boss spawn patterns. Bosses like Hush, Beach Brutus, and Human Bill rotate between certain POIs. If you can defeat them early, the Mythic weapons and transformation items give you a massive advantage.
Adapt to the circle. Even the best landing spot becomes terrible if it’s on the opposite side of the first circle. Always check the storm path and plan accordingly.
Communicate with your squad. Call out which building you’re looting, enemy positions, and loot you don’t need. Efficient communication wins more fights than mechanical skill alone.
Master the new loot pool. Chapter 7 introduced completely new weapons like the Iron Pump Shotgun and Arc-Lightning Gun. Spend time learning which weapons work best in different POIs.
Final Thoughts
Golden Coast is one of the most diverse maps Fortnite has released in recent chapters. Whether you want the controlled chaos of Wonkeeland, the scale of Battlewood Boulevard, or the tactical advantages of Tiptop Terrace, there’s a landing spot that fits your playstyle.
My personal recommendation? Start with Wonkeeland or Battlewood Boulevard to get a feel for high-action drops, then experiment with edge-of-map locations like Painted Palms or Tiptop Terrace when you want to focus on survival and placement.
The beauty of Chapter 7 is that every POI offers something unique. Don’t be afraid to rotate through different landing spots as you learn the map. Your favorite drop zone might not be the one you expect.
What’s your go-to landing spot in Chapter 7 Season 1? Drop your favorite POI in the comments below!