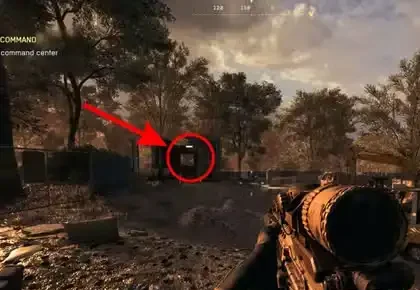
One of the most game-changing additions in Fortnite Chapter 7 Season 1 is the Self-Revive Device—an item that lets you literally pick yourself back up after getting knocked down. And yes, this works even in Solo mode, which is absolutely wild.
For years, Fortnite’s revive system evolved gradually. First, only teammates could revive you while you were knocked. Then Reboot Vans arrived, letting squads bring back fully eliminated teammates. Eventually, you could even buy Reboot Cards at vans to simplify the process. But Chapter 7 takes it to the next level: now you can be your own medic.
The Self-Revive Device doesn’t just change how you play—it fundamentally shifts late-game strategy, especially in Solos where one mistake used to mean instant elimination. Let me walk you through exactly how to find this Legendary item, how it works, and the best strategies for using it effectively.
What Is the Self-Revive Device?
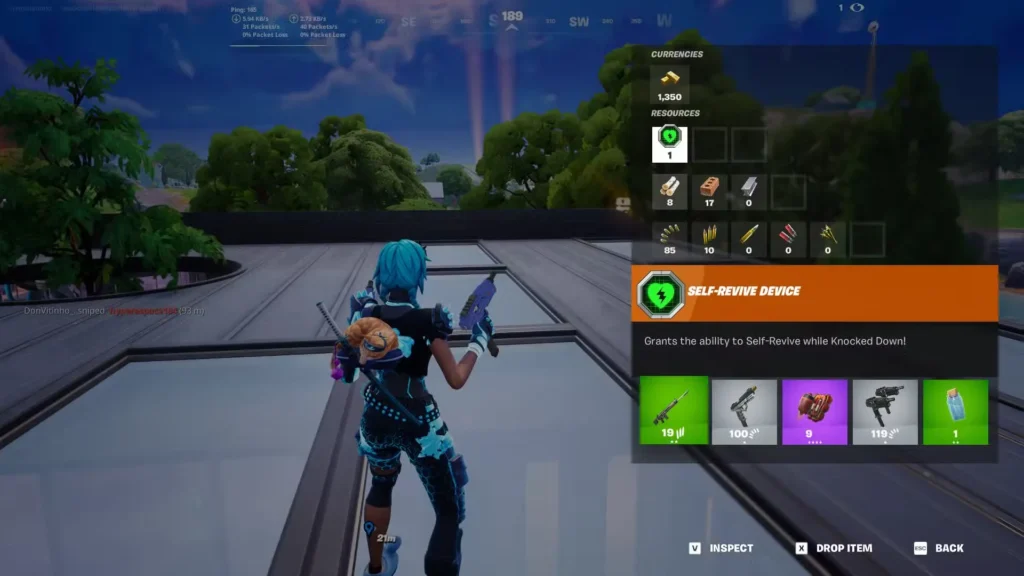
The Self-Revive Device is a Legendary-rarity item that automatically revives you when your health hits zero. Whether you got knocked by enemy fire, fell off a cliff, or took storm damage, this device gives you a second chance.
Here’s what makes it special:
- Doesn’t take up an inventory slot – it occupies a dedicated equipment slot, similar to how the old Medallions worked
- Works in all modes – Solos, Duos, Trios, Squads, even Zero Build
- One-time use – once it revives you, it’s consumed
- 10-second revival time – same duration as a teammate reviving you
- Restores you to 30 HP – you’re vulnerable immediately after, so have heals ready
The item is intentionally rare because of how powerful it is. Getting a second life in Fortnite—especially in high-stakes situations like Ranked matches or late-game circles—can be the difference between victory and elimination.
How to Find the Self-Revive Device
There are three main ways to obtain a Self-Revive Device in Chapter 7. None of them are guaranteed, so you’ll need to actively hunt for this item if you want it in your loadout.
1. Mending Machines (Most Reliable Method)
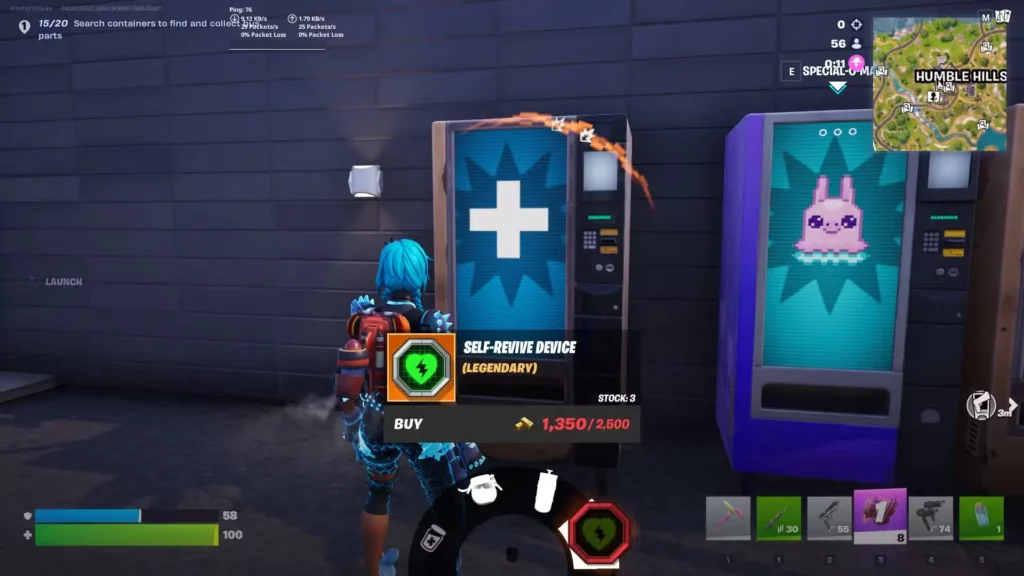
Mending Machines are specialized vending machines scattered across the Golden Coast map. They’re the most consistent way to get a Self-Revive Device, but they come with a steep cost.
How it works:
- Each Mending Machine sells up to 3 Self-Revive Devices per match
- Cost: 2,500 Gold Bars per device
- First come, first served—if another player buys them first, they’re gone
Where to find Mending Machines:
Mending Machines spawn at various POIs across the map. You’ll recognize them by their distinctive medical cross symbol. Common locations include:
- Innoloop Labs (central map) – often has one near the main facility
- Battlewood Boulevard – scattered throughout the massive POI
- Sandy Strip – near the Sphere landmark area
- Wonkeeland – near the entrance or food court areas
- Tiptop Terrace – among the elevated buildings
Check popular landing spots where infrastructure is dense—these areas typically have Mending Machines.
Pro tip: Gold Bars reset to zero after each match in Chapter 7, but drop rates have been significantly increased. You can easily farm 2,500 Gold in the early game by:
- Eliminating players (they drop Gold)
- Opening cash registers and safes
- Completing bounties
- Looting Gold piles from buildings
- Talking to NPCs who give free Gold (like The Bride at Sandy Strip)
2. Care Packages (Rift Event)
Care Packages are a special Supply Drop variant that appears during certain Rift Anomaly events. These are random match modifiers that can activate during Battle Royale games.
How it works:
- Watch for a notification on the right side of your screen: “Care Packages incoming”
- Open your map immediately—Care Package drop locations appear as markers
- Travel to the nearest one and open it for guaranteed loot, including a Self-Revive Device
What’s inside Care Packages:
- 1 Self-Revive Device (guaranteed)
- High-tier weapons (often Legendary)
- Healing items (Shield Kegs, Chug Jugs, Med Kits)
- Utility items
The challenge: Care Packages are visible to everyone, which means you’ll likely face competition. Players will flock to these drops, especially in late-game scenarios. Be ready to fight for the loot or grab it and immediately reposition.
Strategy tip: If you’re hunting boss locations or have strong mid-game positioning, prioritize Care Packages when the event triggers. The Self-Revive alone makes it worth the risk.
3. Rare Chests (RNG-Based)
Rare Chests (the glowing purple chests) have a chance to drop two Self-Revive Devices when opened. However, this is completely random and shouldn’t be relied upon as your primary method.
Where to find Rare Chests:
- Hidden in basements and secret areas of POIs
- Underground locations like the Unstable Element vault at Innoloop Labs
- High-tier loot rooms in major landmarks
- Near boss spawn locations
The reality: The drop rate for Self-Revive Devices from Rare Chests is low. If you happen to get one, great—but don’t plan your entire loadout strategy around hoping for lucky chest RNG.
Pro tip: If you’re already hitting the Unstable Element vault, you’re opening a Rare Chest anyway. Check if it drops Self-Revive Devices as a bonus to your Legendary weapons.
How the Self-Revive Device Works
Once you have a Self-Revive Device in your inventory, here’s exactly what happens when you get knocked down:
The Revival Process
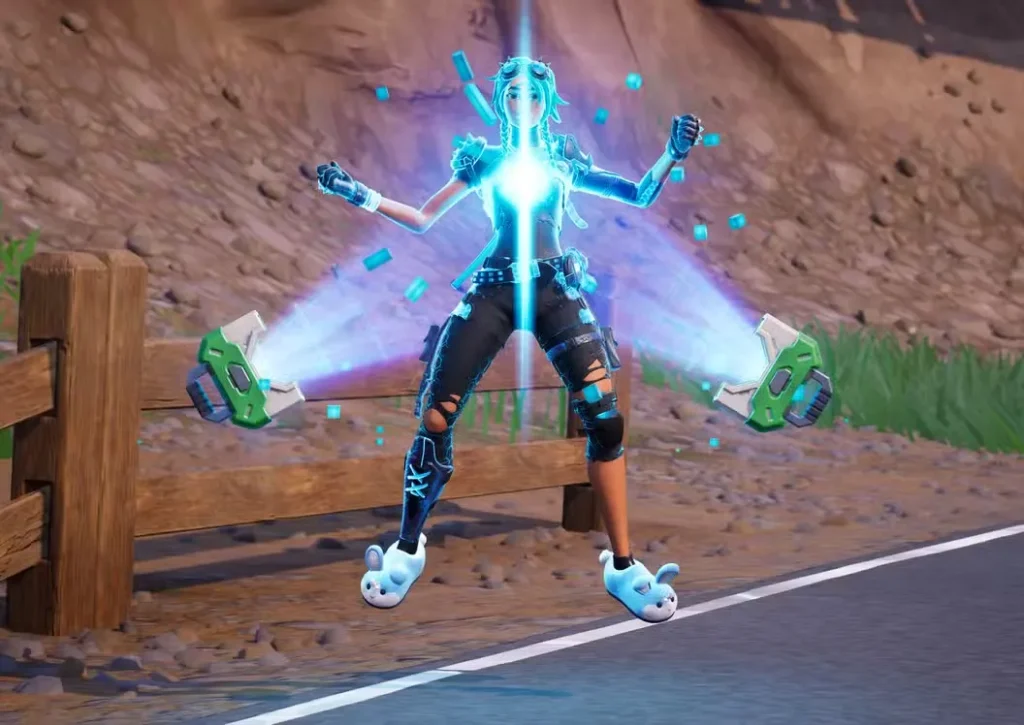
- You get knocked down (health drops to zero)
- Self-Revive automatically activates – you don’t need to press anything
- 10-second countdown begins – your character performs the revival animation
- You’re vulnerable during this time – enemies can still eliminate you
- After 10 seconds, you’re back up with 30 HP and no shields
- The device is consumed – it’s a one-time use per device
Critical Details
Works in Solo mode: This is huge. Normally in Solos, getting knocked means instant elimination. With a Self-Revive Device, you get the same “knocked but not out” state that Squad players experience, giving you a chance to recover.
You can still be eliminated: During the 10-second revival, enemies can finish you off. They’ll see you glowing with the revival animation, so it’s not subtle. If someone is actively pushing you, they can still eliminate you before the revival completes.
Starts at 30 HP: After reviving, you’re immediately vulnerable. Have healing items ready—Med Kits, Bandages, Shield Potions—because you’ll need them immediately.
Doesn’t occupy weapon slots: The Self-Revive Device sits in a dedicated equipment slot, meaning you don’t have to sacrifice a weapon or healing item to carry it.
Best Strategies for Using Self-Revive
Just having the device isn’t enough—you need to use it strategically to maximize its value.
1. Find Cover Immediately After Getting Knocked
The moment you’re knocked, crawl to cover before the Self-Revive starts. Use the new Chapter 7 movement features:
- Roll while downed to reach safe spots faster
- Sprint while knocked for increased movement speed
- Use the tumble mechanics to roll down slopes and get out of sight
Don’t just lie there in the open—your Self-Revive animation is a giant neon sign saying “finish me off.”
2. Use It for Long-Range Engagements
The Self-Revive Device is most effective when you’re knocked from a distance. If a sniper downs you from 100+ meters away, they likely won’t be able to push and finish you before the 10-second revival completes.
Get behind a tree, rock, or building, and let the device do its work. By the time they reach you, you’re back up and can either fight or escape.
3. Combine With Build Mode
If you’re playing standard Battle Royale (not Zero Build), getting knocked in a box is ideal:
- Build walls around yourself immediately after being knocked
- The Self-Revive activates while you’re protected
- By the time enemies break through, you might already be up
In late-game circles with limited space, this can clutch rounds.
4. Don’t Rely on It in Close-Quarters
If you get knocked in a shotgun fight at point-blank range, the Self-Revive probably won’t save you. Your opponent will just finish you off during the 10-second animation.
The device is best for:
- Long-range sniper duels
- Storm damage recovery
- Fall damage accidents
- Getting third-partied and having time to hide
It’s not ideal for:
- Aggressive W-key fights
- Close-range shotgun battles
- Situations where enemies are already on top of you
5. Save It for Late Game
If you find a Self-Revive Device early, don’t waste it on a random mid-game fight. Save it for Top 10 situations where a single elimination means placement points in Ranked or a potential Victory Royale.
Getting knocked in a 1v1 final circle and self-reviving while your opponent reloads? That’s the dream scenario.
6. Communicate With Your Squad
If you’re in Duos, Trios, or Squads, tell your teammates you have a Self-Revive Device. This changes their decision-making:
- They don’t need to immediately push to revive you
- They can focus on eliminating threats first
- They know you have a backup plan if things go wrong
Also, if multiple squad members find Self-Revive Devices, coordinate who uses theirs first in a fight.
Countering Enemy Self-Revives
Now that you know how powerful Self-Revive Devices are, here’s how to counter players who have them:
Confirm eliminations immediately: If you knock someone and see the glowing Self-Revive animation, push and finish them before the 10 seconds are up.
Listen for the audio cue: The Self-Revive has a distinct sound effect. If you hear it, the downed player is vulnerable and stationary—easy target.
Use explosives or spray weapons: Clingers, Arc-Lightning Guns, or just spraying with an SMG can prevent them from successfully reviving.
Don’t let them crawl away: The new movement mechanics in Chapter 7 let downed players move faster. Chase them down before they reach cover.
Is the Self-Revive Device Worth the Gold?
At 2,500 Gold Bars, the Self-Revive Device is expensive. Is it worth it?
Yes, if:
- You’re playing Solos (it’s basically a necessity in competitive Solos)
- You’re in late-game circles and need insurance
- You’ve already secured good weapons and healing
- You’re playing Ranked and grinding for Top 10 placements
Maybe not, if:
- You’re early game and need weapons/heals first
- You’re playing Squads and have reliable teammates who can revive you
- You’re low on Gold and need to save for hiring NPCs or other purchases
My recommendation? Always buy it in Solos. In team modes, coordinate with your squad—one person carrying a Self-Revive is usually enough.
Does It Work With Boss Transformations?
Interesting question: If you become a boss using the Play as Boss Transform, does the Self-Revive Device still work?
Yes, but with caveats. The Self-Revive occupies a separate equipment slot from the Boss Transform item, so you can have both simultaneously. However, when you’re eliminated as a boss, the Transform item is destroyed—so you’ll revive as a normal player, not as the boss.
Still worth having both if you can manage it, especially in late-game scenarios.
Common Mistakes to Avoid
Buying it too early: Don’t spend 2,500 Gold on a Self-Revive Device when you don’t even have a decent weapon yet. Prioritize your core loadout first.
Reviving in the open: Getting knocked in a field with zero cover? The Self-Revive probably won’t save you. Crawl to safety first.
Forgetting to heal after revival: You come back with 30 HP—immediately pop Med Kits, Bandages, and Shield Potions. Don’t run into another fight at 30 HP.
Not communicating in Squads: Your teammates need to know you have it so they don’t waste time trying to revive you manually.
Final Thoughts
The Self-Revive Device is one of the best additions to Fortnite in recent memory. It adds a layer of strategy and decision-making that didn’t exist before, especially in Solo mode where it completely changes the risk-reward calculus of aggressive plays.
Is it overpowered? Maybe slightly in Solos. But the 2,500 Gold cost, limited availability, and 10-second vulnerability window keep it balanced enough that skilled players can still counter it.
Whether you’re grinding Ranked challenges, hunting for that Victory Umbrella, or just playing casually, learning to effectively use and counter Self-Revive Devices will make you a better player.
So next time you’re farming Gold at a Mending Machine or looting a Care Package, grab that Self-Revive Device. It might just be the difference between watching your squad win from the spectator screen and clutching the Victory Royale yourself.
Have you pulled off a clutch self-revive yet? Share your best comeback story in the comments!