How to Get Free Ray Gun Mk2 in Black Ops 7 Ashes of the Damned
If you’ve been grinding through Ashes of the Damned, you know this map is absolutely massive – and the zombie hordes don’t mess around. But here’s some good news: there’s a hidden easter egg that rewards you with a free Ray Gun Mark 2, one of the most devastating wonder weapons in the game.
This isn’t just a one-time thing either. You can repeat this easter egg every single match, which makes it an absolute game-changer for your zombies strategy. Whether you’re hunting zombies camos or just trying to survive higher rounds, having this weapon in your arsenal makes everything easier.
Let’s break down exactly how to unlock this beast.
Prerequisites: What You Need Before Starting
Before you dive into this Ray Gun Mk2 easter egg, you’ll need to set up a few things:
- Turn on the power across the entire map
- Open all areas (yes, every single one)
- Have at least 4,000 Essence ready to spend on jump pads
- Be prepared to survive 4 additional rounds after the initial step
If you’re still getting familiar with the map layout, check out our Ashes of the Damned perk locations guide and Pack-a-Punch guide to get oriented.
Step 1: The Jump Pad Circuit (Complete the Loop)
Here’s where things get interesting. Your first objective is to create a complete circuit using all 8 jump pads on the map. Think of it like connecting the dots – you need to visit every jump pad location and end up back where you started.
Jump Pad Locations in Ashes of the Damned:
- Blackwater Lake
- Ashwood (Market Square)
- Ashwood (Rabbit Alley)
- Exit 115
- Zarya Cosmodrome
- Vandorn Farm
- Janus Towers Plaza
Pro tip: You can start at ANY jump pad – there’s no required starting point. Just make sure you hit all of them and complete the loop back to your starting location.
Example Circuit Route:
Here’s one route that works perfectly:
Blackwater Lake → Ashwood → Exit 115 → Zarya Cosmodrome → Ashwood → Vandorn Farm → Janus Towers Plaza → Blackwater Lake
The total cost is 4,000 Essence for all 8 jump pad uses (500 each), so make sure you’re farming essence efficiently beforehand.
Important: Don’t use any jump pads out of sequence once you start the next steps, or you’ll fail the easter egg and have to restart.
Step 2: Wait 4 Rounds (Patience is Key)
After completing your jump pad circuit, you’ll need to survive 4 full rounds. I know waiting can be tedious, but use this time productively:
- Farm salvage for weapon upgrades
- Work on your weapon camo challenges
- Stock up on perks and armor
- Practice your training routes at one of the best training spots
This waiting period gives the map time to register your jump pad completion and prepare the next phase.
Step 3: Decode the Light Sequence at Janus Towers Plaza
Once 4 rounds have passed, head over to Janus Towers Plaza. Look at the northern lights in the lobby – specifically, focus on the furthest left light.
How to Read the Sequence:
This light will start blinking in a specific pattern, flashing anywhere from 1 to 7 times before pausing. Your job is to count these flashes carefully:
- Count the number of flashes in the first set
- Wait for the pause
- Count the next set of flashes
- Repeat until the sequence completes
You’ll know the sequence is complete when a solid light remains, then the pattern will loop again for confirmation.
Example Sequence Breakdown:
Let’s say the light flashes: 3 times → pause → 6 times → pause → 5 times → pause → 7 times → pause → 4 times → pause → 1 time → pause → 2 times → solid light.
Your sequence would be: 3, 6, 5, 7, 4, 1, 2
Write this down immediately – you don’t want to mess this up!
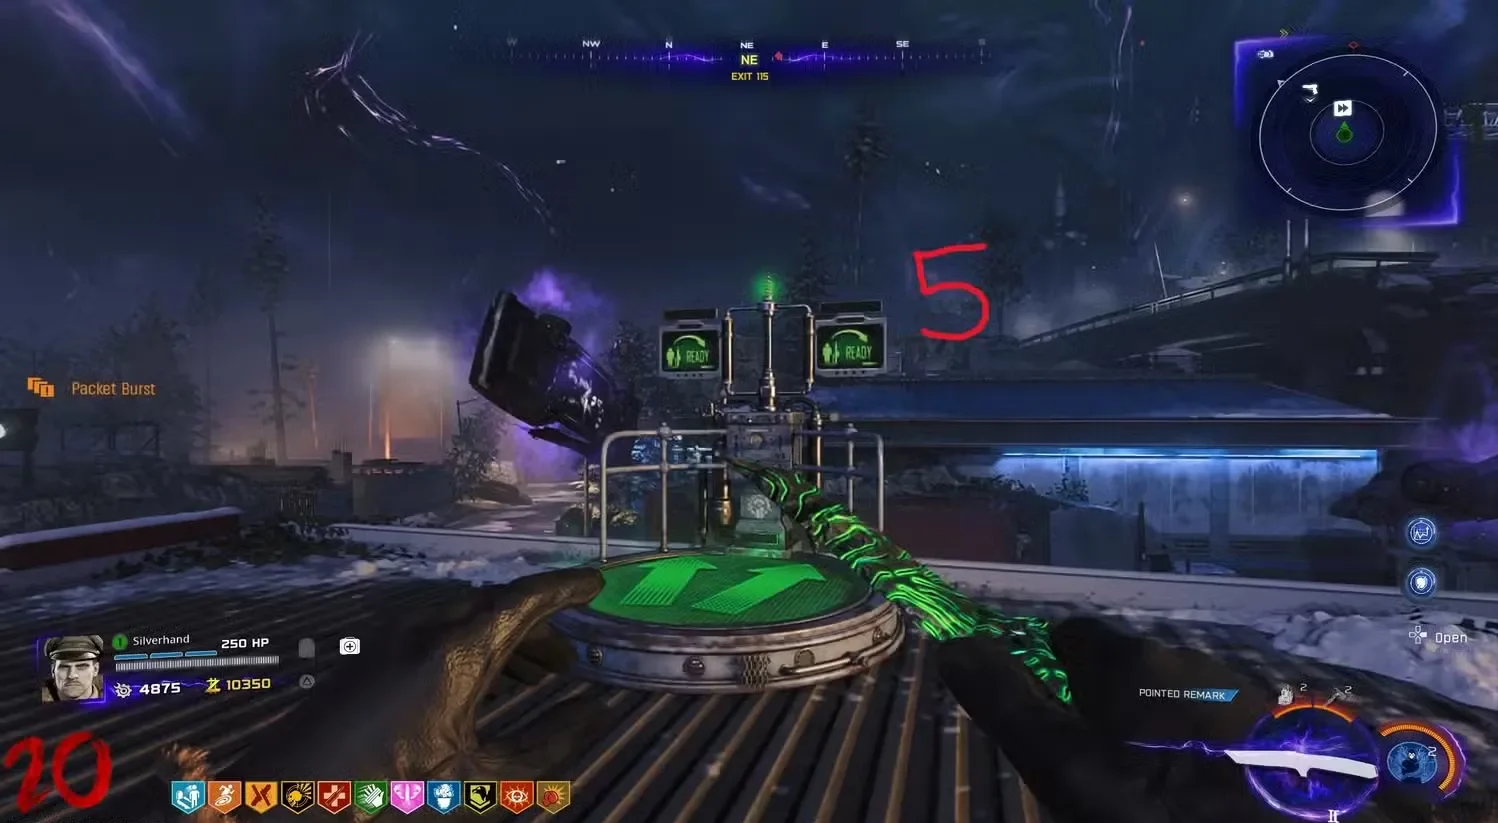
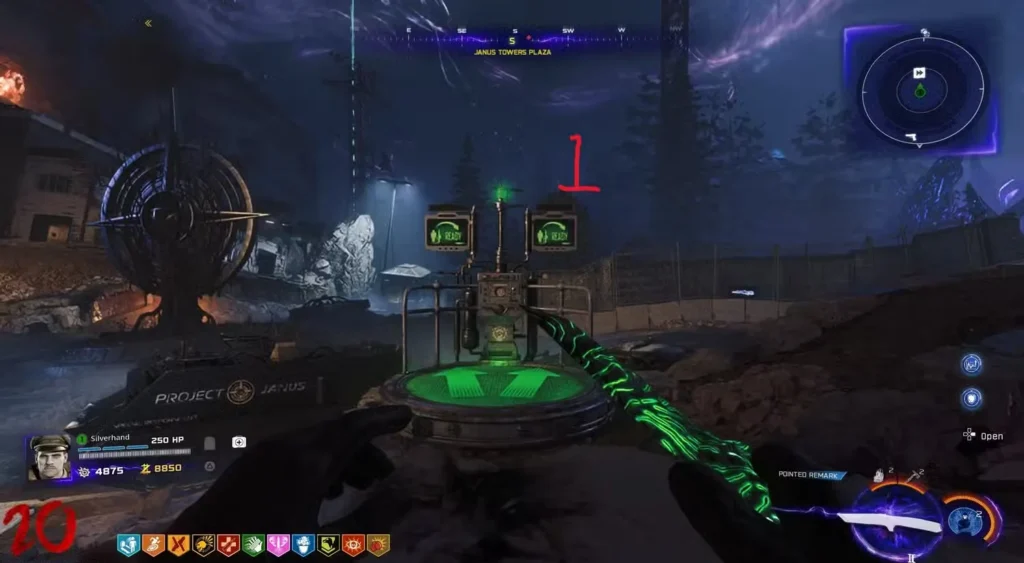
Step 4: Jump Pad Number Translation Guide
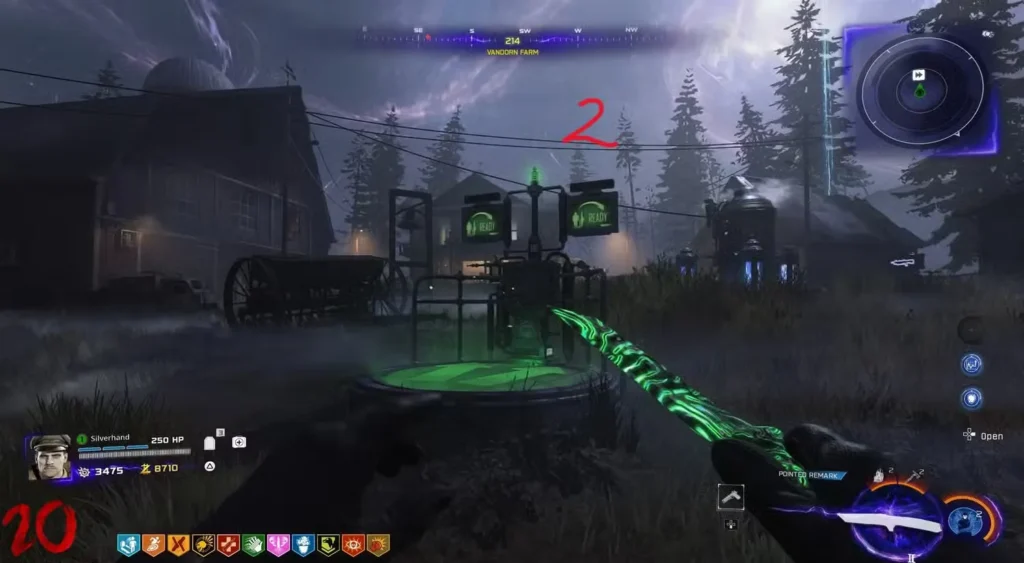
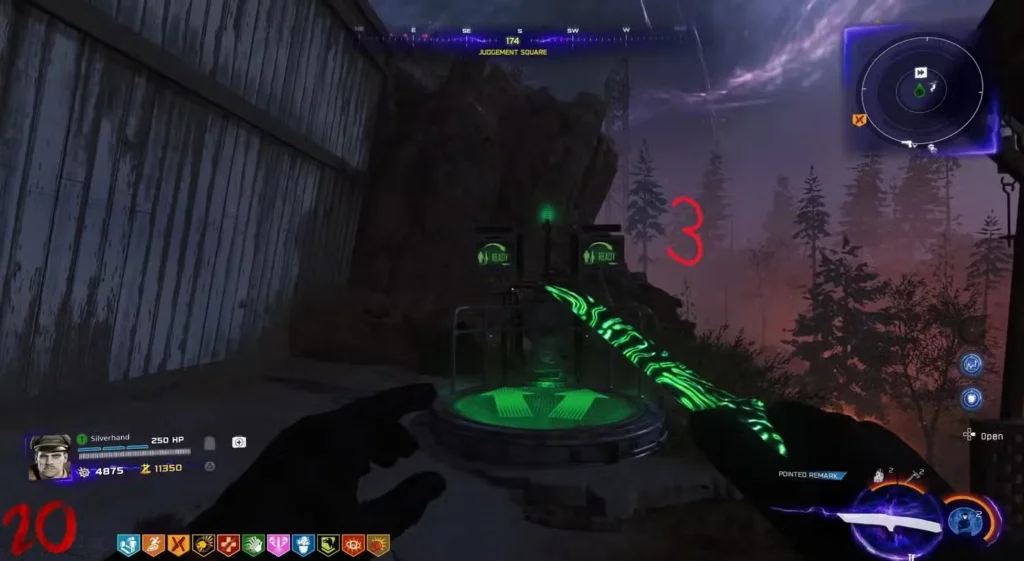
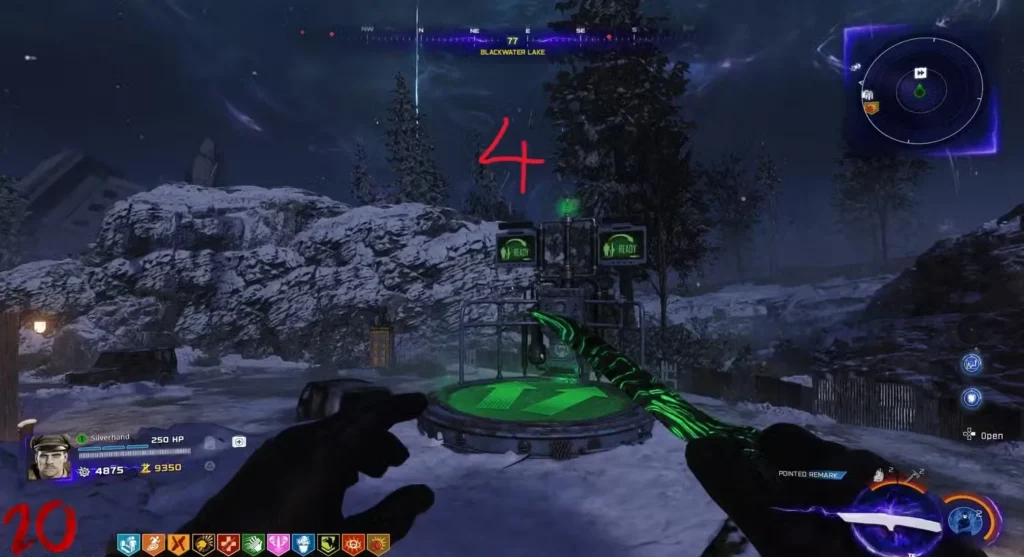
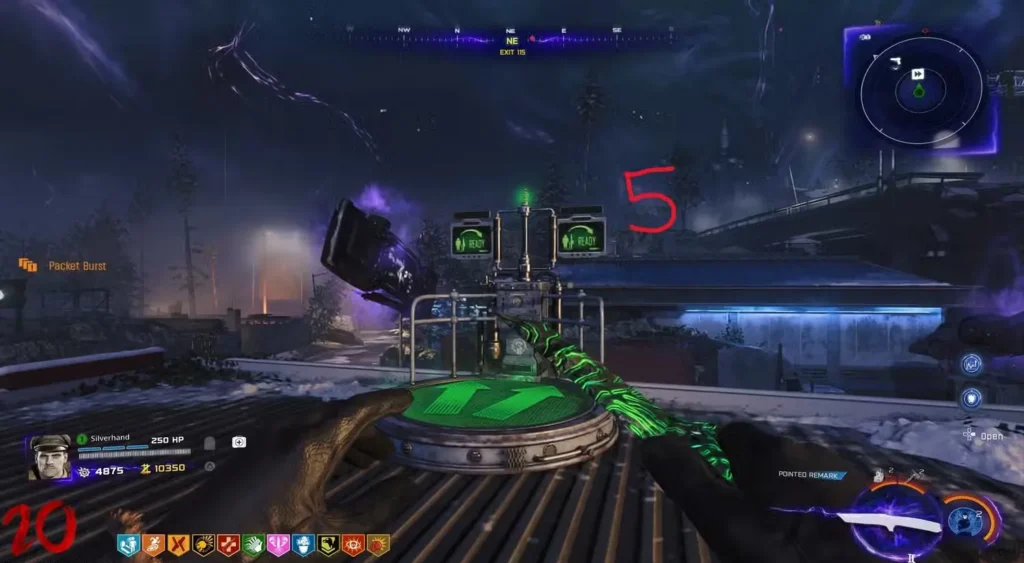
Each number in your sequence corresponds to a specific jump pad location. Behind every jump pad on the map, there’s actually a number marker, but here’s the complete translation to save you time:
| Number | Jump Pad Location |
|---|---|
| 1 | Janus Towers Plaza |
| 2 | Vandorn Farm |
| 3 | Ashwood (Market Square – toward Exit 115/Zarya Cosmodrome) |
| 4 | Blackwater Lake |
| 5 | Exit 115 |
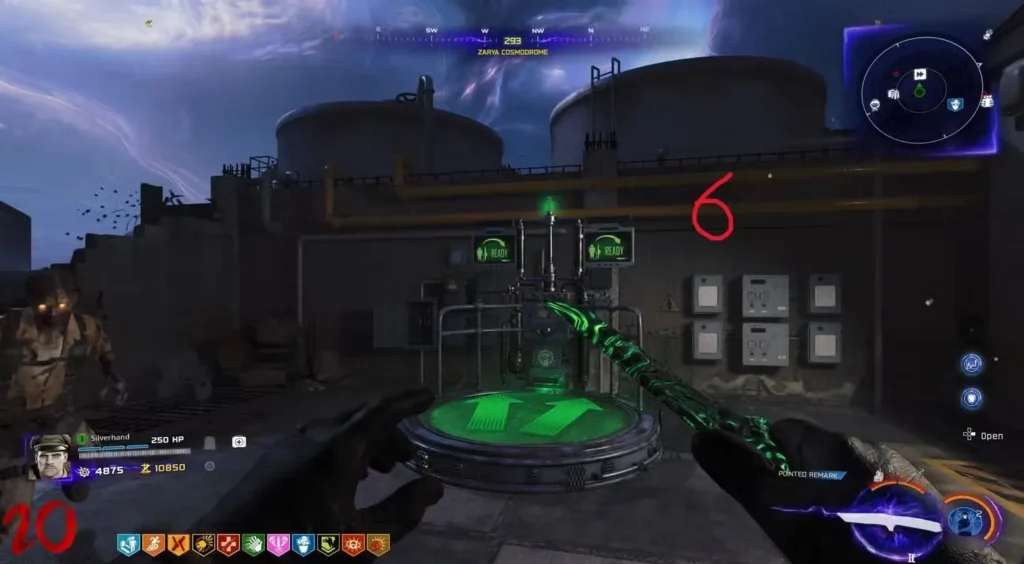
| 6 | Zarya Cosmodrome |
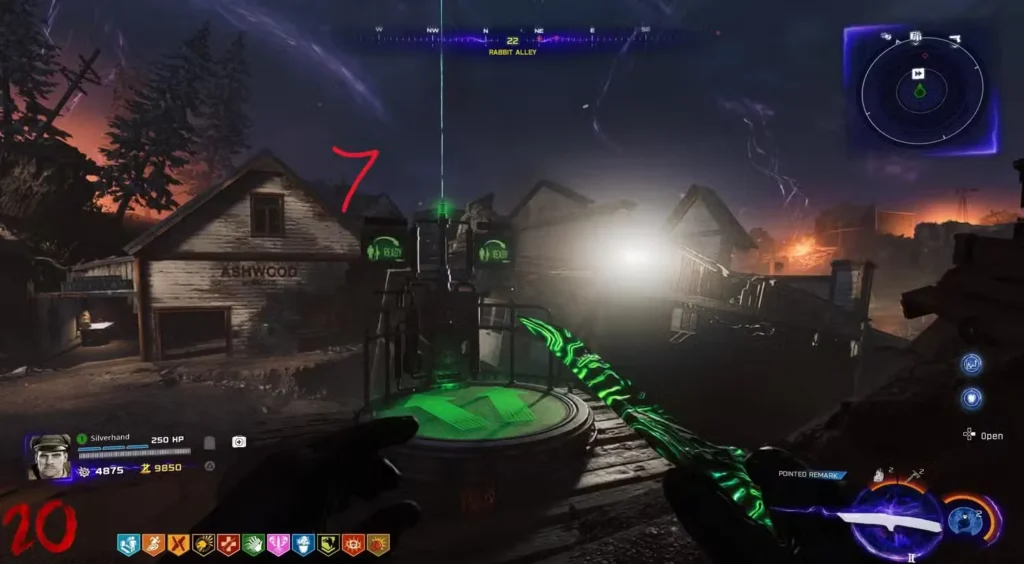
| 7 | Ashwood (Rabbit Alley – toward Vandorn Farm/Blackwater Lake) |
Note: Ashwood has TWO jump pads (numbers 3 and 7), so pay attention to which one the sequence calls for!
Step 5: Execute the Jump Pad Sequence
Now comes the execution. Using the sequence you decoded, you need to use the jump pads in that exact order, creating a loop that ends back at Ashwood.
Following Our Example (3, 6, 5, 7, 4, 1, 2):
- Start at jump pad #3 (Ashwood – Market Square)
- Use jump pad #6 (Zarya Cosmodrome)
- Use jump pad #5 (Exit 115)
- Use jump pad #7 (Ashwood – Rabbit Alley)
- Use jump pad #4 (Blackwater Lake)
- Use jump pad #1 (Janus Towers Plaza)
- Use jump pad #2 (Vandorn Farm)
- Use whichever jump pad you’re currently at to return to Ashwood
Critical reminder: Do NOT use any jump pad out of the required sequence, or the easter egg will fail and you’ll have to restart the entire process.
Step 6: Find and Enter the Purple Portal
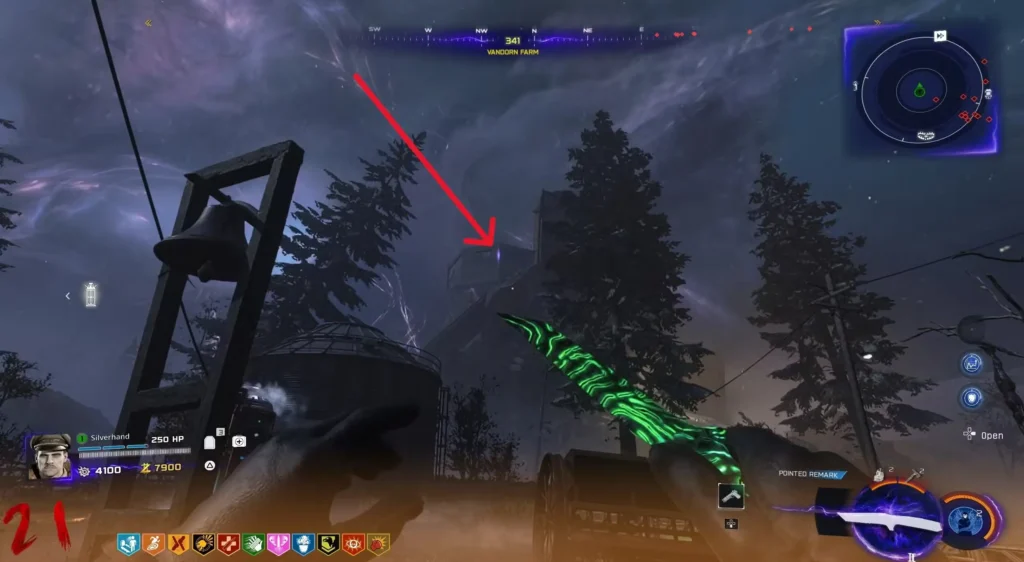
After completing your sequence correctly, look up at the sky – you should see a purple portal appear somewhere on the map.
This portal spawns between two connecting jump pad locations. In our example, it appeared between Vandorn Farm and Janus Towers Plaza.
How to Locate Your Portal:
- Scan the skyline carefully
- The portal appears as a bright purple rift
- It’s typically positioned along the path between two jump pads you just used
Once you’ve spotted it, position yourself at the correct jump pad and launch yourself directly into the purple portal. Timing and positioning matter here – you want to hit that portal mid-air during your jump pad launch.
Step 7: Claim Your Free Ray Gun Mk2
Successfully entering the portal teleports you back to Ashwood, where a dimensional rift opens up and unleashes a shower of rewards:
- Free Ray Gun Mark 2 (the main prize!)
- Free Essence
- Bonus Points
- Potential Mystery Perks
- Dead zombie bodies (already eliminated for you)
Just walk over and collect everything. The Ray Gun Mk2 is now yours to dominate the higher rounds!
Drop Rate Tips:
According to player testing, the Ray Gun Mk2 is more guaranteed if you complete this easter egg after Round 15. While you can attempt it earlier, waiting until Round 15+ significantly increases your chances of getting the weapon drop instead of just perks and essence.
If you’re serious about maximizing your zombie-slaying potential, pair this with the best weapons for zombies and consider checking out the Necrofluid Gauntlet wonder weapon for a devastating combo.
Why the Ray Gun Mk2 is Worth the Effort
For those new to the series or wondering why this easter egg is so valuable, the Ray Gun Mark 2 is an absolute powerhouse:
- High damage output against zombie hordes
- No splash damage to yourself (unlike the original Ray Gun)
- Excellent for high rounds when zombies become bullet sponges
- Free wonder weapon – normally you’d need insane RNG from the Mystery Box
Having this weapon from mid-game onward completely changes your survivability, especially when combined with proper perk augments and field upgrades.
Common Mistakes to Avoid
Through extensive testing, here are the most common reasons players fail this easter egg:
❌ Using jump pads out of sequence during Steps 5-7
Once you start executing your number sequence, any random jump pad usage breaks the easter egg.
❌ Not waiting the full 4 rounds after Step 1
The light sequence won’t trigger if you rush to Janus Towers too early.
❌ Miscounting the light flashes
Take your time, confirm the sequence, and write it down. One wrong number ruins everything.
❌ Confusing the two Ashwood jump pads (3 and 7)
Remember: #3 is Market Square (toward Exit 115), #7 is Rabbit Alley (toward Vandorn Farm).
❌ Missing the portal completely
Keep your eyes on the sky and scan thoroughly between jump pad locations.
Additional Easter Eggs and Rewards in Ashes of the Damned
If you’re enjoying these hidden challenges, Ashes of the Damned has tons of other secrets to discover:
- Main Easter Egg complete walkthrough
- All free power-up locations
- Music Easter Egg guide
- Mr. Peeks Axe Throwing Easter Egg
- Permanent Double Points location
- Launch the Cosmodrome Rocket
- Free Wisp Tea Perk Easter Egg
For a broader perspective on tackling this massive map, don’t miss our complete Ashes of the Damned walkthrough.
Frequently Asked Questions (FAQ)
Can you get the free Ray Gun Mk2 in solo mode?
Yes! This easter egg works perfectly in solo, co-op, and all party sizes. You don’t need teammates to complete any step – just follow the sequence exactly as outlined.
What happens if you fail the jump pad sequence?
If you use a jump pad out of order or make a mistake during the execution phase, the easter egg resets. You’ll need to complete another full jump pad circuit (Step 1), wait 4 more rounds, and decode a new light sequence. It’s frustrating, but the free Ray Gun Mk2 is worth the retry.
Is the Ray Gun Mk2 better than the regular Ray Gun?
For most situations, yes. The Mk2 fires three-round bursts instead of single shots, doesn’t have self-damage splash, and performs better in tight spaces. The original Ray Gun has higher single-shot damage, but the Mk2’s versatility makes it superior for general high-round survival.
Can you do this easter egg multiple times in one match?
No, this is a one-time completion per match. Once you’ve claimed your free Ray Gun Mk2, you won’t be able to repeat the easter egg in the same game. However, you CAN do it every single match you play, making it a reliable way to secure this wonder weapon game after game.
The free Ray Gun Mk2 easter egg in Ashes of the Damned is one of those perfectly balanced challenges – not too easy that it’s handed to you, but not so difficult that it requires frame-perfect execution. Once you’ve done it a few times, the sequence becomes second nature, and you’ll be securing this powerhouse weapon within the first 15-20 rounds of every match.
Remember to be patient during the light sequence decoding, double-check your jump pad numbers (especially those two Ashwood locations), and don’t panic when looking for the purple portal. With practice, this becomes one of the most rewarding easter eggs to complete.
For more Black Ops 7 strategies, check out our complete level unlocks guide, best settings and optimization, and join the community discussion on the Call of Duty Black Ops 7 subreddit or the official COD Discord.
Now get out there and claim your free Ray Gun Mk2 – those zombies won’t bury themselves!
Official Black Ops 7 Website: Call of Duty: Black Ops 7