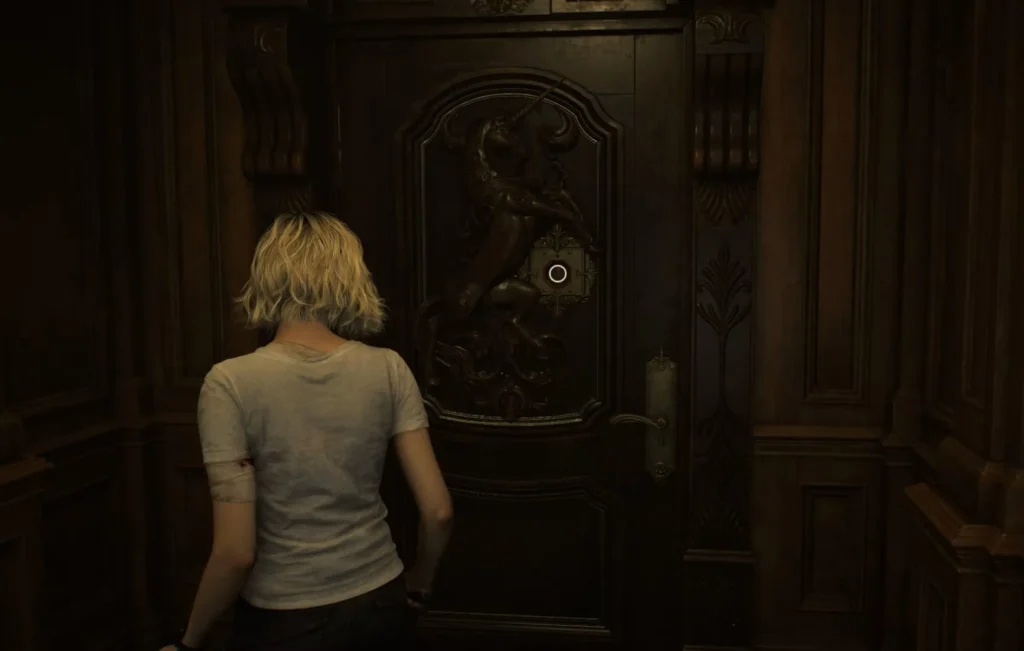
When Leon Kennedy returns to the Raccoon City Police Department in Resident Evil Requiem, he’s walking the halls of a place he knows better than almost anywhere else — but the building has been ravaged by time, fire, and the events that followed the city’s fall. Scattered among the wreckage of the S.T.A.R.S. Office are two photographs left behind by Barry Burton, one of Leon’s old allies from the original STARS unit. On the back of each photo, the same handwritten note: “You kids have fun solving this one.”
This is Barry’s Scavenger Hunt — an entirely optional two-part puzzle hidden in the RPD that rewards Leon with a pair of powerful weapon charms. Neither charm is required to finish the game, but both offer meaningful upgrades, and the puzzle itself is a genuinely charming piece of fan service packed with Capcom Easter eggs. This guide covers how to start the hunt, find JoJo’s Locker Key, decode the briefcase combination, and claim both rewards.
What You Get for Completing Barry’s Scavenger Hunt
Before diving in, here’s what you’re playing for:
| Reward | Source | Effect |
|---|---|---|
| S.T.A.R.S. Emblem Charm | JoJo’s Locker (West Office) | Increases firepower for automatic weapons; increases weapon sway |
| Power Shades Charm | Briefcase (S.T.A.R.S. Armory) | Limitless bullet penetration + increased firepower on the Requiem’s last bullet in the cylinder |
The S.T.A.R.S. Emblem is a strong early automatic weapon boost — ideal if Leon is leaning into a submachine gun or assault rifle playstyle. The Power Shades are the more unique of the two: modeled after Albert Wesker’s iconic sunglasses, they turn the Requiem into an even more lethal weapon if you keep your ammo low and only reload when the cylinder is fully empty.
Both charms are permanently missable if you leave the RPD without collecting them, so make sure you complete both halves of the hunt before moving on.
How to Reach the S.T.A.R.S. Office
The entire puzzle starts on the second floor of the RPD in the S.T.A.R.S. Office. Here’s how to get there from the main lobby:
- From the Main Hall, take the west door.
- Follow the only available path through the hallway and turn left toward the lit corridor leading to the Reception room.
- Defeat the zombie that appears, then turn left again to reach a room with a retracted ladder.
- Shoot the ladder to drop it down, then climb up to the second floor.
- Walk forward into the S.T.A.R.S. Office.
The S.T.A.R.S. Office is the emotional core of Leon’s RPD visit. It’s filled with remnants of his former colleagues — Chris Redfield, Jill Valentine, Albert Wesker, Barry Burton, and Rebecca Chambers all leave their mark here in some form. Take your time exploring before pressing on.
Part One: Barry’s Scavenger Hunt — JoJo’s Locker Key
Step 1 — Find the Two Photo Clues
Inside the S.T.A.R.S. Office, two photographs serve as your clues:
Clue Photo #1 is tucked into the jacket hanging on the wall — Chris Redfield’s old jacket. Examine it to pull out a photograph showing a room in the RPD before the city fell: a noticeboard by a window, an American flag, and a TV mounted from the ceiling. Flip it over to read Barry’s note.
Clue Photo #2 is inside a locker in the S.T.A.R.S. Office. This is a closer, zoomed-in shot of the same TV unit, making it much easier to identify. Both photos carry the same message on the back from Barry. Together, the two images narrow down the location to a single room on the ground floor.
Step 2 — Identify the Location: The Operations Room
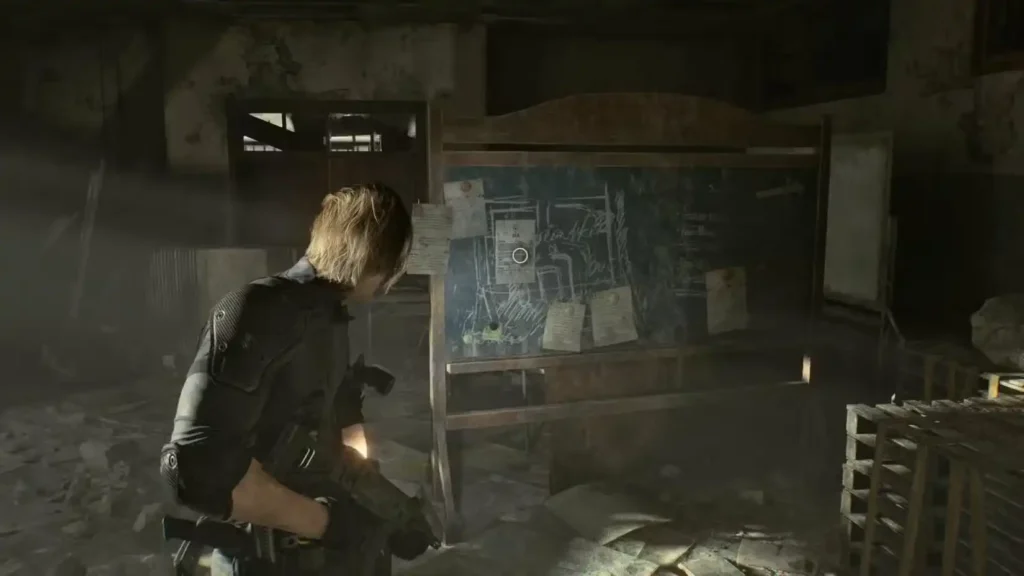
Both clues point to the Operations Room on the west side of the RPD’s ground floor. This is the room directly adjacent to the West Office — the bullpen area where you’ll later use the Locker Key. The room is far more damaged than in Barry’s photograph, but the key visual landmarks are still recognizable despite the debris: a chalkboard/noticeboard on the right wall and the ceiling-mounted TV unit hanging in front of it.
To reach the Operations Room from the S.T.A.R.S. Office:
- Head back down via the ladder.
- Pass through the West Office (the open bullpen area with desks and lockers).
- Go through the door on the right side of the West Office into the Operations Room.
Step 3 — Climb the Crates and Grab JoJo’s Locker Key
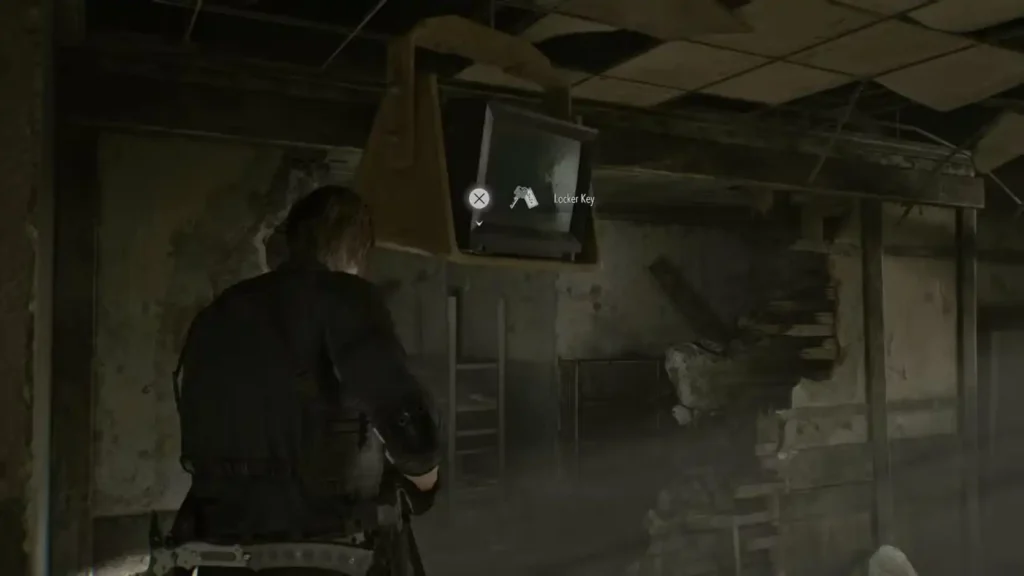
Inside the Operations Room, look for a stack of wooden pallets or crates positioned to the right of the noticeboard and chalkboard. Climb on top of them, then turn around to face the ceiling-mounted TV suspended in the metal box overhead. There’s a prompt to interact — reach up and grab JoJo’s Locker Key, which has been balanced on the edge of the TV unit this whole time.
This is the moment both of Barry’s photos were pointing to: the TV mounted from the ceiling. In the “before” photograph, it’s a clean operations room; in the present, it’s rubble and ruin — but the TV is still hanging, and the key is right where Barry left it.
While you’re in the Operations Room: There’s also a Mr. Raccoon Memoriam statue hidden in this room. Shoot it before leaving, as backtracking can be costly.
Step 4 — Open JoJo’s Locker in the West Office
Return to the West Office (the room you passed through on the way in). At the back of the room, near a row of standing lockers, find the one marked JoJo and use the Locker Key to open it.
Inside you’ll find:
- The S.T.A.R.S. Emblem Charm — your primary reward, a firepower boost for automatic weapons
- Two tickets to the Raccoon City Zoo with Barry’s handwritten note: “Enjoy! And don’t say I never gave you anything!”
- And if you look inside the locker itself: a Street Fighter Alpha poster, a dusty games console, and a stack of classic Capcom titles including Resident Evil, Street Fighter Alpha 2, and Mega Man 3 — a lovely Easter egg for longtime Capcom fans
Part Two: The S.T.A.R.S. Briefcase and the RRR Code
The second half of Barry’s challenge is a separate, parallel hunt based entirely in the S.T.A.R.S. Office. It rewards the Power Shades Charm for Leon’s Requiem handgun.
Where Is the Briefcase?
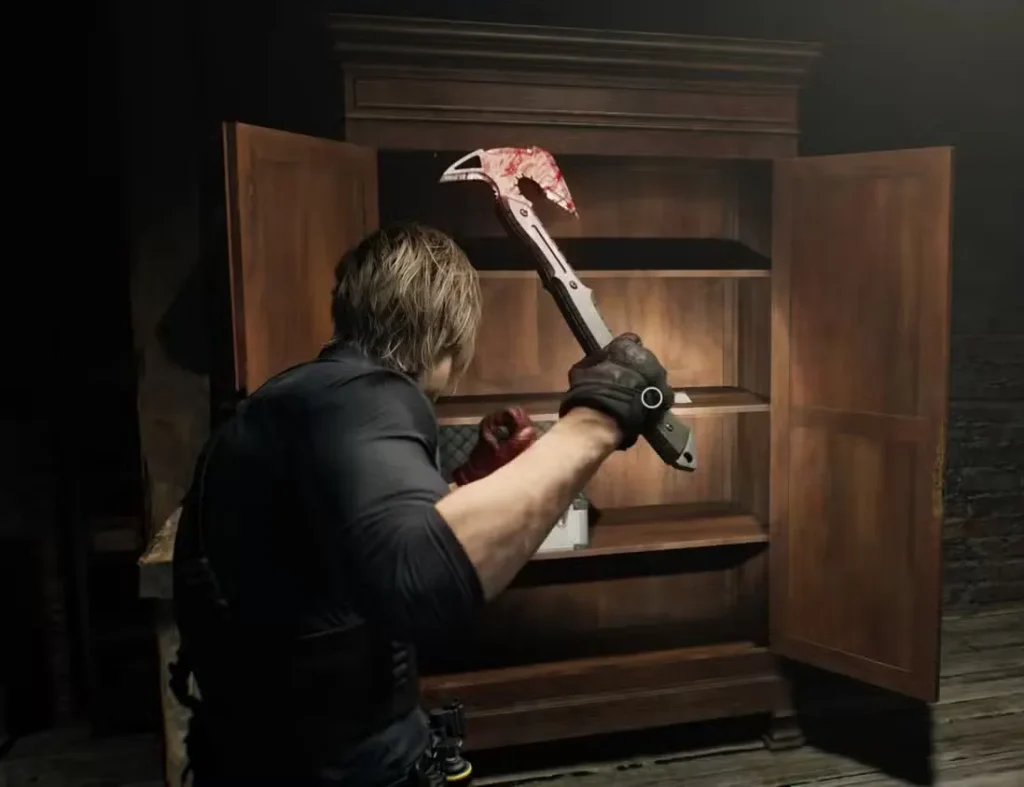
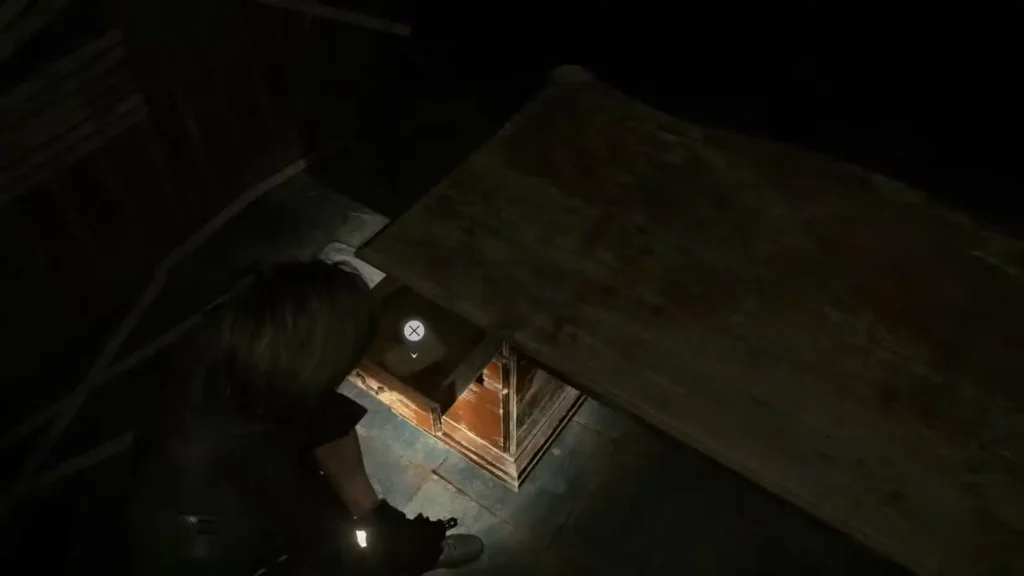
The briefcase is located in the Armory — the small back room of the S.T.A.R.S. Office, accessible from inside the main office space. It’s stored in a locker and stands out immediately for how clean and preserved it looks compared to the rest of the ravaged building. Examine it to find a three-character combination lock.
The Briefcase Code
The code is: R – R – R
Input all three characters as R to open the briefcase and claim the Power Shades Charm.
How to Discover the Code Naturally (Optional)
If you want to follow the trail the way Capcom intended rather than just entering the solution directly, here’s the full paper trail hidden in the S.T.A.R.S. Office:
Step 1 — Read Barry’s To-Do List. On Barry’s desk inside the S.T.A.R.S. Office, find the file titled “Barry’s To-Do List.” It mentions that returning Captain Wesker’s overdue library book is a top priority.
Step 2 — Check Wesker’s Office. The sectioned-off room inside the S.T.A.R.S. Office belongs to Wesker. Walk in and interact with the framed photograph of the S.T.A.R.S. team on his desk, then open the desk drawer. After a brief pause, a library checkout card appears. The card shows that Wesker borrowed a book called Medicinal Benefits of Herbs and has since returned it.
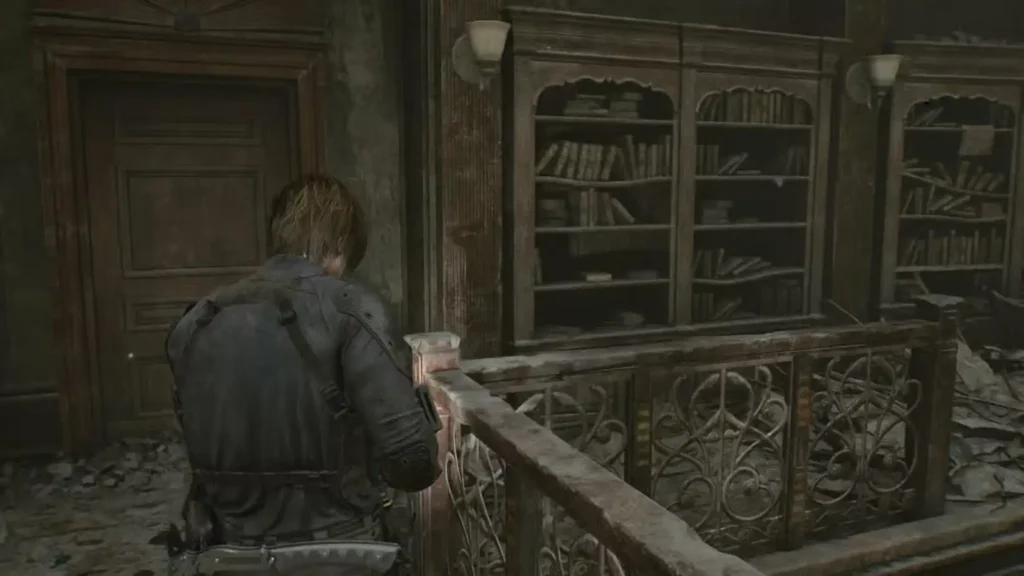
Step 3 — Go to the Library. The Library is accessible by heading back toward the ladder area and walking straight through the door instead of climbing down. Head up the library staircase, cross to the left side, and check the bookshelf on the right. Open the correct book and inside you’ll find a photograph of Rebecca Chambers in a basketball/gym outfit — a nod to a classic Easter egg from previous entries and unmistakable proof of Wesker’s unsettling fixation.
Step 4 — Read the Back. Flip the photo over to find the written clue: “Rising Rookie Rebecca.” The first letter of each word spells R-R-R — the briefcase combination.
The Power Shades Charm
Once you crack the briefcase, you’ll receive the Power Shades Charm, styled after Albert Wesker’s signature sunglasses. Equip it to the Requiem for two stacking effects: limitless bullet penetration (every shot passes through multiple enemies) and bonus firepower on the last bullet in the cylinder. To get the most out of this charm, keep your Requiem ammo low and only reload when you’ve completely emptied the cylinder — the last-bullet bonus makes each final shot count for significantly more damage.
The charm can also be equipped to certain post-game bonus weapons beyond the Requiem, giving it ongoing replay value.
RPD Scavenger Hunt: At-a-Glance Checklist
| Step | Location | Action |
|---|---|---|
| Find Clue Photo #1 | S.T.A.R.S. Office — Chris’ jacket | Examine jacket on wall |
| Find Clue Photo #2 | S.T.A.R.S. Office — locker | Open locker inside office |
| Get JoJo’s Locker Key | Operations Room (1F) — ceiling TV | Climb crates, grab key from TV |
| Open JoJo’s Locker | West Office (1F) — back locker row | Use JoJo’s Locker Key |
| Reward: S.T.A.R.S. Emblem Charm | JoJo’s Locker | Auto weapon firepower boost |
| Find Briefcase | S.T.A.R.S. Armory (2F) | Examine locker in back room |
| Read Barry’s To-Do List | S.T.A.R.S. Office — Barry’s desk | Optional clue step |
| Check Wesker’s desk drawer | Wesker’s Office (inside S.T.A.R.S.) | Reveals library card |
| Find Library book | Library (2F) — west bookshelf | Opens to Rebecca photo |
| Input Briefcase Code | S.T.A.R.S. Armory briefcase | Code: R – R – R |
| Reward: Power Shades Charm | Briefcase | Requiem bullet penetration + last-shot power |
Don’t Miss These Before Leaving the RPD
The RPD is a one-time location. Once Leon moves on from Raccoon City, he cannot return. Before you leave, make sure you’ve done everything on this list in addition to the scavenger hunt:
- Shoot every Mr. Raccoon Memoriam statue in the building, including the one in the Operations Room
- Explore all unlocked rooms for files, ammo, and crafting materials
- Equip both charms while you still have time to test them against RPD enemies — the S.T.A.R.S. Emblem in particular pairs well with whatever automatic weapon you’re carrying at this stage
- Remember: the Power Shades Charm works best with low Requiem ammo, so adjust your play style accordingly now rather than later
If you want a full sense of how the RPD visit fits into Resident Evil Requiem’s overall pacing, our How Long Does It Take to Beat Resident Evil Requiem guide breaks down every major act by playstyle and difficulty. And if you’ve already cleared the RPD and are heading toward the Care Center’s deeper sections, Grace’s segment in the Basement is where the next major puzzle challenge begins — our Joint Plugs Basement guide walks through every step of that area’s power-switching puzzle in full.
It’s also worth noting that during Leon’s portion of the Care Center — which comes just before the RPD — there are several missable items tied to his unique access. The Basement safe code clue, for instance, is only findable as Leon. Our Basement Safe Code guide has the full combination in case you missed it, and our Pantry guide covers Leon’s alternate route through the Kitchen if you didn’t tackle the Chef as Grace. Finally, if you’re trying to max out Grace’s upgrades from the Antique Coins and Parlor Prizes before leaving the Care Center entirely, make sure that’s done before the Courtyard exit — that door closes permanently.