If you’re looking to lean more into the PvE side of Arc Raiders rather than constant PvP firefights, quest missions like A Lay of the Land offer exactly that opportunity. These missions provide structured objectives, valuable rewards, and a reason to explore specific map locations without simply wandering around hoping to stumble upon good loot.
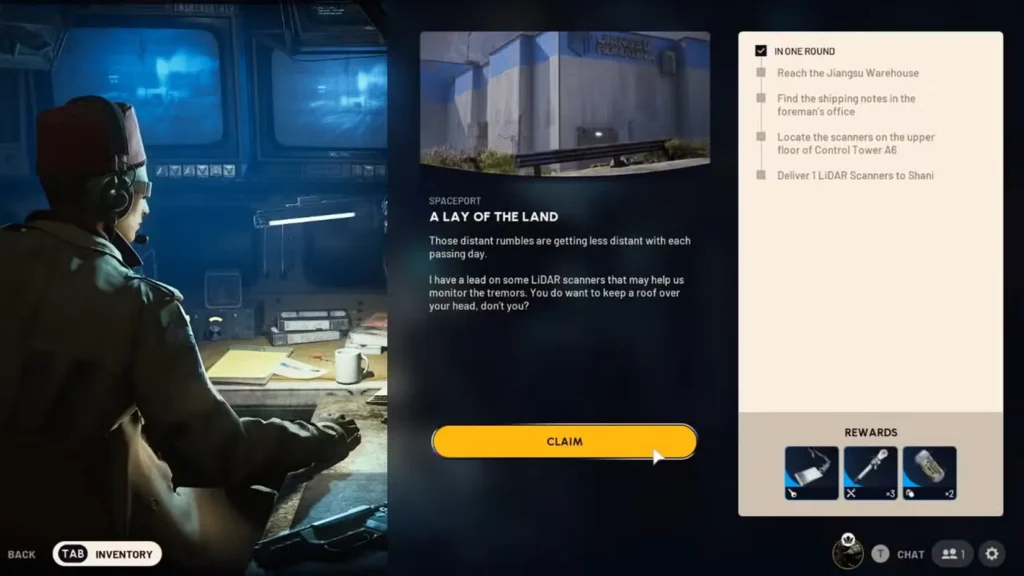
A Lay of the Land is one of Shani’s quests that sends you on a multi-stage scavenger hunt across the Spaceport map. You’ll need to navigate to the Jiangsu Warehouse, gather intelligence from shipping notes, then push into the dangerous Control Tower A6 to retrieve LiDAR Scanners. The reward for your trouble? A Dam Testing Annex Key, three Ziplines, and two Smoke Grenades—all useful items that would cost significant resources to craft or purchase otherwise.
Let me break down the entire quest chain so you know exactly where to go, what to expect, and how to complete A Lay of the Land efficiently.
A Lay of the Land Quest Overview
Quest Giver: Shani at Esperanza
Map: Spaceport
Difficulty: Medium to High (requires navigating contested areas)
Extraction Required: Yes—you must extract with the LiDAR Scanners to complete the quest
A Lay of the Land Quest Rewards
Upon completion, you receive:
- Dam Testing Annex Key (unlocks a specific high-value location)
- Three Ziplines (mobility equipment for vertical traversal)
- Two Smoke Grenades (tactical equipment for combat or escape)
These rewards are particularly valuable. The Dam Testing Annex Key opens access to premium loot locations, Ziplines enable faster navigation and escape routes, and Smoke Grenades provide tactical options in both PvE and PvP situations. Compared to the coin cost of purchasing or crafting these items, completing the quest is highly efficient.
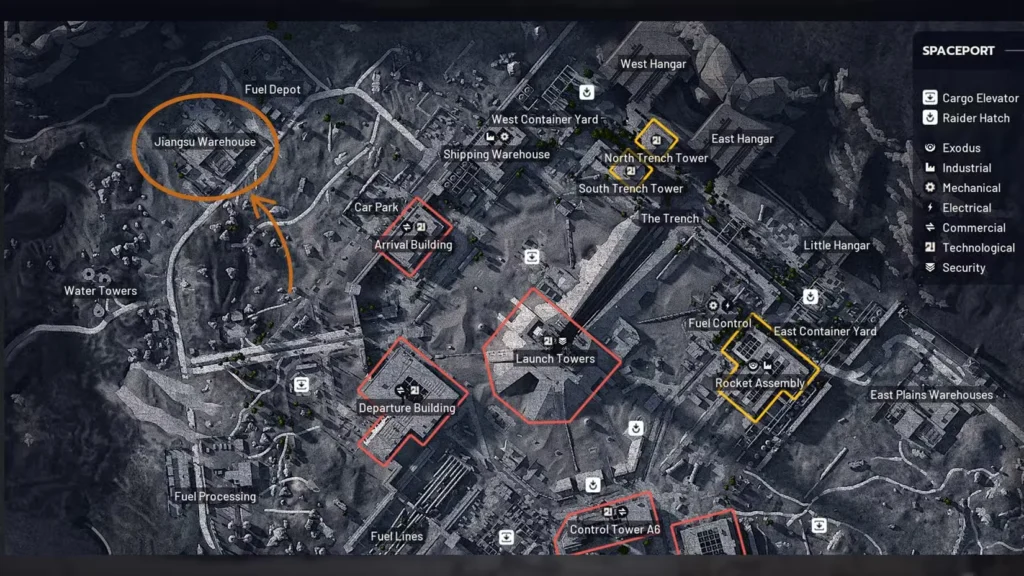
Jiangsu Warehouse Location: Stage 1 of Lay of the Land
Shani’s intel leads you to Jiangsu Warehouse on the Spaceport map, where he believes LiDAR Scanners information can be found.
Jiangsu Warehouse Location
Map: Spaceport
Region: Western side
Landmark: Directly underneath a Fuel Depot structure
The Jiangsu Warehouse is positioned on the western edge of Spaceport, making it somewhat isolated from the central high-traffic zones. This is good news—it means you’re less likely to immediately encounter hostile players when starting this quest.
Navigation Tips
Check your spawn: When you load into Spaceport, immediately check your position relative to Jiangsu Warehouse. If you spawn on the eastern side far from the warehouse, you might want to reconsider pursuing this quest during that particular run.
Why distance matters: A Lay of the Land requires you to travel from Jiangsu Warehouse to Control Tower A6 (in the center of the map), then extract successfully. Starting far from the warehouse adds significant travel time and exposure to threats. If your spawn is unfavorable, consider completing other quests or activities instead.
Route planning: If you do commit to the quest from a distant spawn, plan your route to avoid obvious chokepoints and high-traffic areas. Use the map edges when possible to minimize player encounters.
What to Expect at Jiangsu Warehouse
Enemy presence: Expect standard ARC enemies around the warehouse—typically Wasps, Spotters, and possibly a Rocketeer or two. Clear them before entering to avoid being ambushed while searching for objectives.
Loot opportunities: While you’re primarily here for the quest, Jiangsu Warehouse contains standard loot containers. Grab what you can, but don’t get distracted from the main objective.
Building layout: The warehouse is a relatively straightforward structure with ground and upper floor sections. The shipping notes you need are upstairs.
Shipping Notes in Foreman’s Office: Stage 2 Walkthrough
Once you arrive at Jiangsu Warehouse, the quest updates with a new objective: locate and collect the shipping notes from the foreman’s office.
Where to Find the Notes
Location: Upper floor of Jiangsu Warehouse at the end of the building
Step-by-step directions:
- Enter the Jiangsu Warehouse structure
- Navigate toward the far end of the building
- Locate the stairs leading to the upper level
- Ascend to the upper floor
- Find the foreman’s office area
- Interact with the shipping notes to collect them
Notes Collection Tips
Clear the area first: Before searching for the notes, eliminate any ARC enemies inside the warehouse. Being interrupted mid-collection by a Wasp attack is frustrating and potentially deadly.
Watch for turrets: Some interior Spaceport locations have turrets. While not confirmed specifically for Jiangsu Warehouse, stay alert for automated defenses.
Check your surroundings: The upper floor provides good visibility of the surrounding area. Before leaving, scan for approaching threats—both ARC and player-controlled.
Mark your exit: Mental note where you entered and identify alternative exits. If hostile players show up, you need escape routes ready.
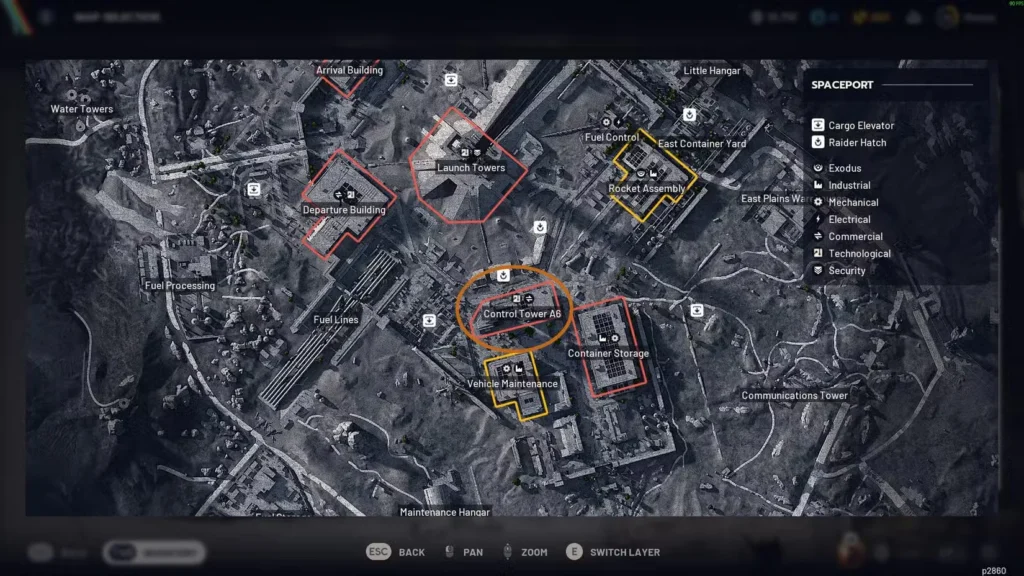
LiDAR Scanners at Control Tower A6: Stage 3 Location
After collecting the shipping notes, the quest updates with its most challenging objective: retrieve the LiDAR Scanners from the upper floor of Control Tower A6.
Why This Stage Is Dangerous
Control Tower A6 is a high-risk, high-reward location in the dead center of Spaceport. This makes it one of the most contested areas on the map because:
Central positioning: Players from all spawn points can reach it relatively quickly
Blueprint farming: Control Tower A6 is known for blueprint spawns, attracting treasure hunters
Strategic value: The elevated position provides excellent overwatch for the surrounding area
Heavy ARC presence: Expect significant ARC enemy patrols including Rocketeers, Hornets, and potentially Harvesters
Control Tower A6 Location in Spaceport
Map: Spaceport
Region: Central area (roughly middle of the map)
Identification: Large tower structure with multiple floors
You’ll know you’re at the right location when you see the distinctive tower building with statue markers near the entrance.
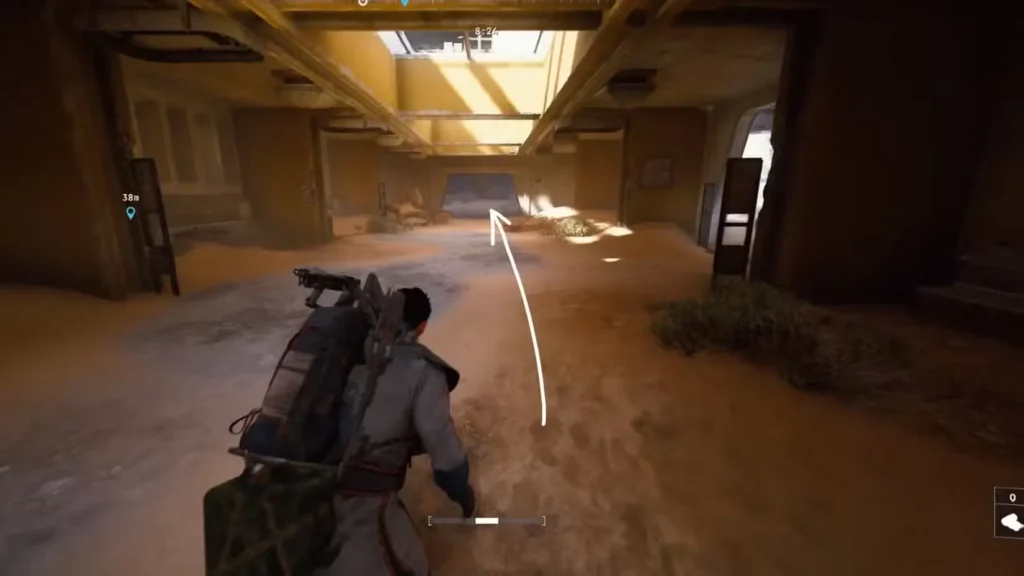
Control Tower A6 Navigation: How to Reach LiDAR Scanners
Getting to the Second Floor
The LiDAR Scanners are on the second floor, which requires specific navigation:
Step-by-step directions:
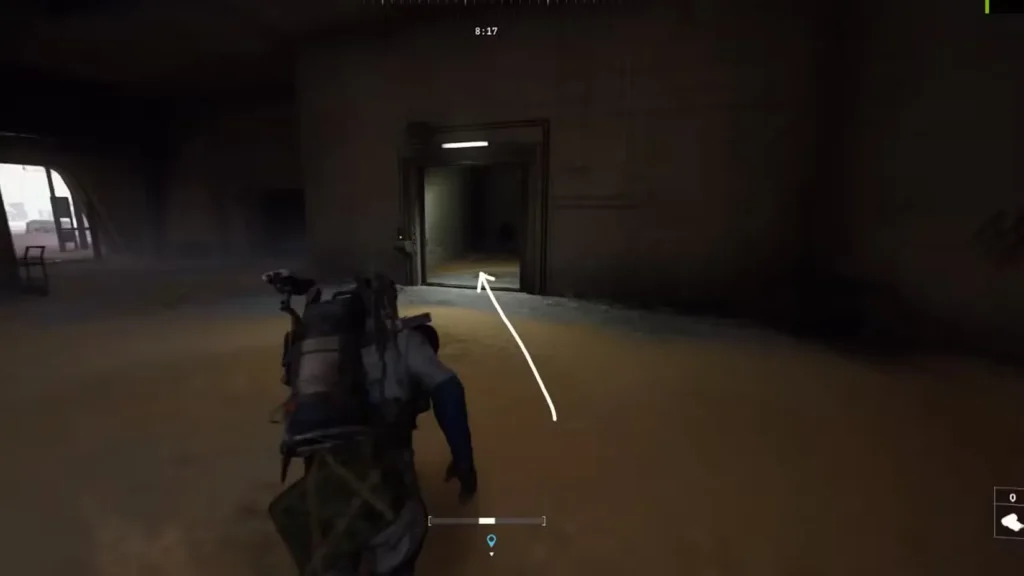
- Enter Control Tower A6 through the main entrance
- Navigate to the far end of the building’s ground floor
- Look for the room with statues positioned in front of it—this is your landmark
- Enter the statue room and locate the stairwell
- Ascend the stairs to reach the second floor
- Turn right immediately after reaching the upper level
- Walk down the corridor in that direction
- Turn right again at the end of the corridor
- Enter the small office at this location
- Search for the LiDAR Scanners inside the office and interact to collect them
Visual Landmarks
Ground floor: Look for the statue markers—these are your primary navigation reference point
Stairwell room: The stairs aren’t in an obvious central location; they’re specifically in the end room marked by statues
Upper corridor: After ascending, the right turn is immediate. Don’t wander the upper floor looking for alternate routes
Office location: The scanners are in a small office space, not a large open area
Control Tower A6 Combat: Enemy Threats & Tips
ARC Enemy Threats
Rocketeers: High-damage ranged enemies that can quickly deplete your shields. Prioritize eliminating them or breaking line of sight.
Hornets: Flying enemies with tracking capability. They’re persistent and dangerous in enclosed spaces.
Spotters: Will mark you for other ARC enemies. Destroy them quickly to avoid getting swarmed.
Potential Harvester: Control Tower A6 occasionally hosts Harvesters. If you encounter one, decide whether to engage for legendary loot or avoid it entirely to focus on the quest.
Player Threats
Ambush risk: The multi-floor design creates excellent ambush opportunities. Hostile players can camp stairs, corridors, or the scanner office itself.
Sound discipline: Your footsteps and gunfire attract attention. Move quietly when possible and consider silenced weapons if available.
Exit strategy: Know where stairs and exits are located before you grab the scanners. Once you have them, you become a high-value target.
Team advantage: This stage is significantly safer with teammates. Have them provide overwatch while you collect the objective.
Loadout Recommendations for A Lay of the Land Quest
Suggested Equipment
Weapons:
- Primary: Upgraded weapon with good ARC damage
- Secondary: Reliable sidearm for backup
- Consider bringing something with range for Control Tower overwatch positions
Shield:
- Medium Shield minimum for survivability
- Heavy Shield if you expect heavy PvP at Control Tower A6
Healing:
- Multiple healing items for extended journey
- Consider bringing extra given the two-stage quest requirement
Utility:
- Smoke Grenades (ironic that the quest rewards them) for escape
- Ziplines if you have extras for mobility
- Ammo reserves—this quest involves considerable travel and potential combat
Safe Pocket Protection
Critical: Once you collect the LiDAR Scanners, immediately store them in Safe Pockets. This quest requires extraction with the scanners, so losing them to death before extracting means you fail the quest and have to start over.
If your Safe Pockets are full, consider dropping less valuable items to make room. The quest rewards are worth protecting.
Extraction and Quest Completion: Stage 4 Strategy
After successfully collecting the LiDAR Scanners from Control Tower A6, you must extract safely and return to Esperanza to complete the quest.
Extraction Strategy for Lay of the Land Quest
Choose your extraction point carefully:
- Avoid the closest extraction if it’s in a contested area
- Consider traveling to a safer, more distant extraction
- Check if you have a Raider Hatch Key for secure extraction
Travel safely:
- Don’t sprint constantly—maintain situational awareness
- Listen for gunfire, footsteps, and ARC sounds
- Use cover and terrain to minimize exposure
- Avoid obvious paths that experienced players might camp
Defend yourself if necessary:
- If engaged by players, decide quickly: fight or flee
- Remember your Safe Pockets protect the scanners even if you die
- Sometimes retreating and extracting later is smarter than risking gear
Extract successfully:
- Once you’re in the extraction zone, stay alert until the timer completes
- Players often ambush during extraction animations
- Have teammates cover you if possible
Common Mistakes in A Lay of the Land Quest
Starting from bad spawns: Committing to the quest when you spawn on the opposite side of Spaceport wastes time and increases risk. Be willing to skip this quest if conditions aren’t favorable.
Not clearing enemies first: Trying to grab quest objectives while under fire is inefficient and dangerous. Clear the area, then collect items.
Forgetting Safe Pockets: Collecting the scanners without Safe Pocket protection means one death can fail your entire quest run.
Lingering at Control Tower A6: The central location means reinforcements (both ARC and player) constantly arrive. Get in, get the scanners, get out.
Ignoring audio cues: Players telegraph their presence through footsteps and gunfire. Stay alert and you can avoid many ambushes.
Fighting unnecessarily: Every combat engagement risks quest failure. Avoid fights that don’t directly threaten your objectives.
Combining A Lay of the Land Quest with Other Activities
Since A Lay of the Land requires significant map traversal, consider stacking additional objectives:
Material farming: Collect crafting resources along your route between warehouse and Control Tower
Blueprint hunting: Control Tower A6 is a known blueprint location—check containers while you’re there
Other quests: If you have additional Spaceport quests active, complete them on the same run
Supply Drops: If you spot a Supply Drop console, consider calling one in for extra resources
Experience farming: Eliminate ARC enemies for XP toward max level
Solo vs Team Approaches for A Lay of the Land Quest
Solo Strategy
Stealth over combat: Avoid unnecessary fights to conserve resources and reduce exposure
Patience: Take your time and don’t rush into dangerous areas without scouting
Escape over ego: If things go wrong, retreat and try again rather than forcing a bad situation
Safe extraction: Consider waiting for chaos to subside before extracting
Team Strategy
Role division:
- One player grabs objectives while others provide security
- Designate a scout to check ahead for threats
- Have someone monitor flanking routes
Communication: Call out enemy positions, player movements, and extraction timing
Covering fire: Teams can engage threats while the objective carrier focuses on survival
Coordinated extraction: Extract together or in sequence with overwatch
A Lay of the Land Quest Value Assessment
Worth completing? Absolutely. The rewards justify the effort:
- Dam Testing Annex Key provides access to premium loot locations
- Ziplines are expensive to craft and invaluable for mobility
- Smoke Grenades offer tactical options worth more than their material value
Difficulty vs. reward: Medium difficulty for high-value rewards makes this a favorable quest for most players.
Best for: Players comfortable with PvE combat and basic navigation who want structured objectives rather than random looting.
Consider skipping if: You spawn on the wrong side of Spaceport and have limited play time, or if you’re carrying extremely valuable loot from previous activities that you don’t want to risk.
Final Thoughts on A Lay of the Land Quest
A Lay of the Land exemplifies what makes Arc Raiders’ quest system engaging. It’s not just “go here, click thing”—it requires map knowledge, risk assessment, combat capability, and extraction success. The multi-stage design forces you to traverse dangerous territory while managing resources and threats, creating genuine tension that pays off when you successfully complete the objective.
The journey from Jiangsu Warehouse to Control Tower A6 to extraction teaches you Spaceport’s geography while rewarding you with tangible, useful items. Unlike some quests that provide mediocre rewards, A Lay of the Land’s prizes are worth the investment of time and gear.
For players looking to improve at Arc Raiders, this quest serves as excellent practice for complex objectives under pressure. You’ll learn navigation, threat management, resource prioritization, and extraction timing—all critical skills for success in this game.
Just remember: check your spawn, protect those scanners with Safe Pockets, don’t get greedy at Control Tower A6, and extract smart instead of fast. Complete those steps, and Shani’s rewards will be yours.
And while you’re mastering Spaceport, don’t forget about other quest opportunities on different maps, like the Raider’s Refuge cellar puzzle on Blue Gate. Each quest teaches you new areas and mechanics while building your resource stockpile.
Now get out there, find that warehouse, grab those scanners, and make it home in one piece. Shani’s counting on you, Raider.
Available on PlayStation and Xbox, Arc Raiders continues to challenge players with multi-stage quest objectives. Good hunting, Raider!