Celeste’s Balanced Harvest quest is one of those missions that sounds straightforward until you’re actually standing inside the Research and Administration building wondering which of the dozen identical-looking rooms is Lab 1. The R&D building is genuinely massive, and without clear signage or waypoint markers, it’s easy to waste 10 minutes wandering hallways while hostile raiders potentially zero in on your location.
Let me save you the frustration with a precise route to Lab 1, plus some bonus looting opportunities that make this quest surprisingly profitable.
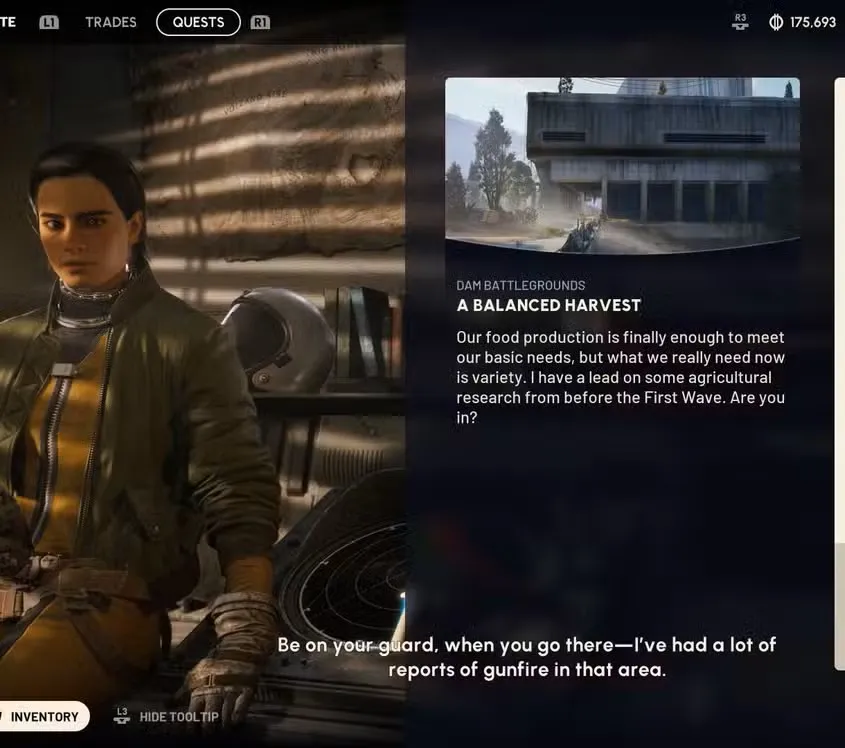
What is the Balanced Harvest Quest in Arc Raiders?
A Balanced Harvest takes place on Dam Battlegrounds, which is the starting map most players know inside and out. That familiarity is a huge advantage—you already understand spawn points, extraction routes, and common PvP hotspots. The Research and Administration building itself sits in a relatively safe area compared to, say, the chaos around Power Generation.
Quest rewards breakdown:
- 3x Advanced Mechanical Components – Critical for high-tier weapon upgrades
- 3x Medium Gun Parts – Always useful for gunsmith modifications
- 10x Steel Spring – Valuable crafting material for multiple recipes
Those Advanced Mechanical Components are the real prize here. They’re significantly harder to farm than basic Mechanical Components, and getting three just for finding a room and interacting with some notes is excellent value.
How to Accept the Balanced Harvest Quest from Celeste
Before launching into Dam Battlegrounds, make sure you’ve spoken with Celeste at your base and properly accepted A Balanced Harvest. Celeste has several active quests, so double-check you’ve grabbed the right one. The objective will clearly state you need to locate Lab 1 inside the Research and Administration building.
Loadout considerations:
Since Dam Battlegrounds is relatively player-friendly and the R&D building isn’t a major PvP magnet, you can bring mid-tier gear without excessive risk. That said, don’t get complacent—the building’s interior has tight corners perfect for ambushes, and some players specifically patrol loot-heavy locations like R&D.
Where to Find Research and Administration Building
Once you load into Dam Battlegrounds, navigate to the Research and Administration building. Your map will show its location clearly—it’s one of the larger named structures on the map.
Critical approach strategy: Use the south entrance.
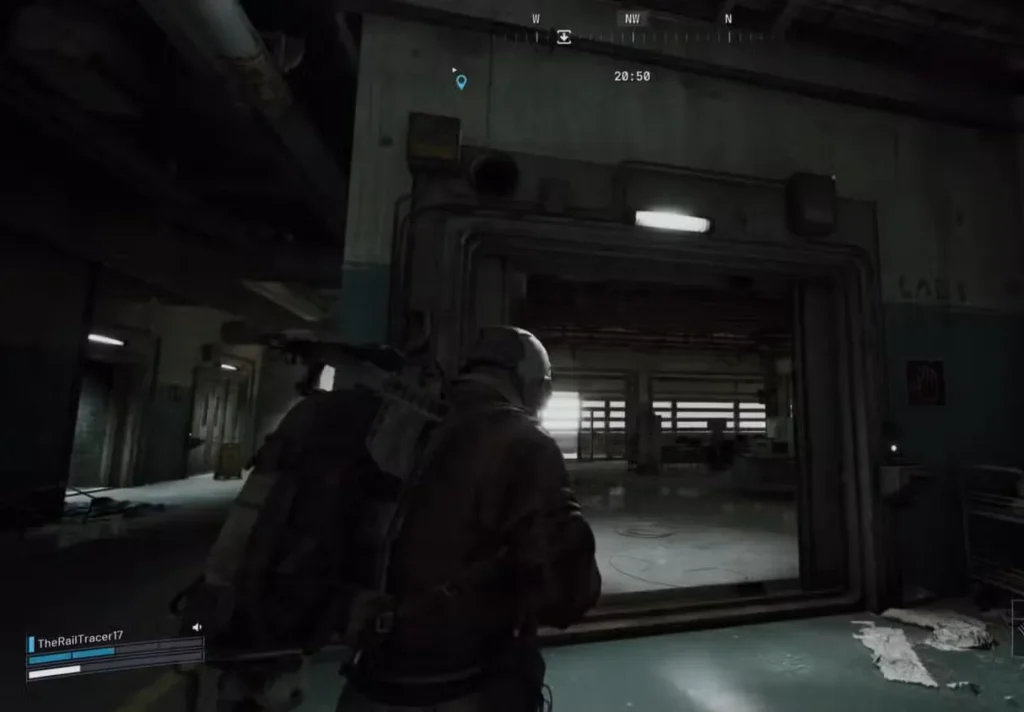
This is important. The R&D building has multiple entry points, but approaching from the south side gives you the cleanest route to Lab 1. You’ll see blue stairs leading up to an upper entrance. This approach also provides better sightlines for spotting potential threats before committing to entering the building.
Dealing with the Sentinel Threat
Here’s something many guides skip: there’s often a Sentinel mounted on the wall above those blue stairs. This automated turret will shred you if you casually walk up without checking first.
How to handle the Sentinel:
Take it out from medium range before ascending the stairs. Use cover from nearby structures and peek-shoot until it’s destroyed. The slight ammo expenditure is absolutely worth avoiding the damage.
Bonus benefit: Sentinels drop Sentinel Firing Cores, which you’ll need if you’re planning to upgrade your Gunsmith station to level 3. Grab it even if you don’t need it immediately—Firing Cores are valuable trade materials and always worth stashing.
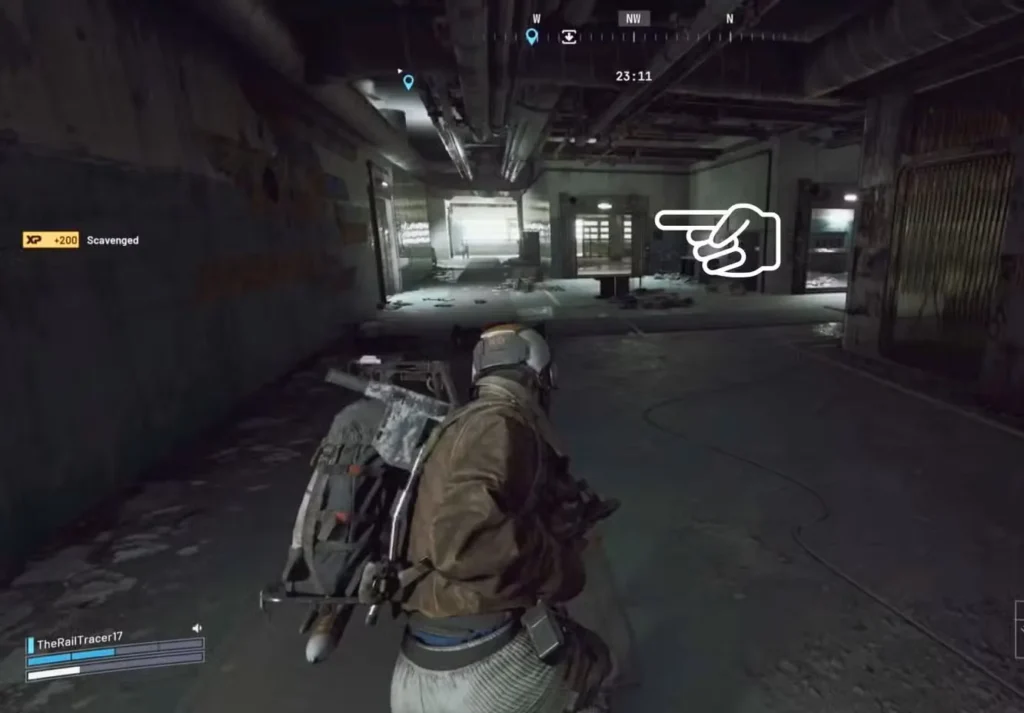
How to Navigate to Lab 1 in Arc Raiders
Once you’re safely inside via the upper south entrance, you’ll find yourself in a lobby area with branching paths. The building’s interior layout can be disorienting because many hallways look identical, but the route to Lab 1 is actually quite direct once you know it.
Step-by-step navigation:
- Ignore the door on your left – This leads to a different section of the building and will just waste your time
- Take the right-side path – Open the door on your right and proceed through
- Turn left immediately – You’ll enter a long hallway with multiple rooms on both sides
- Look for Lab 1 on your right – It’s positioned near the lockers and shower room area
Visual landmarks to help you:
The hallway you’re walking down has administrative and lab rooms branching off. Lab 1 specifically is identifiable by its proximity to the locker room facilities. If you find yourself in shower areas or near bathroom facilities, you’re in the right zone.
How to Complete the Balanced Harvest Quest Objective
Once you locate and enter Lab 1, don’t just interact with the first thing you see. Push further into the room—there’s an open doorway leading to an inner section. This is where your objective actually is.
Inside this inner area, you’ll find a table with research notes sitting on top. Walk up to the table and hold the interact button. The quest completes immediately once you’ve examined the notes.
No combat, no puzzles, no timers—just find the room and interact with the notes. Celeste’s quests are generally straightforward like this, which is refreshing compared to some of the more complex mission chains in Arc Raiders.
Balanced Harvest Quest Loot and Rewards
Now here’s where experienced players separate themselves from newcomers: don’t extract immediately after completing the quest. The R&D building is a goldmine if you know what to look for, and you’re already inside with the hard part done.
High-Value Loot Locations
Medical rooms: The R&D building has multiple medical supply rooms packed with consumables, medical materials, and occasionally rare components. These heal items are either immediately useful or highly valuable for selling.
Lockers throughout the building: Don’t skip a single locker. Systematically work your way through each floor, opening every locker you find. The loot tables here include:
- Consumables and healing items
- Crafting components like Cooling Fans and electronics
- Epic Trinkets – These are the jackpot
Epic Trinkets: Hidden Money Makers
Epic Trinkets are cosmetic/trade items that sell for 7,000 to 10,000 coins depending on market rates. Finding just one or two during your R&D looting run can fund your next several expeditions. They’re rare enough that many players don’t actively farm them, but common enough in loot-dense locations like R&D that checking thoroughly pays off.
If you’re working on farming coins fast, incorporating R&D building runs into your routine is smart economics. Complete the quick Balanced Harvest quest, then spend 5-10 minutes thoroughly looting before extraction.
Safe Pocket Everything Valuable
As you loot, immediately transfer valuable finds into your Safe Pocket. This is especially critical for:
- Epic Trinkets (high value, impossible to replace if lost)
- Advanced Mechanical Components from the quest reward
- Any rare crafting materials you find
The R&D building feels safer than hotspots like Power Generation, but you’re still vulnerable. Another player could enter at any moment, or you might get unlucky with ARC enemy spawns. Safe Pockets prevent losses from unexpected fights.
Best Extraction Route After Balanced Harvest Quest
Once you’ve finished looting, it’s time to extract. The quest description mentions Water Treatment elevator as the closest extraction point, and that’s accurate—it’s a short run from R&D and usually less camped than main extraction zones.
Alternative extraction:
If Water Treatment feels unsafe (you hear gunfire, see other players heading that way, etc.), Dam Battlegrounds has multiple extraction options. Check your map for the nearest Raider Hatch or public extraction zone. Having a Raider Hatch Key in your loadout is never a bad idea for guaranteed extracts.
Don’t get greedy and overstay. Once your backpack is full or you’ve thoroughly cleared the valuable loot, get out. Risking everything for one more locker isn’t worth it.
How to Turn in the Balanced Harvest Quest
Back at base, navigate to the Vendors tab in your main menu. Find Celeste’s quest turn-in option and claim your rewards:
- 3x Advanced Mechanical Components
- 3x Medium Gun Parts
- 10x Steel Spring
Immediate use recommendations:
Those Advanced Mechanical Components should go straight toward weapon upgrades if you’re pushing into harder content. They’re required for higher-tier modifications that significantly improve weapon performance.
The Steel Spring is useful for workbench upgrades and various crafting recipes. Don’t sell these unless you absolutely need emergency coins.
Related Dam Battlegrounds Quests
Since you’re already comfortable with the R&D building location, consider tackling these nearby Dam quests:
- Doctors Orders Quest – Involves medical supplies, synergizes with R&D looting
- Dam Control Tower Key – Unlocks premium loot in the area
- Dam Surveillance Key – Another key worth acquiring for future runs
Dam Battlegrounds has an extensive quest network. Check the complete quests list to see what else you can stack into single runs.
Tips for Completing Balanced Harvest Quest Efficiently
Stack multiple Dam quests: Before launching into Dam Battlegrounds, grab every available quest that takes place there. Completing 3-4 objectives in one expedition is far more efficient than multiple trips.
Learn the R&D building layout: A Balanced Harvest is your introduction to this structure, but you’ll return multiple times for other quests and farming. Take an extra minute to memorize hallways and room locations.
Time your runs strategically: R&D building is busiest during peak hours. Off-peak expeditions mean safer looting and higher chances of finding undisturbed Epic Trinkets.
Upgrade backpack capacity: The more you can carry, the more valuable each expedition becomes. Invest in backpack space upgrades early.
Common Balanced Harvest Quest Mistakes to Avoid
Rushing to extraction after completing the quest: The biggest mistake new players make. You’re already inside one of the best looting locations on Dam—take advantage of it.
Not clearing the Sentinel: Getting damaged or killed by the entrance Sentinel wastes your run. Always clear it first.
Entering through the wrong side: Using entrances other than the south approach adds unnecessary navigation complexity. Stick to the proven route.
Ignoring Safe Pockets: Losing Epic Trinkets or rare components because you didn’t take two seconds to secure them is heartbreaking.
Final Thoughts
A Balanced Harvest is an excellent early-to-mid game quest that teaches you the R&D building layout while providing genuinely useful rewards. The Advanced Mechanical Components alone make it worthwhile, but the real value comes from understanding that quest completion is just the beginning—the looting opportunities are where you actually profit.
Take your time, clear the building systematically, and don’t let other players intimidate you out of thorough looting. The R&D building is large enough that you can often avoid confrontation entirely by listening for footsteps and rotating to different sections.
This quest is also perfect for practicing general survival skills in a relatively controlled environment. You’re learning building navigation, loot prioritization, and risk assessment without the intense pressure of maps like Spaceport.
Get Arc Raiders: Available on PlayStation and Xbox with full crossplay support. Visit the official Arc Raiders website for patch notes and updates.
Now get out there and show Celeste you know how to find a lab room without getting lost. Good luck, Raider!