Running around Battlefield 6 spraying bullets might work for a few kills, but it won’t make you a consistently strong player. The difference between someone who goes 15-20 every match and someone who dominates with 40+ eliminations often isn’t raw aim—it’s understanding the game’s deeper systems and making smarter decisions.
I’ve spent hundreds of hours in Battlefield 6 since launch, and the improvement curve is real. Small adjustments to settings, understanding positioning fundamentals, and knowing class-specific tricks can double your effectiveness almost overnight.
This guide covers everything from crucial settings adjustments to advanced tactical knowledge that experienced players use to dominate lobbies. Whether you’re struggling with inconsistent aim, getting destroyed by vehicles, or just feeling ineffective during matches, these tips will help you level up fast.
Critical Settings: Fix Your Aim First
Before diving into tactical advice, let’s address the elephant in the room—if your aim feels off in Battlefield 6, it’s probably not entirely your fault. The default settings create inconsistent sensitivity that throws off muscle memory.
Fixing Mouse & Keyboard Aim Sensitivity
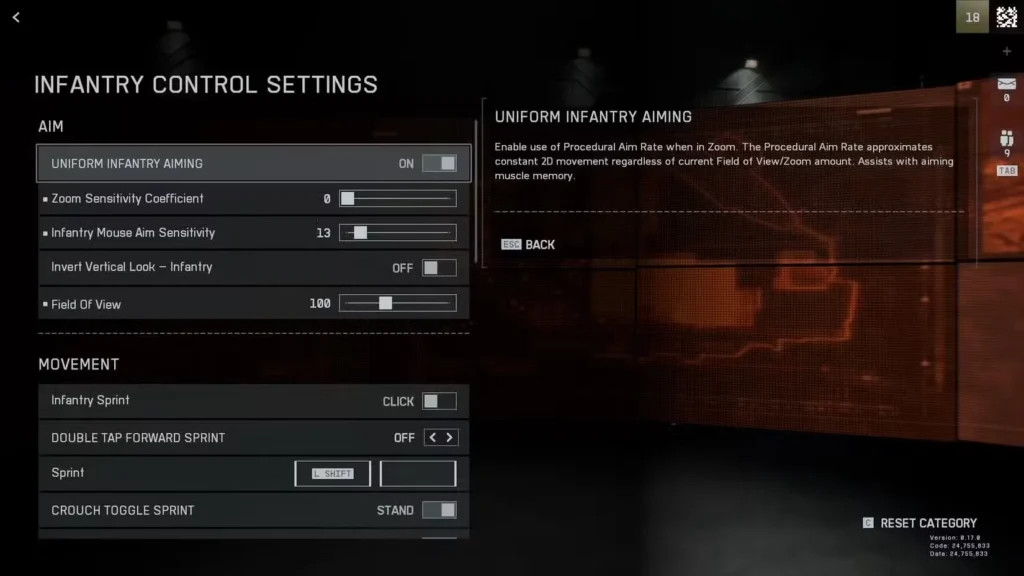
Navigate to Settings → Mouse & Keyboard → Infantry Control Settings and make these changes:
Set Zoom Sensitivity Coefficient to 0 – This is the most important change. The default coefficient creates different sensitivities between hipfire and ADS (aiming down sights), which destroys your muscle memory. Setting it to 0 ensures your sensitivity feels consistent regardless of whether you’re aiming or not.
Turn off Uniform Infantry Aiming – If your aim still feels inconsistent after adjusting the coefficient, disable this setting entirely. Some players prefer it on, but most competitive players turn it off for more predictable mouse movement.
Why this matters: Your brain can’t build accurate muscle memory when sensitivity changes depending on game state. Consistency is everything for aim development. After making these changes, spend 30 minutes in the practice range letting your muscle memory adjust to the new settings.
Controller Aim Settings
Controller players face similar issues. Access Settings → Controller → Infantry Control Settings and experiment with:
- ADS Sensitivity separate from hipfire sensitivity – Find what feels natural for tracking targets while aiming
- Dead zone adjustments – Reduce dead zones as much as your controller allows without stick drift
- Aim assist settings – Don’t disable it entirely, but some players prefer reducing its strength slightly for more predictable tracking
Pro tip: Most controller players benefit from slightly lower ADS sensitivity than hipfire sensitivity, unlike the 1:1 ratio recommended for mouse users.
Vehicle Control Optimization
Vehicle handling in Battlefield 6 can feel awkward with default settings, especially for aircraft. Here’s how to make them more manageable.
Essential Vehicle Settings
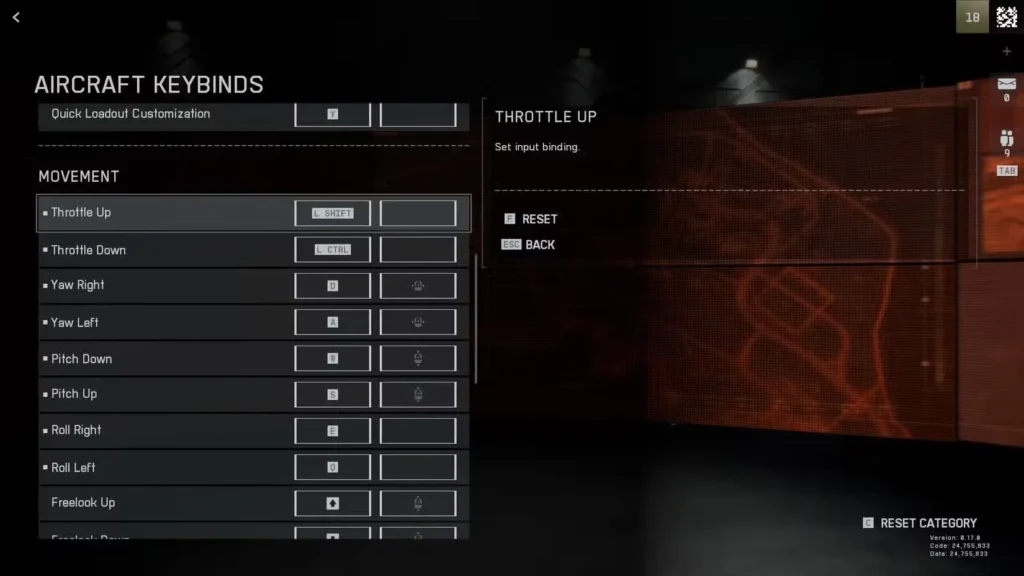
Access Settings → Mouse & Keyboard (or Controller) → Vehicle Control Settings:
Enable Helicopter Assisted Mode – This adds stability assistance that makes helicopter flying significantly more forgiving. You can still perform advanced maneuvers, but basic flight becomes much easier.
Change Aircraft Controls – The default aircraft setup is unintuitive for most players. Here’s a better keyboard/mouse configuration:
- Pitch: Vertical mouse movement + W/S keys – Pull mouse down to pitch up (yes, this feels backward initially but matches flight sim standards)
- Roll: A/D keys – Tilts your aircraft left and right
- Yaw: Horizontal mouse movement – Turns your nose left and right
- Throttle: Shift (accelerate), Ctrl (decelerate), Space (afterburner)
This setup lets you fly with one hand while aiming weapons with your mouse like a normal weapon, dramatically improving your combat effectiveness in aircraft.
Practice location: Use Portal’s Co-op vs AI modes or the custom Air Superiority mode to practice flying without getting destroyed by experienced pilots immediately. Vehicle mastery takes time—don’t get discouraged.
Audio Settings: Hear Everything That Matters
Audio in Battlefield 6 provides crucial tactical information, but the default mix prioritizes cinematic impact over competitive clarity.
Choosing Your Audio Mix
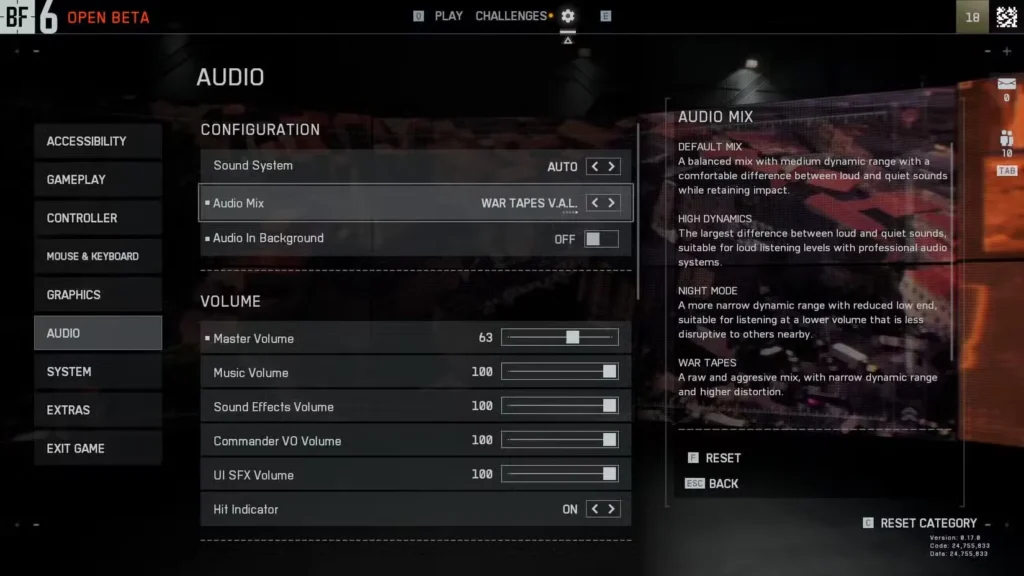
Navigate to Settings → Audio → Audio Mix:
War Tapes or War Tapes VAL – These settings maximize immersion with louder, more visceral sound design. Explosions feel massive, gunfire sounds punchy, and the battlefield feels alive. The tradeoff? Footstep audio becomes less distinct, and quieter sound cues get overwhelmed by louder effects.
Standard Mix (Default) – Prioritizes clarity and competitive information. Footsteps, vehicle approaches, and weapon sounds remain distinct even during chaotic firefights. Most competitive players stick with this for tactical advantages.
My recommendation: Use Standard mix while learning the game and completing challenges. Once you’re consistently performing well and know what to listen for, experiment with War Tapes for that incredible Battlefield atmosphere. Just remember you’re trading some competitive edge for immersion.
Damage Numbers: Keep or Remove?
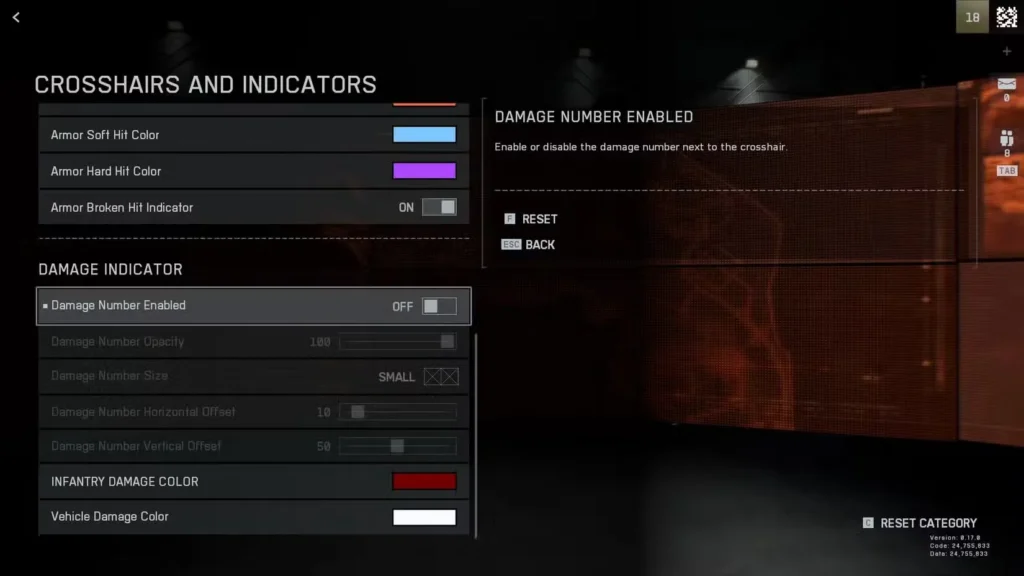
The damage number display shows exactly how much damage each bullet deals, appearing next to your crosshair during combat.
To Disable:
Settings → Graphics → Icons & Indicators → Crosshairs & Indicators tab
Arguments for keeping damage numbers:
- Teaches you effective weapon ranges through immediate feedback
- Helps you understand when to push wounded enemies
- Confirms hit registration during network hiccups
- Useful for learning new weapons
Arguments for removing damage numbers:
- Cleaner visual experience
- Forces you to develop intuitive range understanding
- More immersive gameplay
- Less screen clutter during intense fights
My take: Keep them on while learning weapons and completing challenges. The immediate feedback accelerates your understanding of weapon mechanics and optimal engagement distances. Once you’ve mastered your main loadouts, try turning them off if you prefer cleaner visuals.
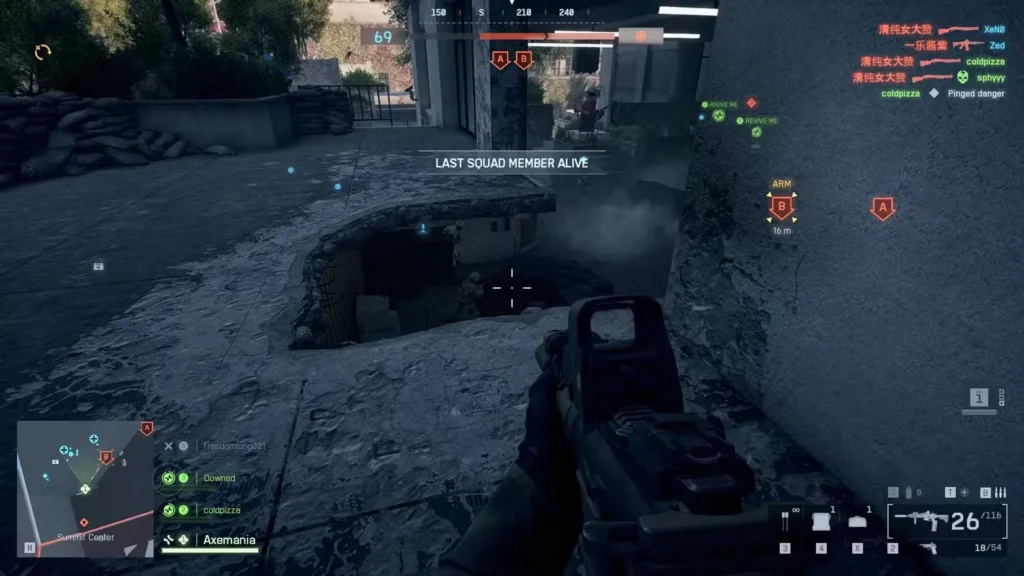
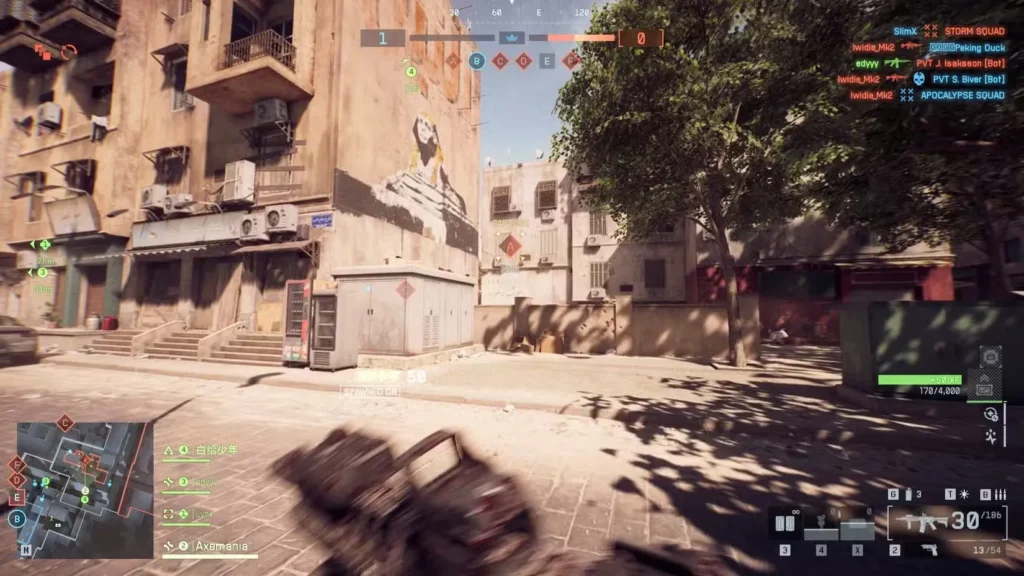
Master Positioning: The Most Underrated Skill
Here’s a truth many players ignore: positioning and awareness matter more than raw aim in Battlefield 6. You can have mediocre accuracy and still dominate if you consistently catch enemies off-guard.
Fundamental Positioning Principles
Track the frontline constantly – Always know where the current battle line exists. This invisible line separates controlled territory from contested space. Understanding frontline location lets you predict enemy positions and movement.
Identify spawn patterns – Each map and mode has predictable spawn logic. Pay attention to where enemies consistently appear, and position yourself to exploit this knowledge.
Expect flanks always – The enemy team is trying to flank just like you are. Periodically check your sides and rear, especially when holding positions near objectives.
Shoot unaware enemies first – An enemy looking away from you is a free kill 90% of the time. Position yourself to maximize engagements against unaware opponents rather than fair fights.
Use the minimap aggressively – Your minimap shows friendly positions, spotted enemies, and gunfire (unless suppressed). Constantly glance at it to build situational awareness.
For specific positioning advice on each battlefield, check our complete maps guide to learn map-specific flanking routes and power positions.
Avoid Meat Grinders (Unless You’re Farming Chaos)
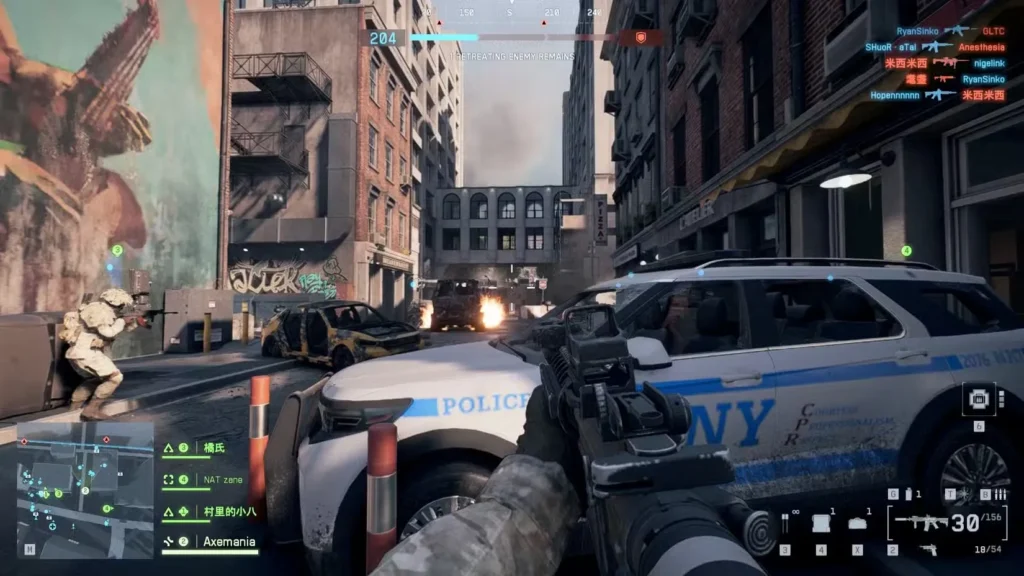
“Meat grinders” are those notorious chokepoints where 20+ players from both teams mindlessly throw themselves into a kill blender. The main road on Empire State, certain bridges on Manhattan Bridge, doorways on Saint’s Quarter—you know the spots.
Why they’re traps: The odds of trading kills or getting immediately deleted by explosives skyrocket in meat grinders. Your individual skill matters less when you’re one of 15 people spam firing down a hallway.
The better approach: Find the flanking route. Almost every meat grinder has side paths that fewer players use. Taking these alternate routes lets you:
- Engage smaller groups with better odds
- Hit the enemy backline and objectives directly
- Force enemies to turn and fight you, relieving pressure on your main frontline
- Actually capture objectives instead of just farming kills
Exception: Some Close Quarters challenges require specific kill counts in single matches. Meat grinders, despite being frustrating, do provide target-rich environments for grinding these challenges quickly.
Understand and Execute Your Class Role
Battlefield 6’s class system works when players embrace their designated roles. A team where everyone tries to be a solo hero loses to a team executing class synergies properly.

Assault Class: Space Takers
Primary job: Push objectives and eliminate enemies preventing your team’s advance.
Your gadgets support aggressive play—Adrenaline Injectors for health during pushes, grenades for clearing positions, and Deploy Beacons for squad spawning. If you’re playing Assault and camping in the back, you’re wasting your class’s potential.
Key mindset shift: Your K/D matters less than objectives secured. Trading 1-for-1 while capturing a point is a win for Assault players.
For detailed Assault optimization, see our Assault Class Challenges guide which covers gadget usage and aggressive tactics.
Engineer: Vehicle Specialists
Primary job: Repair friendly armor, destroy enemy armor, and deny fortified positions.
Engineers keep your team’s vehicles alive and eliminate the enemy’s vehicle advantage. You’re also excellent at destroying enemy fortifications and equipment with explosives.
Critical knowledge: Always carry repair tools and stay near friendly vehicles. A tank with a dedicated Engineer support can hold objectives against overwhelming odds.
Support: Sustain Providers
Primary job: Keep teammates alive with heals and supplied with ammunition.
Support players enable everyone else to perform their roles effectively. You can also deploy portable cover to create defensive positions or block enemy sightlines.
Impact multiplier: A good Support player can turn mediocre teammates into effective fighters just by keeping them healed and armed.
Recon: Information Warfare
Primary job: Spot enemies for your team, not just get sniper kills.
Many players treat Recon as “sniper class” and camp on distant hills contributing nothing. The real value of Recon is marking enemies—making them visible to your entire team on the minimap with red diamonds over their heads.
Pro tip: Aggressive Recon players using carbines or DMRs while constantly spotting enemies often contribute more than camping snipers with 30+ kills. For advanced Recon tactics, check our Recon Class Challenges guide.
Sniper Sweet Spot Mechanic: One-Shot Power
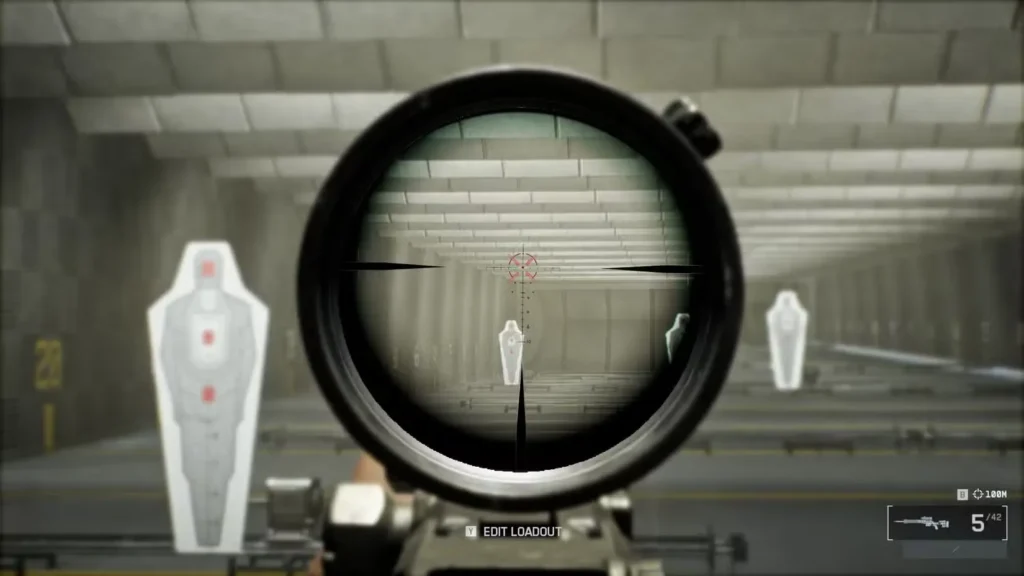
Battlefield 6 brings back the sweet spot mechanic from Battlefield 1, and many players don’t realize it exists.
How it works: Each sniper rifle has a specific distance range where upper body shots (chest and above) result in one-hit kills against full-health enemies. Outside this range, you need headshots for instant kills.
Example: The M2010 ESR has a sweet spot around 100 meters. Hit someone’s chest at 100m, they drop instantly. Hit them at 50m or 150m, they survive unless you hit the head.
Finding distances:
- Spot/ping enemies to see range indicators
- If spotting fails, ping terrain near them
- Equip Range Finder attachment for constant distance readings
Why this matters: Understanding sweet spots transforms sniper effectiveness. Instead of going for difficult headshots at all ranges, position yourself at your rifle’s optimal distance and aim center mass for consistent one-shots.
For players working on long-range accuracy, our Deadeye Challenges guide covers precision shooting techniques.
The Headshot Debate: When Center Mass is Better
Here’s counterintuitive advice: with automatic weapons, going for headshots often hurts your performance.
The math: Most assault rifles and SMGs have a 1.30x headshot multiplier, meaning headshots deal only 30% more damage than body shots. This small increase rarely changes time-to-kill (TTK) significantly.
M4A1 example:
- 5 body shots to kill
- 4 headshots to kill OR 3 headshots + 1 body shot to kill
That’s barely any improvement for significantly more difficult aim requirements. Missing shots while trying to hit heads reduces your effective DPS more than the headshot damage bonus gains.
When headshots become crucial: Soft Point Rounds attachment changes everything. This attachment dramatically increases headshot damage multipliers:
- Standard weapons: 1.30x becomes 1.75x+ with Soft Point
- AK-205 with Synthetic Tip: 2.10x headshot multiplier (three-shot headshot kills)
Practical advice: Aim center mass with standard attachments, then practice headshots once you unlock Soft Point Rounds. The improved multiplier makes the accuracy requirement worthwhile.
Fast Tank Killing: Target Weak Points
Heavily armored vehicles seem invincible until you understand their weaknesses.
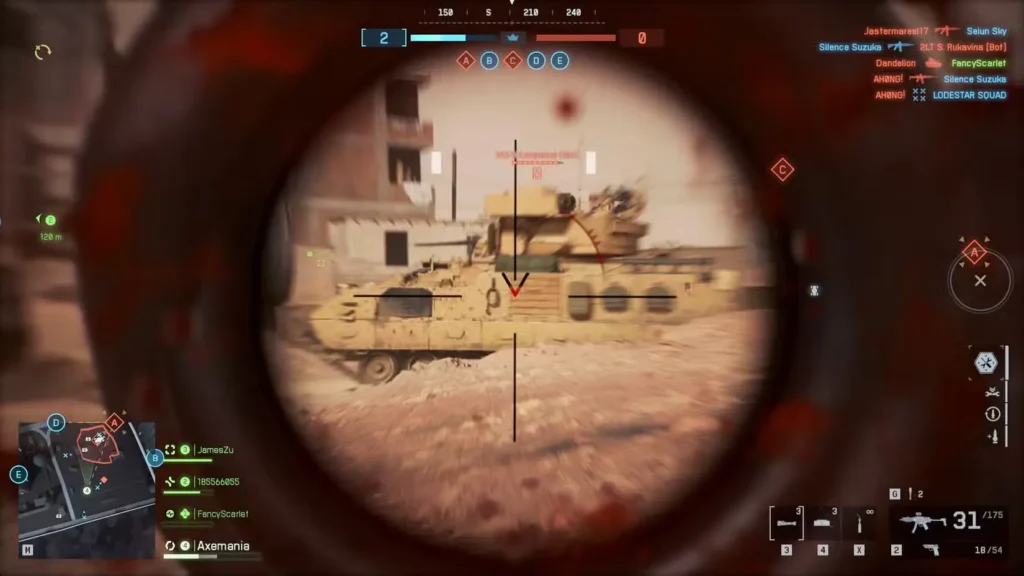
Armor weak spots (from strongest to weakest):
- Rear – Least protected, highest damage multiplier
- Top – Vulnerable to aircraft and elevated positions
- Sides – Moderate protection
- Front – Heaviest armor, lowest damage
Single Engineer strategy: One rocket never destroys a tank regardless of where it hits. Instead, use this combination:
- Place AV mines or Acoustic Sensor AV mines near the tank
- Fire your rocket at the tank’s weak points
- When the driver moves to dodge or reposition, they trigger the mines
- Combined damage destroys the tank or leaves it critical
Team coordination: Multiple Engineers focusing the same vehicle while hitting weak spots can eliminate it in seconds. Communication makes vehicle hunting exponentially more effective.
Exploit Out-of-Bounds Timers
When you leave the playable map area, a 10-second countdown begins. Most players immediately retreat—don’t be like most players.
The trick: Ten seconds is a long time. You can sprint or drive significant distances through out-of-bounds zones before dying, allowing you to:
- Flank around the enemy’s entire defensive line
- Reach objectives from completely unexpected angles
- Bypass meat grinders by taking “illegal” routes
- Escape dangerous situations by temporarily leaving the map
Best maps for this: Siege of Cairo has excellent flank routes using out-of-bounds zones. Manhattan Bridge and Liberation Peak also offer strategic OOB flanking opportunities.
Important: Some game modes restrict this more than others, and certain maps have shorter timers. Always test routes in low-pressure situations before relying on them in critical moments.
Tank Tactics: Survive and Dominate
Playing as armor effectively requires different thinking than infantry combat.
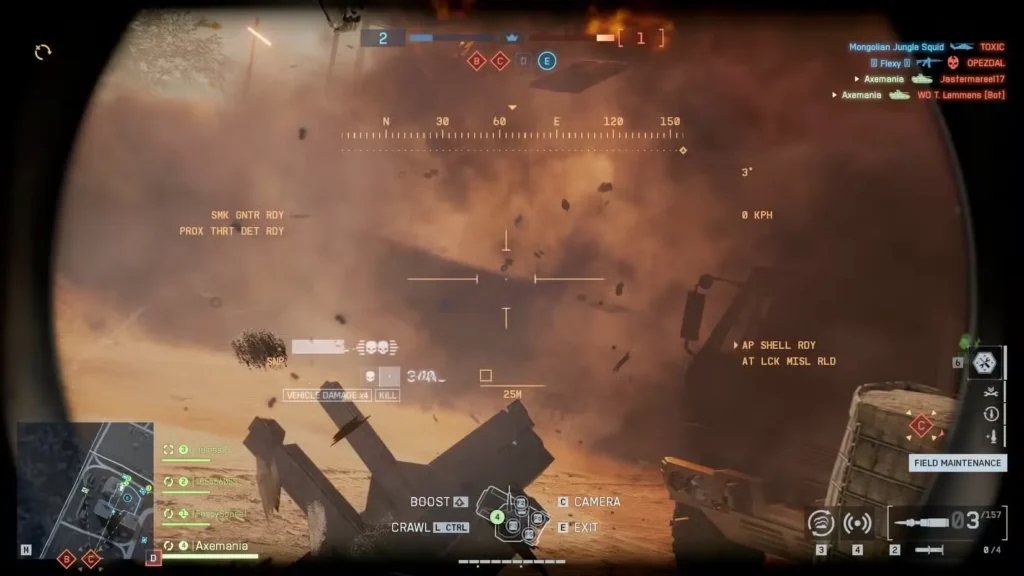
Essential Tank Survival Rules
Stay near hard cover – When anti-tank fire starts incoming, you need solid objects to break line of sight. Buildings, large rocks, and terrain features are your friends.
Use buildings against aircraft – On maps with jets and helicopters, position near tall structures. Aircraft can’t hit you through buildings, but infantry threats increase—balance the risk.
Drive in third-person, aim in first-person – Third-person perspective shows threats around your tank that first-person view misses, especially sneaky Engineers with C4. Switch to first-person only when engaging targets for better accuracy.
Protect your Engineers – Friendly Engineers approaching your tank probably want to repair you. Let them climb on even at full health—they’ll keep you alive during sustained fights.
Don’t overextend alone – Tanks seem invincible until you’re surrounded by three Engineers and have no escape route. Advance with your team or maintain retreat options.
Angle your armor – Position your tank at angles to enemies when stationary, forcing them to hit your stronger front armor instead of weak sides.
Practice Flying in Safe Environments
Aircraft in Battlefield 6 have brutal learning curves. Getting into a jet for your first time in a live Conquest match means you’ll crash within 30 seconds while wasting a valuable team asset.
Better approach: Use Portal and Co-op vs AI modes to learn basic flight mechanics without pressure. These modes let you:
- Practice takeoffs and landings safely
- Learn combat maneuvers without getting instantly shot down
- Understand weapon systems and targeting
- Build muscle memory for flight controls
Progression path:
- Portal/Co-op for basic flight (2-3 hours minimum)
- Air Superiority mode in Portal for PvP practice
- Live Conquest/Breakthrough once you can fly confidently
Don’t skip this process. Every match where you waste a jet by crashing immediately hurts your team’s chances of winning. Put in the practice time.
Muzzle Attachment Strategy
Muzzle attachments drastically affect your visibility to enemies, not just recoil control.
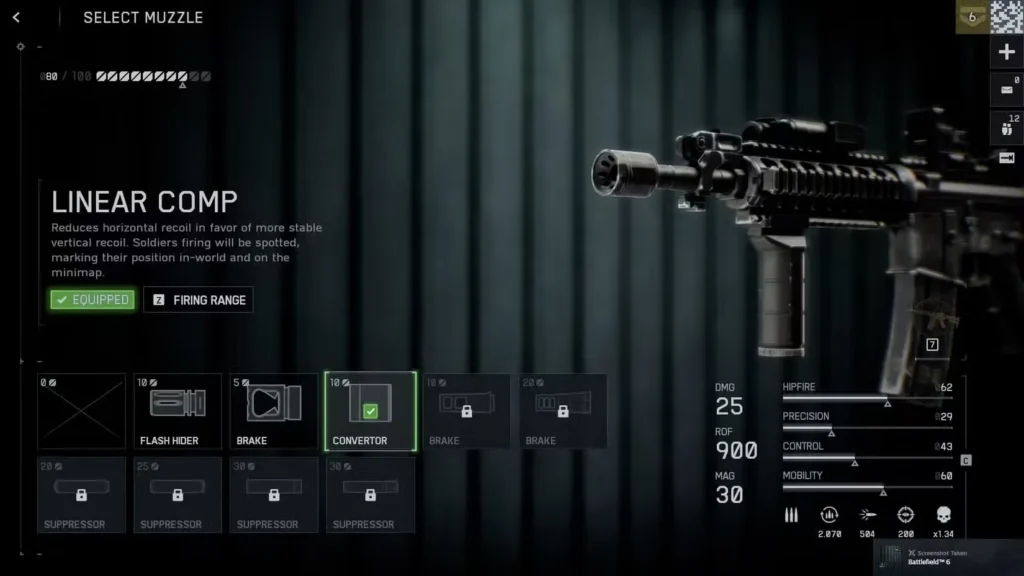
Attachment Trade-offs
Muzzle Brakes (Heavy Recoil Reduction)
- Pros: Dramatically reduce recoil, easier to control
- Cons: Auto-spot you to enemies when firing at them
- Best for: Players prioritizing accuracy over stealth
Flash Hiders (Default)
- Pros: Balanced recoil reduction without spotting penalties
- Cons: You still appear on minimap when firing
- Best for: General use before unlocking suppressors
Suppressors (Unlocked at Weapon Rank 20+)
- Pros: Don’t appear on minimap when firing (beyond certain range)
- Pros: Moderate recoil reduction
- Cons: Require significant weapon progression
- Best for: Flanking playstyles and stealth approaches
Strategic considerations: Suppressors shine when flanking or playing aggressively behind enemy lines. Being invisible on the minimap lets you eliminate multiple enemies before they identify your position.
Muzzle brakes work better for holding positions where your location is already known—the auto-spot doesn’t matter if enemies already see you.
Advanced Tips for Specific Scenarios
Playing on Small Maps
Small maps like Empire State and Saint’s Quarter reward different tactics than large combined arms maps:
- Use high fire-rate weapons (SMGs, certain carbines)
- Check corners constantly—enemies are everywhere
- Throw grenades proactively before entering rooms
- Play more aggressively—conservative play gets you surrounded
Our Danger Close Challenges guide covers optimal carbine usage for these tight spaces.
Playing on Large Maps
Maps like Mirak Valley and Operation Firestorm demand awareness of vehicle threats:
- Always have anti-vehicle options equipped or nearby
- Don’t stay in open ground—move between cover constantly
- Listen for vehicle engine sounds to identify nearby threats
- Use terrain elevation to hide from armor
Check our maps guide for specific position recommendations on each large map.
Defending Objectives
When holding captured points:
- Set up overlapping fields of fire with teammates
- Place mines/traps on likely enemy approach routes
- Position near exits so you can retreat if overwhelmed
- Call out enemy positions to teammates constantly
Attacking Objectives
When trying to capture enemy-held points:
- Use smoke grenades to block enemy sightlines
- Attack from multiple angles simultaneously with your squad
- Clear defenders before starting the capture if possible
- Have teammates ready to spawn on you via Deploy Beacon
Weapon Selection by Engagement Distance
Match your loadout to the map and your playstyle:
Close range (0-20m):
- Shotguns, SMGs, high fire-rate carbines
- Best on: Empire State, Saint’s Quarter, Iberian Offensive
Medium range (20-60m):
- Assault rifles, carbines, LMGs
- Best on: Manhattan Bridge, Siege of Cairo, New Sobek City
Long range (60m+):
- DMRs, sniper rifles, accurate assault rifles
- Best on: Mirak Valley, Liberation Peak, Operation Firestorm
For complete weapon breakdowns and recommendations, check our complete weapons guide.
Common Mistakes That Cost Games
Ignoring the objective – TDM is the only mode where kills matter more than objectives. Every other mode rewards objective play heavily.
Fighting alone – Stick near squadmates. Solo players, even skilled ones, get overwhelmed by coordinated teams.
Poor spawn choices – Spawning on contested objectives or exposed squadmates gets you killed immediately. Choose safe spawns and approach carefully.
Tunnel vision – Focusing on one enemy while ignoring threats around you is the fastest way to die. Maintain awareness of your surroundings.
Wrong weapon for the map – Using snipers on small CQB maps or shotguns on huge open maps handicaps you massively.
Not using gadgets – Your gadgets exist for a reason. Use them frequently rather than saving them for perfect moments that never come.
Giving up on difficult challenges – Many players quit challenging requirements too early. Most class challenges seem impossible until you develop the right strategies.
The Compound Effect: Small Improvements Add Up
None of these tips will transform you into a Battlefield god overnight. But implementing even a few creates compound improvements:
- Fix your aim settings → 10-15% accuracy improvement
- Improve positioning → 20% more favorable engagements
- Learn your class role → 25% more team contribution
- Optimize weapon attachments → 10% better gunfight performance
Combined, these “small” improvements can double your overall effectiveness. The player who masters fundamentals consistently outperforms mechanically skilled players who ignore game sense.
Start With Three Changes
Don’t try implementing everything at once. Pick three things from this guide to focus on:
- Fix your aim settings – Do this immediately, it costs nothing and helps everything
- Choose one positioning principle – Maybe “track the frontline” or “avoid meat grinders”
- Master your main class role – Pick one class and truly understand its job
Once these become natural, add more improvements. Gradual mastery beats overwhelming yourself with information.
Essential Battlefield 6 Resources:
- Battlefield 6 Official Site
- Battlefield 6 on Steam
- Battlefield 6 on PlayStation
- Community Discussions
- Epic Games Store
Battlefield 6 rewards players who understand its systems and make smart decisions. Raw mechanical skill matters, but game knowledge, positioning, and proper settings often matter more. Implement these tips gradually, focus on fundamentals, and you’ll see consistent improvement in your performance. Good luck on the battlefield!