Here’s something frustrating: two of the best carbines in Battlefield 6—the QBZ-192 and SG 553R—aren’t just handed to you. They’re locked behind the Danger Close challenge series, which means you’ll need to put in some dedicated work with carbines to earn them.
The good news? These challenges are totally manageable once you understand the requirements and know which game modes make progression fastest. Let me break down everything you need to complete Danger Close challenges efficiently.
The Rank 23 Gate: When You Can Actually Start
Before you get excited about grinding these challenges, there’s an important catch: Danger Close challenges don’t unlock until you hit Rank 23.
This means all those carbine kills you racked up in your first few hours? They don’t count. None of your pre-Rank 23 stats carry over—the progress tracking only begins once you’ve unlocked the challenges themselves.
My honest take: This is actually a blessing in disguise. Use those first 23 ranks to experiment with different weapon types, learn the maps, and figure out your playstyle. By the time you unlock Danger Close, you’ll be a much better player, which makes completing the challenges significantly easier.
Where to Track Your Progress
You don’t need to guess how you’re doing on these challenges. Battlefield 6 lets you check your progress anytime through the main menu:
- Navigate to the Challenges tab
- Select Assignments
- Choose Weapon category
- Look for Danger Close near the top of the list
I recommend checking this regularly so you know which requirements you’re close to finishing. It helps you adjust your playstyle if you’re falling behind on specific objectives like headshots.
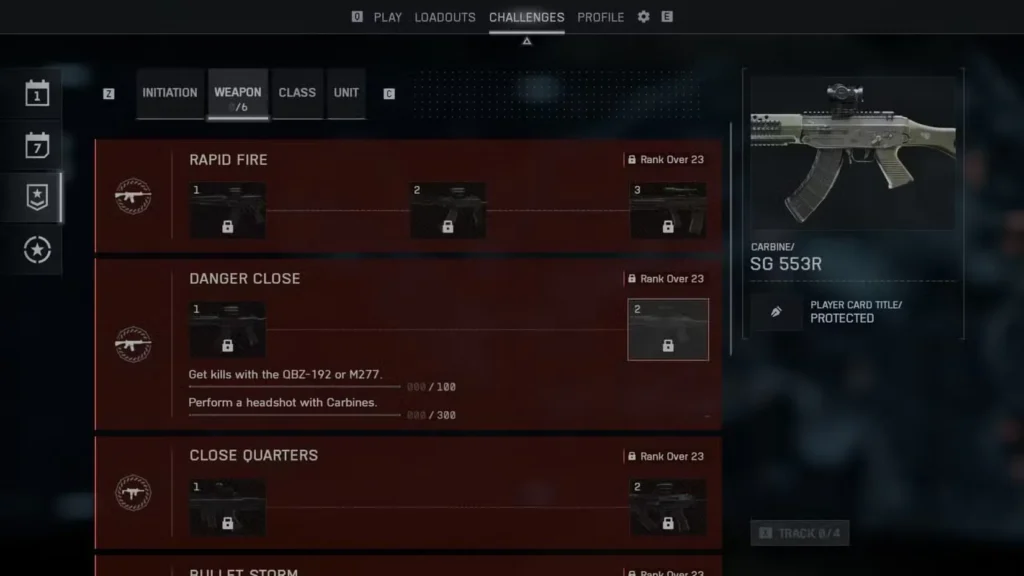
Danger Close 1: Getting Your First Unlock
The first Danger Close challenge requires you to prove your general carbine competency:
Requirements:
- 250 ADS kills with Carbines – These must be kills while aiming down sights (not hipfire)
- 10,000 damage with Carbines – Total damage dealt across all matches
Reward: QBZ-192 Carbine
Breaking it down: The damage requirement sounds intimidating, but it accumulates naturally as you work toward 250 kills. Most players hit 10,000 damage before reaching 250 ADS kills, so focus primarily on getting eliminations while aiming down sights.
Important note: Make sure you’re actually aiming before shooting. Hipfire kills don’t count toward the 250 ADS requirement, which can slow your progress if you’re not careful during close-quarters chaos.
Danger Close 2: The Advanced Challenge
Once you’ve unlocked the QBZ-192, the second challenge ramps up the difficulty and specificity:
Requirements:
- 100 kills with QBZ-192 or M277 – You can use either carbine (or combine progress from both)
- 300 headshots with any Carbines – This is the tough one
Rewards:
- SG 553R Carbine
- Protected Player Card Title (bragging rights included)
The headshot hurdle: Getting 300 headshots is significantly harder than just getting kills. This requires deliberate aim and patience. You’ll need to consciously aim higher than you normally would, which might hurt your K/D ratio temporarily—but the unlock is worth it.
Smart strategy: Start working on headshots during Danger Close 1. Even though it’s technically part of the second challenge, there’s no reason not to aim for heads early. The more headshots you bank before officially starting Danger Close 2, the faster you’ll complete it.
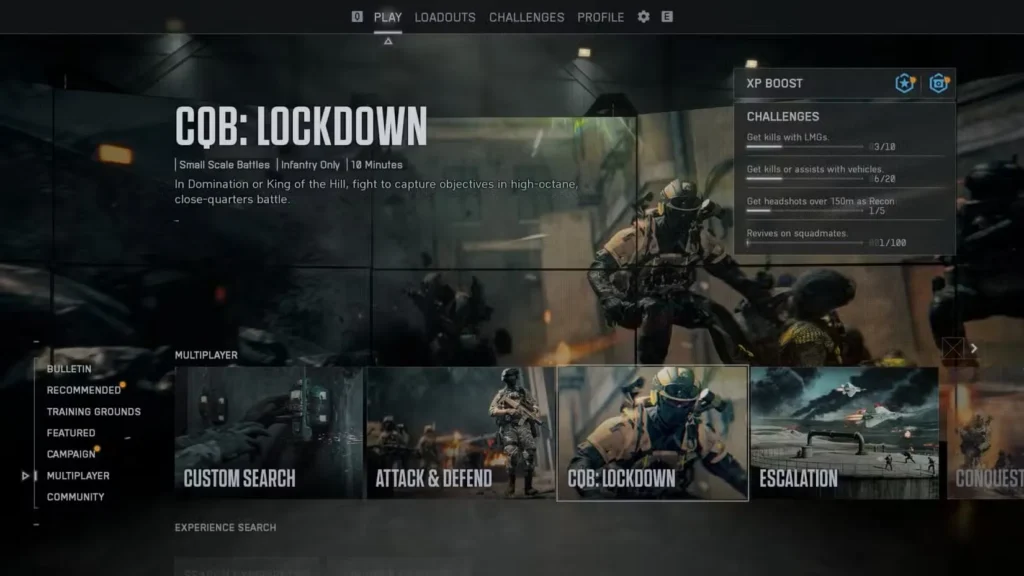
Best Game Modes for Fast Completion
Carbines excel at close-to-medium range, which means your choice of game mode dramatically affects how quickly you complete these challenges.
Optimal modes:
- Domination – Tight objective play keeps enemies close
- King of the Hill – Constant fighting in confined spaces
- Team Deathmatch – Pure elimination focus without vehicle interference
- Hardpoint (if available) – Similar benefits to King of the Hill
Modes to avoid:
- Conquest on large maps – Too much open space and long-range combat
- Breakthrough on vehicle-heavy maps – Tanks and aircraft reduce infantry encounters
- Rush (on certain maps) – Some Rush maps force long-range engagements
Why this matters: Carbines lose effectiveness at longer ranges. Playing modes that keep combat close ensures you’re actually using carbines in their optimal engagement distance, making every match more productive toward your challenge progress.
Map Selection Strategy
Not all maps are created equal for carbine grinding. Look for maps with:
- Multiple interior spaces – Buildings and structures where carbines dominate
- Tight chokepoints – Narrow passages that force close engagements
- Vertical gameplay – Multi-level structures where you can catch enemies off-guard
- Limited vehicle presence – You want infantry fights, not tank battles
Pro tip: If you’re in a server browser or can select maps, prioritize urban warfare maps over wide-open battlefield settings. Think city streets over desert plains.
Carbine Selection: What to Use
Before you unlock the QBZ-192, you have five carbines available from the start:
- M4A1 – Reliable all-arounder, great starting point
- M277 – Needed for Danger Close 2, so get comfortable with it
- AK-205 – Higher damage per shot, slower fire rate
- M417A2 – Good accuracy and control
- GRT-BC – Experimental option if others aren’t clicking
My recommendation: Start with the M4A1 to get comfortable with the challenge requirements. Once you’re confident, switch to the M277 so you can kill two birds with one stone—working toward both Danger Close 1 completion and getting familiar with the weapon you’ll need for Danger Close 2.
Maximizing Your Headshot Efficiency
Since 300 headshots is the most demanding requirement, here’s how to approach it strategically:
Aim adjustment: Consciously raise your crosshair placement. Your default aim should be neck/head level, not center mass. This feels unnatural at first but becomes second nature with practice.
Target selection: Prioritize stationary or slow-moving enemies. Someone camping a window or moving in a predictable pattern is a much better headshot target than someone sprinting and sliding unpredictably.
Engagement distance: Medium range is your sweet spot for headshots. Too close and fights become chaotic; too far and carbine accuracy drops off. Find that 15-30 meter range where you have time to aim precisely.
Burst fire technique: Instead of holding down the trigger, fire 3-5 round bursts aimed at the head. This maintains accuracy while still giving you multiple chances to land that headshot kill.
Time Investment: What to Expect
Let’s be realistic about how long these challenges take:
Danger Close 1: Expect 8-12 hours of focused gameplay if you’re playing efficiently in the right modes. Casual players might stretch this to 15-20 hours.
Danger Close 2: The headshot requirement adds considerable time. Plan for another 10-15 hours minimum, potentially more if headshots don’t come naturally to you.
Total commitment: You’re looking at roughly 20-30 hours of dedicated carbine gameplay to complete both challenges. That’s not a weekend grind—it’s a sustained commitment.
Common Mistakes to Avoid
Hipfiring in close quarters: It’s tempting to hipfire when enemies are right in your face, but those kills won’t count toward your ADS requirement. Train yourself to quickly ADS even in chaotic situations.
Starting before Rank 23: I’ve seen players grind carbine kills for hours before hitting Rank 23, only to discover none of it counted. Don’t make this mistake—wait until you’ve unlocked the challenges.
Playing the wrong modes: Spending hours in Conquest on massive maps will triple your completion time. Stick to close-quarters modes where carbines actually shine.
Ignoring the M277: Since you need 100 kills with either the QBZ-192 or M277 for Danger Close 2, getting comfortable with the M277 early saves you time later. Don’t wait until you’ve finished Danger Close 1 to start using it.
Forcing headshots recklessly: Yes, you need 300 headshots, but dying constantly while going for low-percentage shots hurts your overall efficiency. Balance headshot hunting with smart gameplay.
Are the Unlocks Worth It?
Absolutely. The QBZ-192 and SG 553R are genuinely excellent carbines that compete with the best weapons in Battlefield 6. They’re not just trophy unlocks—they’re legitimate meta options.
The challenges also make you a better player. By the time you’ve completed both Danger Close challenges, you’ll have mastered carbine mechanics, improved your aim (especially headshots), and developed better map awareness for close-quarters combat.
Final Tips for Efficient Grinding
Play with friends: Coordinated squad play leads to more consistent engagements and better positioning, both of which help you complete challenges faster.
Take breaks: Grinding the same challenge for hours leads to fatigue and worse performance. Take regular breaks to maintain focus and enjoyment.
Don’t stress the order: You can work on multiple aspects simultaneously. Going for headshots while getting your ADS kills for Danger Close 1 saves time overall.
Track your pace: Check your progress every few matches to see if your current strategy is working. If your numbers aren’t moving fast enough, switch modes or adjust your approach.
Enjoy the process: These challenges are designed to take time. If you’re not having fun, take a break and come back later. The unlocks aren’t going anywhere.
More Battlefield 6 Resources:
- Battlefield 6 Official Site
- Complete Weapons Guide
- Battlefield 6 on Steam
- Join the Community Discussion
- Battlefield 6 on Epic Games
The Danger Close challenges represent a significant time investment, but they reward dedicated carbine players with two excellent weapons. Focus on the right game modes, aim consciously for headshots, and remember that progress compounds—every match gets you closer to those premium unlocks.