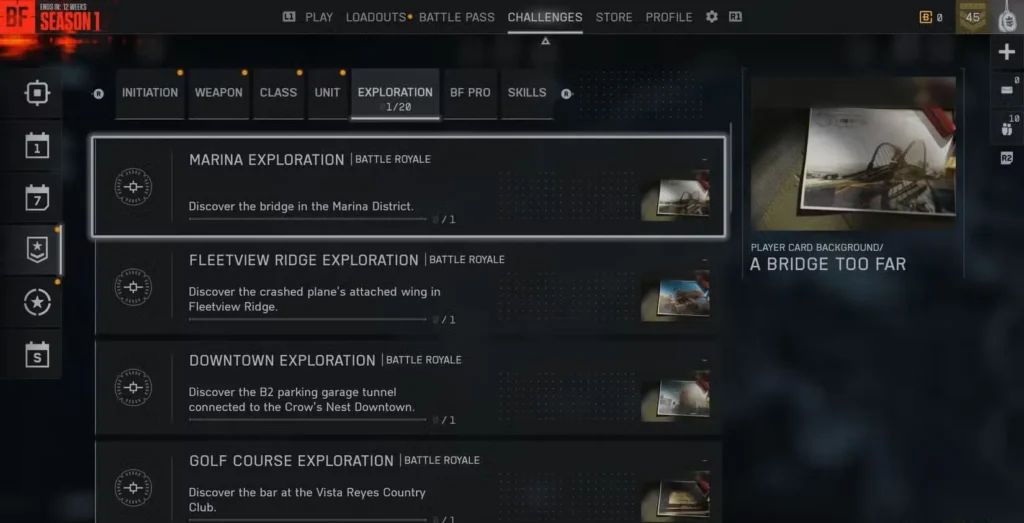
What Are Exploration Challenges in Battlefield RedSec?
If you’re looking to add some unique flair to your profile in Battlefield RedSec, the Exploration Challenges are your ticket to exclusive player card backgrounds. These 20 location-based challenges task you with discovering specific landmarks scattered across the Fort Lyndon map.
The concept is straightforward: find the location, trigger the discovery, earn your reward. But here’s the catch—while some challenges practically complete themselves as you rotate through the map, others have descriptions and map markers that are maddeningly vague. I’ve spent more time than I’d like to admit running in circles looking for that “crashed plane’s wing” before finally figuring it out.
Let me break down every single Exploration Challenge, where to find them, and—most importantly—how to tackle the three that trip up basically everyone.
Complete List of All 20 Exploration Challenges
Here’s the full roster of challenges you’ll need to complete, along with what you’re looking for and what background you’ll unlock:
Marina & Coastal Areas
Marina Exploration – “A Bridge Too Far”
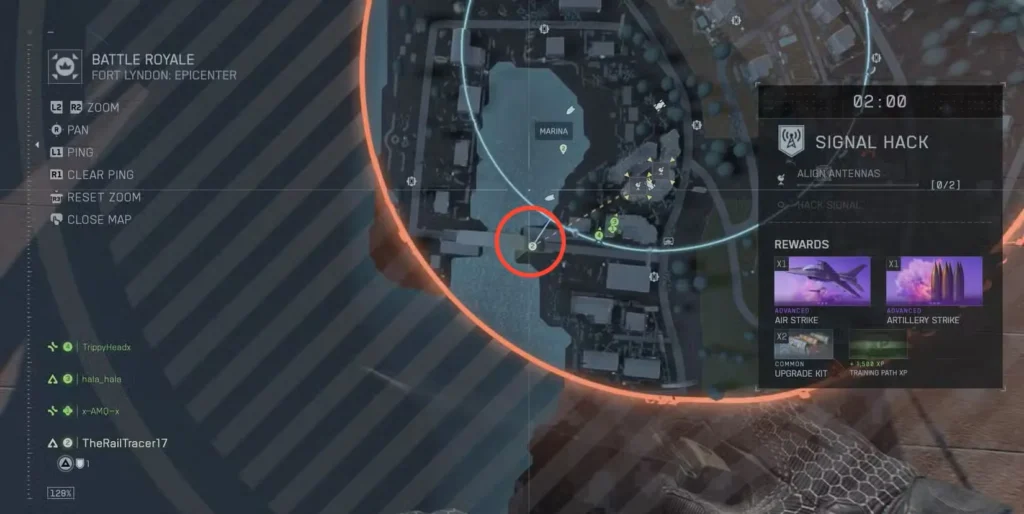
- Objective: Find the bridge in the Marina District
- Tip: Head toward the waterfront structures connecting the marina area
Lighthouse Exploration – “Crab Landing”
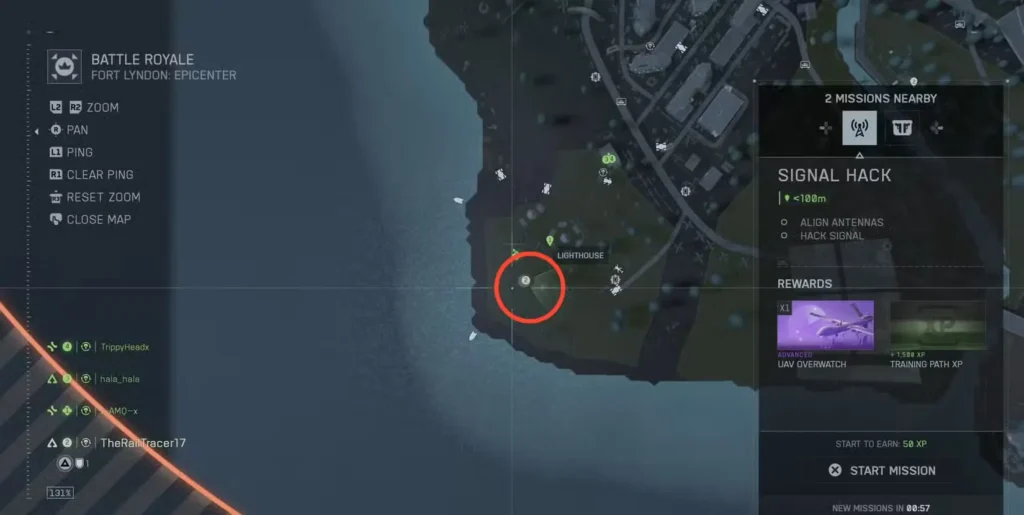
- Objective: Discover the mounted crab inside Lyndon Point Lighthouse
- Tip: You’ll need to actually enter the lighthouse building—the crab display is unmistakable once you’re inside
Evac Alpha Exploration – “On the Waterfront”
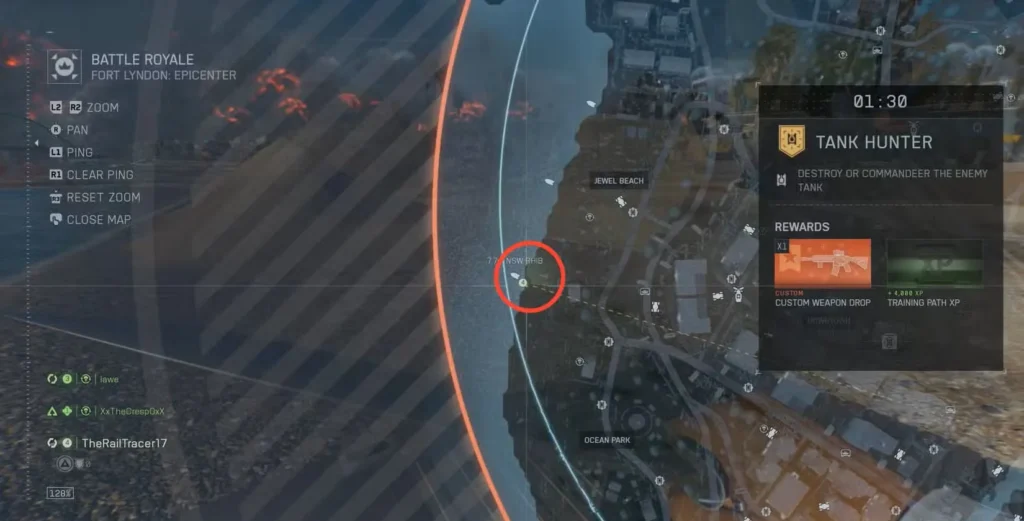
- Objective: Find the docks at Jewel Beach
- Tip: Look for the evacuation point near the beach area
Evac Bravo Exploration – “Catch of the Day”
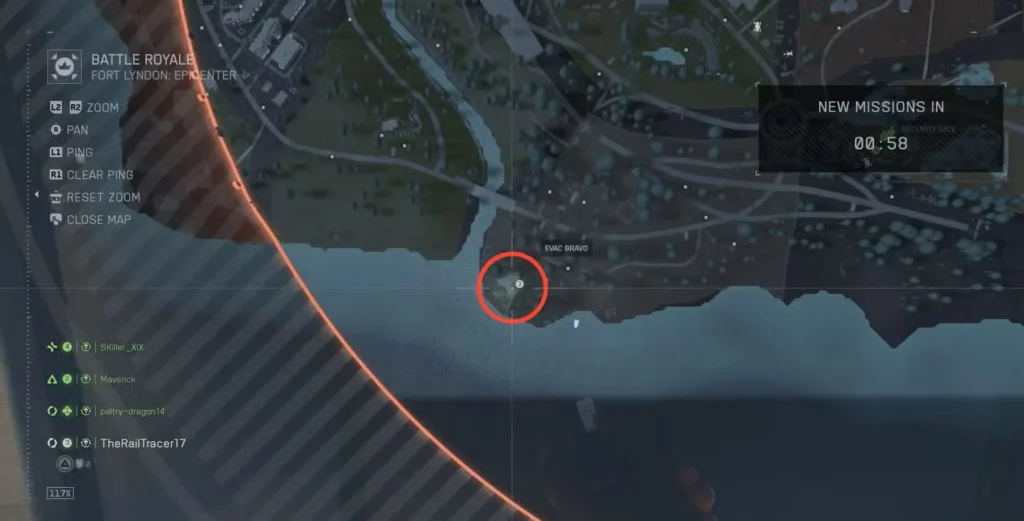
- Objective: Discover the Golden Anchor restaurant
- Tip: This beachside restaurant is hard to miss once you’re in the right zone
Urban & Downtown Areas
Downtown Exploration – “Hidden Passage” ⚠️ CONFUSING
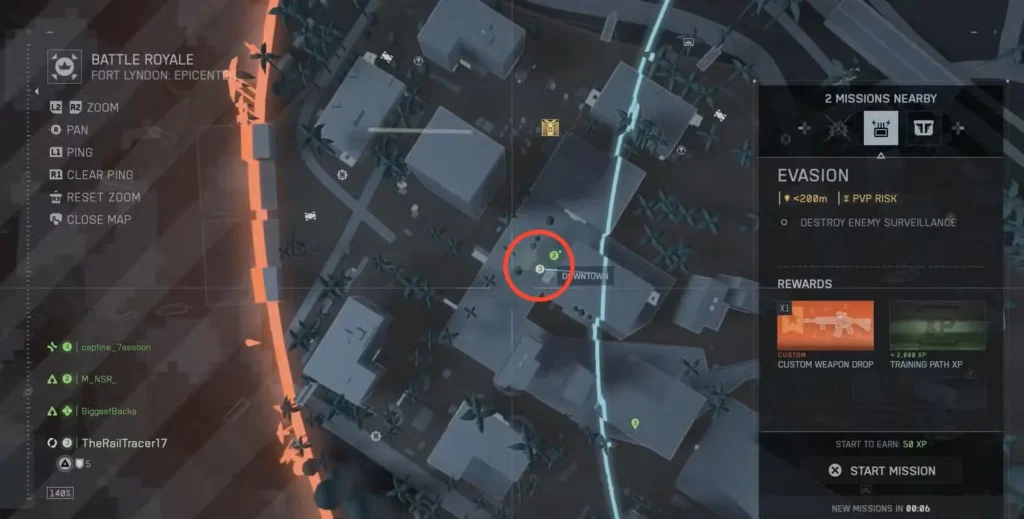
- Objective: Find the B2 parking garage tunnel connected to Crow’s Nest Downtown
- How to complete: This one’s tricky. You need to go to the building dead center of the Downtown area—literally right on top of where “down” appears on your map. Get to the rooftop, then take the zipline that descends all the way down into the B2 parking level. That’s your hidden passage.
Boutique District Exploration – “Dressed to Impress” ⚠️ CONFUSING
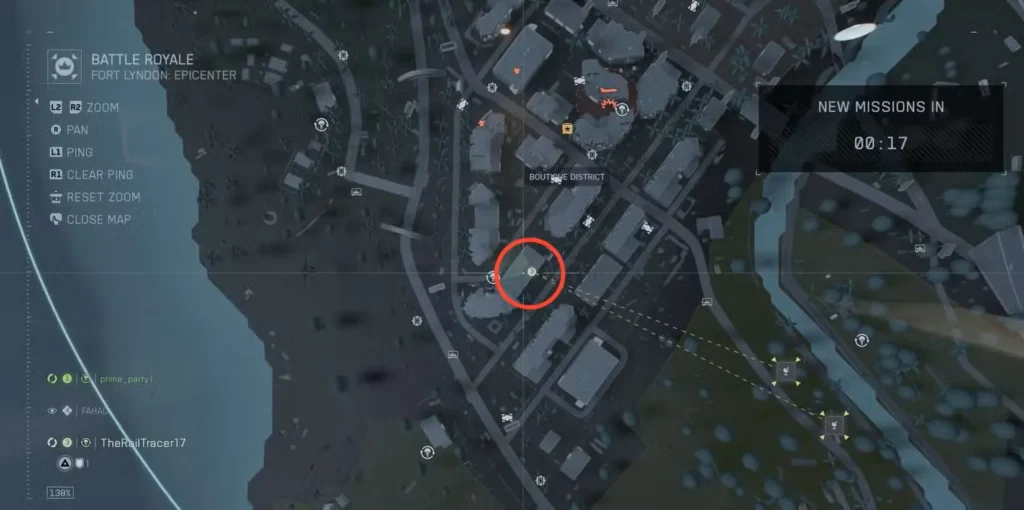
- Objective: Find the Chavel Noir shop in the Boutique District
- How to complete: Navigate to the main shopping area where you’ll see multiple billboards and storefronts. Chavel Noir is one of the retail shops in this cluster. The issue is that the map marker doesn’t pinpoint the exact shop, so you’ll need to search the storefronts until you find the right name.
Defense Nexus Exploration – “Elite Retreat”
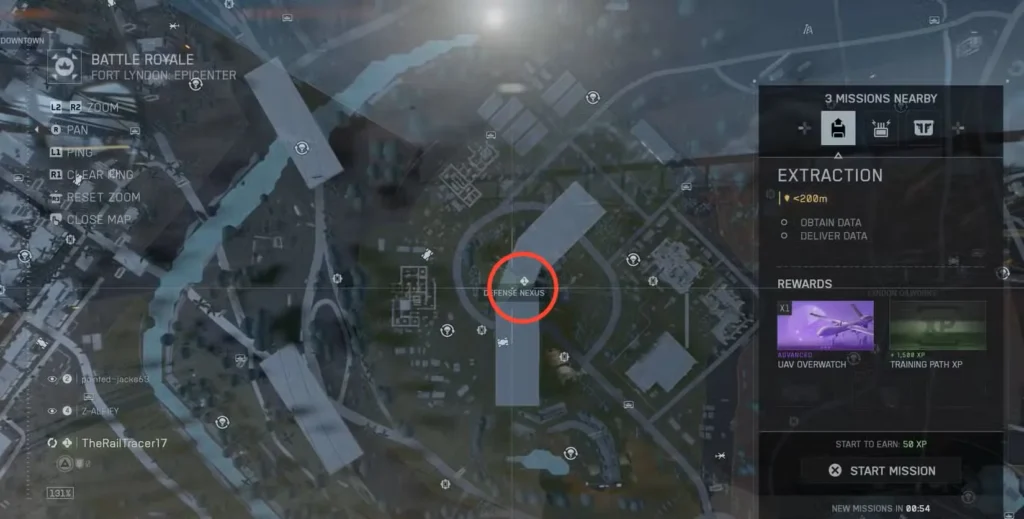
- Objective: Discover Walker-Senex’s rooftop patio
- Tip: Look for the corporate building with rooftop access
Residential & Recreational Areas
Golf Course Exploration – “It’s Five O’Clock Somewhere”
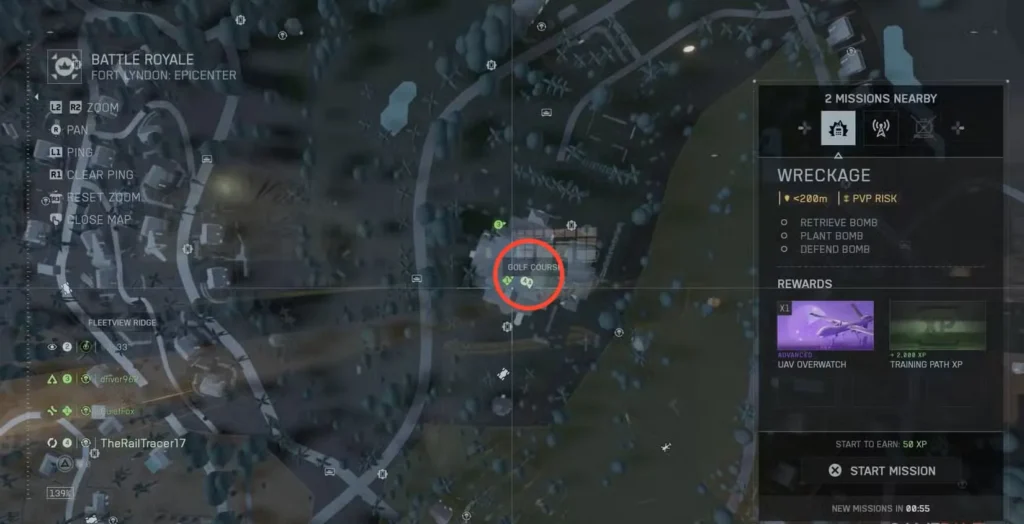
- Objective: Find the bar at Vista Reyes Country Club
- Tip: The country club has a distinctive layout—head inside to locate the bar area
Ocean Park Exploration – “Game, Set, Match”
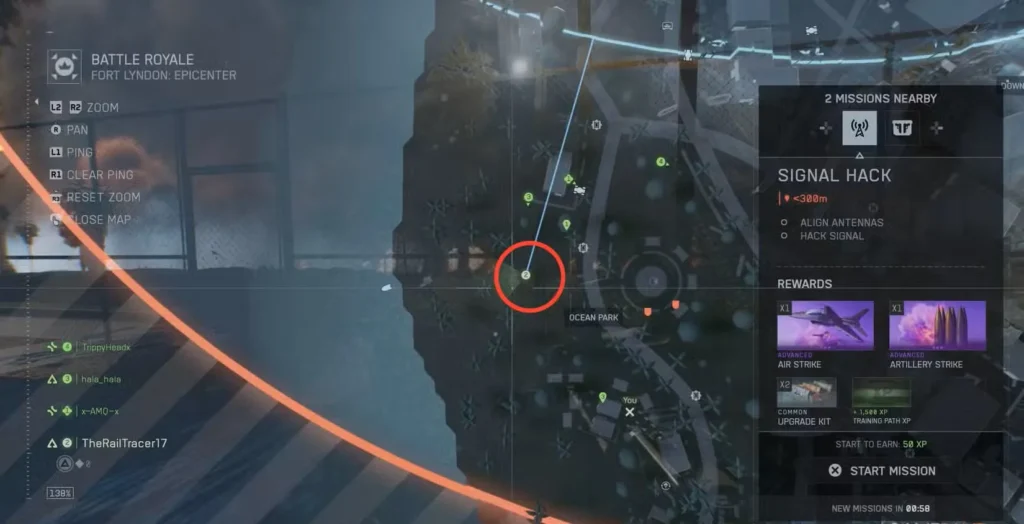
- Objective: Discover the tennis courts in Ocean Park
- Tip: Pretty straightforward—look for the recreational sports area
Fleetview Ridge Exploration – “Flame Out” ⚠️ CONFUSING
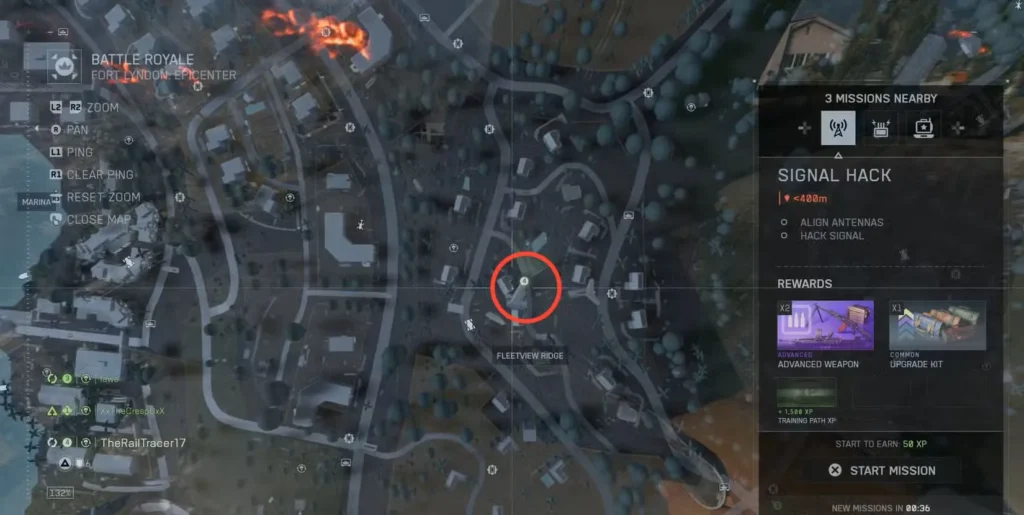
- Objective: Find the crashed plane’s attached wing in Fleetview Ridge
- How to complete: Here’s what makes this one frustrating—you can’t just stand near the plane wreckage. You need to physically climb up onto the wing and get to the elevated position on top of it. Only then will the challenge register as complete. Many players walk right past this thinking they’ve discovered it, only to realize later it didn’t count.
Industrial & Military Areas
Chemical Storage Exploration – “Black Gold”
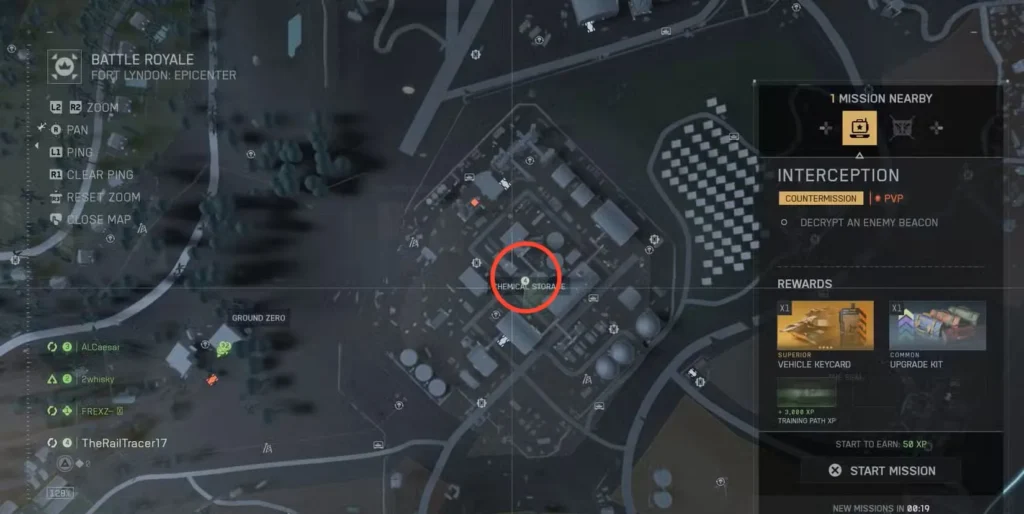
- Objective: Find the oil refinery near Chemical Storage
- Tip: Look for the large industrial structures with refinery equipment
Lyndon Oilworks Exploration – “Nodding Donkeys”
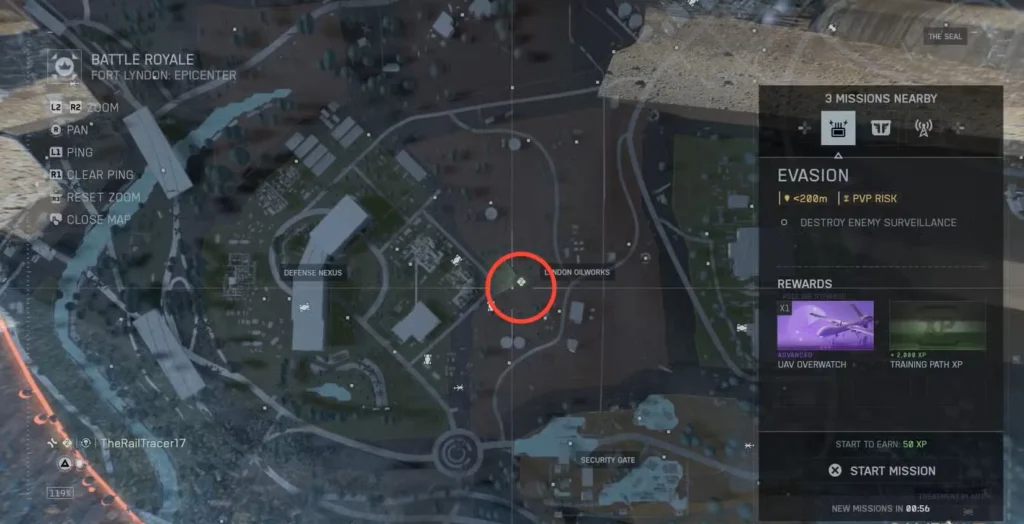
- Objective: Discover the oil pump jacks at Lyndon Oilworks
- Tip: Those distinctive up-and-down pumps are your target
Redline Storage Exploration – “That’ll Buff Right Out”
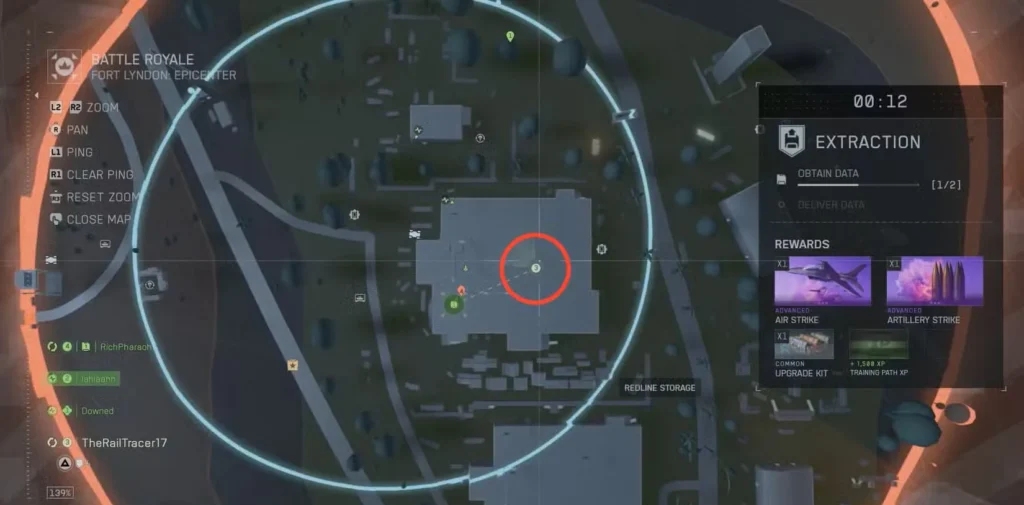
- Objective: Find the D-06 vehicle repair bay near Redline Storage
- Tip: Search for the garage area with vehicle maintenance equipment
Treatment Plant Exploration – “Save Our Water”
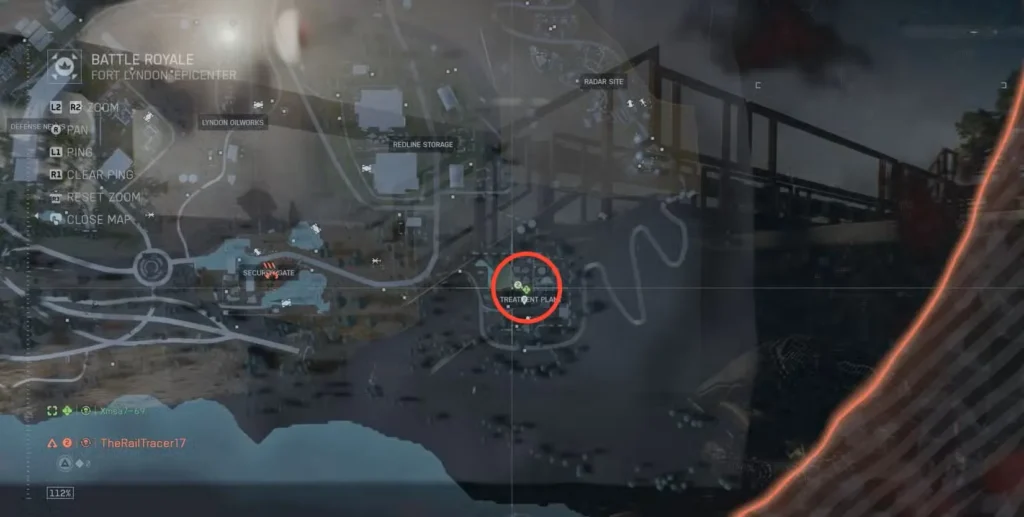
- Objective: Discover the sediment tanks at Fort Lyndon Treatment Plant
- Tip: Look for the large circular water treatment structures
Military Base & Restricted Areas
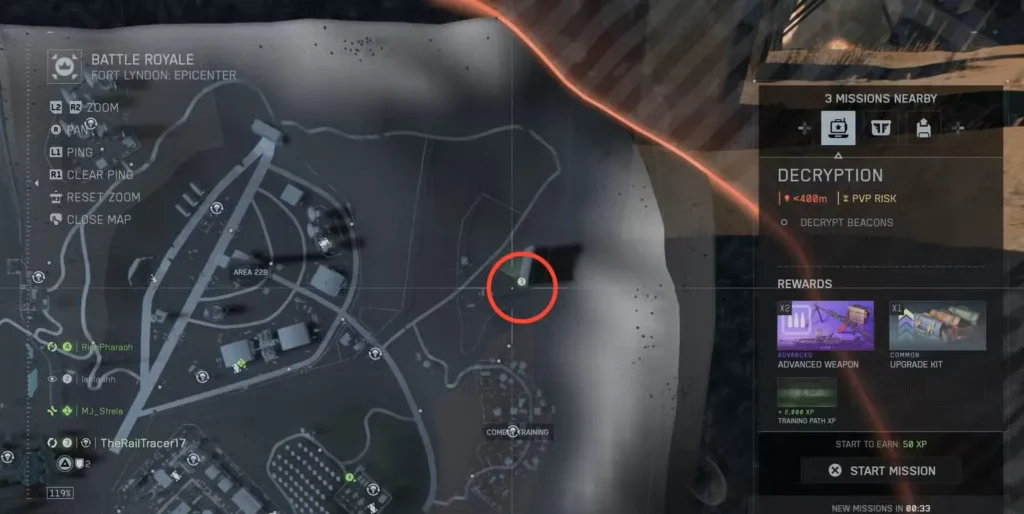
Area 22B Exploration – “Restricted Airspace”
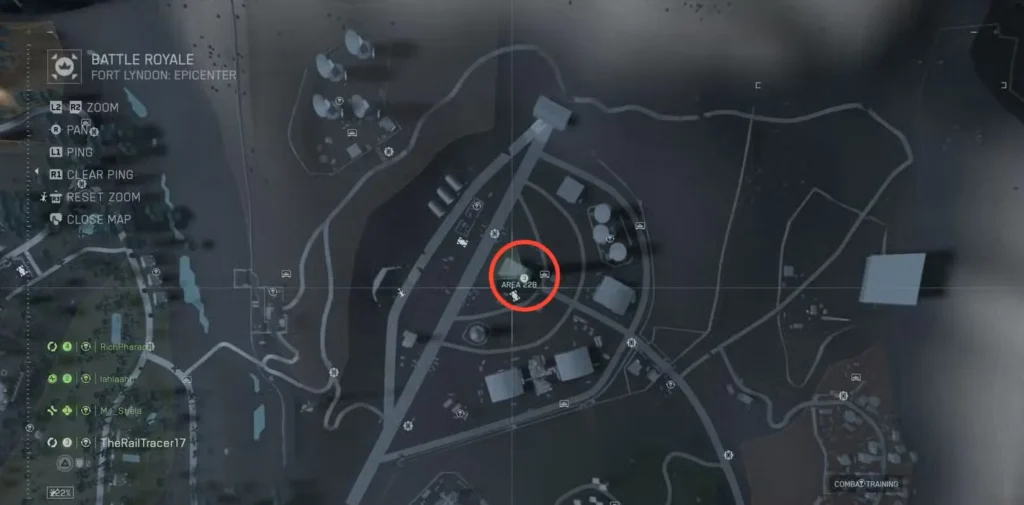
- Objective: Find the air traffic control tower in Area 22B
- Tip: The tall tower structure should be visible from a distance
Radar Site Exploration – “The Hills Have Ears”
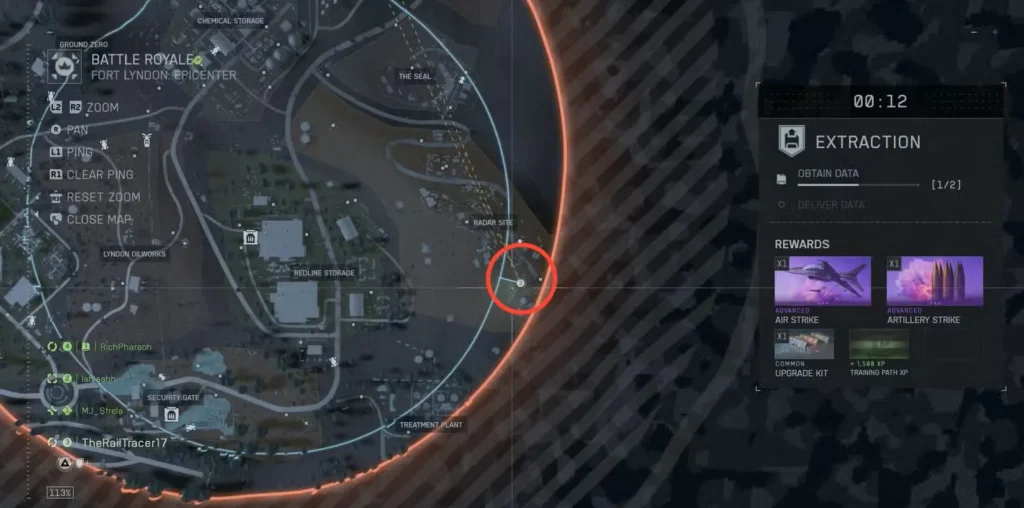
- Objective: Discover a radar dome in the Radar and Communications area
- Tip: Look for those distinctive dome-shaped structures on elevated positions
Combat Training Exploration – “High Frequency”
- Objective: Find the radar array near Combat Training
- Tip: Different from the dome—this is the array structure with multiple dishes
Security Gate Exploration – “Clearance Denied”
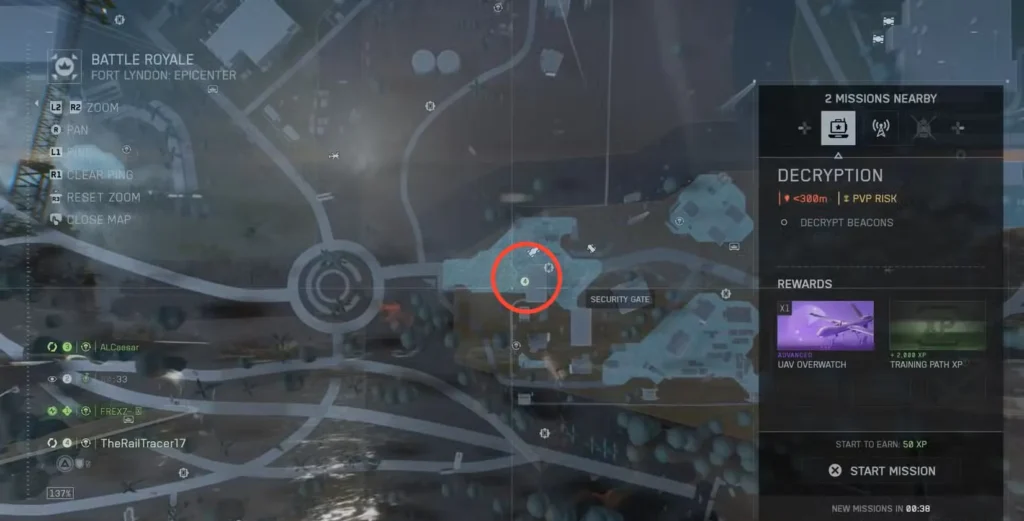
- Objective: Discover the Fort Lyndon Gate checkpoint
- Tip: The main entrance checkpoint to the base area
Special Locations
Ground Zero Exploration – “Cause Undetermined”
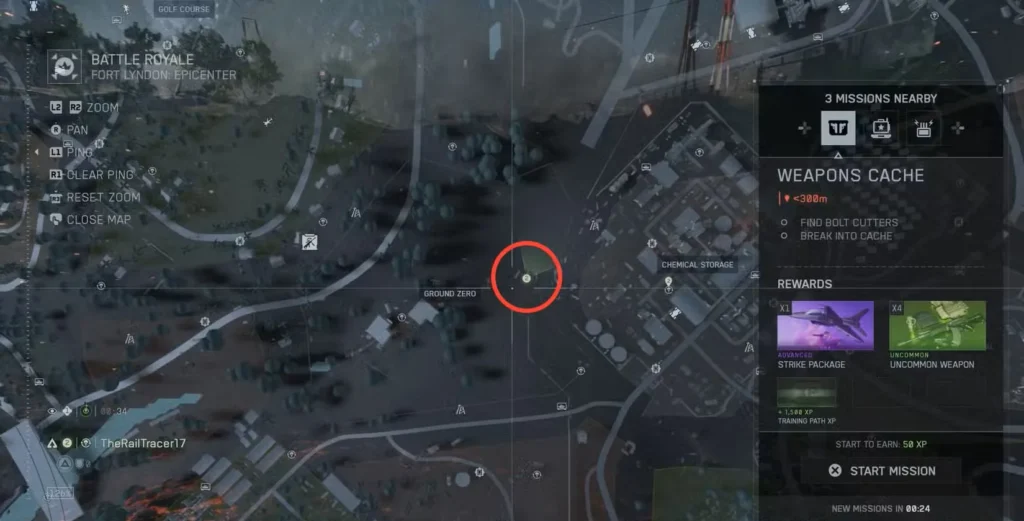
- Objective: Find the epicenter of the explosion
- Tip: Look for the most destroyed area showing obvious explosion damage
The Seal Exploration – “Lyndon’s Labyrinth”
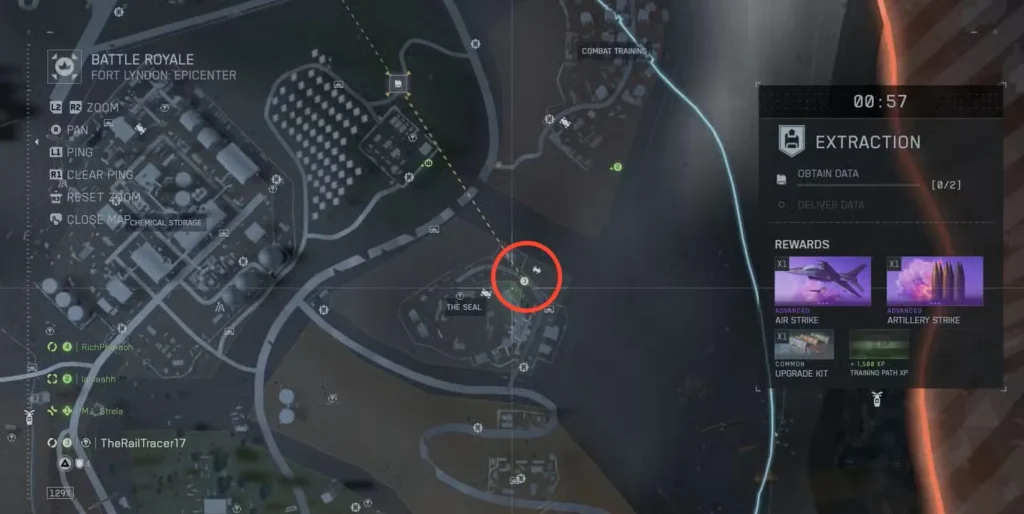
- Objective: Discover the secret tunnel near The Seal
- Tip: Search around The Seal area for tunnel entrances—they might not be immediately obvious
Pro Tips for Exploration Challenge Hunters
Plan your route strategically. Since you’re at the mercy of the storm and safe zones, you won’t always be able to beeline toward every challenge location. I recommend mentally noting which challenges are near your drop zone and hitting those first.
Use early-game downtime. The opening minutes of a RedSec match are perfect for exploration since combat isn’t as intense. Grab basic loot, then start checking off nearby challenges.
Don’t force it mid-game. If a challenge location is outside the safe zone and the storm is closing, let it go. These challenges aren’t going anywhere—you can complete them across multiple matches. Dying to the storm for a player card background isn’t worth it.
Replay specific areas. Once you’ve completed challenges in one section of the map, adjust your drop locations in future matches to systematically cover other areas.
Team coordination helps. If you’re playing with a squad, split up (but stay close enough to support each other) to cover more ground and complete multiple challenges per match.
Why Bother With Exploration Challenges?
Beyond the obvious completion-ist satisfaction, these challenges serve a practical purpose: they force you to learn the map intimately. Every landmark you discover becomes a mental anchor for navigation, callouts, and strategic positioning.
Knowing where that hidden parking tunnel is? That’s a rotation option most players won’t think of. Remembering the zipline from the Downtown rooftop? That’s an escape route. Understanding the layout of Area 22B? That’s tactical knowledge that gives you an edge in firefights.
The player card backgrounds are a nice bonus, but the real reward is becoming someone who knows Fort Lyndon like the back of their hand.
Start Exploring Fort Lyndon
With all 20 Exploration Challenges mapped out, you’re ready to systematically unlock every player card background while simultaneously mastering the map. Pay special attention to those three confusing challenges—Downtown, Boutique District, and Fleetview Ridge—since they’re the ones that’ll eat up your time if you’re not prepared.
You can jump into Battlefield RedSec on Steam, Xbox, and EA’s platform completely free. Happy hunting, and may the storm always be at your back!
Also Check: How to Get Custom Loadouts in Battlefield RedSec: Complete Guide