Finding Every Collectible in Ashes of the Damned
If you’re looking to become a true completionist in Black Ops 7 Zombies, tackling Ashes of the Damned’s Intel collection is essential. This massive launch map is packed with 26 collectible pieces spread across three categories: Audio Logs, Documents, and Artifacts. While hunting these down can feel overwhelming at first, having a solid roadmap makes the process way more manageable.
Here’s what you’re working with: each Intel piece nets you 1,000 XP individually, but land all 26? You’ll earn 10,000 XP plus the exclusive Ol’ Tessie Beams Calling Card. That’s some serious bragging rights.
Audio Logs (14/14) – The Story Pieces
The Audio Logs form the backbone of Ashes of the Damned’s narrative. These are scattered across all the major locations, and most of them are tucked in pretty logical spots once you know where to look.
Audio Log #1 – Tilling the Earth
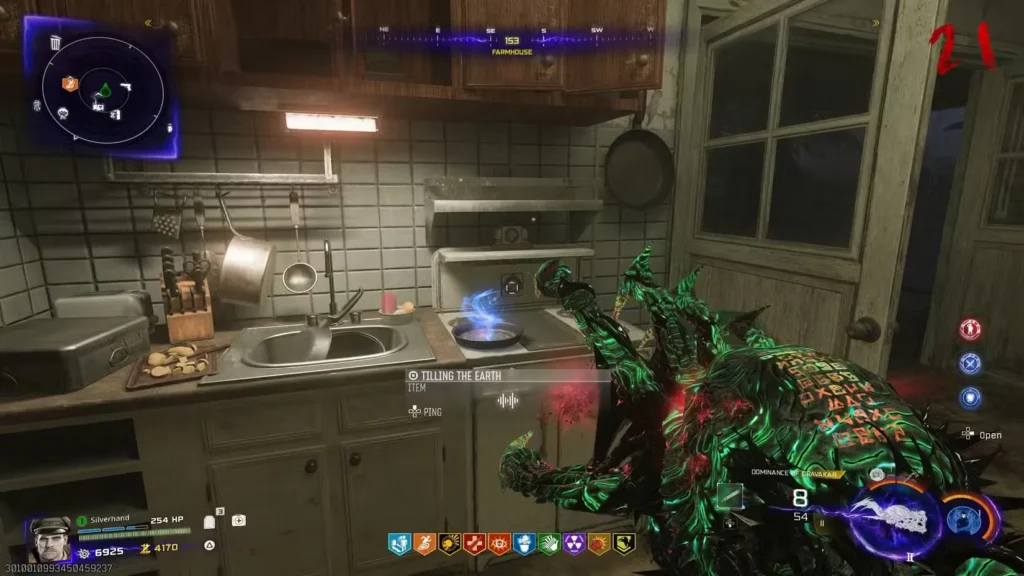
Start at Vandorn Farm’s Farmhouse. Head inside and look in the kitchen facing southeast—you’ll spot this one sitting in a pan. Easy grab for your first collectible.
Audio Log #2 – Meat the Vandorns
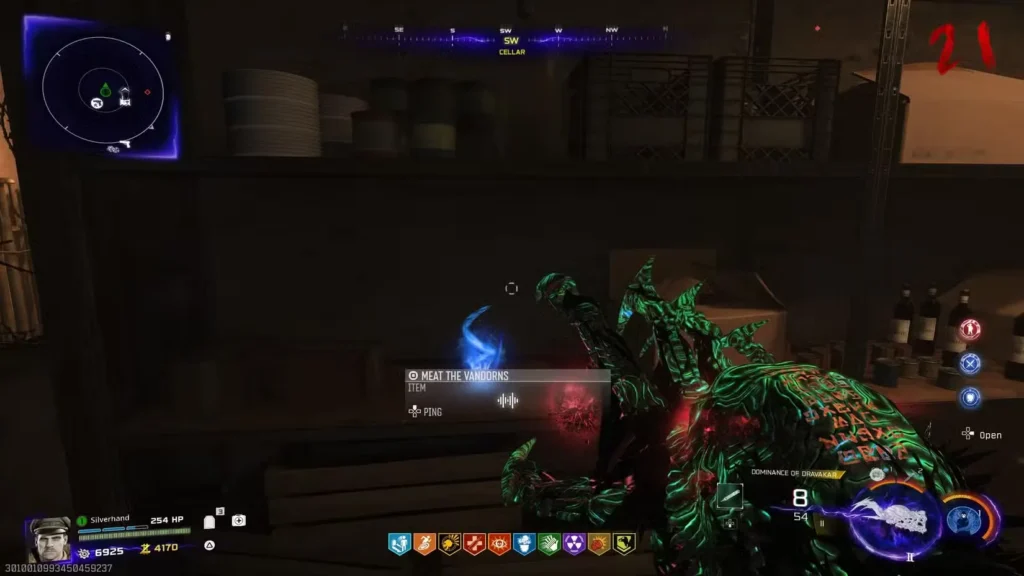
This one requires a bit of progression. Drop into the Barn’s Cellar at Vandorn Farm and check the southwest wall shelf, but you’ll only be able to grab it after completing the farm ritual as part of the main quest.
Audio Log #3 – Ground Control
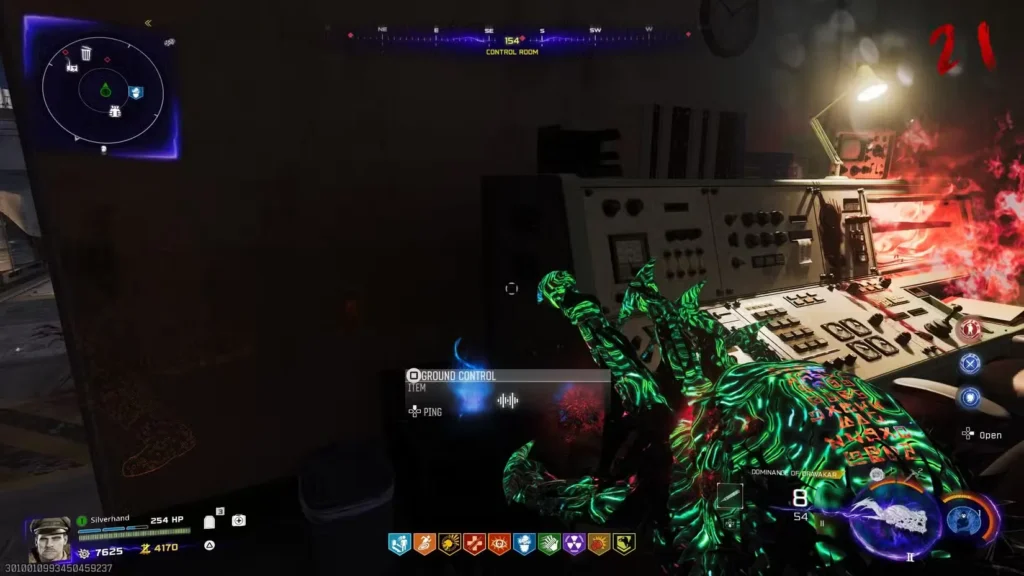
Once you’ve solved the Serum puzzle at Zarya Cosmodrome, head to the Control Room and check the southeast wall. This marks the midway point where the story really picks up.
Audio Log #4 – What Came After
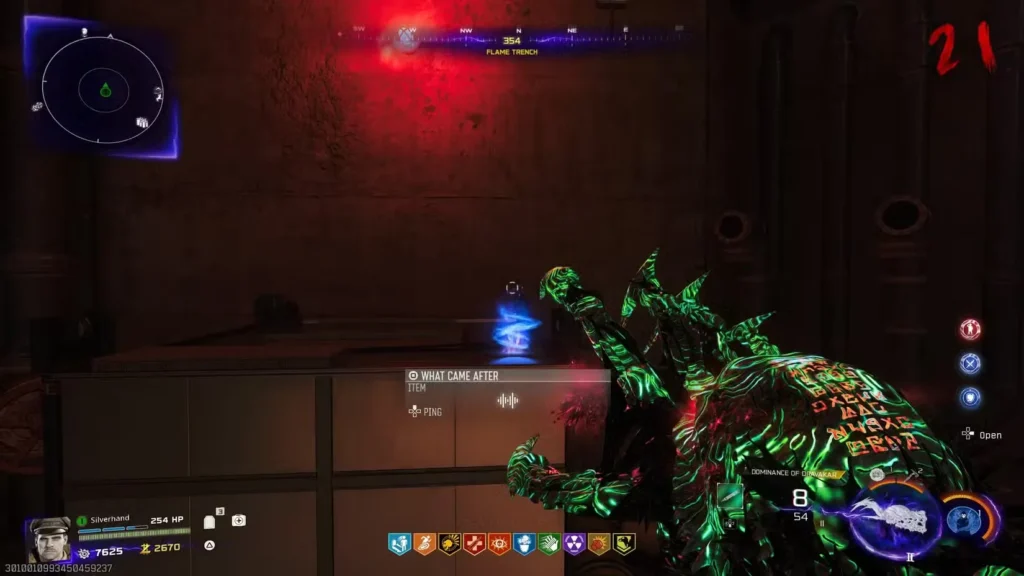
Stick with the Cosmodrome theme—after the Serum puzzle, venture down to the Flame Trench area and face north. You’ll find this one sitting on a box.
Audio Log #5 – She Got Hers
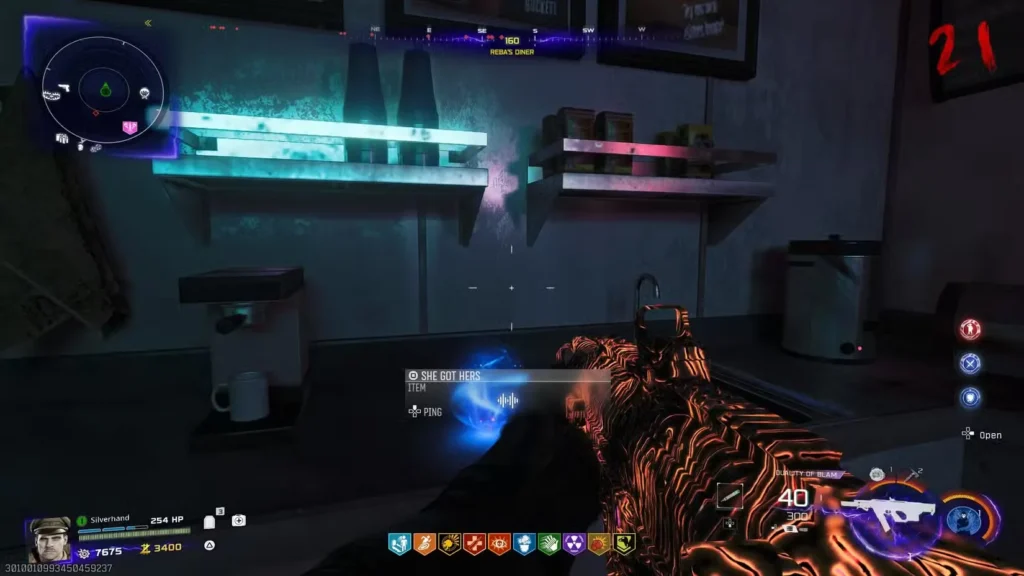
Take a trip to Reba’s Diner at Exit 115. You’ll find this Audio Log chilling in the kitchen area.
Audio Log #6 – He Got His

Head over to McDougal’s Service Station, also at Exit 115. Look northeast and you’ll spot this one on a shelf—fitting pair with the previous log.
Audio Log #7 – The Price You Pay
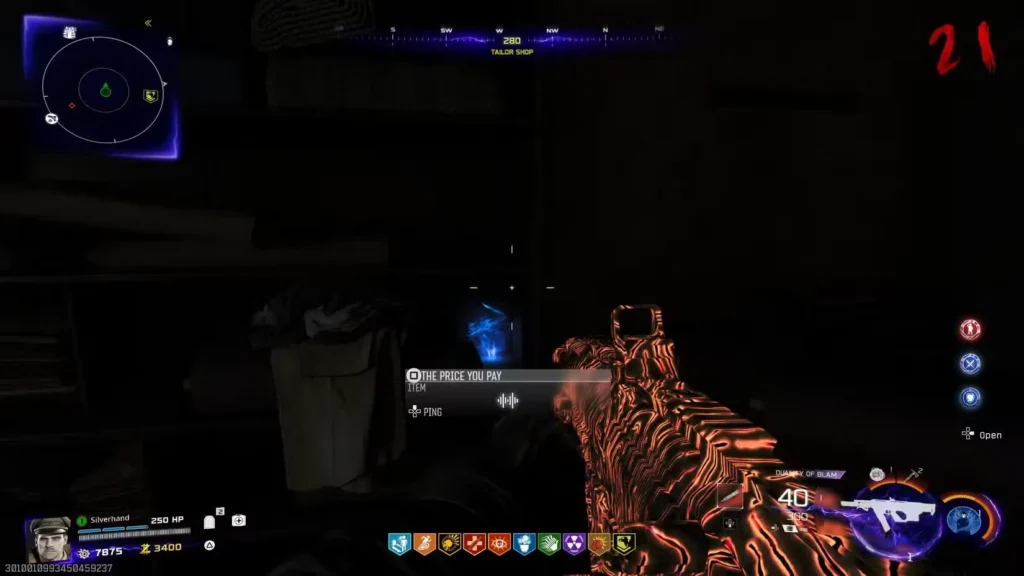
In Ashwood, locate the Tailor Shop on the east side near Vulture Aid. Check the west wall for this collectible.
Audio Log #8 – Craftsmanship
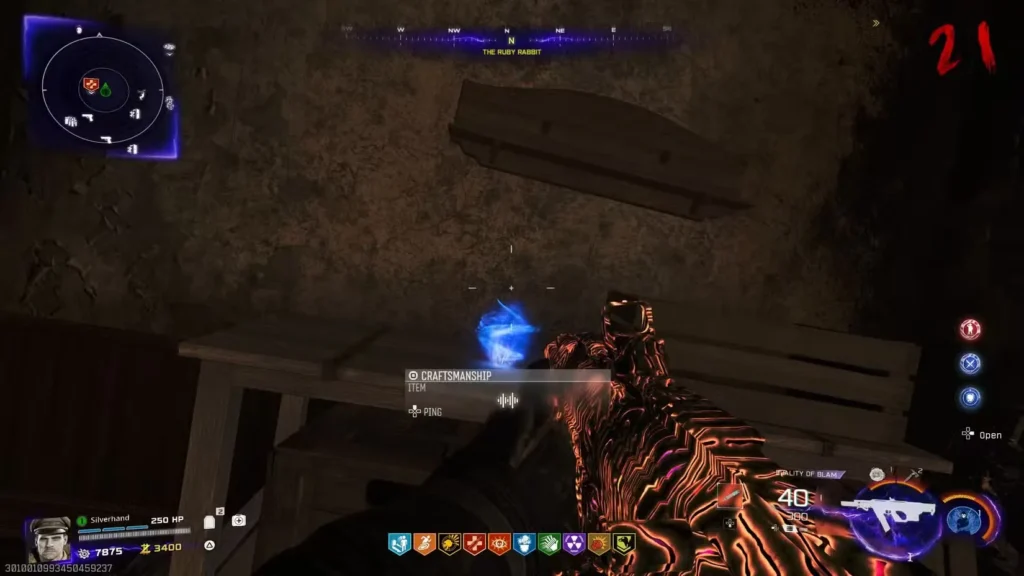
The Ruby Rabbit is on Ashwood’s west side. Climb upstairs and face north toward the shelves—you’ll find this one there.
Audio Log #9 – Cold Blooded Thriller
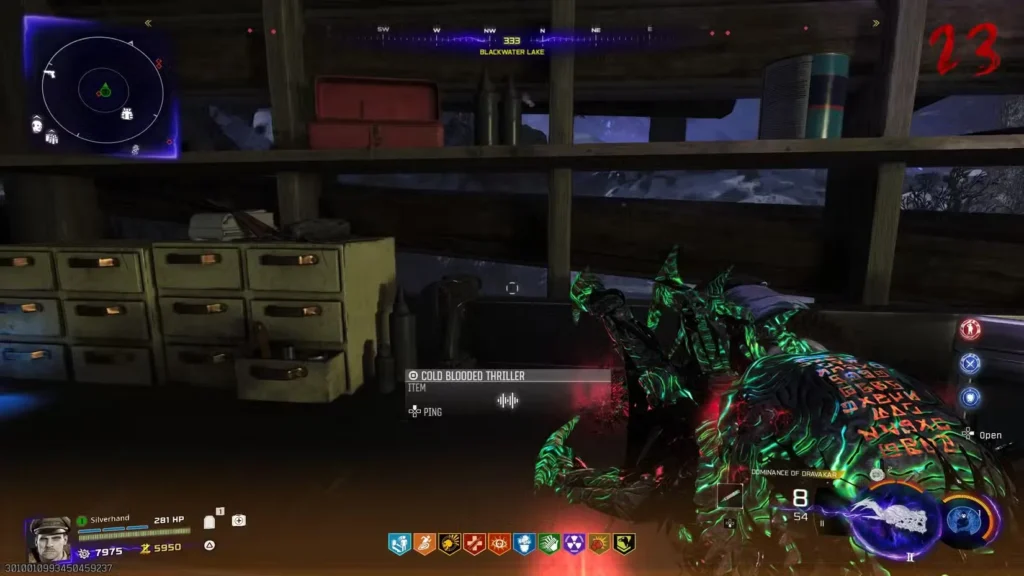
Head to the fishing hut outside the Cabin at Blackwater Lake. The northwest shelf holds this Audio Log.
Audio Log #10 – The Fate of the Flock
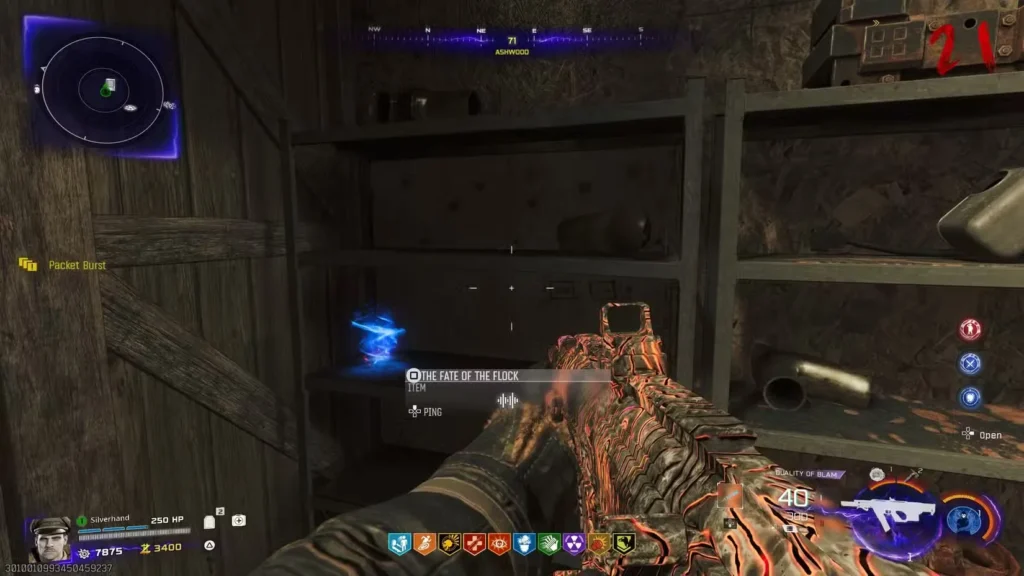
Ol’ Tessie garage in Ashwood is where this one lives. Check the east wall shelf and you’re golden.
Audio Log #11 – Scene 27 The Drowning
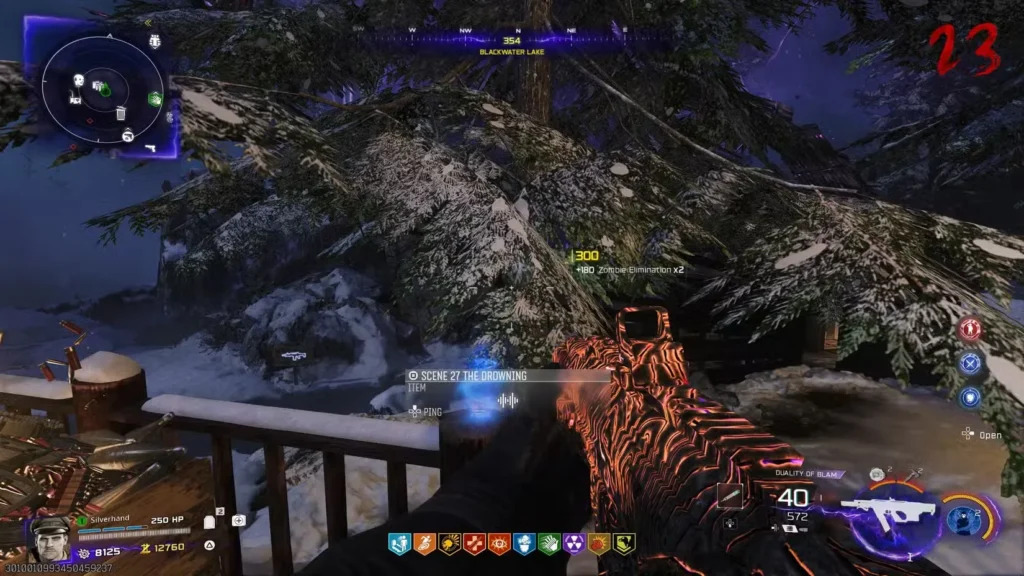
After you’ve completed the reels puzzle at Blackwater Lake (part of the main quest), head to the back of the Cabin and look north. It’s right there on the railing by the ammo box.
Audio Log #12 – Study Room Monologue Rehearsal
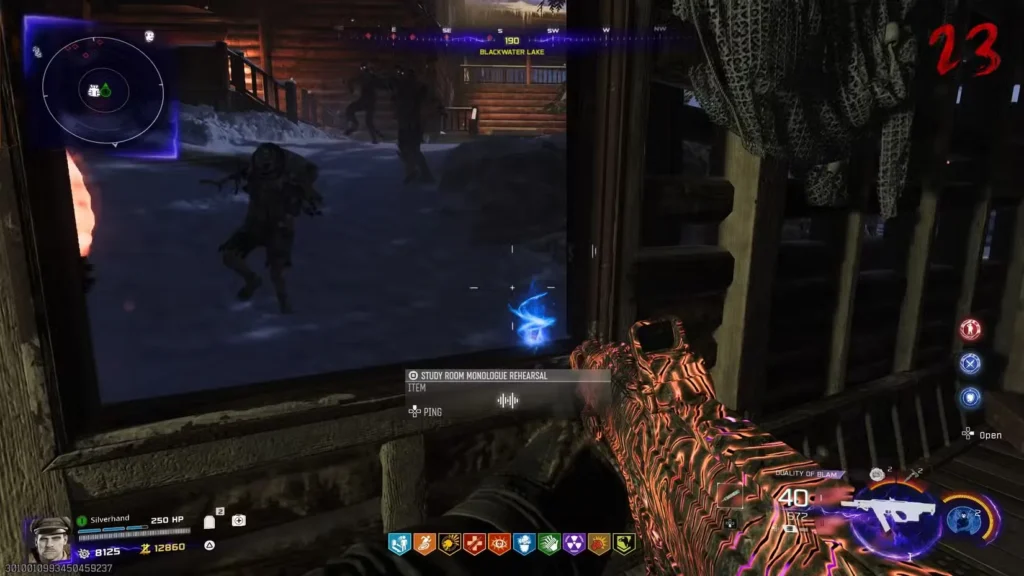
Post-reels puzzle, go back to that fishing hut and look out the south window. This one’s visible from the interior.
Audio Log #13 – Confrontation in the Parlor – Camera B
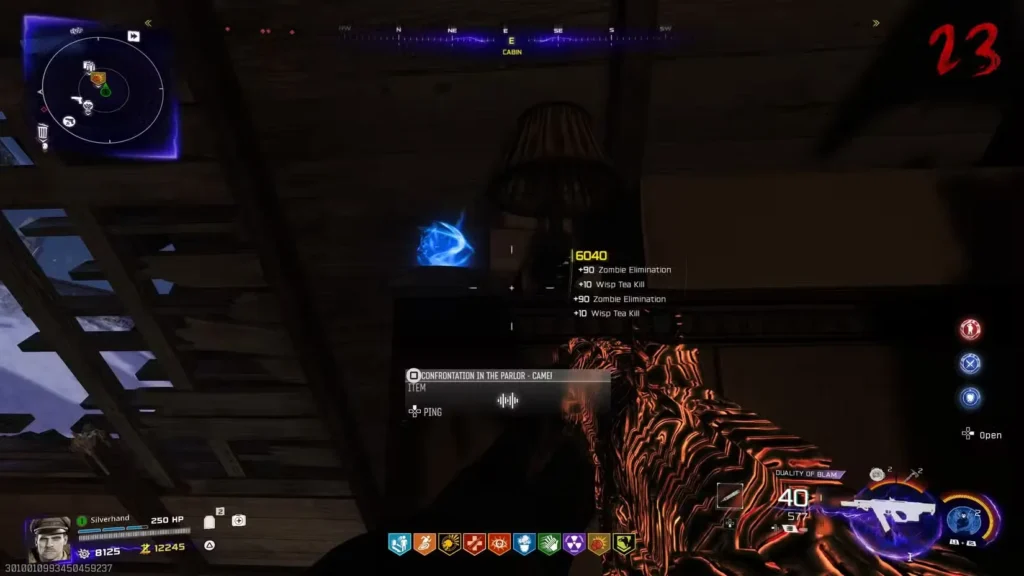
Inside the Cabin’s upstairs after the reels puzzle, face east toward the projector reel. You’ll see this on a shelf nearby.
Audio Log #14 – Director’s Notes: Improv Test
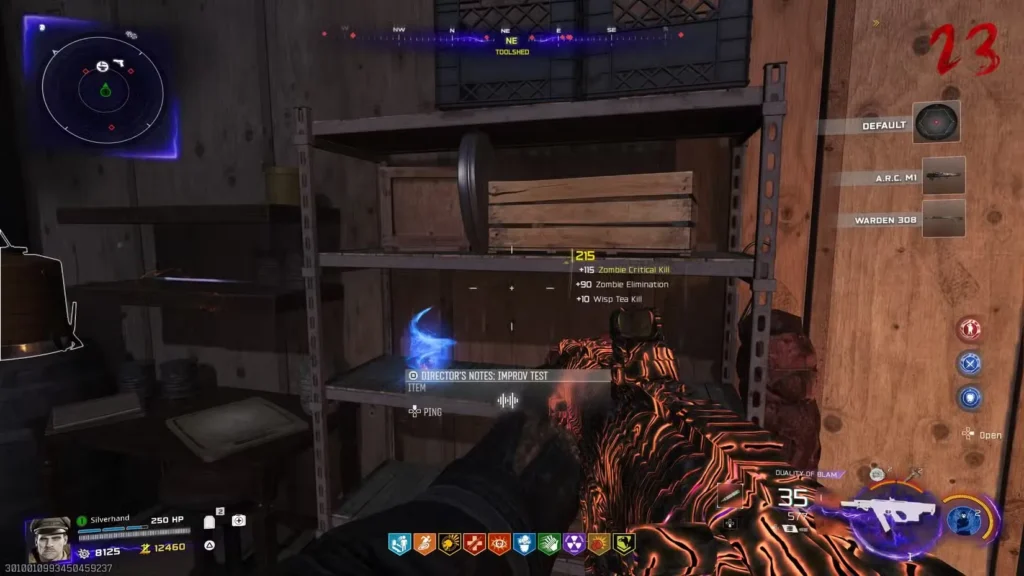
The final Audio Log is in the Toolshed. After the reel puzzle, face northeast and look below the projector reel on the shelf.
Documents (6/6) – The Written Records
Documents require a bit more detective work than Audio Logs, but they’re worth the effort for the story context they provide.
Document #1 – Cut
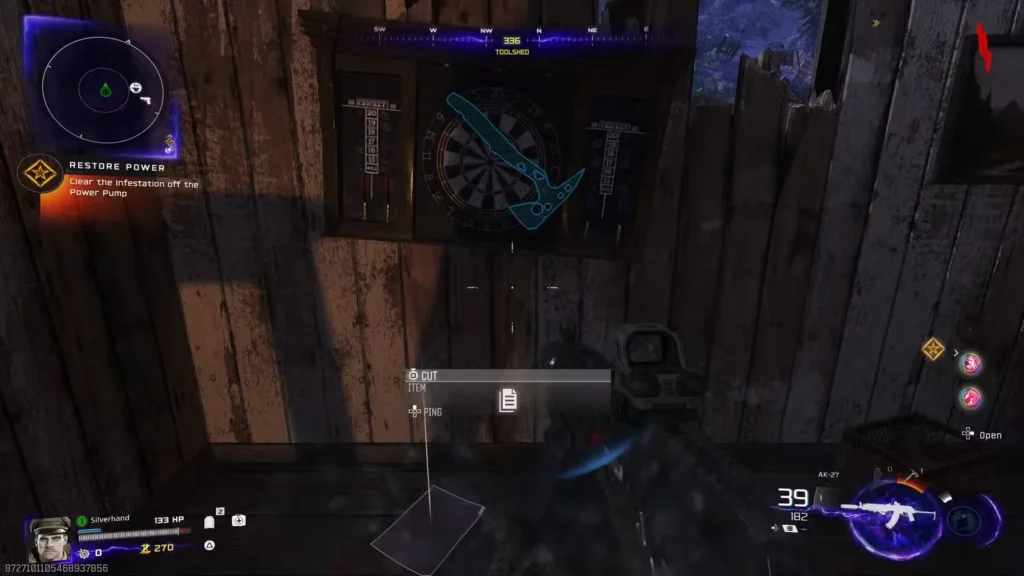
Inside the Toolshed at Blackwater Lake, you’ll notice one floorboard that stands out from the others—it’s a different color. Stand on or near it and shoot the bullseye on the nearby dartboard. The document will drop down.
Document #2 – Maintenance
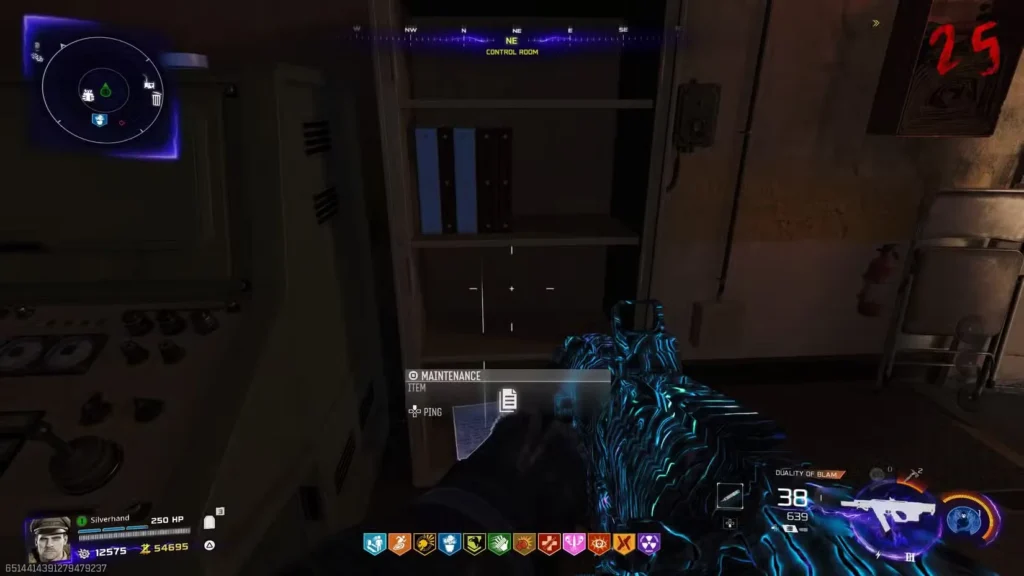
Head to Zarya Cosmodrome’s Control Room (the area behind Wisp Tea). Face northeast toward the shelves and shoot the stacks of papers. The document is hidden behind them.
Document #3 – Signal Fires
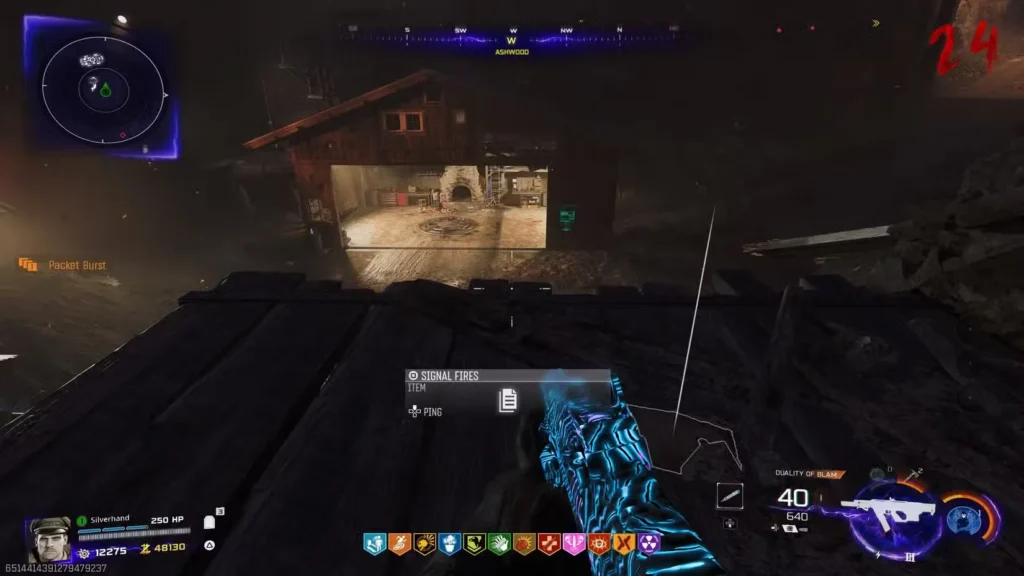
In Ashwood, use the zipline facing east to reach the top. Once up there, look back toward Ol’ Tessie garage and walk right until you can drop to a lower platform—this document is waiting there.
Document #4 – Playmates
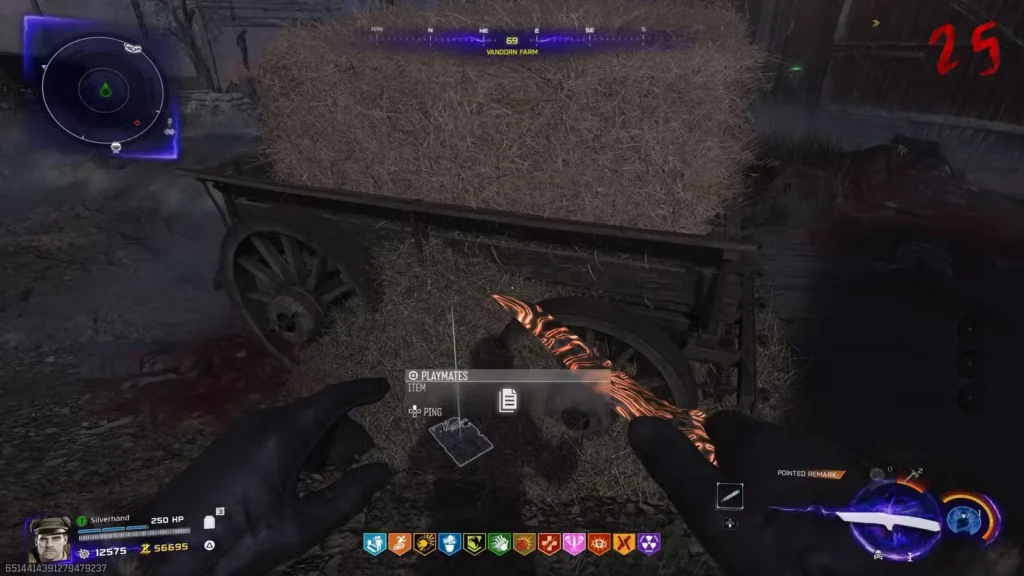
This one’s interactive. Head to Vandorn Farm and locate all the haystacks and hay barrels scattered around. Reload repeatedly near them until this document pops out. Pro tip: we found ours in the middle haystack sitting on a cart just before the Barn.
Document #5 – Evidence
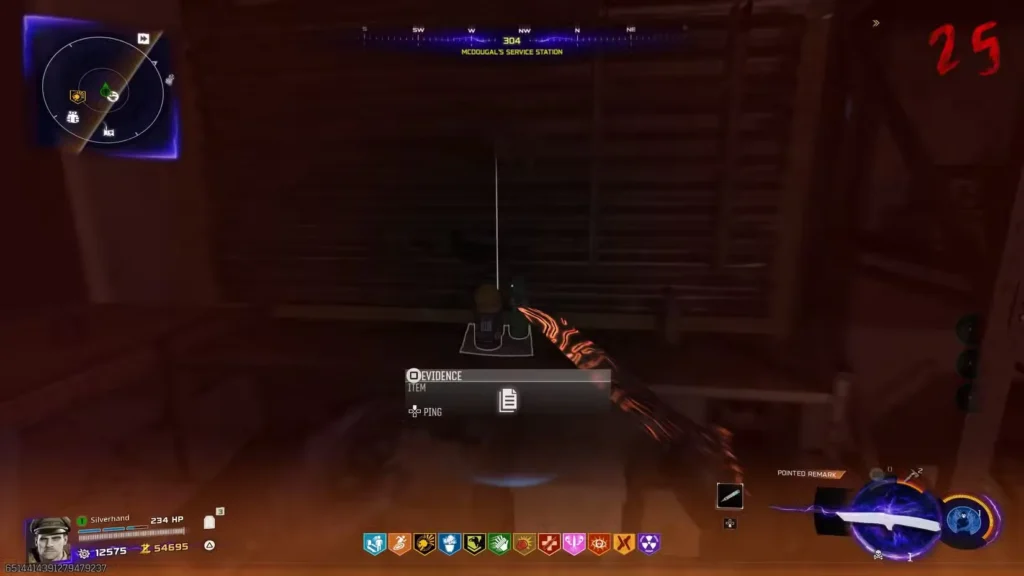
At McDougal’s Service Station in Exit 115, check the northwest side of the room. You’ll find this document tucked underneath two spray cans.
Document #6 – Good Game
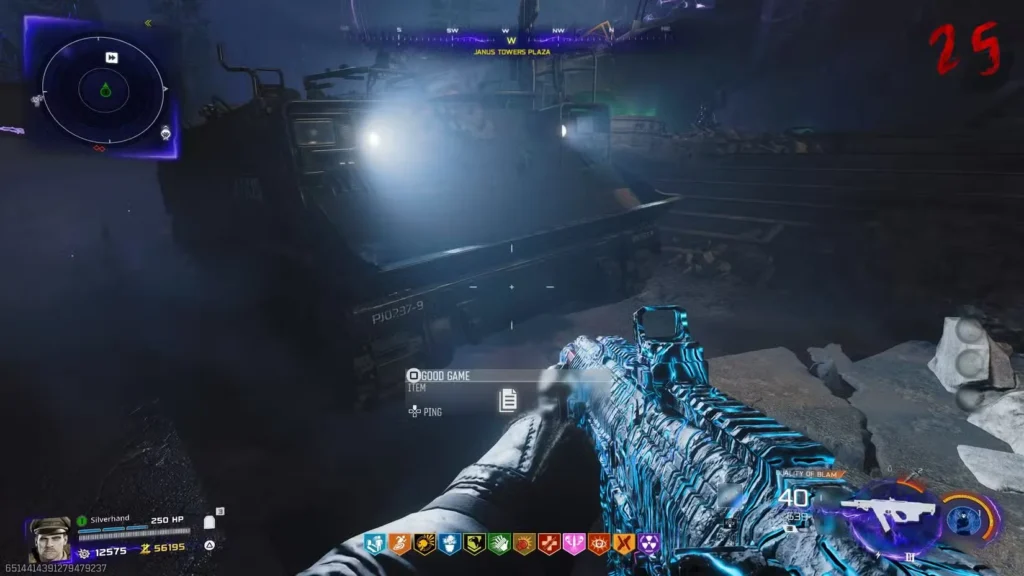
This requires a small purchase first. Buy Melee Macchiato from either the Cabin at Blackwater Lake or from Der Wunderfizz in Janus Towers Plaza. Once you have it, head to Janus Towers Plaza and use your melee punch on the tank closest to the Jump Pad. The document drops from there.
Artifacts (6/6) – The Major Collectibles
Artifacts are the heavy hitters of Intel collection—they’re tied to quests and progression, making them feel like real rewards rather than just hidden items.
Artifact #1 – T.E.D.D. Head
This is the freebee. Jump into Ashes of the Damned, open the Server Room, melee the floor grate, and pick up T.E.D.D. It’s impossible to miss since it’s part of the main quest with objective markers.
Artifact #2 – Mirror of the Forgotten
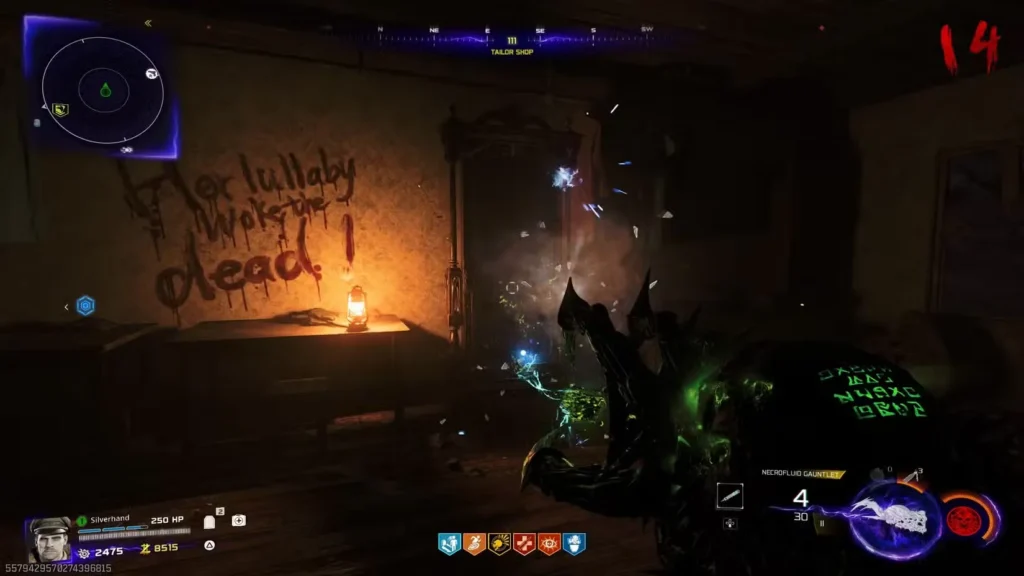
You’ll need Wisp Tea for this one—grab it from Zarya Cosmodrome or get it free through the Twins Easter Egg at Vandorn Farm. Climb the zipline in East Ashwood and head to the Tailor Shop on the right of Vulture Aid. With Wisp Tea active, the mirror cracks. Shoot it with the Necrofluid Gauntlet to shatter it, and the artifact drops.
Artifact #3 – DG-2 Turret
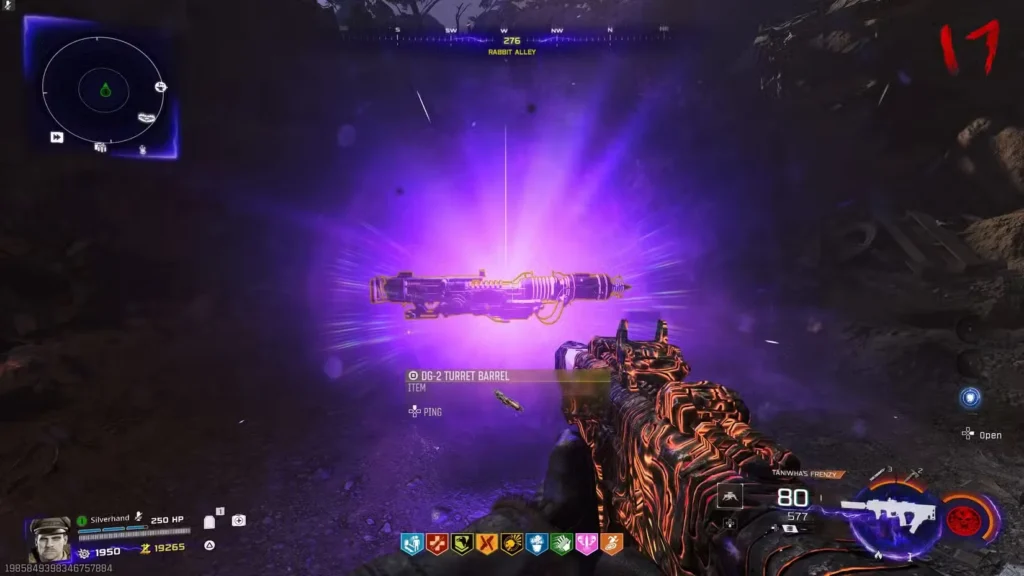
This is part of the main questline. First, collect all 6 Serum parts and solve the Serum puzzle. Then use the Necrofluid Gauntlet to shoot and pull 3 unique keys from the Crashed Rocket, Orda Graveyard, and Grounded Ship. Transfer each key to the locked chest in West Ashwood’s Rabbit Alley. After the mid-game cutscene, the DG-2 Turret spawns.
Artifact #4 – Seal of Sorrow
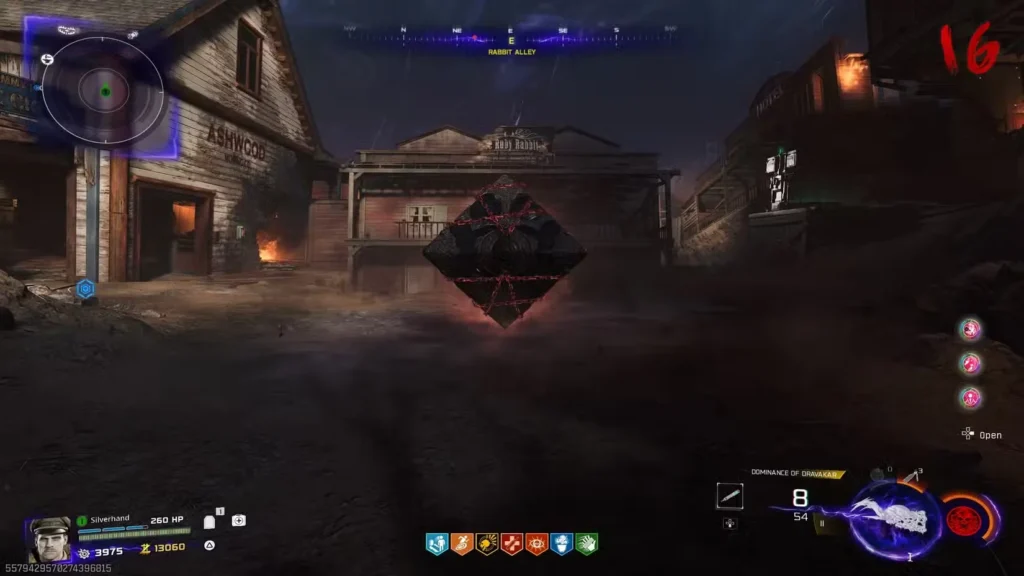
This unlocks automatically as part of main quest progression. Once you’ve found and transferred all 3 Keys (from the artifact above), head to Upper Ashwood’s Rabbit Alley and open the chest. The artifact is yours after the following cutscene.
Artifact #5 – Necrofluid Gauntlet
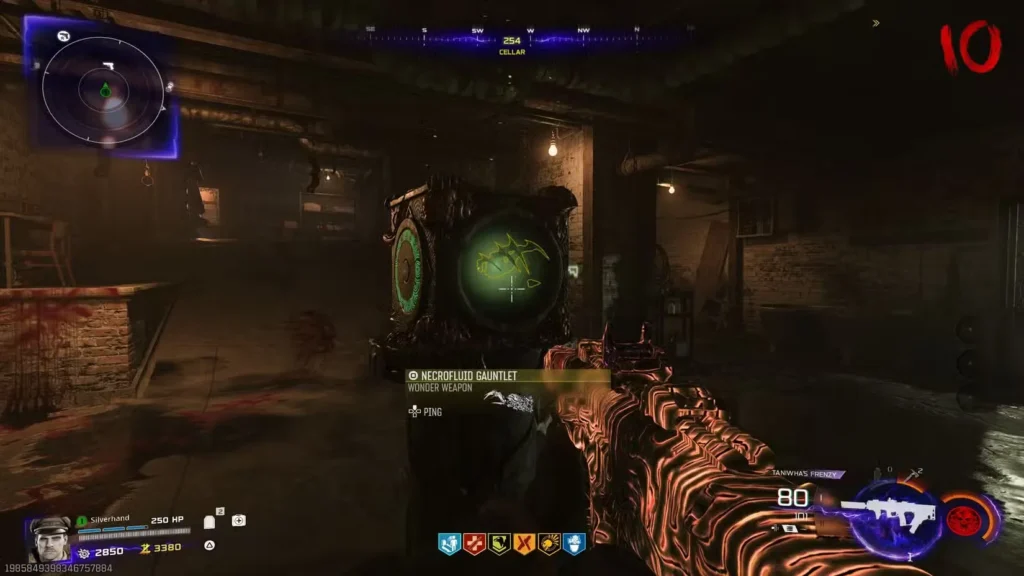
Complete the Necrofluid Gauntlet quest to unlock this. Start by freeing Klaus from the Ashwood Sheriff’s Office (left of Vulture Aid). For full details on the questline, check out our complete Necrofluid Gauntlet guide.
Artifact #6 – Hellion Horn

This is the final puzzle piece. Complete all four trials at Exit 115, Zarya Cosmodrome, Vandorn Farm, and Blackwater Lake. After finishing the Blackwater Lake trial, enter the Cabin’s upstairs room where Speed Cola is located. You’ll see a lockbox covered in wisps. Summon Klaus and bring him to the box, then ping it so he picks up the Hellion Horn.
Pro Tips for Intel Hunting
Take Your Time Early: Don’t rush through the main quest. Many Intel pieces require puzzle completion or main story progression, so you’ll naturally stumble upon them as you play.
Use Cooperative Sessions: Having squadmates helps tremendously when hunting Intel. One person can solve puzzles while others cover defense, making harder-to-reach pieces more achievable.
Mark Your Map: Keep track of which areas have Intel you’ve already grabbed. Ashes of the Damned is massive, and it’s easy to forget which room you’ve cleared.
Related Guides & Resources
Hunting for more than just Intel? Check out these complementary guides:
- Best Weapons for Zombies in Black Ops 7
- Ashes of the Damned Main Easter Egg Guide
- Complete Ashes of the Damned Walkthrough
- Best Field Upgrades for Zombies
- All Prestige Rewards Guide
For community discussions and tips, join the conversation on Reddit’s BO7 community or the official Call of Duty Discord.
Ending Note
Collecting all 26 pieces of Intel in Ashes of the Damned is a genuinely rewarding experience. Beyond the 10,000 XP and the Ol’ Tessie Beams Calling Card, you’ll get the story context that makes the map feel alive. Plus, hunting these collectibles naturally teaches you map knowledge that’ll make you a better Zombies player overall.
Start with the Audio Logs for narrative flow, tackle Documents as you progress, and save the Artifact questlines for when you’re ready for the bigger challenges. Happy hunting!