How to Get Pack-a-Punch Running in Black Ops 7’s Massive New Zombies Map
If you’ve jumped into Call of Duty: Black Ops 7’s latest Zombies experience, you’ve probably noticed something different right away: Ashes of the Damned is absolutely massive. This Dark Aether adventure represents the biggest Zombies map Treyarch has ever created, complete with genuinely creepy enemies (yes, including that nightmare-fuel zombified bear called Zursa) and an Easter Egg quest that’ll test even veteran players.
But here’s the thing that caught me off guard—activating Pack-a-Punch works completely differently this time around. Instead of finding a stationary machine somewhere on the map, you’re actually turning your trusty Wonder Vehicle, Ol’ Tessie, into a mobile upgrade station. Pretty genius when you think about it, especially for a map this size.
Let me walk you through exactly how to get this set up, because honestly, getting Pack-a-Punch online should be your absolute priority when you first load in.
Why This Pack-a-Punch System Actually Makes Sense
Before we dive into the steps, let’s talk about why Treyarch went this route. In previous Zombies maps, you’d trek across the entire location every time you needed to upgrade a weapon. On a map as sprawling as Ashes of the Damned, that would get old fast. By mounting the Pack-a-Punch to Ol’ Tessie, you’ve essentially got a mobile armory that goes wherever you do. It’s a quality-of-life change that shows the developers were really thinking about player experience.
Step-by-Step: Activating Your Mobile Pack-a-Punch Machine
Step 1: Rescue T.E.D.D.’s Head from the Server Room
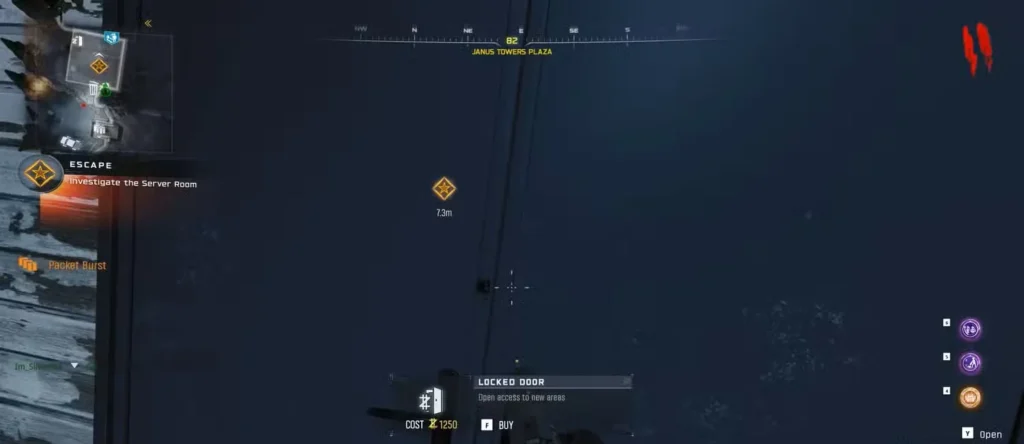
What you need: 1,250 Essence
Your first objective is heading to the Server Room, which you’ll find tucked away in the southeastern corner of Janus Towers Plaza. Once you’ve scraped together enough Essence to unlock the door, head inside and look for a grate on the floor. Give it a good melee hit to break it open, and you’ll find T.E.D.D.’s Head sitting there.
Quick tip: Don’t sleep on earning that initial Essence. Focus on getting headshots and clearing the early rounds efficiently—every kill counts toward unlocking this crucial first step.
Grab the head and make your way outside to where Ol’ Tessie is parked (conveniently right outside the Server Room). Interact with the vehicle to install T.E.D.D.’s Head, and boom—you’ve now got a drivable vehicle that’s about to become your best friend.
Step 2: Road Trip to Vandorn Farm

Now comes the fun part: smashing through that wooden barricade in the starting area like you’re auditioning for an action movie. Follow the path that opens up, and it’ll lead you straight to Vandorn Farm.
Here’s where things get tricky: On the western side of Vandorn Farm, you’ll spot a Power Pump that’s been infested with those gross Cysts. Your mission is to destroy all of them within 30 seconds.
Pro strategy points:
- Bring a weapon with good crowd control or area damage
- Don’t get greedy trying to train zombies while doing this—focus solely on the Cysts
- If you mess up the timing, don’t panic; you can retry next round (though you’ll kick yourself for wasting time)
Once you’ve cleared the infestation, head into the barn and climb to the top floor. Flip the power switch up there, and you’ve successfully restored power to Vandorn Farm. One down, one to go.
Step 3: Continue to Ashwood and Repeat
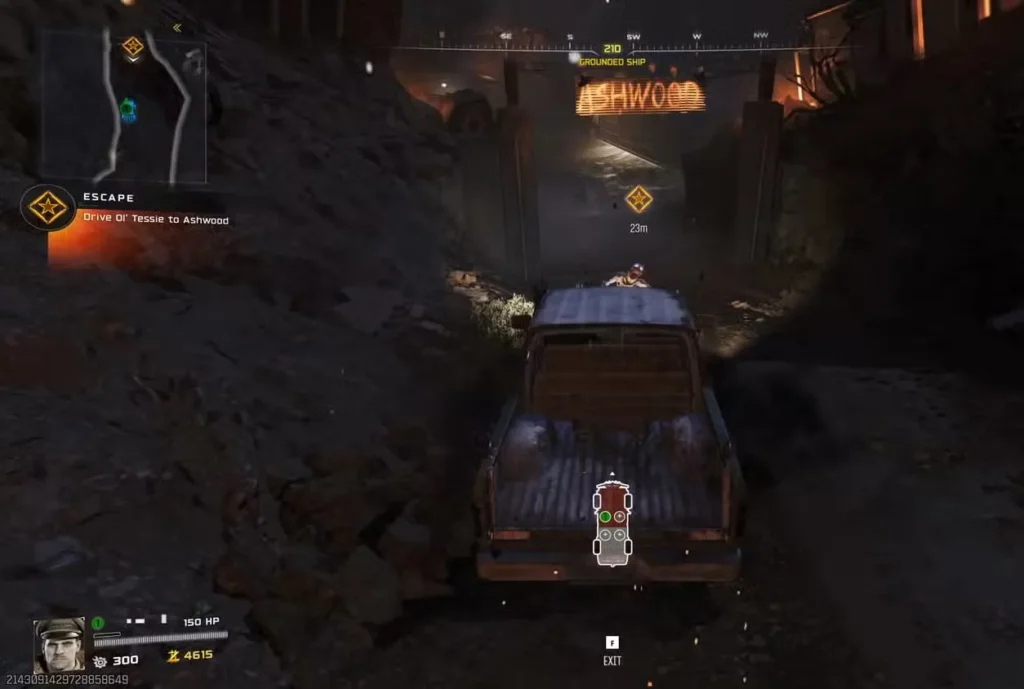
Jump back in Ol’ Tessie and follow the path leading out of Vandorn Farm toward Ashwood. This is where your Essence management becomes important again.
When you arrive at Ashwood, veer left and look for an ascender. Take it up, and you’ll encounter two locked doors:
- First door: 1,000 Essence
- Second door: 1,750 Essence
Yeah, it’s not cheap, but you’re making progress toward one of the most useful tools in Zombies, so it’s worth every point.
Past those doors, you’ll reach a bridge area with another Power Pump surrounded by Cysts. Same deal as before—clear all the Cysts within 30 seconds or prepare to try again next round. Once you’ve handled that, flip the nearby power switch to restore Ashwood’s power.
Step 4: The Grand Finale—Install Pack-a-Punch on Ol’ Tessie
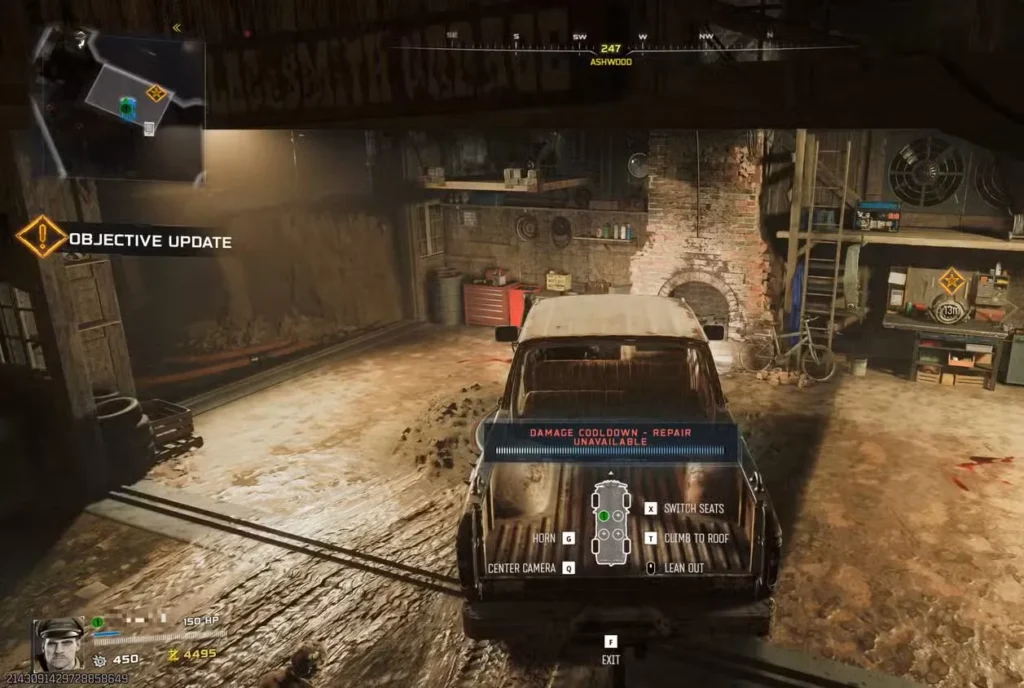
Here’s where all your hard work pays off. With both power stations restored, a garage near Ashwood’s main entrance will automatically open. Head back down the ascender and drive Ol’ Tessie straight into that garage like you own the place.
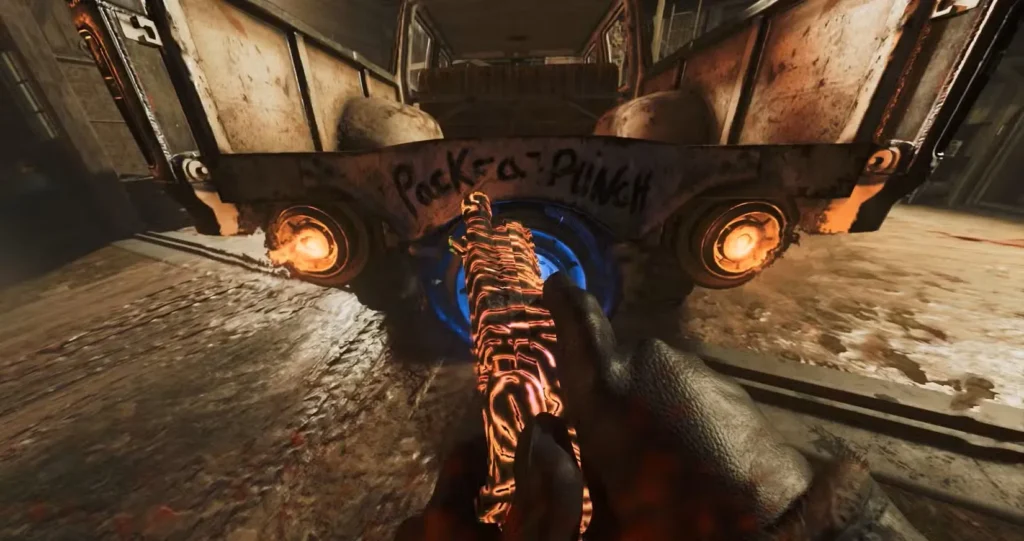
Inside, you’ll find a Vehicle Upgrade Station. Interact with it to install the Pack-a-Punch Machine directly onto Ol’ Tessie. From this moment forward, Ol’ Tessie’s exhaust transforms into a fully functional Pack-a-Punch Machine.
Want to customize your Pack-a-Punch weapon appearance? Check out our Pack-a-Punch Camo Customization Guide to learn how to unlock and apply exclusive camo designs to your upgraded weapons.
What this means for your gameplay: Whenever you need to upgrade your weapons, just head to the back of Ol’ Tessie. No more dangerous cross-map journeys during high rounds. You can park near wherever you’re training zombies and upgrade between rounds safely.
Bonus insight: This Vehicle Upgrade Station isn’t just for Pack-a-Punch. You’ll use this same location for all future Ol’ Tessie upgrades you discover throughout your Zombies journey, so remember where it is.
Additional Tips for Ashes of the Damned Success
Now that you’ve got Pack-a-Punch sorted, here are some extra pointers that’ll help you survive longer in this massive map:
Map navigation:
- Ashes of the Damned is genuinely huge—take time in early rounds to learn the layout
- Keep mental notes of which paths connect where; you don’t want to get lost during a panic moment
- Ol’ Tessie can be a lifesaver for quick escapes, not just Pack-a-Punch access
Essence management:
- Those door costs add up fast (you’re looking at nearly 4,000 Essence just for this process)
- Prioritize headshots and melee kills in early rounds for maximum Essence gain
- Don’t blow your Essence on random wall weapons before completing these steps
Dealing with the Cyst challenges:
- Both 30-second windows can be stressful, especially solo
- Consider using equipment like grenades to speed up Cyst destruction
- In co-op, coordinate with your team so everyone focuses fire on the Cysts
Why Ashes of the Damned Represents a New Era for Zombies
Black Ops 7’s approach to Zombies feels like a genuine evolution of the mode. The Dark Aether storyline has been building momentum, and Ashes of the Damned delivers on both scale and innovation. The mobile Pack-a-Punch is just one example of how Treyarch is rethinking traditional Zombies mechanics for modern gameplay.
The map’s sheer size would normally be intimidating, but quality-of-life features like this mobile upgrade station show the developers understand what works and what frustrates players. It’s these kinds of smart design choices that can make or break the high-round experience.
Ending Note
Getting Pack-a-Punch activated in Ashes of the Damned isn’t complicated once you know the steps, but it does require some planning and Essence management. The payoff is absolutely worth it—having a mobile Pack-a-Punch machine fundamentally changes how you can approach this massive map.
Don’t let the size of Ashes of the Damned intimidate you. Take it step by step, focus on getting Ol’ Tessie upgraded first, and you’ll be well on your way to tackling that lengthy Easter Egg quest. And hey, at least you’ll look cool driving around in a vehicle with a weapons upgrade station sticking out the back.
Now get out there and show those Dark Aether zombies (and that terrifying Zursa bear) who’s boss!