Navigating the Biggest Zombies Map Ever: Your Wall Buy Location Guide for Black Ops 7
Call of Duty: Black Ops 7 has thrown players into a near-future timeline just a decade after Black Ops 2’s conclusion, and honestly? The Zombies experience alone makes this entry worth the price of admission. Ashes of the Damned isn’t just big—it’s massive, representing the largest Zombies map Treyarch has ever created.
But here’s the problem with a map this enormous: finding the weapons you actually want becomes a legitimate challenge. Unlike smaller maps where you could memorize wall buy locations after a few runs, Ashes of the Damned sprawls across multiple distinct points of interest, each with its own weapon selections. You could wander for rounds trying to locate that specific gun you need.
That’s exactly why I’ve put together this comprehensive guide. Whether you’re looking for a specific weapon to complete your loadout or just trying to understand what’s available in each area, this breakdown covers every single wall buy location across the entire map. And trust me, knowing where these weapons are can be the difference between a smooth high-round run and a frustrating scramble for firepower.
Why Wall Buys Still Matter in Black Ops 7
Before we dive into specific locations, let’s talk about why wall buys remain crucial despite the Mystery Box and other weapon acquisition methods. Wall buys offer several advantages that smart players exploit:
Consistency and reliability:
- You always know exactly where to find them
- No RNG luck required like with the Mystery Box
- Perfect for emergency weapon pickups during intense rounds
- Great for refilling ammo on upgraded weapons without breaking the bank
Strategic positioning:
- Often located near high-traffic training areas
- Can be accessed quickly when you’re in trouble
- Some locations coincide with perk machines and utilities
Economy management:
- Generally cheaper than spinning the Mystery Box multiple times
- Predictable Essence spending lets you plan your economy better
- Buying ammo is more cost-effective than replacing weapons entirely
Now, knowing which wall buys exist is one thing, but understanding where they are in this sprawling map is what separates beginners from veterans. Let’s break down every location by point of interest.
Janus Towers Plaza: Your Starting Arsenal
The Janus Towers Plaza serves as your spawn area and first impression of Ashes of the Damned. Fortunately, it offers two solid weapon choices right out of the gate, though you’ll probably want to move on relatively quickly.
CODA 9 (Submachine Gun)

Location details: Head to the far north side of Janus Towers Plaza—it’s immediately to your right as you spawn into the match. You literally can’t miss this one if you turn right at the start.
Why consider it: The CODA 9 is a decent early-game pickup if you’re struggling with your starting weapon. Its high fire rate makes clearing the initial zombie hordes manageable, though you’ll want to upgrade this quickly if you plan to keep it past round 10.
Warden 308 (Marksman Rifle)
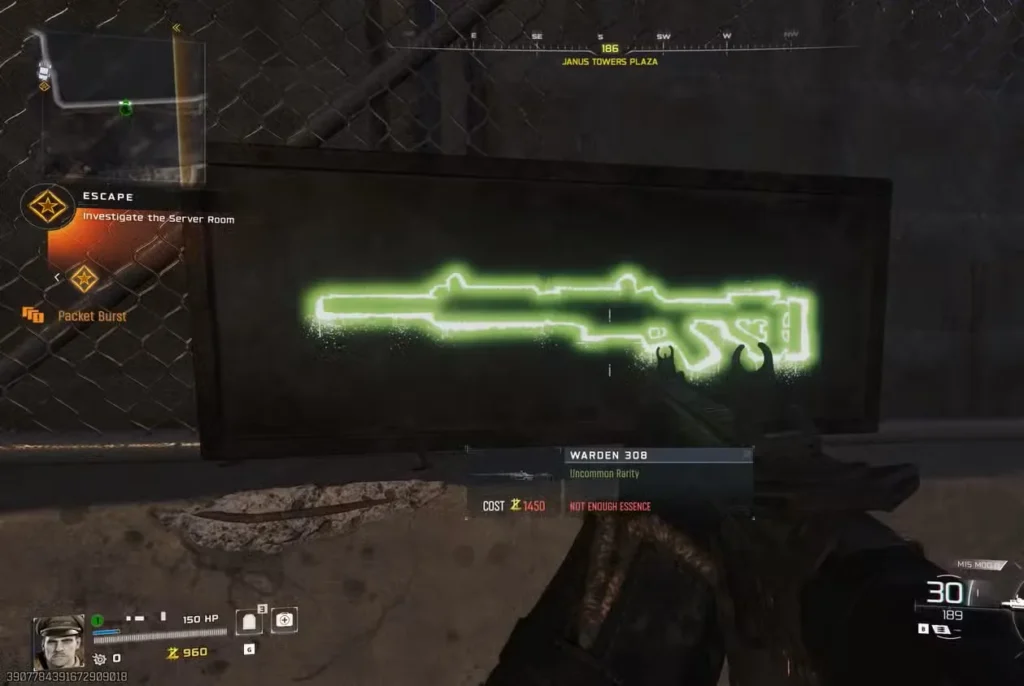
Location details: Look to the western side of Janus Towers Plaza, just before the exit that leads toward Blackwater Lake. It’s positioned strategically on your path out of the starting area.
Strategic value: Marksman rifles occupy an interesting space in Zombies—they offer better range and damage than SMGs but handle faster than snipers. If you’re planning to post up and control lanes early, the Warden 308 is a solid choice before you find something better.
Pro tip: Don’t blow all your Essence on these starting wall buys unless you absolutely need to. Both weapons are serviceable, but you’ll find better options as you venture deeper into the map.
Vandorn Farm: Essential Early-Game Stops
Vandorn Farm is where your adventure really begins, and it’s also where you’ll restore power during the Pack-a-Punch activation process. This location features some genuinely useful wall buys that you should definitely consider.
Echo 12 (Shotgun)

Location details: Find this on the far right side of Vandorn Farm, right next to the Ammo Cache near the Power Pump. Here’s the best part—you don’t need to spend any Essence opening doors to reach it.
Gameplay application: Shotguns in Black Ops 7 Zombies are surprisingly effective, especially when Pack-a-Punched. The Echo 12 excels at close-quarters training and can one-shot zombies at higher rounds when properly upgraded. If you’re planning to train in tighter spaces, this is your friend.
Level II & III Armor Vests
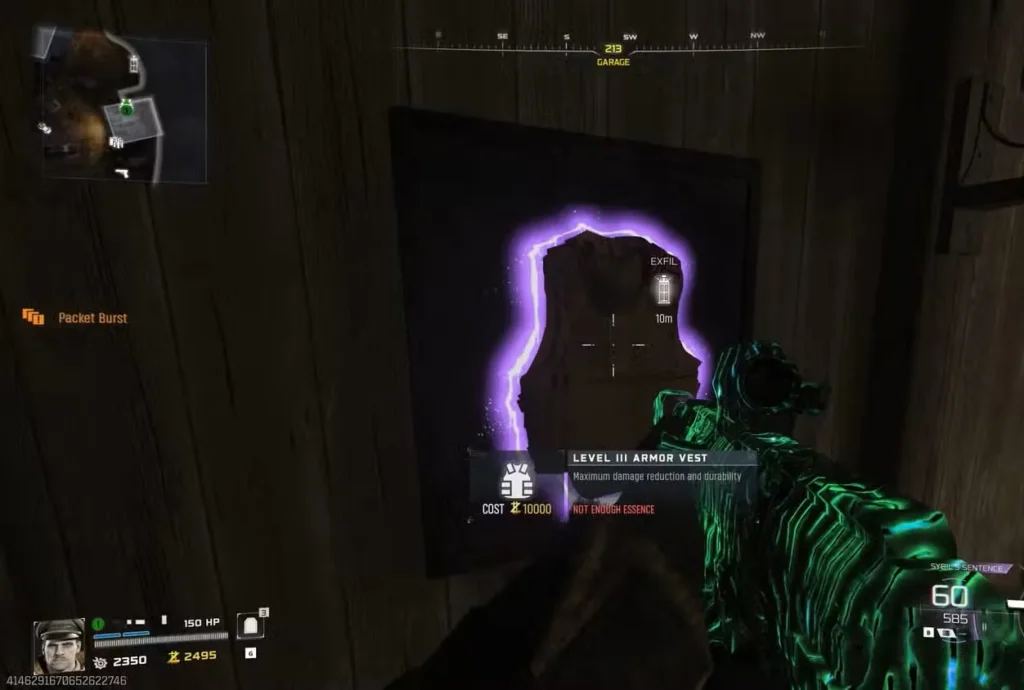
Location details: Located in the garage at Vandorn Farm, which doesn’t require Essence to open. Look for the Ammo Cache outside—that’s your landmark. This area also serves as a potential Mystery Box spawn location.
Critical importance: Armor is non-negotiable for survival in higher rounds. Knowing where these vests are located across the map means you can grab fresh armor without desperately searching when your current vest is about to break. Bookmark this location mentally.
Ryden 45K (Submachine Gun)
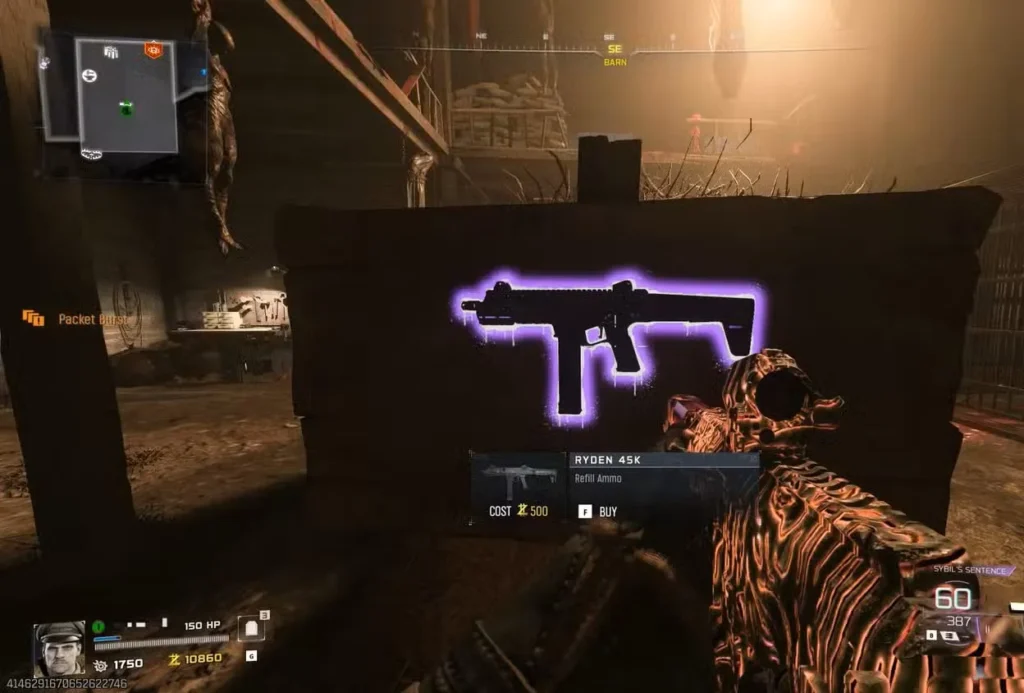
Location details: Inside the barn at Vandorn Farm. You’ll naturally unlock this area when restoring power to the point of interest, so you can’t miss it.
Weapon profile: The Ryden 45K offers mobility and decent damage output. It’s a strong all-around SMG that works well for aggressive players who like to stay mobile while training zombies. The ammo capacity is solid, meaning fewer trips back to refill.
Peacekeeper Mk1 (Assault Rifle)
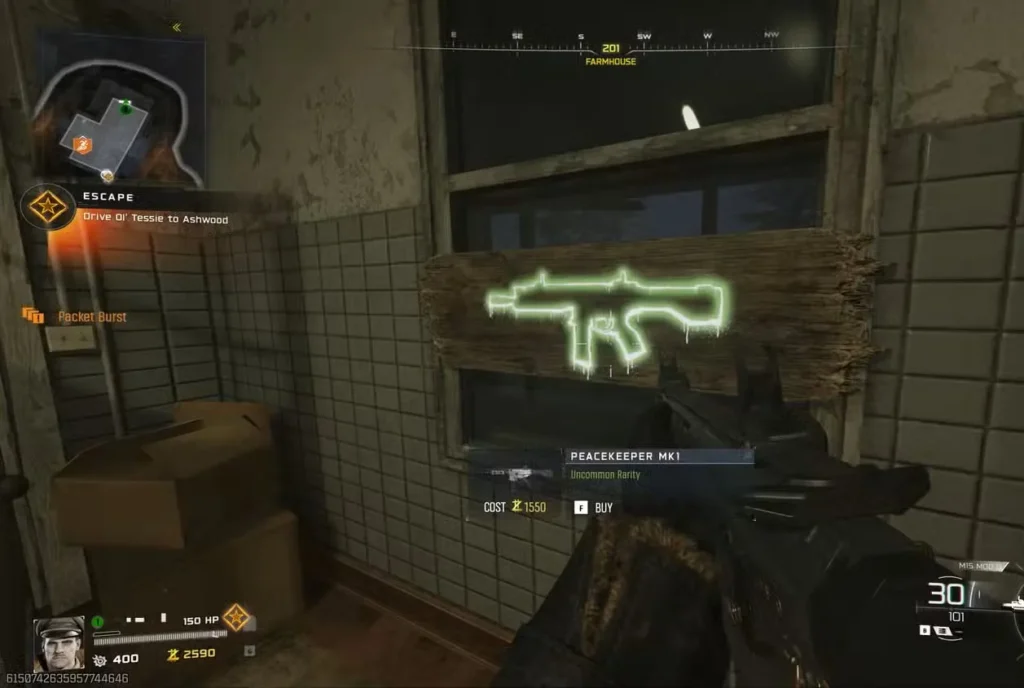
Location details: Ground floor of the farmhouse at Vandorn Farm. Unlike some other wall buys here, you’ll need to spend Essence to unlock the door first.
Worth the investment? The Peacekeeper Mk1 is actually one of the better assault rifles available via wall buy. It balances damage, fire rate, and handling nicely. If assault rifles are your preferred weapon class, spending the Essence to access this one is justified.
Blackwater Lake: Diverse Options Near the Pyramid
Blackwater Lake offers an interesting mix of weapon types and includes that mysterious pyramid structure that’s central to the map’s atmosphere. This area gives you access to some solid mid-range options.
Level II & III Armor Vests
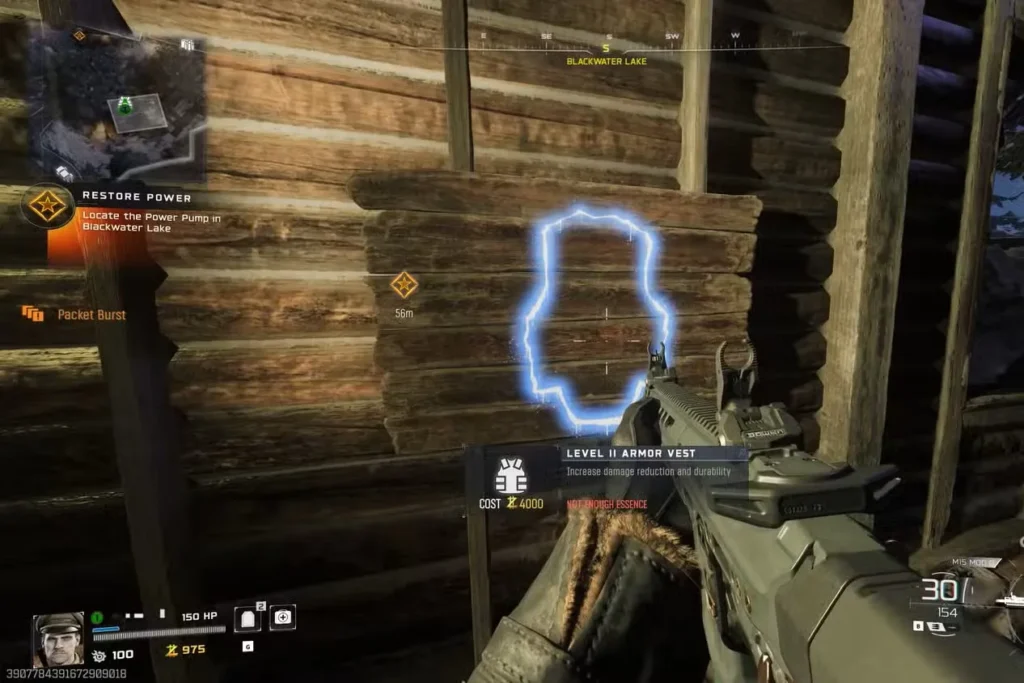
Location details: North side of Blackwater Lake, inside a small wooden shed just right of the road coming from Janus Towers Plaza. No doors to unlock—just walk right in.
Strategic positioning: This armor vest location is perfectly positioned for players pushing toward the frozen lake area. Grab fresh armor here before engaging in the more dangerous central areas of the map.
M8A1 (Marksman Rifle)
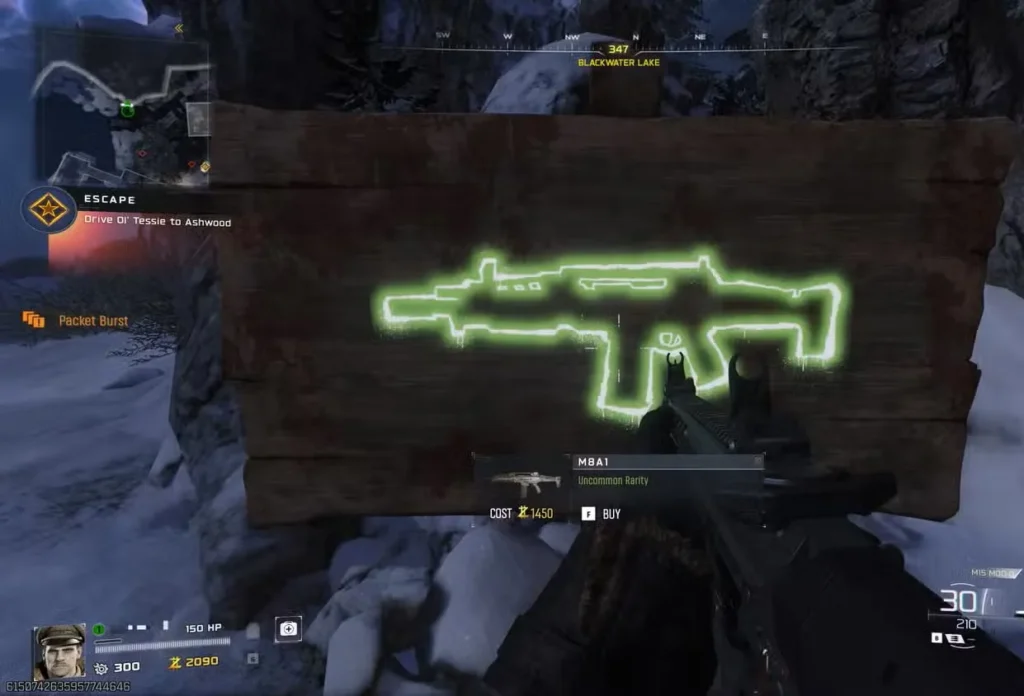
Location details: Just ahead of the armor vest location, toward the frozen lake that borders the pyramid.
When to use it: The M8A1 is a reliable marksman rifle that works well for players who prefer controlled, accurate shots over spray-and-pray tactics. If you’re holding down a position with good sightlines, this weapon delivers consistent damage.
M10 Breacher (Shotgun)
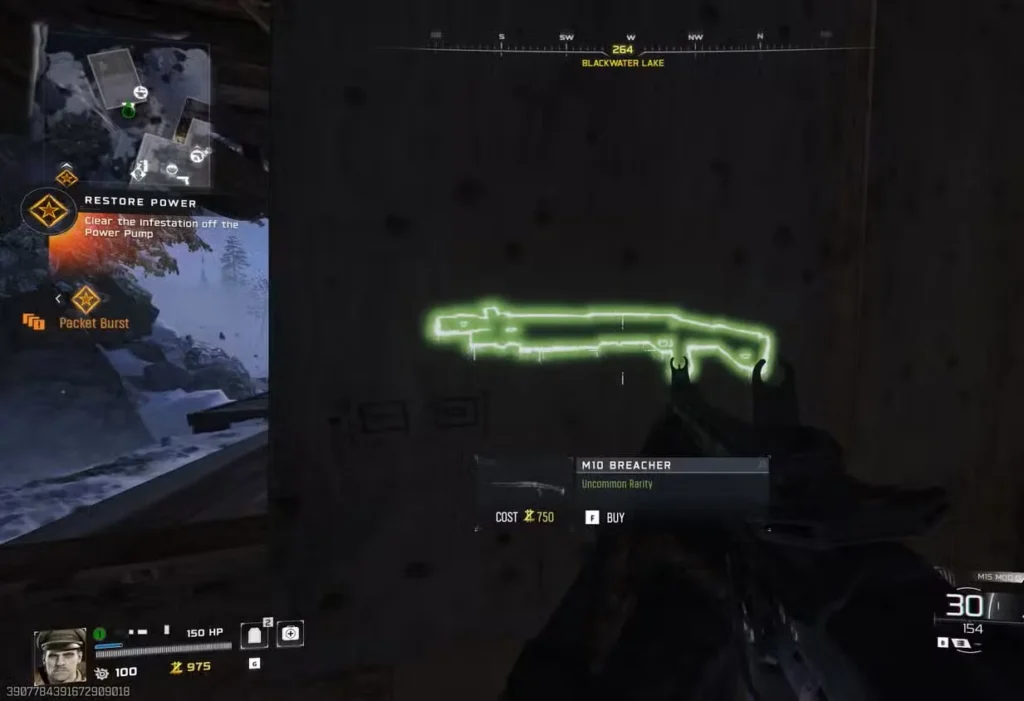
Location details: Outside of a shed in the southwestern corner of Blackwater Lake. You’ll also find a Crafting Bench here, making it a useful utility stop.
Dual purpose location: The presence of both a shotgun wall buy and Crafting Bench makes this corner worth visiting. Stock up on equipment, grab the M10 if needed, and continue your journey.
Dravec 45 (Submachine Gun)
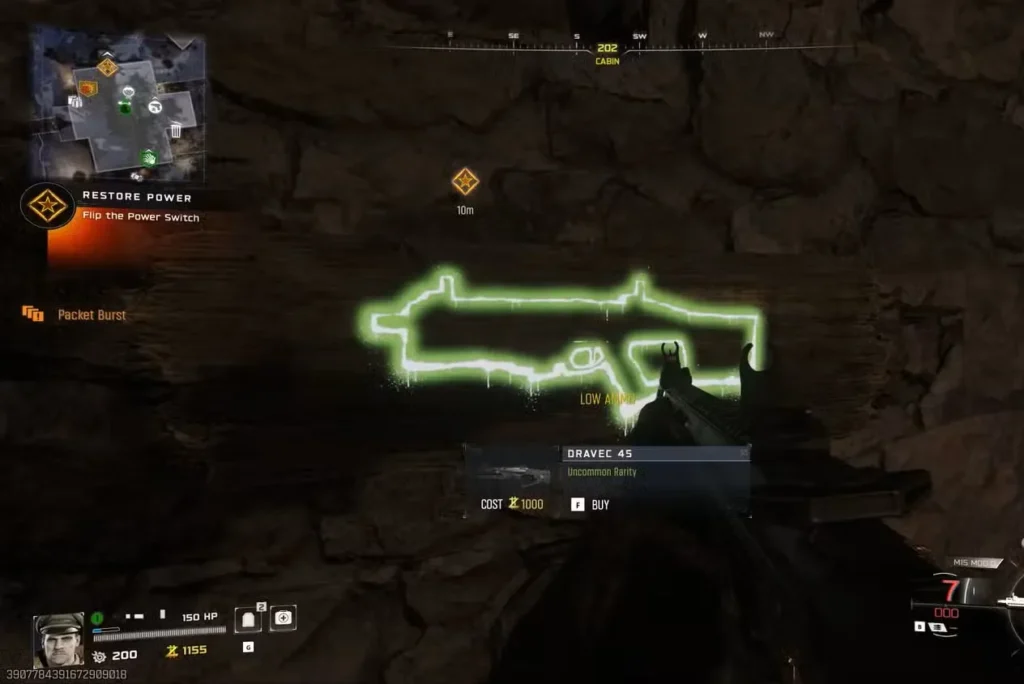
Location details: Ground floor of the cabin at Blackwater Lake. You’ll need to spend Essence to open the cabin—this is the same building where you restore power to this point of interest.
Context matters: Since you’re already visiting this cabin for the power switch, checking out the Dravec 45 makes sense. It’s another solid SMG option if you prefer that weapon class over what you’re currently carrying.
Ashwood: The Weapon Wonderland
Ashwood is where things get interesting. This point of interest packs more wall buy variety than any other location on the map, including access to some legitimately powerful weapons. If you’re shopping for upgrades, Ashwood is your destination.
Akita (Assault Rifle)

Location details: Northeastern corner of Ashwood, accessible via ascender. Located in the Ashwood Sheriff’s Office, behind the locked door to the left of the Vulture Aid Perk Machine.
Access requirements: You’ll need Essence for that locked door, but the Akita is worth considering if assault rifles fit your playstyle. The Sheriff’s Office location is pretty memorable once you’ve visited it.
Level II & III Armor Vests
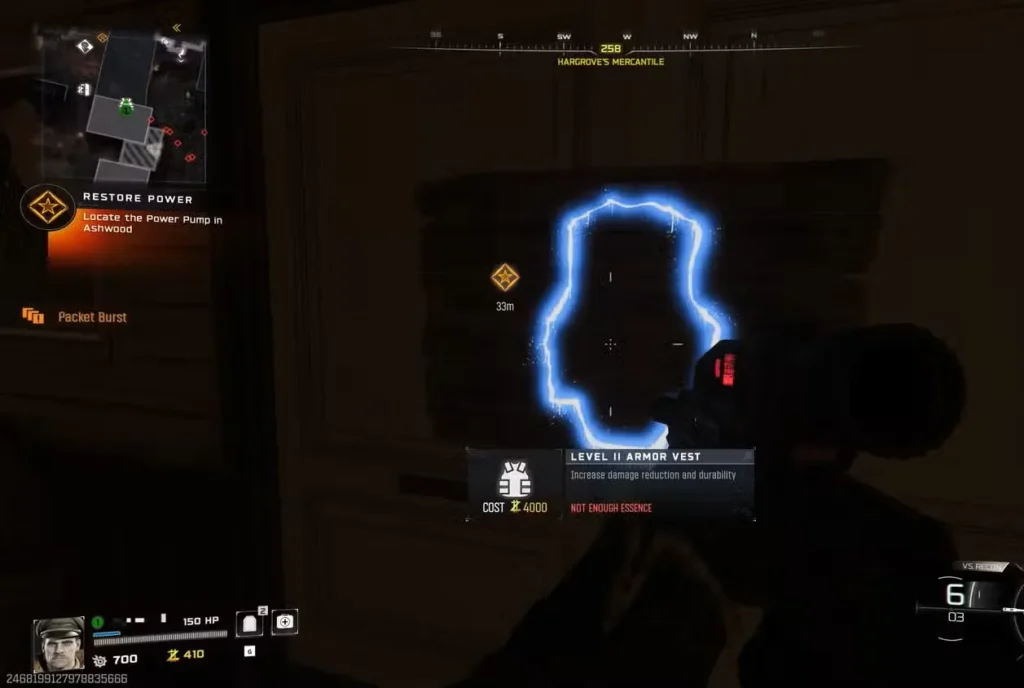
Location details: Hargrove’s Mercantile, accessible by opening the area either from Ashwood Bridge or by purchasing the locked door to the right of the Vulture Aid Perk Machine.
Multiple entry points: The fact that you can reach this armor location from two different directions makes it convenient regardless of which path you take through Ashwood. Always good to know where your closest armor source is.
VS Recon (Sniper Rifle)
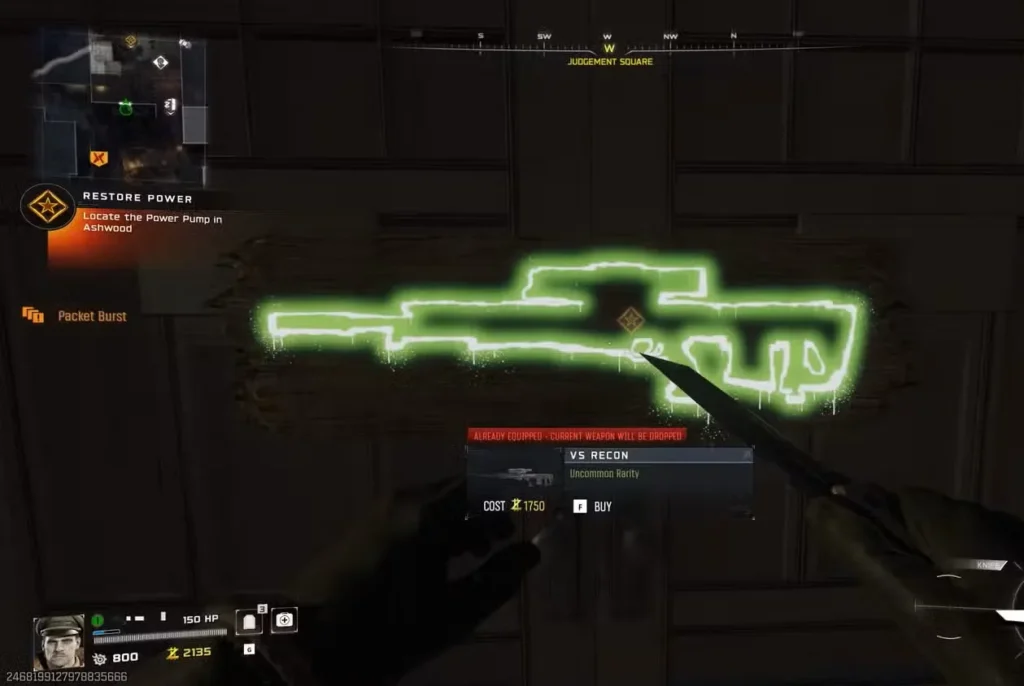
Location details: Judgement Square, accessible just ahead of Hargrove’s Mercantile. The wall buy sits atop a staircase to the left of the barricade leading to Ashwood Bridge. Double Tap Perk Machine is also in this area.
Major find alert: The VS Recon is one of the best snipers in Black Ops 7, as we covered in our multiplayer loadout guide. Finding it as a wall buy in Zombies is fantastic news for players who can land headshots consistently. This weapon absolutely shreds when Pack-a-Punched, offering reliable one-shot kills well into higher rounds with proper aim.
Pro strategy: The proximity to Double Tap makes this an ideal shopping stop. Grab the VS Recon, purchase Double Tap, and you’ve got a lethal combination for mowing down zombies.
X9 Maverick (Submachine Gun)
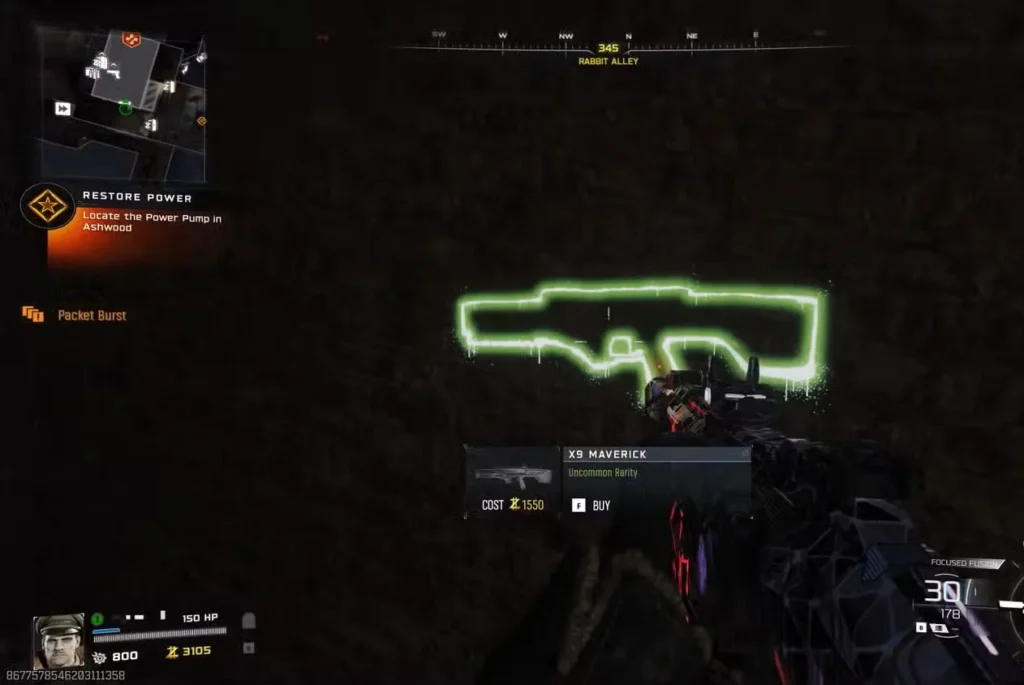
Location details: Ruby Alley, on the wall to the right of The Ruby Rabbit bar. Accessible either by crossing Ashwood Bridge or taking the zipline from Judgement Square.
Mobility option: Another SMG choice for players who prioritize movement speed and handling. Ruby Alley becomes a frequent travel route once you’re familiar with Ashwood’s layout, making this a convenient grab-and-go option.
M34 Novaline (Assault Rifle)
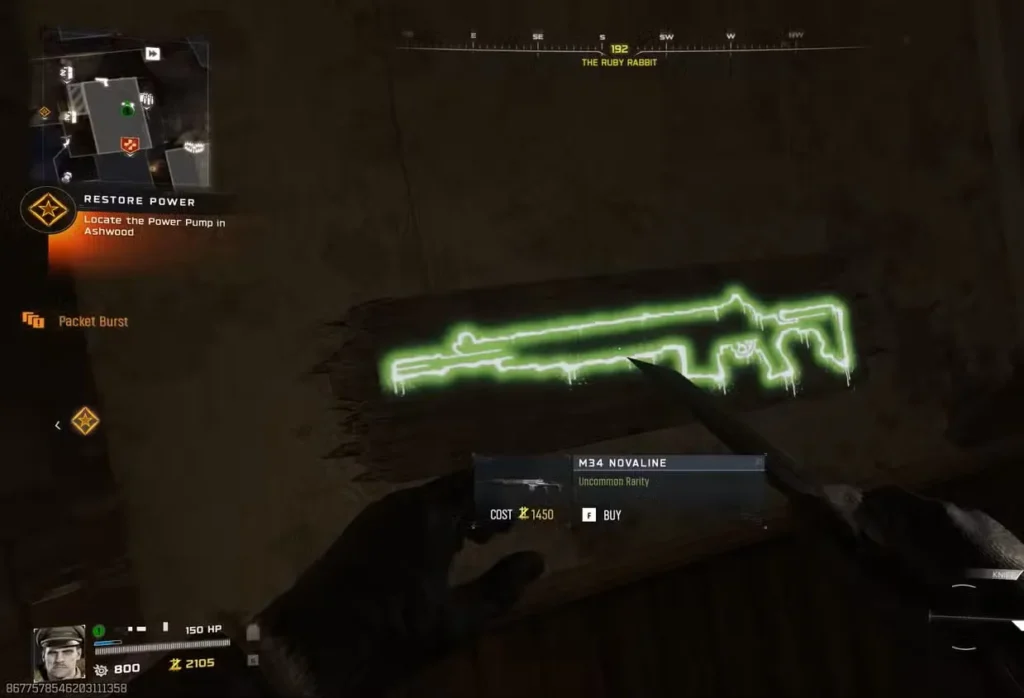
Location details: Second floor of The Ruby Rabbit bar on Ashwood’s western side. You’ll need Essence to enter the bar, accessible from either Ruby Alley or Ashwood Bridge. The Jugger-Nog Perk Machine shares this building.
Premium package: Any location with Jugger-Nog automatically becomes essential in your route. While you’re here getting arguably the most important perk in Zombies, checking out the M34 Novaline makes perfect sense. It’s a capable assault rifle that holds its own through mid-to-high rounds.
Exit 115: The Highway Arsenal
Exit 115 serves as a transitional area between Ashwood and Zarya Cosmodrome, and it’s packed with useful wall buys. The highway setting provides natural training areas, making the weapon locations here quite strategic.
Shadow SK (Sniper Rifle)
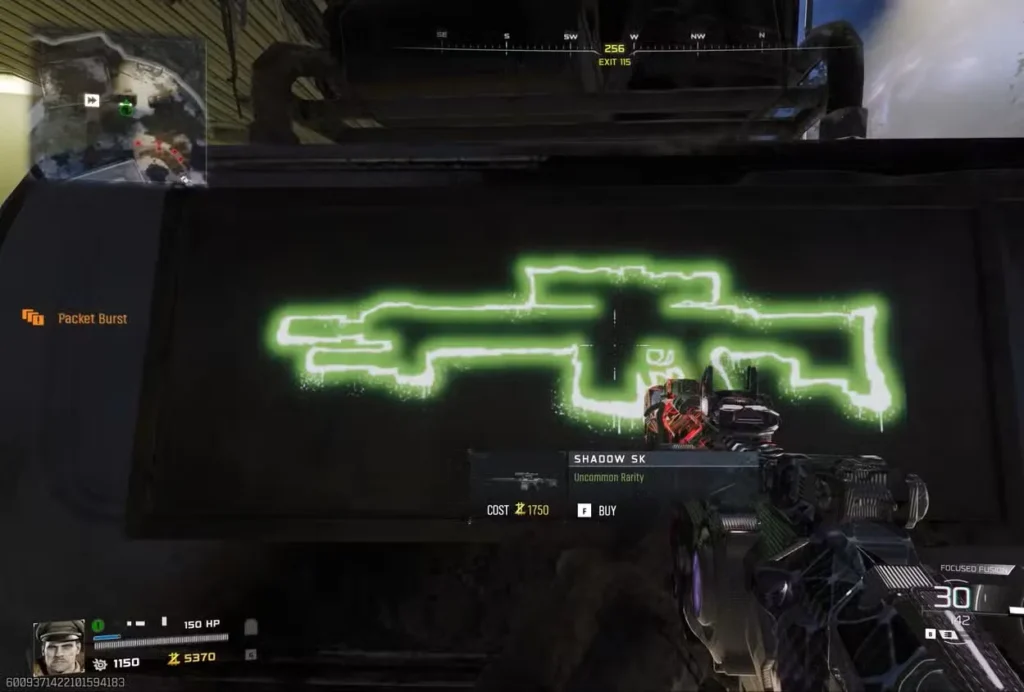
Location details: Western side of Exit 115, just toward the road leading back to Ashwood.
Weapon characteristics: The Shadow SK is that semi-automatic sniper we discussed in our multiplayer guide. In Zombies, its faster fire rate compared to bolt-actions gives you more margin for error. Miss a headshot? Fire again immediately. Facing multiple zombies? The Shadow SK lets you engage them faster than traditional snipers.
Best use cases: Ideal for players who want sniper damage without committing to the slower bolt-action playstyle. Works exceptionally well when Pack-a-Punched and paired with damage-boosting perks.
XM325 (Light Machine Gun)
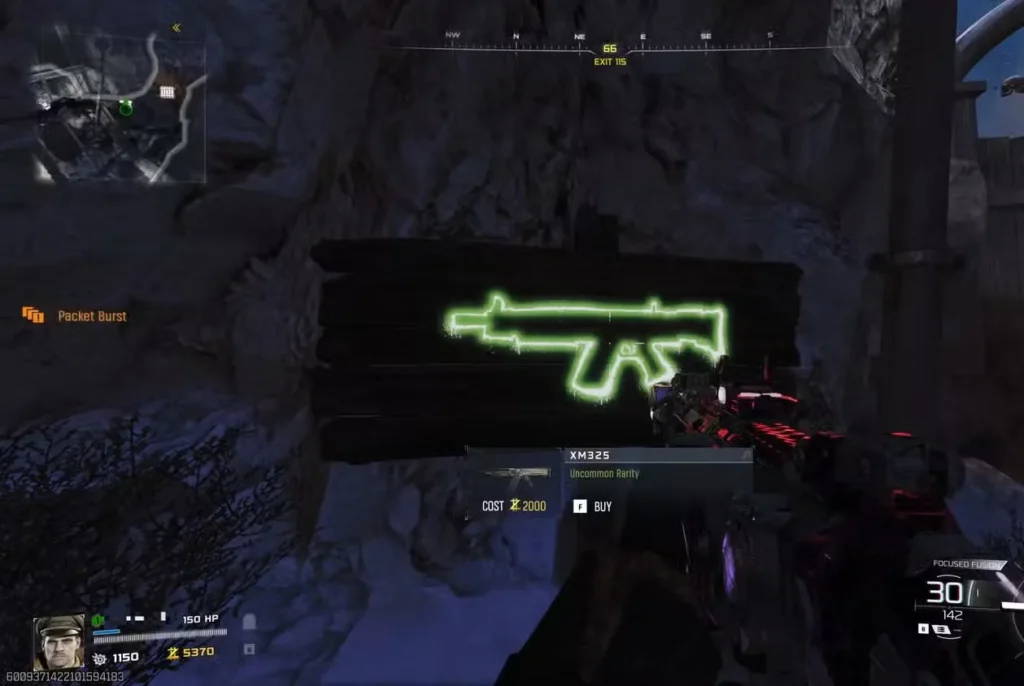
Location details: Road leading to Zarya Cosmodrome, on Exit 115’s southern side.
LMG advantages: Light machine guns in Zombies offer massive ammo pools, letting you spray down zombie hordes without constantly worrying about running dry. The XM325’s magazine capacity means you can train larger groups and eliminate them without reloading mid-horde.
Trade-off consideration: LMGs handle slower than assault rifles or SMGs, so mobility takes a hit. But if you’re setting up defensive positions or training in open areas, that trade-off is worth the firepower.
Level II & III Armor Vests
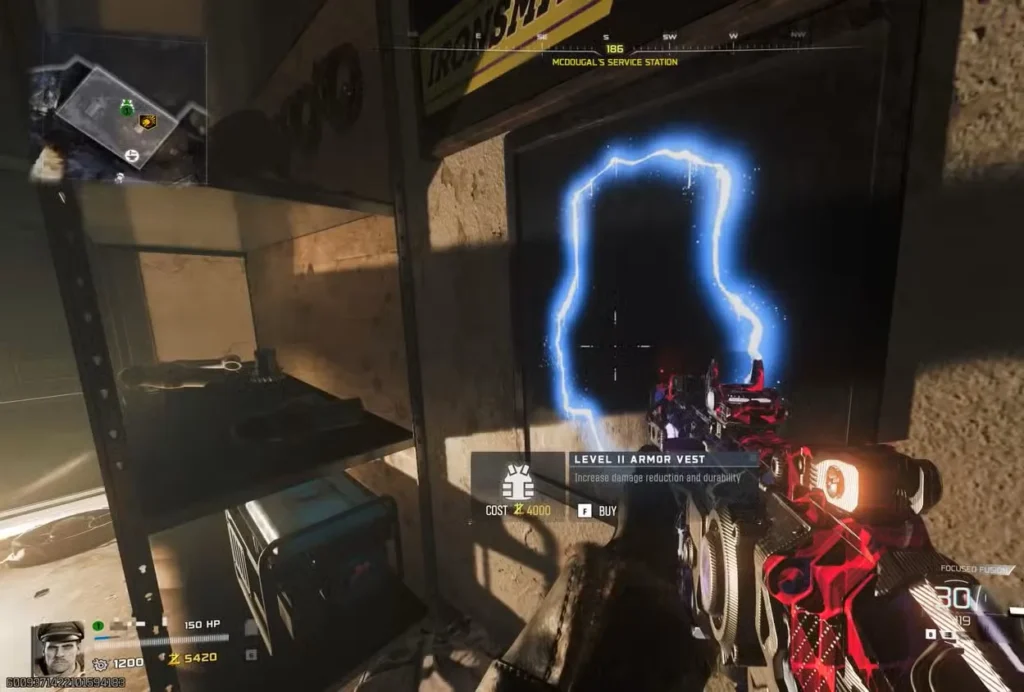
Location details: McDougal’s Service Station toward Exit 115’s southern section. Requires Essence to open, and shares the building with Deadshot Daiquiri.
Perk combo: Deadshot Daiquiri automatically targeting heads pairs beautifully with any precision weapon strategy. Grab armor and Deadshot in one stop—efficiency at its finest.
AK-27 (Assault Rifle)
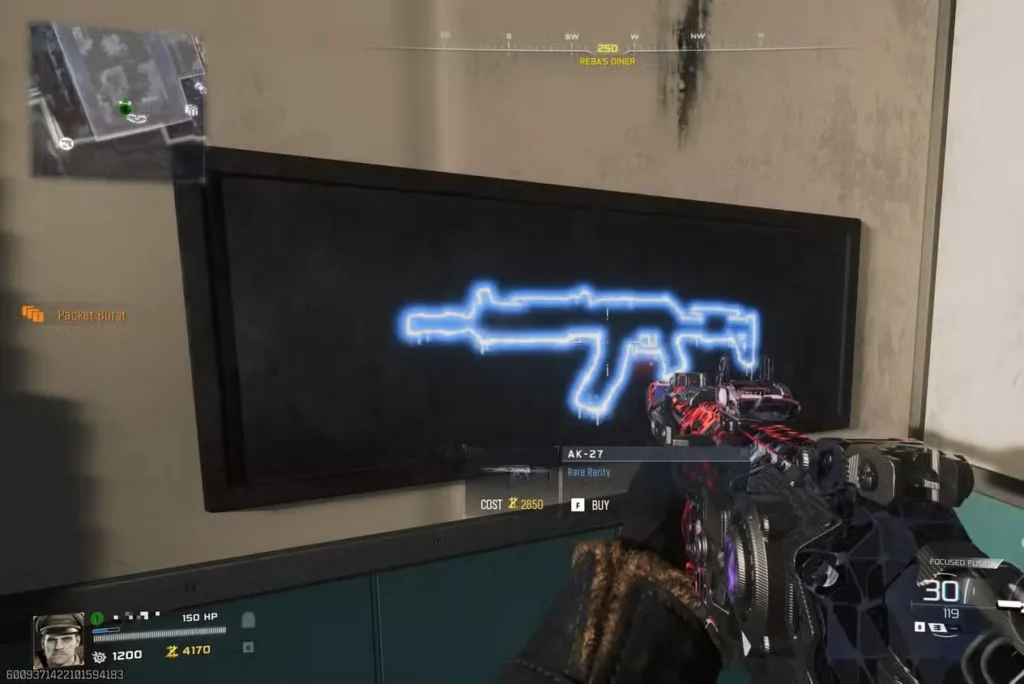
Location details: Reba’s Diner, which also requires Essence to access.
The classic AK: The AK-27 needs no introduction—it’s reliable, powerful, and familiar. If you’re looking for a no-nonsense assault rifle that performs consistently, this is your pick. Pack-a-Punched, it remains viable deep into high rounds.
Zarya Cosmodrome: The Final Frontier
Zarya Cosmodrome represents the map’s furthest reaches and features some interesting weapon choices. This area has a distinctly different atmosphere—more industrial and foreboding than the rural settings you’ve traversed.
DS20 Mirage (Submachine Gun)
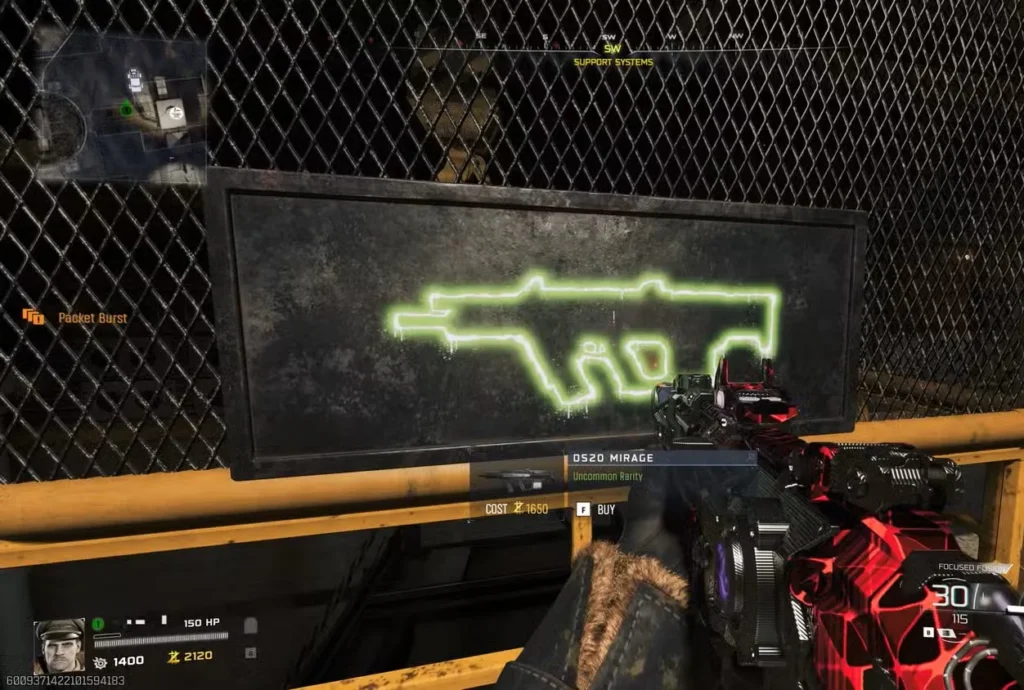
Location details: Support Systems below ground level at Zarya Cosmodrome. Access it from the locked door left of the road leading toward Exit 115 and other barricades.
Underground location: The subterranean positioning makes this less convenient than other wall buys, but if you’re exploring the lower levels or doing Easter egg steps down here, it’s good to know where a weapon option exists.
M15 MOD 0 (Assault Rifle)
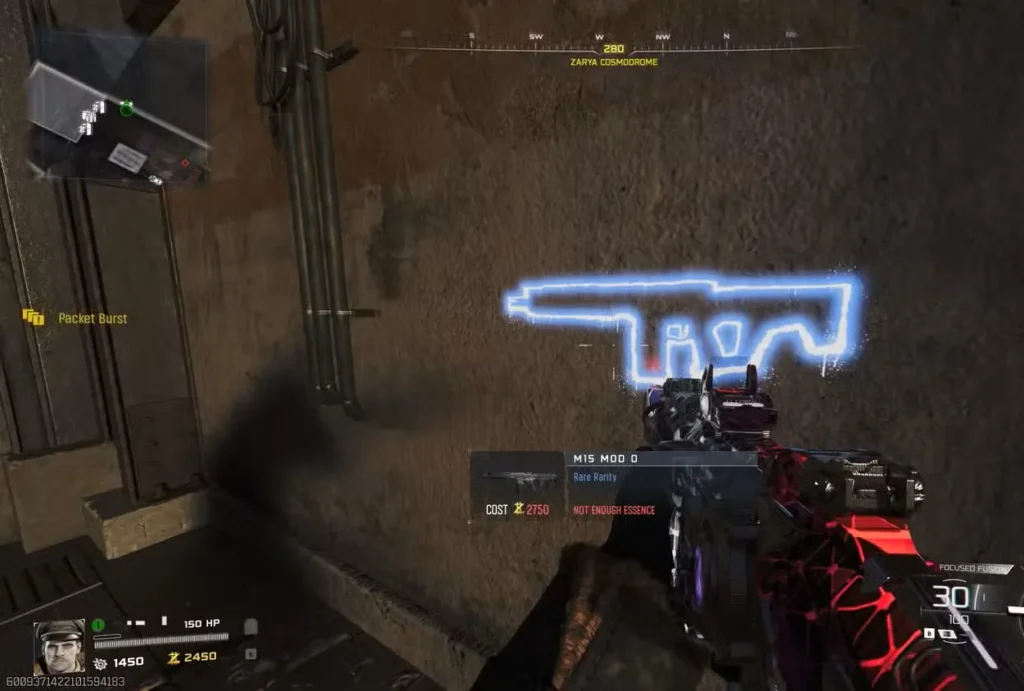
Location details: Southwestern corner of Zarya Cosmodrome, just before Yuri’s Lab and opposite the Zarya Cosmodrome Exfil Point.
Exfil proximity: Being near an exfil point makes this location strategically important. If you’re preparing to extract and need a fresh weapon or ammo, you’re right there. The M15 MOD 0 is a capable assault rifle that won’t disappoint in clutch situations.
XR-3 ION (Sniper Rifle)
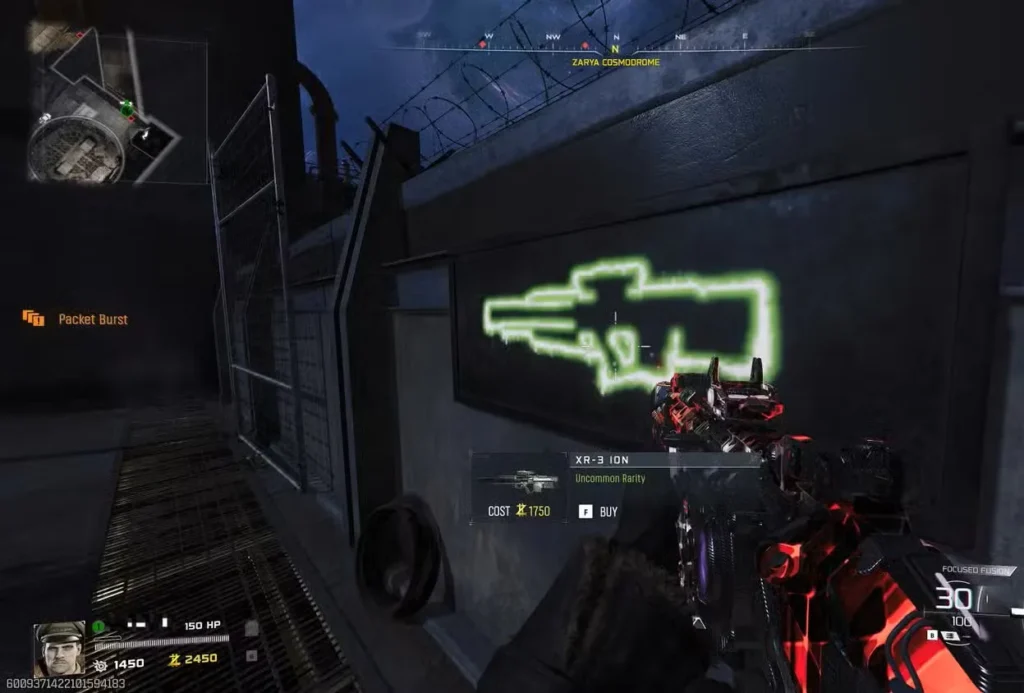
Location details: Northeastern side of Zarya Cosmodrome. Reach it by taking the ascenders from the Flame Trench area.
The burst sniper: Remember the XR-3 Iron from our multiplayer sniper guide? In Zombies, that three-round burst mechanic becomes even more interesting. Each burst can potentially drop multiple zombies if they’re lined up, making it surprisingly effective for clearing groups.
Skill requirement: Like in multiplayer, this weapon demands precision and understanding of its unique firing pattern. But master it, and you’ve got a genuinely fun alternative to traditional snipers.
Level II & III Armor Vests
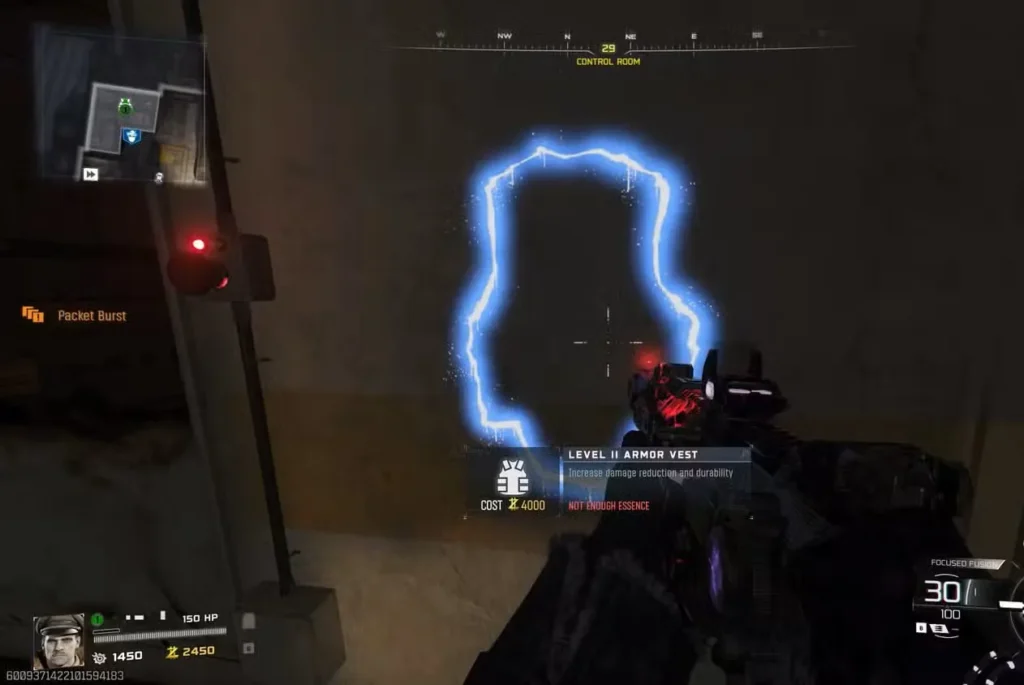
Location details: Control Room on Zarya Cosmodrome’s far north side, just past the Wisp Tea Perk Machine. Good news—this room doesn’t require Essence to access.
Endgame armor: Having a free armor source this deep into the map is clutch for high-round attempts. When you’re pushing your limits and every Essence point matters, not having to pay for door access is a small but meaningful advantage.
Strategic Wall Buy Tips for Ashes of the Damned
Now that you know where everything is, let’s talk about how to actually use this information effectively:
Early Game Strategy (Rounds 1-10)
- Start with the CODA 9 or Warden 308 only if absolutely necessary
- Rush to Vandorn Farm and grab the Ryden 45K or Peacekeeper Mk1
- Don’t over-invest in wall buy weapons before accessing Pack-a-Punch
- Save Essence for door purchases and power activation first
Mid Game Optimization (Rounds 10-25)
- Pick one main wall buy weapon that suits your playstyle
- Know where multiple armor vest locations are—you’ll break vests frequently
- Consider the VS Recon or Shadow SK if you can land headshots consistently
- Stock up on ammo from your chosen wall buy instead of buying new weapons
High Round Preparation (Round 25+)
- Establish a training route that passes near your preferred wall buy
- Memorize the closest armor vest location to your training spot
- Have a backup weapon wall buy in mind if your primary gets overwhelming
- Consider LMGs like the XM325 for their massive ammo pools
Survival Mode Differences
The guide notes that Survival mode features different wall buy locations for each point of interest. This means if you’re playing Survival instead of the standard mode, you’ll need to re-learn some locations. The core strategy remains the same, but don’t assume weapons are in identical spots.
Creating Your Personal Wall Buy Route
Here’s a practical exercise: plan your ideal route through Ashes of the Damned based on your playstyle.
For aggressive SMG players:
- Start → Vandorn Farm (Ryden 45K)
- → Blackwater Lake (armor vest)
- → Ashwood (X9 Maverick + perks)
- → Train wherever you prefer with consistent SMG access
For precision sniper players:
- Start → Push through to Ashwood quickly
- → Grab VS Recon in Judgement Square
- → Get Double Tap nearby
- → Set up positions with long sightlines
- → Know where Shadow SK and XR-3 ION are as backups
For balanced assault rifle players:
- Start → Vandorn Farm (Peacekeeper Mk1)
- → Ashwood (M34 Novaline or Akita as backup)
- → Exit 115 (AK-27 for variety)
- → Flexible training with multiple AR options
The Bigger Picture: Wall Buys in Your Overall Strategy
Wall buys are just one piece of the Ashes of the Damned puzzle. They work best when integrated with:
- Pack-a-Punch access: Once you’ve got Ol’ Tessie upgraded with Pack-a-Punch, your wall buy weapons become exponentially more powerful
- Perk machine routes: Plan wall buy stops around essential perks like Jugger-Nog, Speed Cola, and Double Tap
- Mystery Box spawns: Wall buys are reliable, but sometimes the Box gives you Wonder Weapons that outclass everything
- Crafting benches and utilities: Combine weapon purchases with equipment crafting for complete loadout management
Mastering the Map Through Knowledge
Ashes of the Damned’s size can be overwhelming at first, but knowing where every wall buy is located transforms that overwhelming feeling into strategic opportunity. Instead of wandering aimlessly hoping to stumble upon a weapon you need, you can confidently navigate to specific locations and build your loadout intentionally.
The beauty of Black Ops 7’s Zombies experience is that it rewards both exploration and preparation. This wall buy guide gives you the preparation—now go explore and experiment with different weapon combinations until you find what works for your personal playstyle.
Whether you’re grinding for high rounds, completing Easter eggs, or just enjoying the Dark Aether atmosphere, having instant access to the right weapon at the right time makes all the difference. Bookmark this guide, reference it during your runs, and before long you’ll have these locations memorized naturally.
Now get out there and show those undead exactly why wall buys remain a Zombies staple after all these years!