All Perk-a-Cola Locations in Astra Malorum (Black Ops 7 Zombies)
Black Ops 7 Zombies is taking the undead experience to literal new heights with Astra Malorum, an interstellar map set in orbit around Saturn within the Dark Aether. If you thought Ashes of the Damned was intense, wait until you’re fighting zombies while floating above a gas giant.
When you first land on Astra Malorum, survival becomes your immediate priority – and that means locating your essential Perk-a-Cola machines ASAP. Whether you’re a Jugger-Nog loyalist or someone who can’t function without Speed Cola, knowing where to find these lifesaving beverages can mean the difference between exfiling successfully and becoming zombie food.
This guide covers all 6 on-map Perk-a-Cola locations plus the Der Wunderfizz machine, which unlocks access to the remaining 7 perks. Let’s navigate this space station and get you properly equipped for high-round survival.
Quick Navigation: Astra Malorum Perk Locations
Before we dive into detailed descriptions, here’s a quick reference for all perk locations on the map:
- Quick Revive → Crash Site (spawn area)
- Jugger-Nog → The Luminarium (left path from spawn)
- Speed Cola → Museum Infinitum (right path from spawn)
- Stamin-Up → Archives of Orbis (through Museum Infinitum)
- Mule Kick → The Veilwalk (past Archives)
- Wisp Tea → Abyssal Rim (left path through Luminarium)
- Der Wunderfizz → Stargazer’s Courtyard (center of map, unlocks after obtaining 4 perks)
If you’re planning your best loadout for Astra Malorum, make sure to coordinate your perk selection with your weapon choices and field upgrades.
Quick Revive Location – Crash Site (Spawn Area)
Location: Crash Site (East side when facing outward from spawn)
Quick Revive is positioned right in your starting area, making it one of the most accessible perks on the map – at least visually. However, there’s a catch that might frustrate solo players.
How to Access Quick Revive:
Even though you can see Quick Revive immediately upon spawning, you cannot purchase it until you’ve turned on the power and activated Pack-a-Punch. This applies to all player counts, including solo mode, which is unusual compared to previous zombies maps where Quick Revive was always available from Round 1.
This design choice forces players to explore the map and complete core objectives before securing their self-revive safety net. It’s a smart way to prevent players from camping spawn indefinitely, but it does add early-game risk.
Strategic Tip: Don’t panic about the delayed Quick Revive access. Focus on farming essence efficiently in the early rounds and save your points for opening doors toward the power switch. Once power is active, circle back to grab Quick Revive before pushing deeper into the map.
For solo players following our Zombies beginner tips, Quick Revive should be your first perk purchase after power activation, no exceptions.
Jugger-Nog Location – The Luminarium (West Wall)
Location: The Luminarium (Left path from Crash Site, west wall)
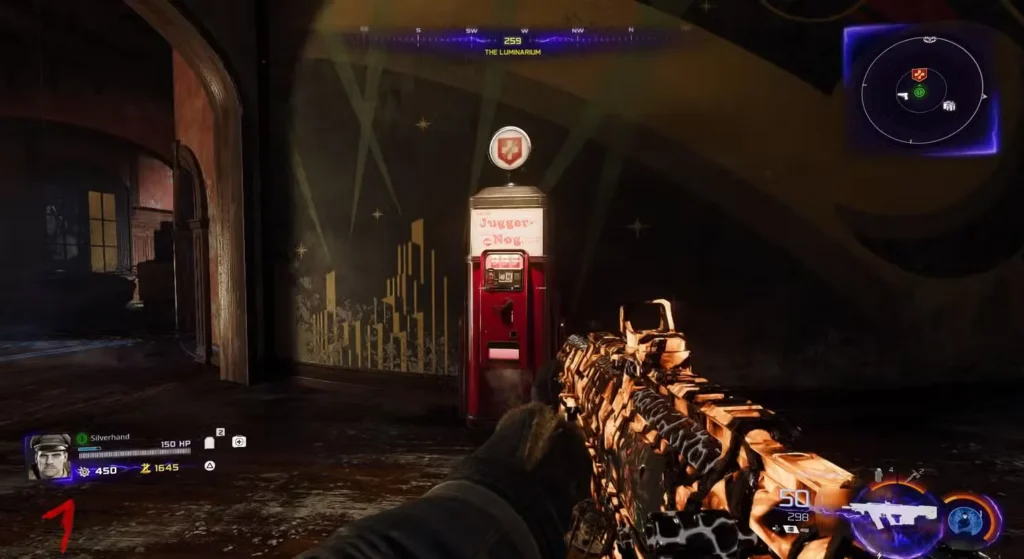
Ah yes, the crown jewel of Zombies perks – Jugger-Nog. If you’ve been playing Call of Duty Zombies for more than five minutes, you already know this perk is non-negotiable. The health boost from Jugger-Nog is what separates high-round survivors from early exfilers.
How to Find Jugger-Nog:
From the Crash Site spawn area, take the left pathway into The Luminarium. Once inside this room, look for the west wall – you can’t miss the iconic red Jugger-Nog machine.
The Luminarium is one of the main hub rooms connecting multiple areas of Astra Malorum, so you’ll become very familiar with this location as you navigate the map. It’s also positioned perfectly for early-game access, allowing you to grab the health boost before venturing into more dangerous territory.
Perk Priority: In most Zombies strategies, Jugger-Nog is your second perk purchase after Quick Revive in solo, or your first perk in co-op (since Quick Revive is less critical when teammates can revive you). Check out our best Slot 1 perks guide for broader perk strategy insights.
If you’re working on Zombies camo challenges or attempting Dark Ops challenges, having Jugger-Nog early makes the grind significantly more forgiving.
Speed Cola Location – Museum Infinitum (East Wall)
Location: Museum Infinitum (Right path from Crash Site, east wall)
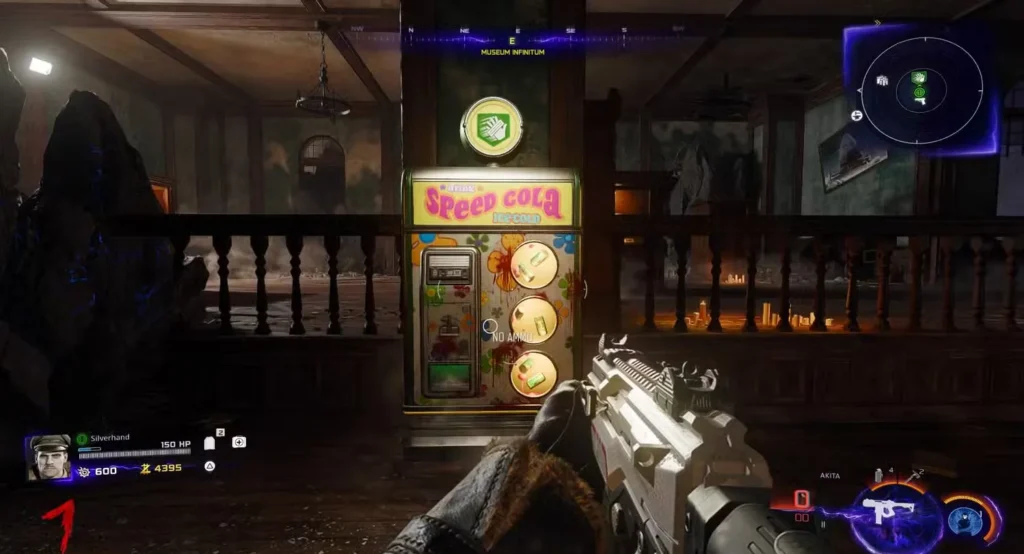
Speed Cola has been a staple perk since the original Black Ops, and its reload speed boost becomes increasingly valuable as you push into higher rounds where every second counts.
How to Find Speed Cola:
From the Crash Site spawn, take the right pathway to access the Museum Infinitum room. Once inside, locate the east wall – the green Speed Cola machine should be clearly visible.
Museum Infinitum serves as the gateway to the right side of the map, connecting to areas like Machina Astralis and Archives of Orbis. This makes Speed Cola a convenient pickup while you’re opening up the map for Pack-a-Punch access.
Why Speed Cola Matters:
While reload speed might not seem critical in early rounds, it becomes absolutely essential when you’re deep into a match with Pack-a-Punch weapons facing endless zombie hordes. The faster you can get your weapon back in the fight, the fewer dangerous moments you’ll face.
Speed Cola pairs exceptionally well with LMGs and weapons with long reload animations. If you’re running the Sokol 545 from Season 1 or other magazine-fed heavy weapons, Speed Cola becomes a top-3 perk priority.
For players exploring best loadouts for Multiplayer, remember that reload mechanics work differently between modes, so test your builds in each environment.
Stamin-Up Location – Archives of Orbis (East Wall)
Location: Archives of Orbis (Through Museum Infinitum → Machina Astralis → Archives, east wall)
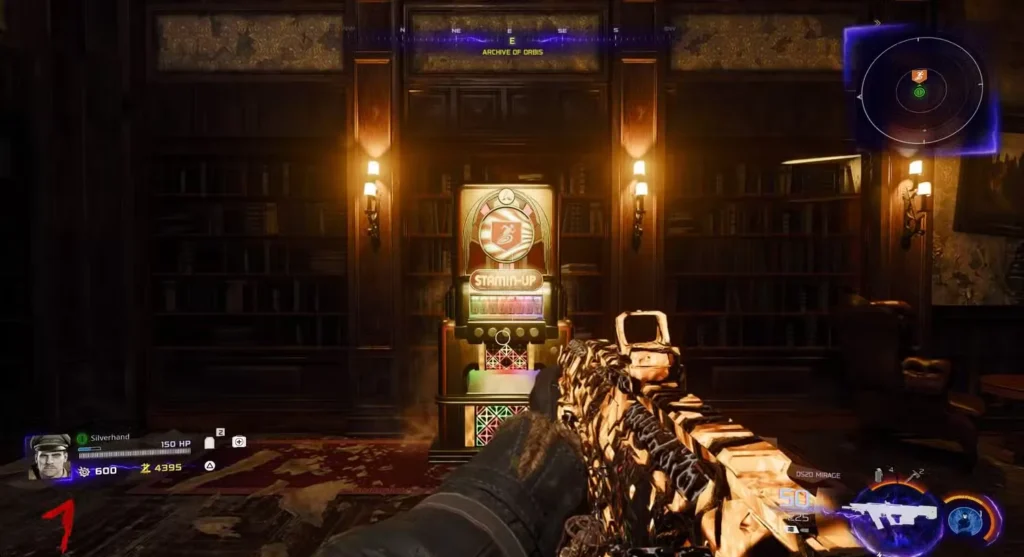
Stamin-Up provides increased sprint speed and duration, which translates to better mobility, faster kiting, and improved survivability when you need to reposition quickly.
How to Find Stamin-Up:
This perk requires a bit more navigation:
- Start at the Museum Infinitum (where you found Speed Cola)
- Continue through to the Machina Astralis room
- Exit through the northeast door
- You’ll enter the Archives of Orbis library
- Look for the east wall to find the purple Stamin-Up machine
The Archives of Orbis has that classic Zombies aesthetic with dark, atmospheric lighting and plenty of hiding spots. It’s a great area for training zombies once you’ve established your perk foundation.
Mobility Strategy:
Stamin-Up becomes increasingly valuable on larger maps like Astra Malorum where you need to cover significant distance between objectives. If you’re attempting the main Easter egg or hunting for Intel locations, the extra mobility saves precious time.
Combine Stamin-Up with proper training spots knowledge, and you’ll have much better control over zombie hordes during high-round runs.
Mule Kick Location – The Veilwalk (West Wall)
Location: The Veilwalk (Continue past Archives of Orbis, west wall)
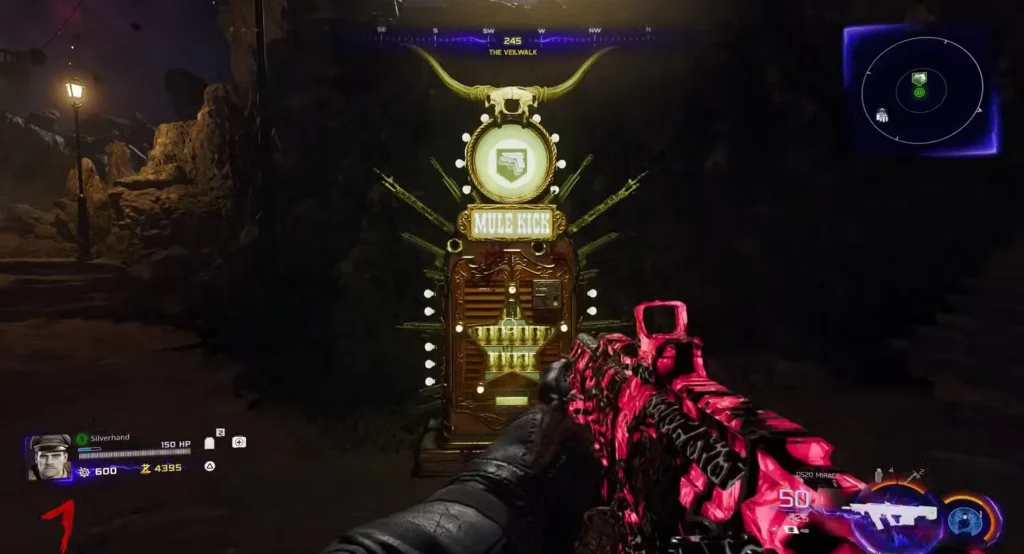
Mule Kick is officially the newest Perk-a-Cola addition to Black Ops 7 Zombies! For those unfamiliar, Mule Kick allows you to carry a third weapon, which opens up incredible loadout flexibility.
How to Find Mule Kick:
Continue your journey from the Archives of Orbis into The Veilwalk area. Once inside, check the west wall for the green Mule Kick machine.
The Veilwalk is positioned in the deeper sections of the map, which makes sense given that Mule Kick is typically a mid-to-late game perk purchase (after you’ve secured your core survival perks).
Three-Weapon Strategy:
Having access to three weapons fundamentally changes your Zombies strategy:
- Primary weapon: Your main DPS gun (usually a wonder weapon or high-tier assault rifle)
- Secondary weapon: Your point-building gun or ammo-efficient option
- Third weapon: Situational tool (sniper for special zombies, launcher for groups, or another wonder weapon)
If you’ve unlocked the free Ray Gun Mk2 and managed to pull a second wonder weapon from the Mystery Box, Mule Kick lets you run both simultaneously alongside a traditional weapon.
Important Warning: If you go down with Mule Kick active, you’ll lose your third weapon. Make sure your most valuable weapon is in your primary or secondary slot to avoid losing it permanently.
Wisp Tea Location – Abyssal Rim (North Corner)
Location: Abyssal Rim (Left path through The Luminarium, north corner facing Saturn)

Wisp Tea is one of the unique perks in Black Ops 7 Zombies, and its location on Astra Malorum is both scenic and slightly dangerous.
How to Find Wisp Tea:
From the Crash Site spawn, follow the left pathway through The Luminarium (where you found Jugger-Nog) and continue until you reach the Abyssal Rim. This is at the edge of the map where you can see Saturn’s massive presence dominating the skyline.
Look for the north corner of the Abyssal Rim – Wisp Tea is positioned right at the edge, offering a breathtaking view of the gas giant while you’re purchasing your perk.
Environmental Hazard Warning:
Be extremely careful near the Abyssal Rim edges. If you fall off, you won’t die instantly, but you’ll be teleported back to solid ground at the cost of half your health. This can be devastating if you’re already low on health or don’t have Jugger-Nog yet.
In later rounds when zombie density is high, getting cornered near these edges becomes especially dangerous. Always maintain awareness of your surroundings and leave yourself an escape route.
What Does Wisp Tea Do?
For players new to this perk, Wisp Tea provides [specific benefits that complement defensive playstyles]. If you’re building an optimal perk loadout with perk augments, Wisp Tea can synergize well with other defensive perks in your arsenal.
Der Wunderfizz Location – Stargazer’s Courtyard (Center of Map)
Location: Stargazer’s Courtyard (West brick wall, center of map)
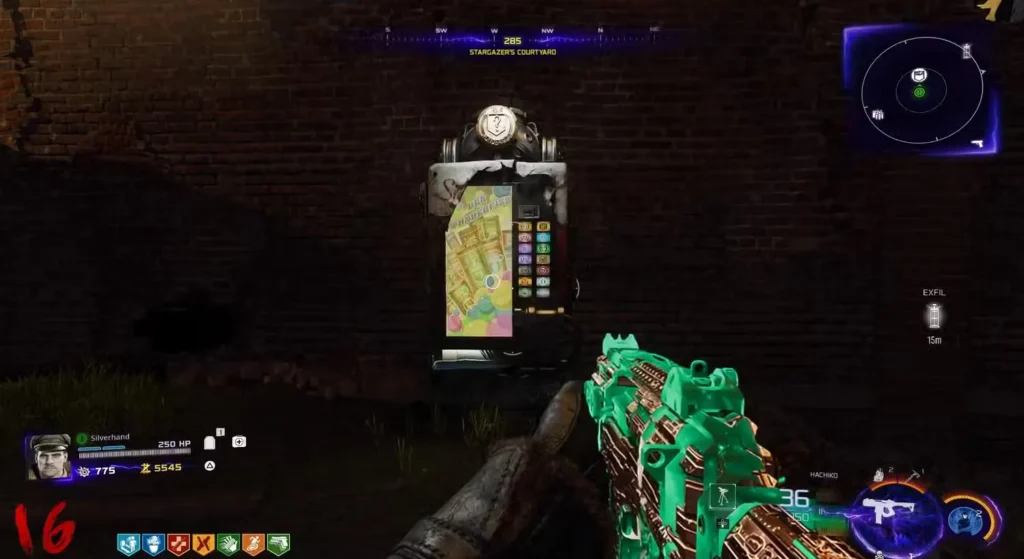
Der Wunderfizz is the gateway to every perk in Black Ops 7 Zombies, including the seven perks that don’t have dedicated machines on Astra Malorum. If you want to maximize your perk collection for high-round survival, Der Wunderfizz is essential.
How to Find Der Wunderfizz:
Der Wunderfizz is located in the Stargazer’s Courtyard, which serves as a central hub in Astra Malorum. Once you’re in the courtyard, look for the west brick wall – the mysterious multi-colored Wunderfizz machine will be waiting.
Important Unlock Requirement:
Unlike the standard perk machines, Der Wunderfizz only appears after you’ve purchased 4 perks. This prevents players from rushing straight to Wunderfizz and skipping the map exploration that Treyarch designed.
The 7 Exclusive Der Wunderfizz Perks:
These perks are ONLY available through Der Wunderfizz on Astra Malorum:
PhD Flopper
Eliminates explosive damage to yourself and creates explosion effects when diving from heights. Perfect for players using tactical equipment or lethal equipment with explosive properties.
Elemental Pop
Randomly applies ammo mod effects to your bullets, giving you free elemental damage without needing to craft specific ammo mods. Synergizes beautifully with ammo mod augments.
Melee Macchiato
Increases melee damage and speed, which is crucial if you’re trying to complete melee weapon challenges or running knife-focused builds.
Vulture Aid
Reveals tactical advantages like ammo drops, equipment drops, and enemy weak points. One of the most underrated perks for resource management in extended survival runs.
Double Tap
The legendary returning perk that increases fire rate. This perk is absolutely cracked on weapons with already-high fire rates, potentially doubling your DPS output.
Deadshot Daiquiri
Auto-aims toward zombie heads and increases headshot damage. Essential for players working on headshot challenges or anyone who wants consistent critical damage.
Death Perception
Reveals enemies through walls and provides intel on special zombie spawns. Incredibly valuable for situational awareness during high-round training.
Der Wunderfizz Strategy:
Der Wunderfizz operates on a random selection system – you don’t choose which perk you get. Each use costs increasingly more Essence, so plan your purchases wisely:
- First use: Base perk cost (typically 2,500 Essence)
- Subsequent uses: Cost increases each time
Pro Tip: If you’re targeting a specific Wunderfizz perk, make sure you’ve already purchased the 6 on-map machines first. This reduces the random pool from 13 perks down to 7, significantly increasing your odds of getting what you need.
If you’re planning to get all perks for the permanent perks strategy, budget your Essence accordingly. You’ll need tens of thousands of points to purchase every perk, so efficient essence farming is mandatory.
Optimal Perk Purchase Order for Astra Malorum
With 13 total perks available on Astra Malorum, you need a strategic purchasing order to maximize your survival chances. Here’s my recommended priority based on thousands of high-round runs:
Early Game (Rounds 1-10):
- Jugger-Nog (The Luminarium) – Non-negotiable health boost
- Quick Revive (Crash Site) – Self-revive safety net for solo, faster revives for co-op
- Speed Cola (Museum Infinitum) – Reload speed becomes critical as weapons level up
- Stamin-Up (Archives of Orbis) – Mobility for training and repositioning
Mid Game (Rounds 11-20):
- Mule Kick (The Veilwalk) – Third weapon slot for wonder weapons or specialists
- Wisp Tea (Abyssal Rim) – Defensive benefits for harder rounds
- Der Wunderfizz unlocks at this point (after 4 perks purchased)
Late Game (Round 20+):
8-13. Der Wunderfizz perks – Focus on these priority picks:
- Double Tap (massive DPS increase)
- Deadshot Daiquiri (critical hits for efficiency)
- Elemental Pop (free ammo mod effects)
- PhD Flopper (if running explosive weapons)
- Vulture Aid (resource management)
- Melee Macchiato (situational)
- Death Perception (luxury pick for information)
This perk order ensures you have your survival foundation established before investing in luxury perks. Adjust based on your playstyle – aggressive players might prioritize Double Tap earlier, while defensive players might grab PhD Flopper sooner.
For players experimenting with different strategies, check out our best perk tier list and augment optimization guide.
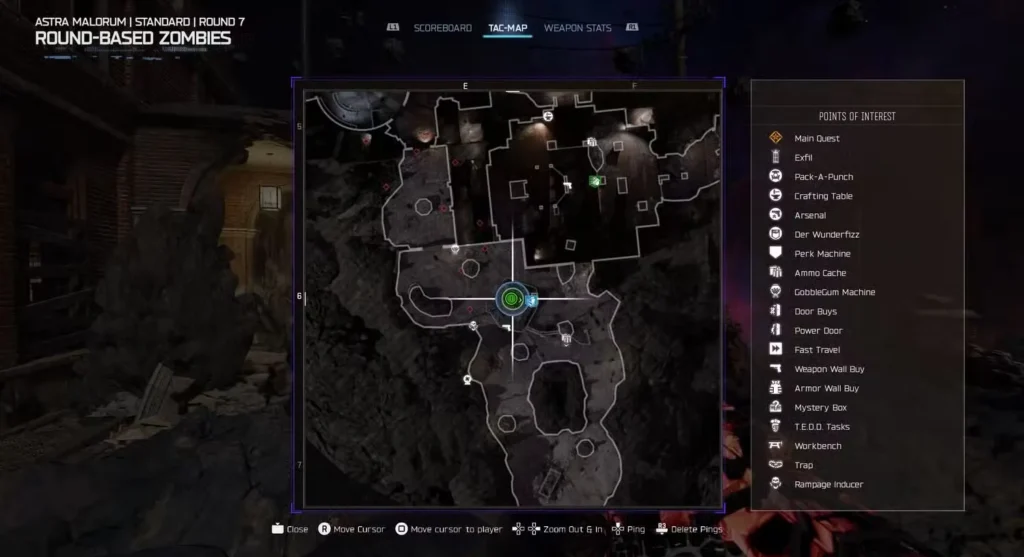
Astra Malorum Map Layout Tips
Understanding the map flow helps you locate perks faster and plan efficient routes:
Left Path (from spawn): Crash Site → The Luminarium → Abyssal Rim
Perks: Quick Revive, Jugger-Nog, Wisp Tea
Right Path (from spawn): Crash Site → Museum Infinitum → Machina Astralis → Archives of Orbis → The Veilwalk
Perks: Speed Cola, Stamin-Up, Mule Kick
Center Hub: Stargazer’s Courtyard (connects both paths)
Perk: Der Wunderfizz
This split-path design encourages exploration while preventing players from accessing everything too quickly. If you’re learning the map for the first time, I recommend taking the left path first to secure Jugger-Nog, then looping around to grab Speed Cola and Stamin-Up on your way to power activation.
For detailed map navigation, check out our complete Astra Malorum walkthrough and wall buy locations guide.
Perk Synergies and Augment Combinations
Black Ops 7 introduces perk augments that can dramatically enhance your perk effects. Here are some powerful synergies for Astra Malorum:
Tank Build:
- Jugger-Nog + Quick Revive + PhD Flopper
- Focus on survivability and explosive resistance
- Pair with armor plate management
DPS Build:
- Double Tap + Speed Cola + Deadshot Daiquiri
- Maximize damage output and critical hits
- Works with best weapons for Zombies
Training Build:
- Stamin-Up + Mule Kick + Elemental Pop
- Enhanced mobility with weapon variety
- Perfect for training spot strategies
Experiment with different combinations to find what works best for your playstyle. If you’re also tackling Season 1 weapon unlocks, try pairing new weapons with complementary perk setups.
Common Mistakes to Avoid on Astra Malorum
After watching countless players struggle on this map, here are the most common perk-related mistakes:
❌ Buying perks before opening the full map
Don’t waste Essence on perks if you haven’t unlocked power yet. Focus on door costs first.
❌ Ignoring Der Wunderfizz entirely
Those 7 exclusive perks can make or break high-round runs. Budget for Wunderfizz purchases.
❌ Purchasing Der Wunderfizz before getting the 6 on-map perks first
You’re paying for random rolls from a pool of 13 instead of 7. Get the guaranteed perks first.
❌ Standing too close to edges near Abyssal Rim
That fall-and-teleport mechanic can get you killed if zombies are nearby when you respawn.
❌ Forgetting about Quick Revive’s power requirement
Solo players expecting immediate Quick Revive access will be disappointed. Plan accordingly.
❌ Not coordinating perk purchases in co-op
Communicate with teammates to ensure everyone gets Der Wunderfizz access simultaneously.
Additional Astra Malorum Resources
While you’re mastering perk locations, don’t forget about these other essential Astra Malorum features:
- Pack-a-Punch machine location and activation
- All power-up locations
- Mystery Box spawn locations
- Special elite zombie strategies
- Best scorestreaks for Zombies
If you’re working on camo grinds or prestige progression, having optimal perk knowledge accelerates your progress significantly.
Frequently Asked Questions (FAQ)
How many total perks can you have on Astra Malorum?
You can have a maximum of 13 perks active simultaneously on Astra Malorum – 6 from dedicated machines on the map, plus 7 additional perks from Der Wunderfizz. However, collecting all 13 perks requires significant Essence investment (typically 30,000-40,000+ depending on Wunderfizz RNG) and is usually only achieved in very high rounds (30+).
Can you get Der Wunderfizz perks from mystery rewards?
Yes! Der Wunderfizz perks can occasionally drop from random perk power-ups, permanent perk easter eggs, or special event rewards. However, Der Wunderfizz remains the most reliable way to collect these perks, especially if you’re targeting specific ones.
What happens if you lose all your perks after going down?
In solo mode with Quick Revive, you’ll lose all perks except Quick Revive itself (which auto-consumes to revive you). In co-op when teammates revive you, you lose all perks. You’ll need to repurchase perks from scratch, which is why high-round players often keep a substantial Essence reserve for emergency perk repurchases. Some Gobblegums can help mitigate perk loss.
Is there a free perk easter egg on Astra Malorum like the Wisp Tea on Ashes of the Damned?
While Astra Malorum does feature various easter eggs and hidden mechanics, a confirmed free perk easter egg (like the free Wisp Tea or permanent Double Points on Ashes of the Damned) hasn’t been widely documented yet. The community is still discovering secrets, so keep exploring and check resources like the Black Ops 7 subreddit for new findings.
Thoughts on Astra Malorum Perks
Astra Malorum delivers a fresh Zombies experience with its space-station aesthetic and Saturn orbit setting, but the core perk mechanics remain familiar territory for veteran players. The strategic placement of perks encourages full map exploration while ensuring new players don’t get completely overwhelmed in the starting areas.
The addition of Mule Kick as a “new” perk (returning from previous Black Ops games) opens up exciting three-weapon strategies, especially when combined with the growing arsenal of wonder weapons and Season 1 weapons.
My personal perk priority remains consistent: Jugger-Nog → Quick Revive → Speed Cola → Stamin-Up for the early foundation, then adapt based on your weapon loadout and whether you’re running solo or co-op. Der Wunderfizz becomes your late-game power spike once you’ve secured the essentials.
Don’t forget to optimize your overall Zombies strategy with proper combat specialties, field upgrade choices, and tactical/lethal equipment selection. Perks are just one piece of the survival puzzle.
Whether you’re attempting the Astra Malorum main easter egg, pushing for round 100, or just trying to successfully exfil for the first time, knowing your perk locations inside and out gives you a massive advantage.
Now get out there, grab those perks, and show Saturn’s zombies who’s boss!
Official Resources:
Related Guides: