Field Upgrades in Black Ops 7 Zombies can mean the difference between a smooth high-round run and a frustrating down on Round 25. After testing all six options across solo and squad scenarios—including some embarrassing deaths that taught me which ones actually deliver—I’ve learned that your Field Upgrade choice matters more than ever with the new augment system.
This isn’t just a ranking based on theory. These placements come from practical experience: which Field Upgrades save you when cornered, which ones accelerate your Essence farming, and which ones become deadweight after Round 30. Whether you’re following our Ashes of the Damned walkthrough or pushing for personal bests, choosing the right Field Upgrade dramatically impacts your survival odds.
Understanding the Field Upgrade System
Before diving into rankings, here’s what you need to know:
Unlock Progression: Field Upgrades unlock at various player levels
Activation: Charges through zombie kills and objective completion
Research System: Unlock augments to enhance each Field Upgrade
Augment Types: Major augments (game-changing modifications) and Minor augments (statistical improvements)
Key consideration: Your Field Upgrade choice should match your playstyle. Aggressive players benefit from different options than defensive teammates holding objectives.
For comprehensive augment breakdowns, check our dedicated guides:
All Field Upgrades: Quick Reference
| Field Upgrade | Unlock Level | Research Augments | Primary Role |
|---|---|---|---|
| Energy Mine | Level 1 | Available immediately | Area damage |
| Dark Flare | Level 1 | 9 total augments | Direct damage beam |
| Frenzied Guard | Level 8 | 3 total augments | Aggressive tanking |
| Healing Aura | Level 17 | 15 total augments | Team support |
| Toxic Growth | Level 29 | 12 total augments | Area denial |
| Aether Shroud | Level 48 | 21 total augments | Emergency escape |
Now let’s break down which ones actually earn their spot in your loadout.
Black Ops 7 Zombies Field Upgrades Ranked (Worst to Best)
6. Dark Flare – Underwhelming Damage Output
Unlock Level: 1
Research Augments: 9 total
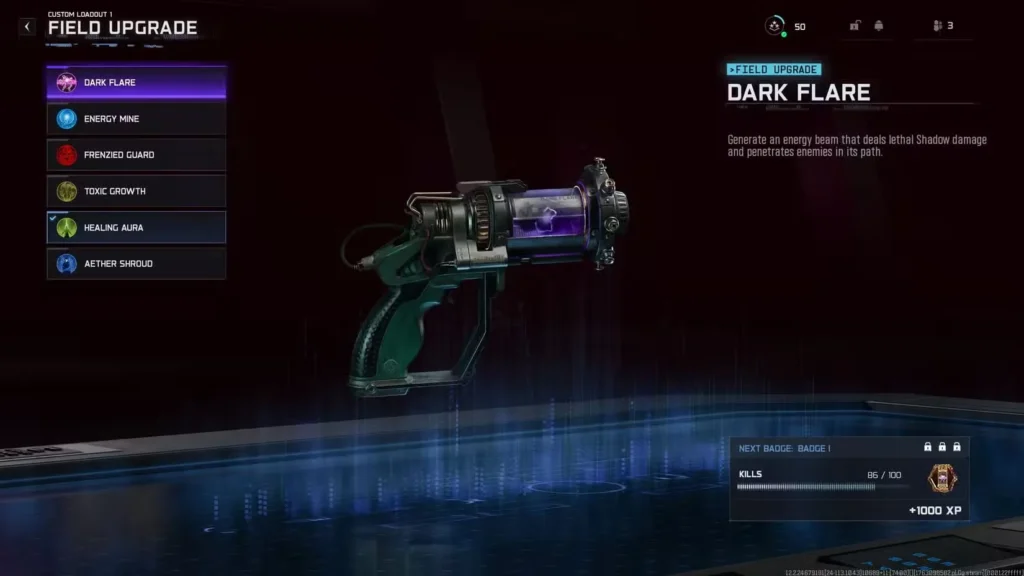
What it does:
Projects an energy beam dealing Shadow damage that penetrates multiple enemies in a straight line.
Why it disappoints:
Dark Flare suffers from a fundamental problem: your weapons do its job better. The beam requires you to hold your Field Upgrade activation while aiming, which leaves you vulnerable and stationary—exactly what you don’t want in high-round Zombies.
The damage output feels impressive in early rounds, but once you have Pack-a-Punch and decent Ammo Mods, Dark Flare becomes redundant. You’re essentially using your Field Upgrade slot for a mediocre weapon when you already have two better ones equipped.
Saving grace for co-op:
The Dark Pact Major Augment transforms the beam into a healing tool that can revive downed teammates from range. This is genuinely useful in squad play when someone goes down in a dangerous position. However, Healing Aura does this job better while also preventing downs in the first place.
Best augment setup (if you must use it):
- Major: Dark Pact (co-op revives) or Supernova (solo damage sphere)
- Minor: Heavy Gloom (enemy slowdown)
Bottom line: Unless you’re running co-op without a designated healer, skip Dark Flare entirely. Every other Field Upgrade provides more practical value.
5. Toxic Growth – Situational Area Denial
Unlock Level: 29
Research Augments: 12 total

What it does:
Summons a thorny barrier that blocks zombie pathing, slows enemies passing through, and deals Toxic damage over time.
Why it’s limited:
Toxic Growth appeals to players who prefer stationary defense over training zombies—holding chokepoints, camping corners, or defending objectives. The problem is that Black Ops 7 Zombies fundamentally rewards movement and training over static defense.
Where it fails:
- Durability issues: Barriers get destroyed quickly in higher rounds (25+)
- Diminishing returns: Each subsequent use requires more kills to recharge
- Playstyle limitation: Forces you into defensive positions that become death traps
- Training contradiction: If you’re kiting zombies effectively, you don’t need barriers
Where it actually works:
Toxic Growth shines in specific scenarios:
- Objective defense during timed challenges
- Revive protection when a teammate goes down in the open
- Funnel creation for weapon camo challenges requiring grouped kills
- Early rounds (pre-Round 15) when barrier durability isn’t an issue
If you’re completing T.E.D.D. Tasks or holding specific positions on Ashes of the Damned, Toxic Growth provides value. Otherwise, mobility-focused Field Upgrades serve you better.
Best augment setup:
- Major: Urticant (wider barrier + stronger slow)
- Minor: Extra Charge (two barriers) or Green Thumb (increased health)
Best for: Defensive players completing specific objectives, not general survival.
4. Energy Mine – Reliable Explosive Damage
Unlock Level: 1 (Available immediately)
Research Augments: Available immediately

What it does:
Deploys a stationary mine that detonates three times, dealing heavy damage to nearby zombies.
Why it’s decent:
Energy Mine is the definition of “middle of the road.” It’s not spectacular, but it’s reliable and available from Level 1, making it a solid starter Field Upgrade for beginners.
Practical applications:
- Training route optimization: Drop it at a chokepoint, train zombies through it
- Emergency crowd control: Quick panic button when you need space
- Salvage-free damage: Doesn’t require Salvage investment like Ammo Mods
- Solo-friendly: Works independently without team coordination
Where it excels:
The three-detonation mechanic means you can drop Energy Mine and continue fighting—it works autonomously while you focus on surviving. This makes it superior to Dark Flare, which demands your full attention.
For farming Essence in training spots like Vandorn Farm or Exit 115, Energy Mine accelerates kill counts without weapon ammo expenditure.
Augment recommendations:
Turret (Major Augment) – Game changer
Converts the mine into an auto-targeting turret that shoots individual zombies. This transforms Energy Mine from a static trap into mobile crowd control. Highly recommended if you’re sticking with this Field Upgrade long-term.
Scatter (Major Augment) – Area coverage
Splits the single mine into three separate detonations spread across a wider area. Better for training large hordes.
Frequency Boost (Minor Augment) – Extended duration
Increases detonation count and active time, maximizing value per use.
Siren (Minor Augment) – Zombie attraction
Makes Energy Mine act like a decoy, pulling zombies toward it. Useful for manipulating spawn behavior during objectives.
Verdict: A dependable workhorse that gets outclassed by higher-tier options but serves as an excellent early-game choice until you unlock better alternatives.
3. Healing Aura – Essential Squad Support
Unlock Level: 17
Research Augments: 15 total

What it does:
Summons healing beams that instantly revive downed allies and restore all nearby players to full health.
Why it’s powerful:
Healing Aura is mandatory for coordinated squad play. The instant revive mechanic alone justifies its existence—no more risky manual revives that get you both killed.
Core benefits: ✅ Instant full-team revival from any distance within range
✅ Full health restoration for all nearby players
✅ Safe revive option without exposing yourself to zombie damage
✅ Panic button utility during overwhelming situations
Solo limitations:
Here’s the issue: Healing Aura loses significant value in solo play. Your natural health regeneration, Quick Revive, and Stim shots already handle healing needs. Using a Field Upgrade slot for self-healing seems wasteful when other options prevent damage entirely (Aether Shroud) or eliminate threats faster (Frenzied Guard).
When to run Healing Aura:
Squad scenarios:
- High-round attempts where downs become frequent
- Easter egg runs requiring risky objective completion
- Teams without strong survival instincts (carrying newer players)
- Coordinated pushes through difficult areas
Solo scenarios:
- Honestly? Rarely worth it. Use Aether Shroud or Frenzied Guard instead.
Best augment setup:
Enduring Radiance (Major) – Extended healing zone
Keeps the healing beam active longer, providing continuous regeneration and multiple revival opportunities per activation.
Persistence (Major) – Perk retention
Revived players keep all Perks from their bleed-out bar instead of losing them permanently. This is essential for high rounds where re-buying expensive Perks isn’t feasible.
Stoic Presence (Minor) – Crowd control
Stuns and knocks down Normal, Special, and Elite enemies around the healing area. This gives you breathing room during desperate revivals, turning Healing Aura into both recovery and defense.
Team composition tip: Only one squad member needs Healing Aura. Coordinate loadouts so others can run offensive or utility Field Upgrades for balanced team capability.
2. Frenzied Guard – Aggressive Tank Mode
Unlock Level: 8
Research Augments: 3 total (surprisingly low for its power)

What it does:
Instantly repairs armor to full, forces all nearby zombies to target only you, and redirects all damage to armor plates. Zombie kills during this period repair armor.
Why it’s elite-tier:
Frenzied Guard is the ultimate offensive Field Upgrade for aggressive players who want to take the fight directly to zombie hordes. The mechanics synergize perfectly with high-mobility playstyles.
The power combo:
- Activate Frenzied Guard
- All zombies ignore teammates and focus you
- Your health becomes invulnerable (damage hits armor only)
- Each kill restores armor plates
- With Tier 3 Armor and aggressive play, you’re essentially immortal for the duration
Practical applications:
Solo play:
- Push through tight corridors without fear
- Clear training spots aggressively
- Farm kills for weapon camo challenges
- Survive while completing critical kill challenges
Squad play:
- Tank damage while teammates revive downed players
- Control zombie aggro during objective phases
- Protect teammates during Exfil attempts
- Draw Zursa bears away from vulnerable allies
Critical weakness:
Getting cornered still kills you. Frenzied Guard protects your health, but if zombies surround you and drain all armor faster than you can kill them, you’re going down. This requires smart positioning and either explosive weapons or high-penetration loadouts.
Best augment setup:
Retribution (Major) – Knockback revenge
Any Normal Enemy hitting you during Frenzied Guard takes damage and gets knocked back. This prevents the “cornered and overwhelmed” scenario by creating space automatically. Highly recommended for aggressive pushes.
Frenzy Fire (Major) – Infinite magazine
Uses ammo from reserves instead of your magazine, effectively giving you infinite magazine capacity during activation. Perfect for sustaining fire without reload interruptions.
Extension (Minor) – Duration increase
More time in tank mode = more kills = more armor restoration = longer survival window. Simple and effective.
Why it ranks #2:
Frenzied Guard would be #1 if not for one critical factor: it requires you to play offensively and take calculated risks. When it works, it’s incredible. When positioning fails, you die quickly. Aether Shroud offers more universal application with lower risk, giving it the edge.
Best for: Aggressive solo players and designated squad tanks who understand spacing and crowd control.
1. Aether Shroud – The Ultimate “Get Out of Jail Free” Card
Unlock Level: 48
Research Augments: 21 total (most of any Field Upgrade)
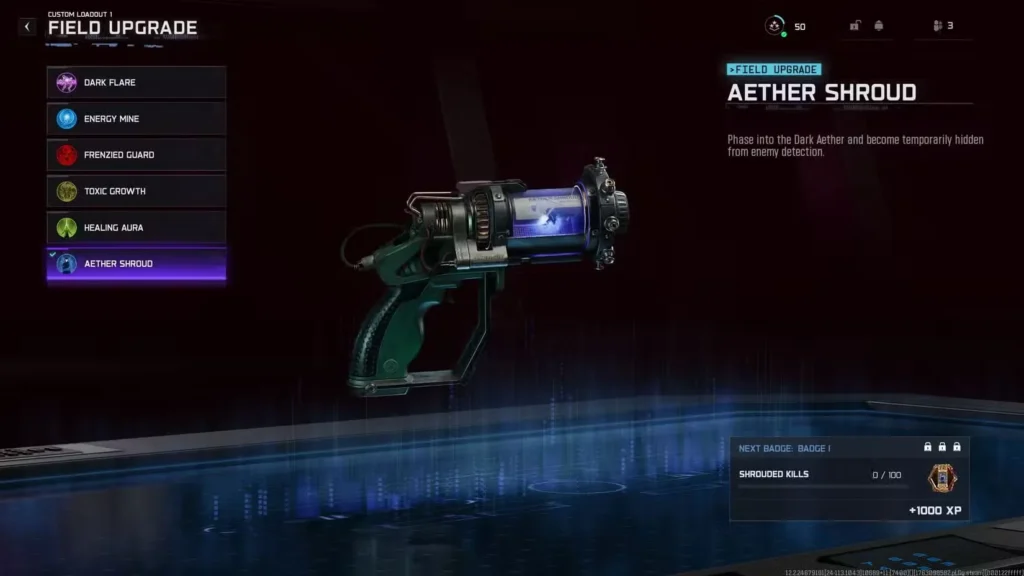
What it does:
Phase into the Dark Aether, becoming completely invisible and undetectable to all zombies for several seconds.
Why it’s the best:
After countless high-round attempts, failed Easter eggs, and clutch revivals, Aether Shroud has saved my runs more than any other Field Upgrade. Here’s the simple truth: every dangerous situation in Black Ops 7 Zombies becomes manageable with Aether Shroud active.
Universal applications:
Emergency escape:
- Cornered with no exit? Shroud and walk through the horde
- Low health and surrounded? Shroud and regenerate safely
- Teammate down in a death trap? Shroud and revive without risk
Strategic advantages:
- Reload weapons without zombie pressure
- Reposition during overwhelming waves
- Manually apply armor plates mid-combat
- Complete objectives without fighting
- Revive multiple teammates sequentially
High-round dominance:
Past Round 40, Aether Shroud becomes mandatory. The zombie density and damage output reach levels where even perfect training gets you cornered eventually. Aether Shroud is your reset button—use it, reposition, and continue surviving.
Solo vs. Squad effectiveness:
Solo: Absolute game-changer for safety and flexibility
Squad: Essential for coordinated revivals and objective completion
Verdict: Universally powerful in all scenarios
The only “downside”:
You unlock it at Level 48, meaning newer players can’t access it immediately. This forces you to use inferior Field Upgrades during early progression. Once unlocked, however, there’s rarely a reason to switch away from it.
Best augment setup:
Group Shroud (Major) – Team invisibility
Cloaks all nearby teammates when activated. Perfect for coordinated teams making risky plays together. Entire squad can revive, reposition, or complete objectives in complete safety.
Afterimage (Major) – Clone distraction
Creates a Dark Aether decoy that zombies attack, keeping them grouped even after you exit stealth. Excellent for maintaining training patterns without zombies dispersing when you disengage.
Extra Charge (Minor) – Second activation
Increases maximum charge by one, letting you use Aether Shroud twice before needing to recharge. This is borderline broken for high-round survival—you essentially have two panic buttons instead of one.
Extension (Minor) – Duration increase
More invisibility time = more actions completed safely. Combine with Extra Charge for maximum flexibility.
Impulse (Minor) – Movement speed
Enhanced mobility while shrouded. Helps you cross large map sections or escape particularly dense horde situations even faster.
Advanced techniques:
Revive chains:
Shroud → revive Player 1 → revive Player 2 → revive Player 3 → reposition. All completed safely without zombie interference.
Objective clutch:
Shroud → complete T.E.D.D. Task → Shroud again (with Extra Charge) → extract safely.
Training reset:
When your zombie train becomes unmanageable, Shroud to break aggro, reposition to your preferred training spot, and rebuild a cleaner train.
Why it’s #1:
Aether Shroud doesn’t just excel in one scenario—it excels in every scenario. Whether you’re a defensive player needing breathing room, an aggressive rusher making risky plays, or a support teammate clutching revivals, Aether Shroud delivers consistent value throughout your entire match.
It’s the only Field Upgrade you’ll never regret having available.
Field Upgrade Tier List Summary
S-Tier (Must Use):
🥇 Aether Shroud – Universal safety and flexibility
🥈 Frenzied Guard – Aggressive tanking and damage absorption
A-Tier (Situationally Strong):
🥉 Healing Aura – Essential for squad support (less valuable solo)
B-Tier (Serviceable):
Energy Mine – Reliable damage, good for beginners
Toxic Growth – Niche defensive utility
C-Tier (Underwhelming):
Dark Flare – Outclassed by weapons in nearly all scenarios
Choosing Your Field Upgrade by Playstyle
Aggressive Solo Player
Primary: Frenzied Guard
Alternative: Aether Shroud
Reasoning: Frenzied Guard rewards aggressive play with sustained damage output. Aether Shroud as backup for when aggression fails.
Defensive Solo Player
Primary: Aether Shroud
Alternative: Energy Mine
Reasoning: Aether Shroud handles all emergency situations. Energy Mine provides consistent area control without requiring aggressive engagement.
Squad Support Player
Primary: Healing Aura
Alternative: Aether Shroud (with Group Shroud augment)
Reasoning: Keep teammates alive with instant revives. Group Shroud provides team-wide safety during coordinated plays.
Squad Tank Player
Primary: Frenzied Guard
Alternative: Aether Shroud
Reasoning: Draw aggro and absorb damage while teammates handle DPS. Aether Shroud for emergency escapes when tanking fails.
High-Round Specialist (Round 40+)
Primary: Aether Shroud (mandatory)
Alternative: Frenzied Guard
Reasoning: At extreme rounds, survivability trumps everything. Aether Shroud is non-negotiable. Frenzied Guard works only if you’re confident in positioning.
Easter Egg Hunter
Primary: Aether Shroud
Alternative: Healing Aura
Reasoning: Easter eggs require objective completion under pressure. Aether Shroud lets you complete steps safely. Healing Aura keeps the team operational during difficult phases.
Augment Research Priority
With limited research materials, prioritize unlocking augments in this order:
1. Aether Shroud augments – Start here once you reach Level 48
2. Frenzied Guard augments – Quick research (only 3 total)
3. Healing Aura augments – If playing squads regularly
4. Energy Mine augments – If you’re still using it pre-Level 48
5. Toxic Growth augments – Only if your playstyle demands it
6. Dark Flare augments – Dead last priority
Check our complete augment unlock guide for efficient research strategies.
Common Field Upgrade Mistakes
❌ Using Dark Flare for damage – Your weapons are better; use them
❌ Relying on Toxic Growth for high rounds – Barriers break too easily past Round 25
❌ Running Healing Aura in solo – Wasted slot when other options prevent damage
❌ Activating Frenzied Guard while cornered – You’ll still die; use it proactively
❌ Saving Aether Shroud “for later” – Use it liberally; it recharges quickly
❌ Ignoring augment research – Base Field Upgrades are significantly weaker without augments
Synergy with Equipment and Perks
Your Field Upgrade should complement your overall loadout:
Frenzied Guard pairs with:
- Tier 3 Armor (mandatory)
- Quick Revive (faster health regen after effect ends)
- Lethal Equipment (Semtex/C4 for close-quarters clearing)
- High-penetration weapons (best loadouts here)
Aether Shroud pairs with:
- Speed Cola (reload during stealth)
- Stamin-Up (enhanced repositioning)
- Tactical Equipment (Smoke/Stun for post-Shroud crowd control)
Healing Aura pairs with:
- PhD Flopper (protect teammates from your explosive spam)
- Jugger-Nog (maximize health pool for entire team)
- Permanent Perks (preserve investment after downs)
Field Upgrade Charging Tips
Speed up your Field Upgrade recharge rate:
✅ Zombie eliminations – Primary charge source
✅ Objective completion – T.E.D.D. Tasks, special challenges
✅ Headshot kills – Slight bonus charge rate
✅ Elite Enemy eliminations – Significant charge boost
✅ Salvage pickups – Minor charge contribution
Pro tip: During high rounds, intentionally leave a few zombies alive while completing objectives or farming Salvage. This ensures steady Field Upgrade charging without the pressure of full horde spawns.
Expand Your Zombies Strategy
Master every aspect of Black Ops 7 Zombies:
Core Guides:
Optimization:
Advanced Tactics:
Loadout Building:
Join the community on Reddit or Discord to discuss Field Upgrade strategies and find teammates.
For official game information, visit the Call of Duty: Black Ops 7 website or check the Wikipedia page.
Final Verdict: If you’re Level 48+, run Aether Shroud unless you have a specific reason not to. If you’re still leveling, use Frenzied Guard for aggressive play or Energy Mine for safer approaches. Once you unlock Aether Shroud, you’ll understand why it dominates every other option—it’s the closest thing to a cheat code that Black Ops 7 Zombies offers.