If you’ve been grinding through the undead hordes in Black Ops 7 Zombies, you already know that Salvage doesn’t grow on trees. Spending 2,500 Salvage on the wrong Scorestreak can set you back significantly, especially when you’re trying to survive past round 30. After testing all 8 Scorestreaks across multiple maps, I’ve learned which ones actually pull their weight and which ones leave you wishing you’d saved that Salvage for augments instead.
Let’s break down every Scorestreak available in Black Ops 7 Zombies, ranked from worst to best, so you can make smart decisions at the Crafting Table.
How Scorestreaks Work in Black Ops 7 Zombies
Before we dive into the rankings, here’s what you need to know about the Scorestreak system:
- Unlock through leveling: Each Scorestreak becomes available at specific player levels
- Purchase at Crafting Tables: Spend Salvage to craft them during matches (check out our Salvage farming guide for efficient collection)
- Activation: Deploy using Down on the D-Pad
- One-time use: Once activated, they expire after their duration ends
The key question isn’t just “which Scorestreak is strongest?” but rather “which ones justify their Salvage cost?” Let’s find out.
All Scorestreaks: Unlock Levels & Salvage Costs
Here’s the complete unlock progression:
| Scorestreak | Level Unlock | Salvage Cost |
|---|---|---|
| D.A.W.G. | Level 12 | 250 |
| ARC-XD | Level 5 | 1,000 |
| Mangler Cannon | Level 15 | 1,250 |
| Sentry Turret | Level 21 | 1,500 |
| HKDS | Level 30 | 1,250 |
| LDBR | Level 38 | 1,250 |
| Hand Cannon | Level 42 | 1,250 |
| Disciple Injection | Level 53 | 2,500 |
Notice the pricing strategy here—the most expensive options aren’t necessarily the best. The 1,250 Salvage tier actually contains the MVP of this entire list.
Black Ops 7 Zombies Scorestreaks Ranked (Worst to Best)
8. ARC-XD – The Fragile RC Car
Level Required: 5
Salvage Cost: 1,000
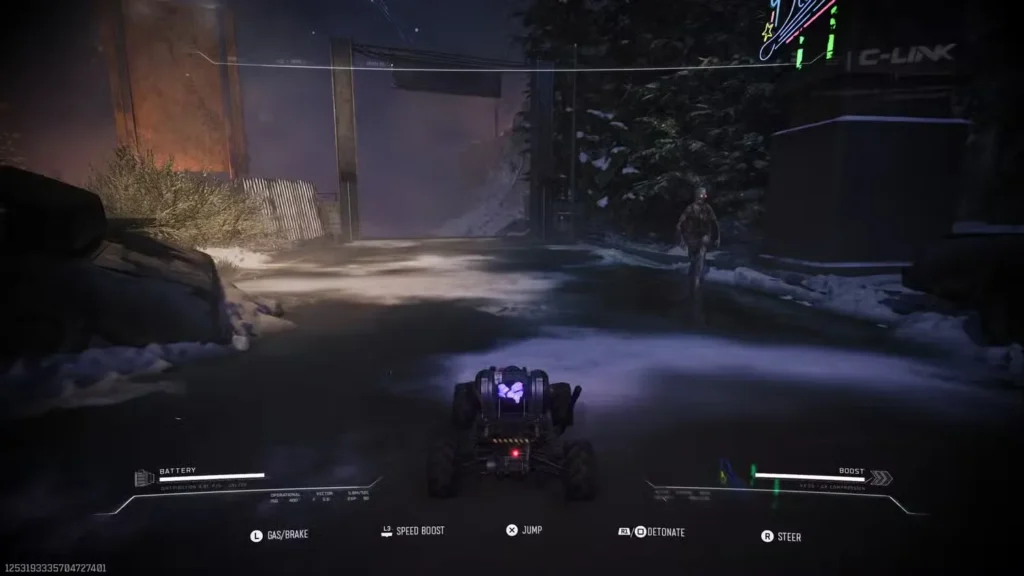
The ARC-XD is basically a remote-controlled car strapped with explosives. While it’s admittedly fun to zoom around the map, its practical value is questionable at best.
What it does:
- Makes you invulnerable while controlling it
- Emits Aether Blasts that attract and damage zombies
- Can boost and jump for mobility
Why it ranks last: The problem? One zombie touch and it’s game over. The ARC-XD explodes the moment anything breathes on it, immediately returning every zombie’s attention to you. This works fine in early rounds when zombies move slowly, but once you hit round 20+, the sudden transition from safe to surrounded can be deadly.
Verdict: Save your 1,000 Salvage for tactical equipment that won’t explode at the worst possible moment.
7. Mangler Cannon – Inconsistent Explosive Damage
Level Required: 15
Salvage Cost: 1,250
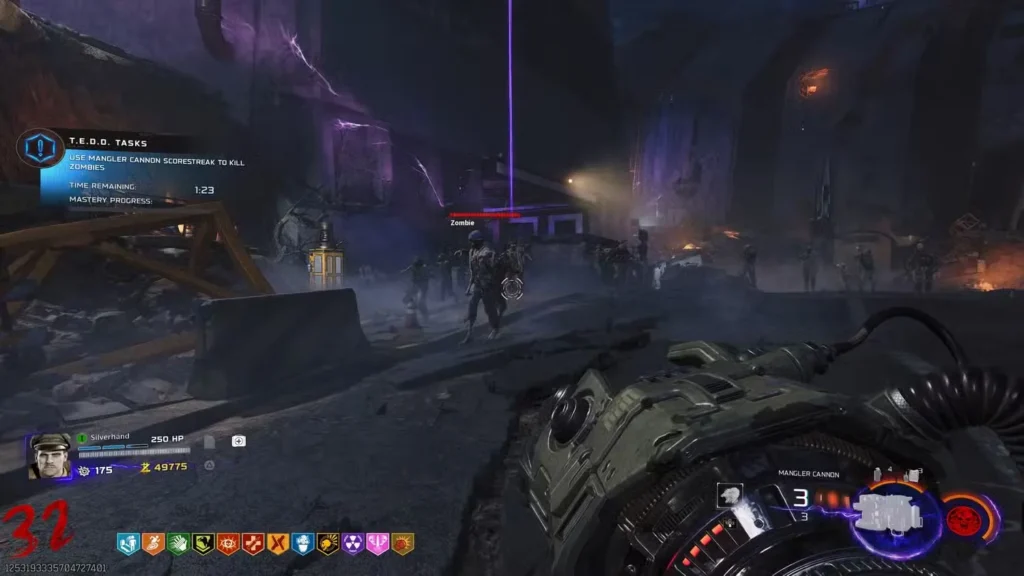
You’d think wielding a Mangler’s signature weapon would feel powerful. Sometimes it does. Other times, you’re left wondering why you spent valuable Salvage.
What it does:
- Fires charged explosive shots
- Can eliminate grouped zombies effectively
- Only 3 total charges
The catch: Movement speed drops significantly while holding and charging this weapon. When you’re kiting a train of zombies at higher rounds, that mobility penalty can get you cornered. The damage is decent when it works, but the blast radius feels unpredictable—sometimes wiping entire waves, other times barely scratching the horde.
Best use case: If you’re playing in a squad and need someone to handle choke points while others cover flanks.
6. HKDS – Explosive Drones with No Patience
Level Required: 30
Salvage Cost: 1,250
Hunter-Killer Drone Seekers deploy several wheeled explosives that autonomously hunt targets. Sounds great in theory.
What it does:
- Deploys multiple explosive drones
- Automatically seeks and destroys zombies
- Requires no aiming or control
The frustration: These drones have zero tactical awareness. They’ll happily detonate on a single zombie instead of waiting for the group you’re carefully training together. You might get 6-8 drones, but if each one wastes itself on individual targets, you’re not getting much value for 1,250 Salvage.
When it’s useful: Emergency situations when you’re overwhelmed and just need immediate crowd control, regardless of efficiency.
5. LDBR – Area Bombardment with Friendly Fire
Level Required: 38
Salvage Cost: 1,250
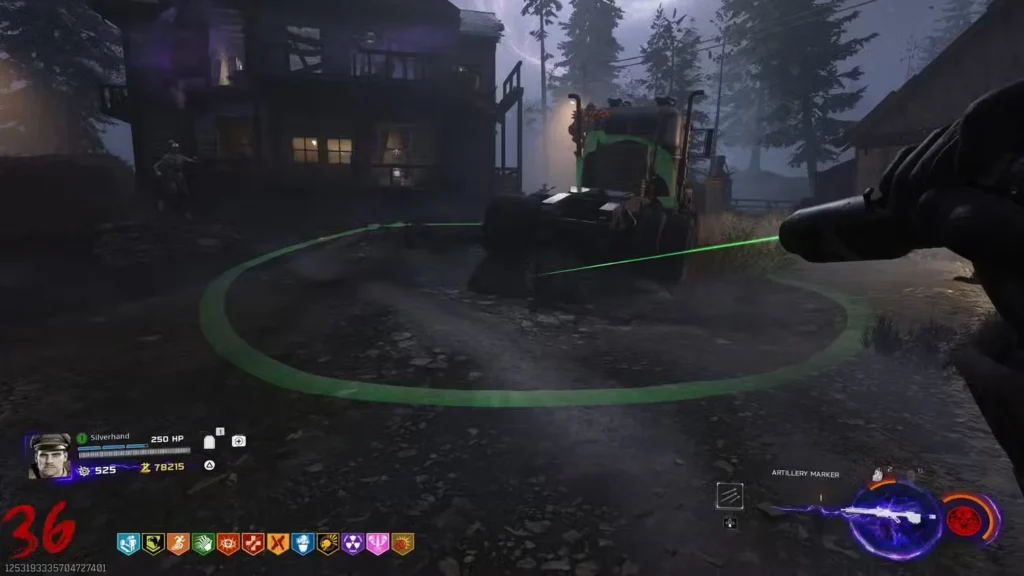
The LDBR delivers a concentrated artillery strike on a targeted area—and it doesn’t care if you’re standing in the blast zone.
What it does:
- Rains explosives on designated area
- Massive damage to grouped zombies
- Creates a deadly kill zone
The complications: Unless you’ve got PhD Flopper equipped (learn about permanent perks here), you’ll need to stay clear of your own bombardment. The explosive smoke also creates visibility issues, making it easy to lose track of where zombies are approaching from.
Pro tip: Works exceptionally well in training spots where you can funnel zombies into a predictable zone, then retreat to safety before activating.
4. Sentry Turret – Set It and Forget It
Level Required: 21
Salvage Cost: 1,500
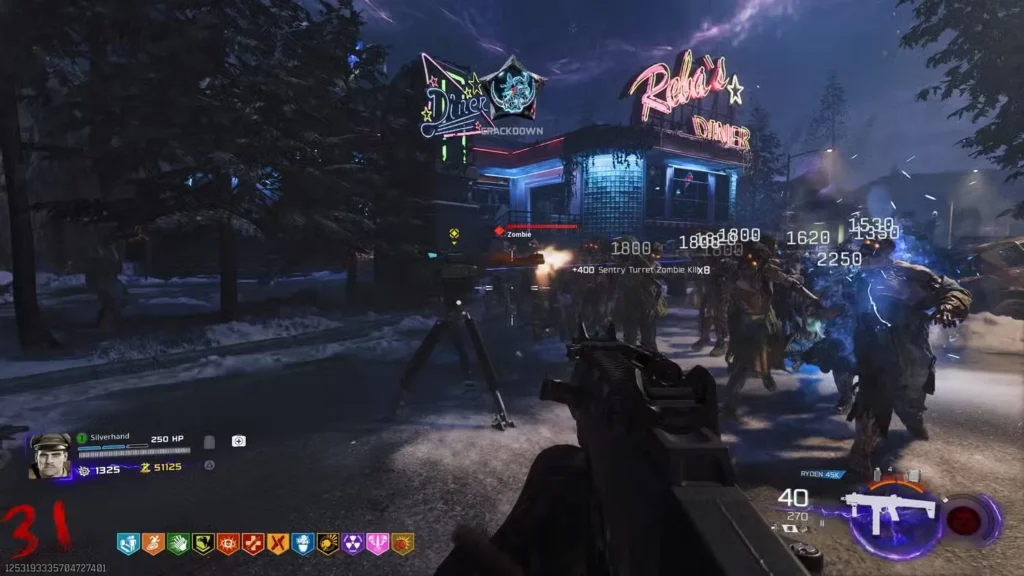
Now we’re getting into the actually useful territory. The Sentry Turret is solid defensive support that requires minimal babysitting.
What it does:
- Automated turret with forward-facing detection
- Zombies ignore it completely
- Continuous fire until ammo depletes
Why it works: The fact that zombies don’t target it means you essentially have a second player laying down suppressive fire. Plant it in a strategic location—near your Pack-a-Punch machine or covering a key corridor—and let it work.
Limitations: The stationary nature means you need good positioning. Place it poorly, and you’ve wasted 1,500 Salvage on a turret shooting at empty hallways.
Best for: Solo players who need to control multiple angles or squads defending objective locations.
3. D.A.W.G. – Your Robotic Killing Companion
Level Required: 1 (Available immediately!)
Salvage Cost: 2,250
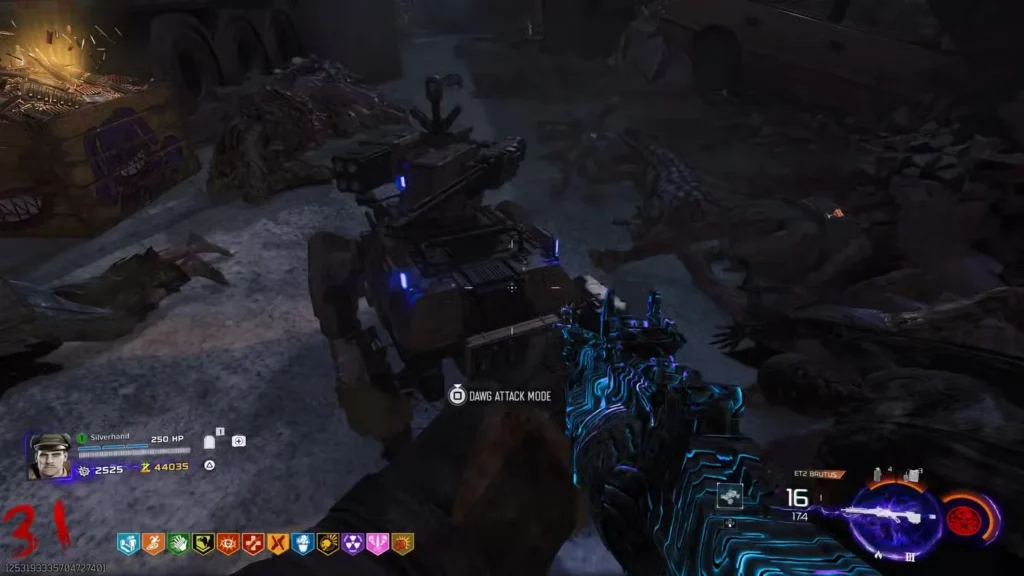
Despite being the most expensive Scorestreak in the standard tier, the Deployable Armored Weaponized Groundcraft earns its price tag.
What it does:
- Roams freely with machine gun turret and rocket pod
- Actively chases and eliminates zombies
- Can be petted (yes, really)
- Provides ammo resupply while active
Why it’s worth the investment: Unlike stationary options, D.A.W.G. follows the action. Zombies ignore it, letting this mechanical beast tear through hordes while you focus on critical kills or reviving teammates. The ammo resupply feature is surprisingly clutch during extended fights.
The drawback: 2,250 Salvage is steep, and it’s less effective against Elite Enemies. Use your regular arsenal for bosses and let D.A.W.G. handle crowd control.
Pro tip: Deploy D.A.W.G. during Exfil attempts for additional firepower when you need it most.
2. Disciple Injection – Temporary Invincibility
Level Required: 53
Salvage Cost: 2,500
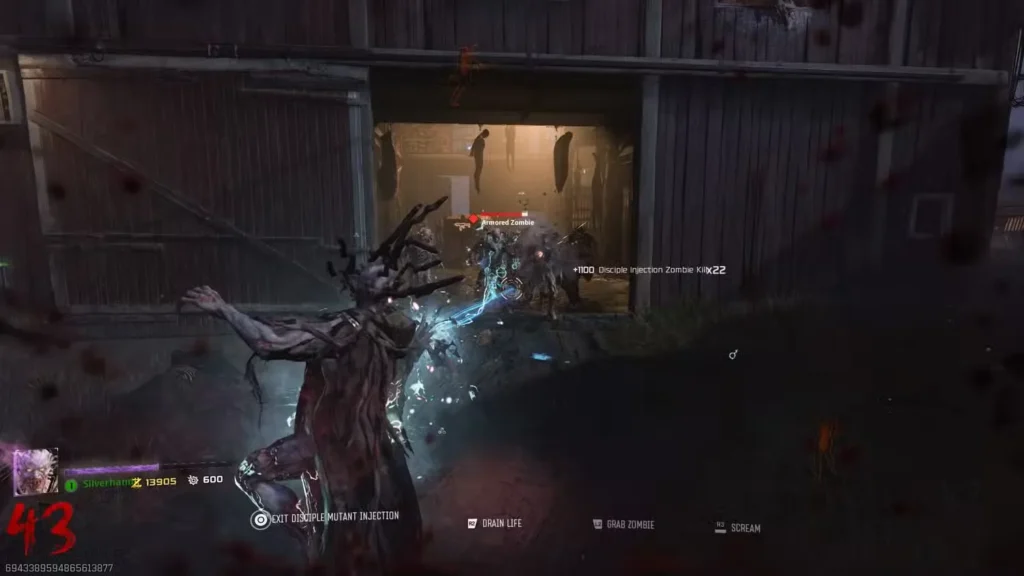
The ultimate “get out of jail free” card, though you’ll need to grind to unlock it (check our leveling guide for tips).
What it does:
- Transform into a Disciple Elite Enemy
- Complete immunity to damage for ~60 seconds
- Grab and slam zombies for area damage
- Life Steal ability extends duration
Why it’s incredible: A full minute of invulnerability is game-changing. You can revive downed teammates without risk, reload weapons leisurely, or reposition without pressure. The grab-and-slam attack creates devastating AoE damage when zombies cluster around you.
Minor issues: Movement feels sluggish compared to your normal speed, and the Scream ability is largely pointless—it just stuns zombies briefly when you should be throwing them for damage instead.
Best use: Save it for desperate situations or high-round boss encounters where you need a guaranteed survival window.
1. Hand Cannon – The Undisputed Champion
Level Required: 42
Salvage Cost: 1,250
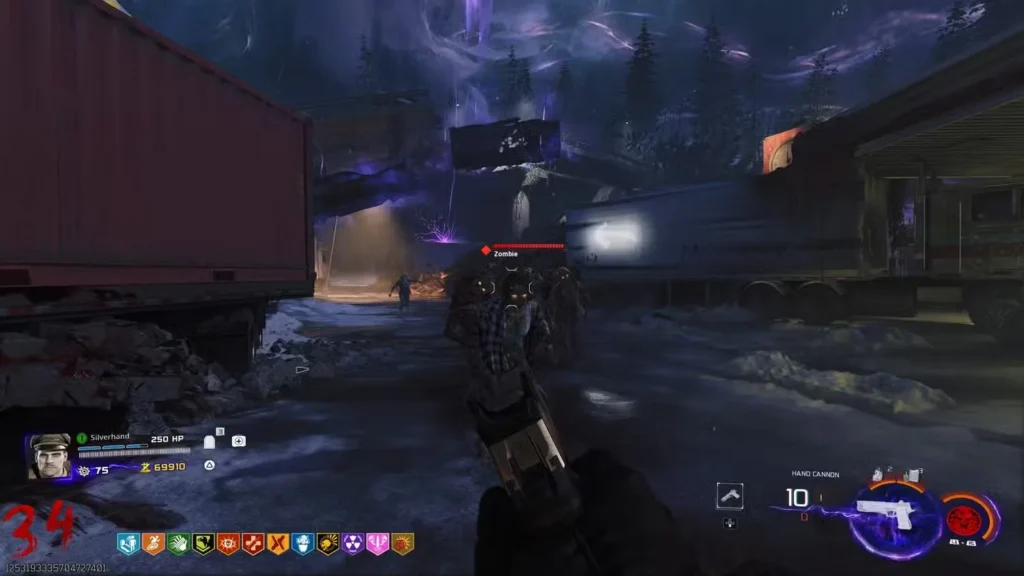
After extensive testing, the Hand Cannon consistently proves itself as the best all-around Scorestreak in Black Ops 7 Zombies. The value-to-cost ratio is unmatched.
What it does:
- High-caliber handgun with incredible penetration
- 10 rounds of devastating firepower
- Increased mobility speed while equipped
- Rapid fire rate
Why it dominates: The combination of damage, penetration, and mobility makes this a complete package. Line up your shots properly, and each bullet can tear through 5-10 zombies. The enhanced movement speed means you’re not sacrificing agility for firepower—you’re actually gaining it.
Practical applications:
- Boss melting: Takes down Zursa bears efficiently
- Horde management: Perfect for trained zombie groups
- Emergency escapes: The mobility boost helps you reposition quickly
Strategic tip: Wait until zombies are tightly grouped in your train before deploying. Each shot’s penetration potential is maximized when targets align behind each other. You can eliminate 50+ zombies with just 10 well-placed rounds.
For 1,250 Salvage—the same price as the underwhelming Mangler Cannon—the Hand Cannon delivers exponentially more value. Unlock it at Level 42 and make it your go-to Scorestreak for serious matches.
Strategic Salvage Management
Not every match requires Scorestreaks. Here’s when to invest:
Do buy Scorestreaks when:
- Pushing for high rounds (35+)
- Attempting difficult TEDD Tasks
- Your squad is struggling with horde control
- You’ve already upgraded weapons and Field Upgrades
Skip Scorestreaks when:
- Still in early rounds (pre-round 20)
- Salvage needed for wall buy customization
- Haven’t purchased essential Perk augments yet
- Playing casually or learning map layouts
Remember that Salvage also funds equipment crafting and ammo mod purchases—balance your spending accordingly.
Final Recommendations
For beginners: Start with the Hand Cannon once you unlock it at Level 42. It’s forgiving, powerful, and teaches good positioning habits.
For solo players: Invest in the Sentry Turret and D.A.W.G. combination for maximum map control.
For squads: Coordinate purchases—have one player grab Disciple Injection for emergency revives while others focus on DPS options like Hand Cannon.
For high-round attempts: Save Salvage for multiple Hand Cannons throughout your session. One per player every 5-10 rounds keeps your team ahead of the difficulty curve.
Level Up Your Zombies Strategy
Want to optimize your entire loadout? Check out these essential guides:
- Best Slot 1 Perks for Zombies
- All Gobblegums Explained
- Beginner Tips & Tricks
- Best Ammo Mod Augments
Looking for more Black Ops 7 content? Join the community on Reddit or Discord to share strategies and find teammates.
For official updates and patch notes, visit the Call of Duty: Black Ops 7 website or check the Wikipedia page for comprehensive game information.
The bottom line: The Hand Cannon at 1,250 Salvage offers the best performance per investment. Master it early, and you’ll have a reliable tool for every situation the undead throw at you