The Final Piece of Your Loadout Puzzle
Slot 3 perks represent the finishing touch on your Black Ops 7 Multiplayer loadout. While Slot 1 perks handle movement and Slot 2 perks manage utility, Slot 3 is where you specialize—choosing between scorestreak efficiency, stealth, tracking, or objective power.
With 7 perks competing for a single slot, the meta heavily favors two clear winners that dominate across all game modes. However, your specific playstyle and match type can make certain “lower-tier” perks surprisingly effective. Understanding when and why to use each perk separates good players from great ones.
Complete Slot 3 Perk Unlock Guide
All Slot 3 perks unlock through natural progression. Here’s your unlock roadmap:
| Perk | Unlock Level | Combat Specialty |
|---|---|---|
| Dexterity | Level 4 | Enforcer |
| Cold-Blooded | Level 17 | Recon |
| Bankroll | Level 23 | Enforcer |
| Charge Link | Level 30 | Strategist |
| Tracker | Level 32 | Recon |
| Guardian | Level 50 | Strategist |
| Looper | Level 54 | Enforcer |
Important note: Guardian (Level 50) and Looper (Level 54) are the highest-level unlocks in Slot 3. If you’re planning your permanent unlock token choices for Prestige, Looper should be a serious consideration.
Slot 3 Perks Ranked (Tier List)
S-Tier: Meta-Defining Perks
1. Cold-Blooded (Level 17 – Recon)
Cold-Blooded is the single best Slot 3 perk in Black Ops 7, and it’s not particularly close. This perk fundamentally changes how you interact with enemy scorestreaks and surveillance.
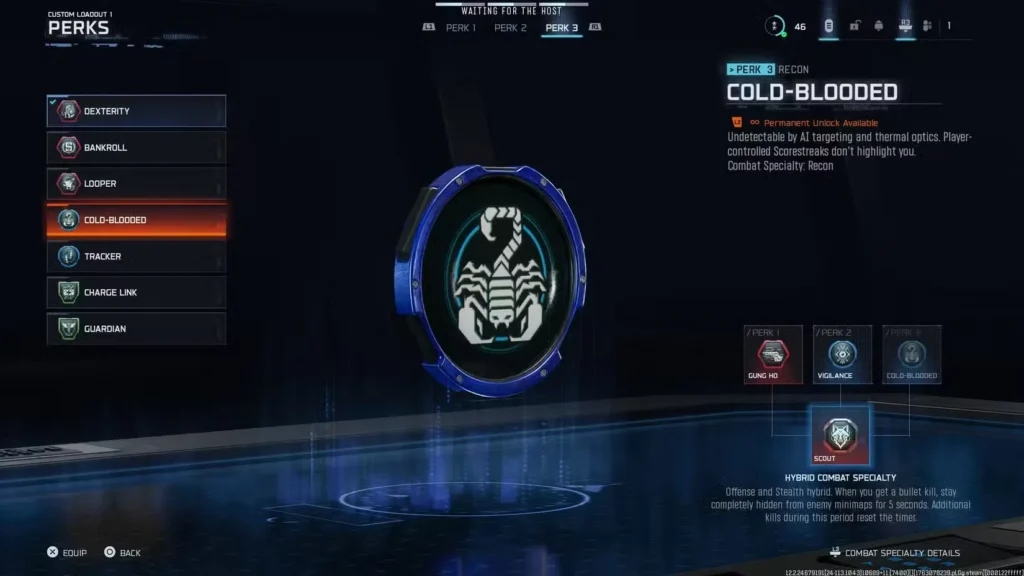
What it does:
- Immunity to AI-targeting systems (sentry guns, attack helicopters, etc.)
- Invisible to thermal optics
- No highlight from player-controlled scorestreaks (RC-XD, chopper gunner, etc.)
Why it’s S-tier:
Scorestreaks are everywhere in Black Ops 7. UAVs, Counter-UAVs, sentry turrets, attack choppers—the sky is constantly raining death. Without Cold-Blooded, you’re forced to either:
- Hide indoors and lose momentum
- Waste time/ammo destroying scorestreaks
- Die repeatedly to AI targeting
Cold-Blooded eliminates this problem entirely. Enemy AI scorestreaks simply ignore you, treating you as if you don’t exist. You can walk directly past a sentry gun without it firing a single shot. Attack helicopters won’t lock onto you. This lets you maintain aggressive pressure while your teammates are pinned down.
The thermal invisibility is critical on maps where enemies run thermal scopes. You’re essentially invisible to an entire optic category, giving you a massive advantage in mid-to-long range engagements.
Player-controlled scorestreaks (chopper gunner, RC-XD, etc.) won’t highlight you with the red outline, making you significantly harder to spot. You blend into the environment while others are marked clear as day.
Best for:
- Literally everyone (it’s that good)
- Players tired of dying to scorestreak spam
- Aggressive players who refuse to hide during enemy streaks
- Maintaining high killstreaks without scorestreak interruptions
Loadout synergy: Pairs perfectly with Recon Combat Specialty and any aggressive loadout. Works on every map, every mode, every situation.
Why not use anything else: Unless you’re specifically running a scorestreak-focused build with Looper, Cold-Blooded should be your default choice 90% of the time.
2. Looper (Level 54 – Enforcer)
Looper fundamentally changes Black Ops 7’s scorestreak economy, but only if you’re good enough to leverage it.

What it does:
- Re-earn scorestreaks in the same life (normally limited to one use per life)
Why it’s S-tier (for the right players):
In Black Ops 7, you can only earn each scorestreak once per life. Pop your UAV and Counter-UAV, and you’re done until you die. This creates a frustrating dynamic where high-skill players who stay alive for extended periods run out of things to earn.
Looper removes that limitation. Now, if you earn 1,500 score, you can loop back and earn another UAV, another Counter-UAV, another set of streaks—all in the same life. For players capable of maintaining 15+ killstreaks, Looper transforms them into scorestreak machines that constantly feed their team with intel and support.
The catch: Looper only provides value if you:
- Consistently stay alive long enough to re-earn streaks
- Actually accumulate enough score to hit your scorestreak thresholds twice
- Are skilled enough that dying to reset streaks isn’t your bottleneck
If you’re averaging 5-10 kills per life, Looper does nothing for you because you’re dying before you can loop anyway. For those players, Cold-Blooded’s defensive benefits are far more valuable.
Best for:
- High-skill slayers with 2.0+ K/D ratios
- Players attempting Prestige challenges requiring extended streaks
- Nuke attempts (30 kills without dying)
- Scorestreak-focused builds running low-cost streaks repeatedly
Loadout synergy: Mandatory pairing with Scavenger (Slot 2) and Enforcer Combat Specialty. Works best on small maps where kills come frequently.
Why it’s not #1: It requires skill to utilize. Cold-Blooded benefits everyone equally, while Looper is wasted on average players who die before looping.
A-Tier: Strong in Specific Contexts
3. Tracker (Level 32 – Recon)
Tracker is a powerful information tool that excels against unaware opponents but struggles against organized teams.
What it does:
- See enemy footsteps in the world (glowing trail on the ground)
- ADS auto-pings enemies for your team
- Killing an enemy reveals the direction of the next closest enemy on your minimap
Why it’s A-tier:
The footstep tracking is Tracker’s primary benefit. You can literally follow enemy movement trails, predicting their position and catching them off-guard. This is devastating for flanking, hunting down stragglers, and clearing buildings.
The ADS ping mechanic turns you into a reconnaissance tool for your team. Spot an enemy, ADS briefly, and they’re marked for everyone—even if you can’t take the fight yourself.
The kill-direction indicator keeps you in the action. No downtime wondering where enemies are—kill one, see where the next one is, repeat.
Why not S-tier:
Tracker can be countered by Ghost (Slot 1 perk). Against coordinated teams running Ghost, Tracker’s footstep tracking becomes useless, dropping its value significantly. Additionally, in chaotic objective modes with 12+ players fighting over a hardpoint, footsteps everywhere create visual clutter rather than useful information.
Best for:
- Solo players hunting kills
- Flanking specialists
- Search & Destroy (fewer players, more tactical)
- Casual lobbies where Ghost usage is lower
- Players with good map awareness who can leverage footstep info
Loadout synergy: Excellent with Recon Combat Specialty for maximum information dominance. Pair with AR loadouts for versatile combat.
4. Guardian (Level 50 – Strategist)
Guardian is the objective player’s best friend, but its usefulness is entirely mode-dependent.
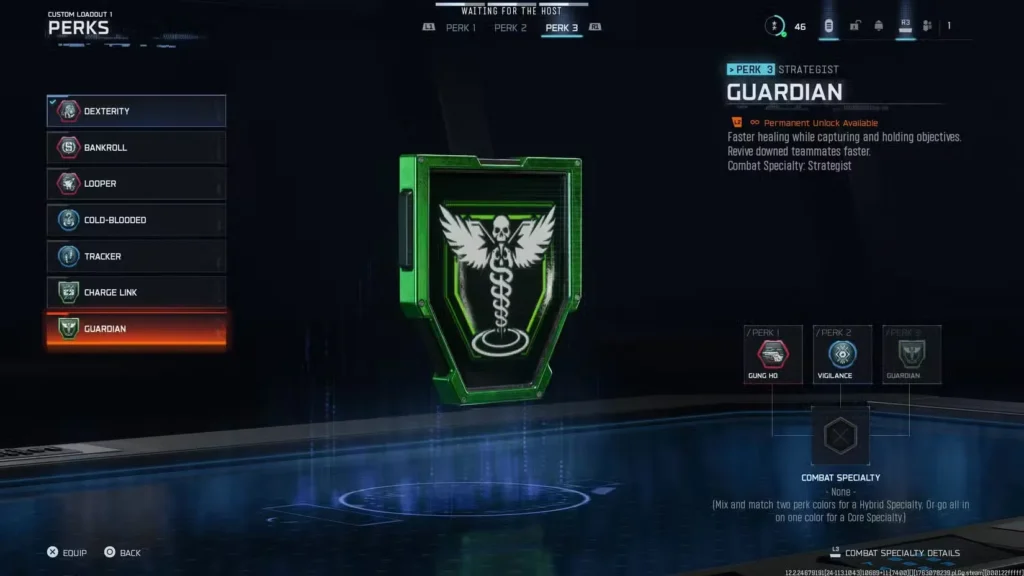
What it does:
- Faster healing while capturing/holding objectives
- Revive downed teammates faster
Why it’s A-tier (in specific modes):
In objective modes like Hardpoint, Domination, and Control, Guardian is a game-changer. The accelerated healing while on objectives means you can tank more damage and recover faster between engagements. This is critical when holding a hardpoint against waves of attackers—you’re regenerating health while defending, giving you massive survivability.
The faster revive speed matters in modes with revive mechanics, allowing you to get teammates back into fights quicker.
Why not higher:
Guardian provides ZERO value in non-objective modes. Playing Team Deathmatch or Kill Confirmed? Guardian does nothing for you. Even in objective modes, if you’re not the player holding points (maybe you’re the slayer getting kills around the objective), Guardian’s benefits don’t apply.
Best for:
- Hardpoint anchors who sit on points
- Domination flag defenders
- Control players
- Objective-focused leveling strategies
- Players who prioritize W/L over K/D
Loadout synergy: Pairs with Strategist Combat Specialty and defensive Slot 1 perks for maximum objective survivability.
Skip it for: Any non-objective mode or if you’re playing the slayer role rather than holding points.
B-Tier: Situational Value
5. Bankroll (Level 23 – Enforcer)
Bankroll accelerates your scorestreak progress, but its effectiveness depends heavily on your survival rate.
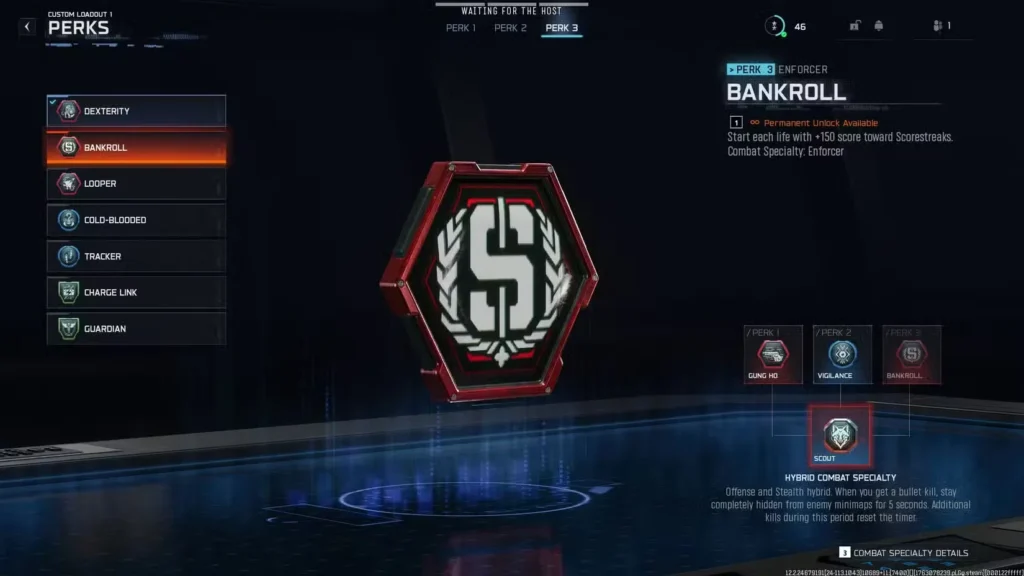
What it does:
- Start each life with +150 score toward scorestreaks
Why it’s B-tier:
+150 score is essentially a free kill’s worth of progress toward your scorestreaks every time you spawn. If you’re running a 500-cost UAV, you only need 350 more score to earn it—achievable with 3-4 kills instead of 5.
This is excellent for:
- Lower-skill players who struggle to earn streaks naturally
- Running cheap streaks repeatedly (UAV, Counter-UAV)
- Modes where you die frequently but want consistent streak access
Why not higher:
The problem: you only benefit from Bankroll when you die. If you’re good enough to stay alive for long stretches (10+ killstreaks), you’re barely benefiting from the perk because you’re not respawning. Meanwhile, Cold-Blooded would be keeping you alive through enemy scorestreaks, or Looper would let you re-earn streaks.
Bankroll is a “crutch perk” that helps struggling players more than skilled ones. If your K/D is below 1.0, Bankroll is great. Above 1.5? You’re better served by other options.
Best for:
- Newer players learning the game
- Objective modes where deaths are frequent
- Scorestreak-focused builds with cheap streaks
- Players with K/D ratios below 1.0
Loadout synergy: Works with Enforcer Combat Specialty for aggressive, respawn-heavy playstyles.
6. Dexterity (Level 4 – Enforcer)
Dexterity is a movement enhancement perk that’s serviceable but outclassed by better options.
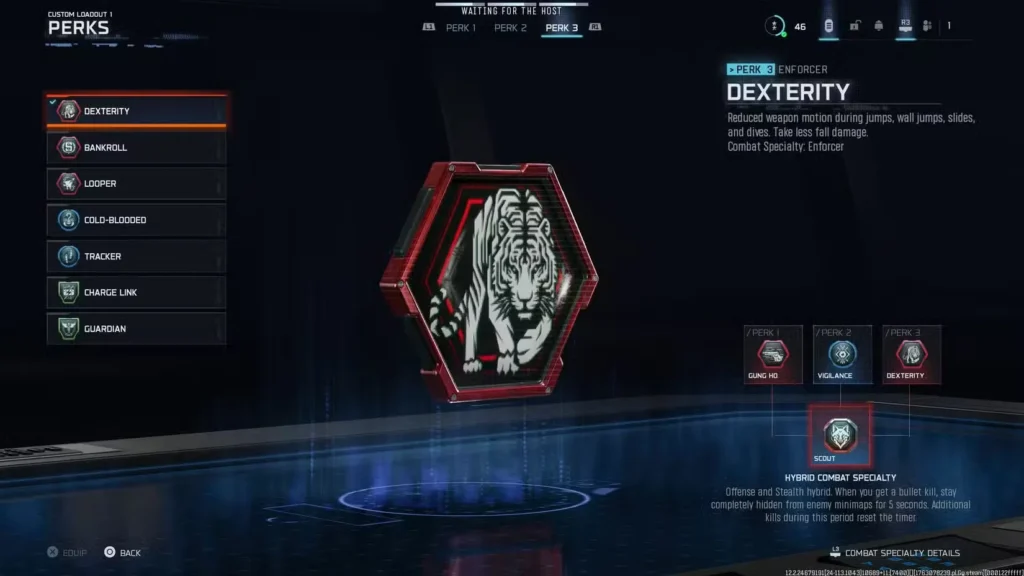
What it does:
- Reduced weapon motion during movement (jumps, slides, dives, wall jumps)
- Reduced fall damage
Why it’s B-tier:
Dexterity keeps your weapon steady during movement mechanics, allowing you to maintain accuracy while performing advanced movement. If you’re a player who constantly slides around corners, jump-shots enemies, or abuses movement mechanics, Dexterity prevents the accuracy penalties associated with those actions.
The fall damage reduction is a minor bonus that occasionally saves you from self-inflicted deaths on verticality-heavy maps.
Why it’s not higher:
The benefits are marginal. Yes, reduced weapon motion helps, but Black Ops 7’s base weapon handling during movement is already pretty forgiving. The accuracy improvement from Dexterity is noticeable but not game-changing—you’re still losing most fights against stationary enemies if you’re mid-slide.
Compare this to Cold-Blooded’s scorestreak immunity or Looper’s scorestreak looping, and Dexterity feels underwhelming. It’s a “nice to have” rather than a “need to have.”
Best for:
- Movement-heavy players (constant sliding/jumping)
- SMG rushers who live in the enemy spawn
- Players with excellent movement mechanics
- Modes on vertical maps where fall damage matters
Loadout synergy: Works with Enforcer Combat Specialty and aggressive SMG builds.
Skip it for: Most players—Cold-Blooded or Looper provide more universal value.
C-Tier: Generally Avoid
7. Charge Link (Level 30 – Strategist)
Charge Link occupies the bottom tier because Field Upgrades simply aren’t impactful enough to warrant a perk slot.
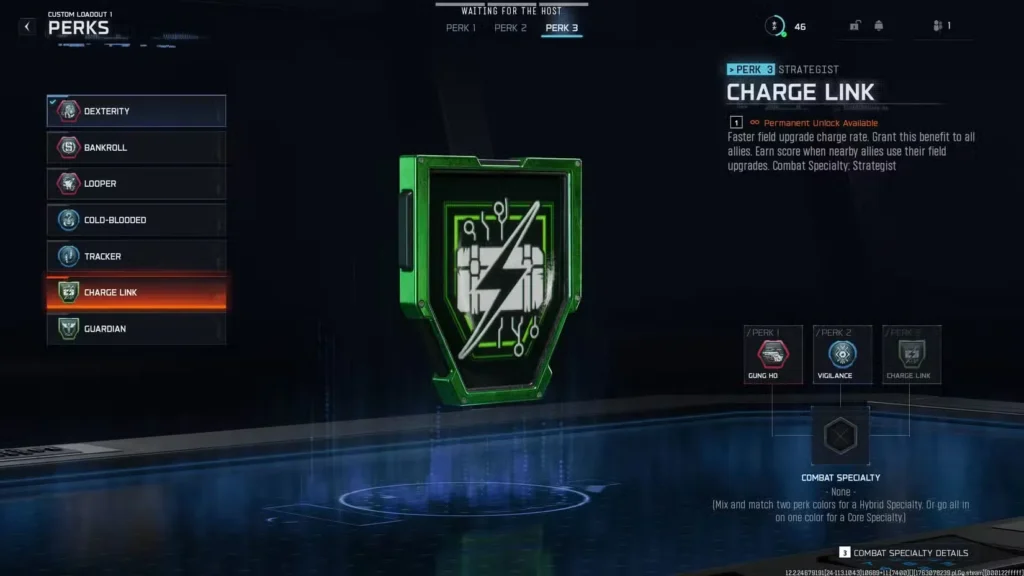
What it does:
- Faster field upgrade charge rate
- Grant this benefit to nearby allies
- Earn score when allies use field upgrades
Why it’s C-tier:
Field Upgrades in Black Ops 7 are useful but not game-defining. They charge reasonably fast already, and spending a perk slot to charge them slightly faster is poor resource allocation when you could have scorestreak immunity (Cold-Blooded) or scorestreak looping (Looper).
The team benefit is nice in theory—coordinated squads get faster field upgrades—but the reality is most players aren’t running cohesive strategies where field upgrade timing matters that much.
The score earned from allies using field upgrades is negligible. You’re not getting meaningful scorestreak progress from this mechanic.
When it’s barely useful:
- Coordinated 6-stacks running field upgrade-focused strategies
- Specific field upgrades that are exceptionally powerful (if any exist in the meta)
- Players who religiously use field upgrades and want them available constantly
Why you should skip it:
Every other Slot 3 perk provides more tangible benefits. Even Dexterity’s marginal weapon motion reduction impacts more gunfights than Charge Link’s faster field upgrade charging.
Loadout synergy: Technically pairs with Strategist Combat Specialty, but you’re still better off running Cold-Blooded.
Recommended Loadout Combinations
Aggressive Slayer Build (High-Skill)
- Slot 3: Looper
- Slot 2: Scavenger
- Slot 1: Movement perk
- Weapons: AR or SMG
- Combat Specialty: Enforcer
Maximum scorestreak spam for players who can maintain extended killstreaks.
Standard Flex Build (Universal)
- Slot 3: Cold-Blooded
- Slot 2: Vigilance
- Slot 1: Survivability perk
- Weapons: Versatile AR loadout
- Combat Specialty: Recon
Works in every mode, every map, every skill level. Default loadout for most players.
Information Hunter Build
- Slot 3: Tracker
- Slot 2: Vigilance
- Slot 1: Movement perk
- Weapons: AR or Sniper
- Combat Specialty: Recon
Maximum information for flanking and hunting isolated enemies.
Objective Anchor Build
- Slot 3: Guardian
- Slot 2: Tech Mask
- Slot 1: Survivability perk
- Weapons: Defensive AR or LMG
- Combat Specialty: Strategist
Built for sitting on hardpoints and holding objectives through sustained combat.
Budget Scorestreak Build (Lower Skill)
- Slot 3: Bankroll
- Slot 2: Fast Hands
- Slot 1: Survivability perk
- Weapons: Easy-to-use weapon loadouts
- Combat Specialty: Enforcer
Designed for consistent low-tier scorestreak access despite frequent deaths.
Final Recommendations by Playstyle
If you’re unsure what to run: Choose Cold-Blooded. It’s universally beneficial across all skill levels, modes, and maps. You cannot go wrong with scorestreak immunity.
If you’re a high-skill player: Use Looper and dominate the scorestreak economy. Your ability to stay alive translates directly into non-stop streak spam for your team.
If you play objective modes exclusively: Guardian keeps you alive on points longer. Pair it with defensive perks for maximum objective holding power.
If you love hunting enemies down: Tracker turns you into a relentless pursuer. Follow footsteps, chain kills, never lose momentum.
If you’re new or struggling: Bankroll gets you into scorestreaks faster despite dying frequently. It’s training wheels for the scorestreak system.
If you’re a movement god: Dexterity enhances your advanced movement, though honestly, Cold-Blooded is probably still better.
Skip entirely: Charge Link—it’s just not worth the perk slot in the current meta.
Prestige Planning: Permanent Unlock Priority
When you Prestige, consider using a permanent unlock token on:
High priority:
- Looper (Level 54) – Highest unlock, massive impact for skilled players
Medium priority:
- Guardian (Level 50) – High unlock, very strong in objective modes
- Tracker (Level 32) – Moderately high unlock, powerful tool
Skip these:
- Cold-Blooded (Level 17) – Unlocks quickly through natural progression
- Dexterity (Level 4) – Available almost immediately
- Bankroll (Level 23) – Low-medium unlock
Focus permanent unlocks on Level 50+ items. Cold-Blooded, despite being the best perk, unlocks early enough that spending a token on it is wasteful.
Common Mistakes to Avoid
Don’t run Looper if you can’t utilize it: If you average 8 kills per life, you’re not looping scorestreaks. Use Cold-Blooded instead and focus on staying alive through enemy streaks.
Don’t sleep on Cold-Blooded: New players underestimate how much they die to scorestreaks. Cold-Blooded removes an entire category of deaths from your experience.
Don’t run Guardian in non-objective modes: It literally does nothing in TDM or Kill Confirmed. Mode-specific perks require mode-specific usage.
Don’t overvalue Dexterity: Movement skill matters, but movement perks aren’t as impactful as immunity perks or scorestreak economy perks.
Don’t run Charge Link: Just… don’t. Any other perk is more valuable.
Beyond Slot 3: Complete Your Loadout
Your Slot 3 perk completes your loadout, but don’t neglect:
- Slot 1 perks for movement and survivability
- Slot 2 perks for utility and sustain
- Combat Specialties for ability synergy
- Weapon optimization for gunfight advantages
- Game settings for performance
And if lag is costing you gunfights, check our packet burst fix guide.
Additional Black Ops 7 Resources
Core progression:
Multiplayer optimization:
- Best pistol builds
- Best sniper loadouts
- How to get easy headshots
- Longshot kills guide
- Point-blank kills guide
Game features:
- How to take enemies hostage
- How to use emotes and sprays
- Split-screen multiplayer
- Enable/disable crossplay
Zombies guides:
- Complete Zombies beginner guide
- How to farm Essence
- Critical kills guide
- Set custom weapons in wall-buys
Cosmetics and rewards:
External Resources:
Choose wisely—your Slot 3 perk can turn a good loadout into a dominant one. Now get out there and put these perks to work!