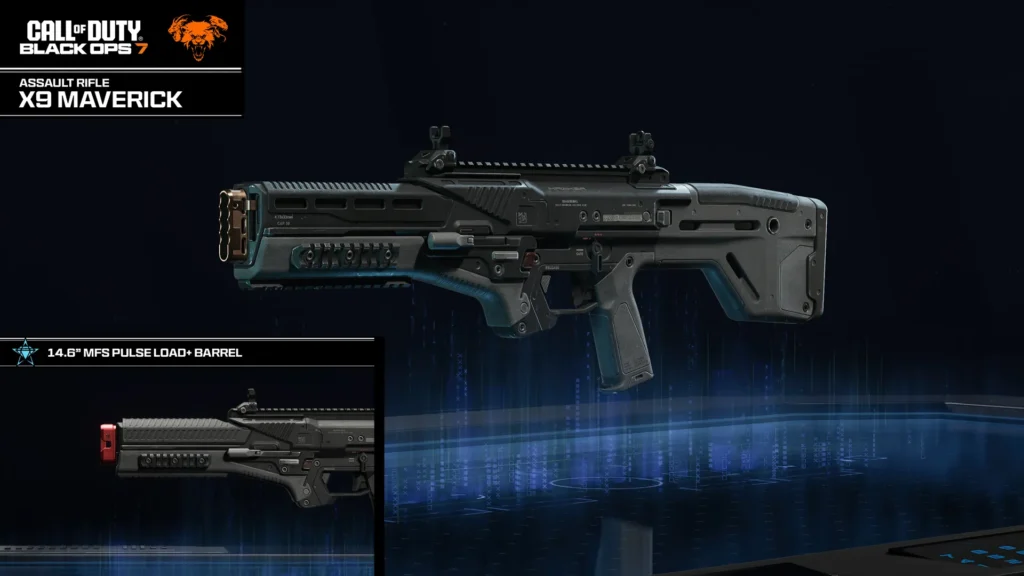
The X9 Maverick is flying under the radar at Black Ops 7’s launch, and honestly, that’s working to your advantage. While most players are gravitating toward the usual suspects, the Maverick sits as one of the most lethal weapons in multiplayer—if you know how to use it.
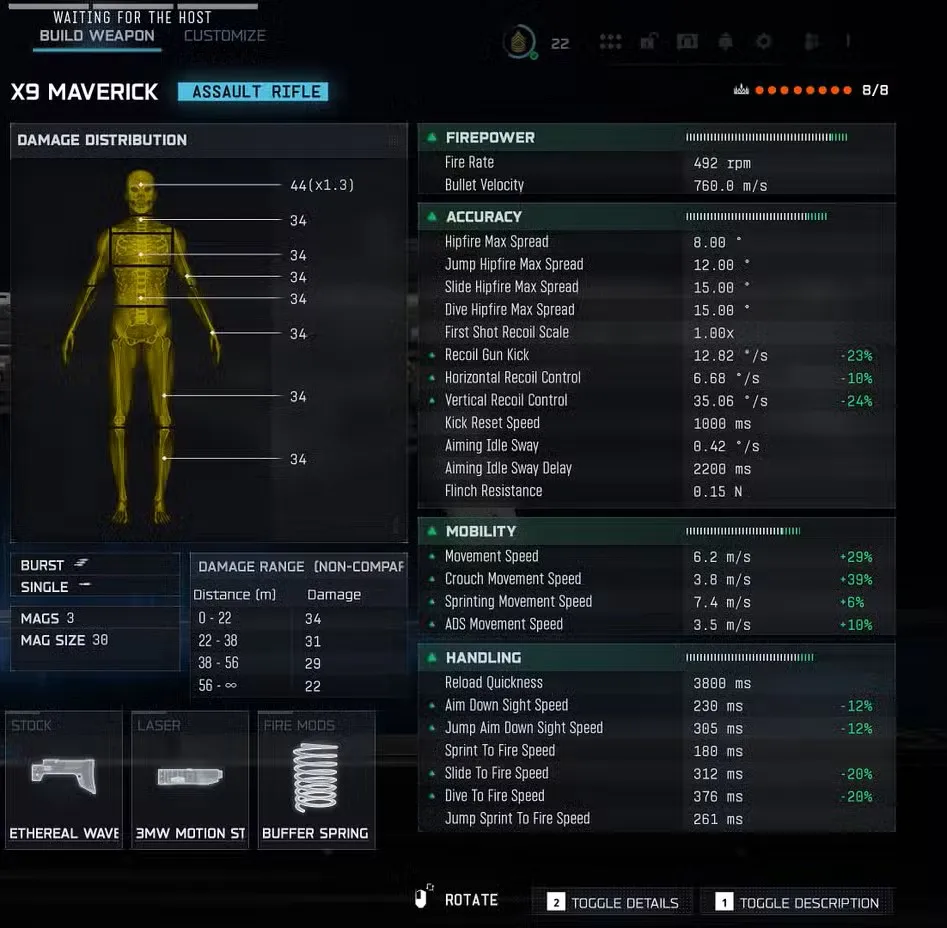
This is a burst rifle in an era where burst weapons have fallen out of favor, which immediately makes it seem like a liability. But the stats tell a different story. If you’re landing your shots consistently, the X9 Maverick has the best time-to-kill in the entire assault rifle category. The competition isn’t even close. I’ve been running this weapon since launch, and once you understand what makes it tick, it becomes a highlight-reel generator.
The catch? It demands accuracy. This isn’t a weapon that forgives spray-and-pray tactics. But if positioning and shot placement are your strengths, the Maverick will reward you relentlessly.
Why the X9 Maverick Deserves Your Attention
Let’s break down what makes this weapon special—and why it’s criminally underutilized.
The TTK Advantage: The X9 Maverick is the only three-round burst assault rifle in Black Ops 7. But unlike other burst weapons that feel balanced by lower damage, the Maverick carries the highest damage-per-shot of any assault rifle in the game. This combination is devastating: you’re delivering maximum damage in the shortest time window possible, assuming accuracy.
If you’re landing all three rounds of a burst, you’re eliminating opponents faster than any other AR. Full stop. This is mathematical fact, not opinion. Assault rifles don’t get better TTKs than this.
Recoil Reality: This is where the Maverick becomes genuinely special. Horizontal recoil is practically non-existent. We’re talking minimal drift. Vertical kick is present but manageable—each burst has a small upward climb that you can predict and counter. For a weapon with this much damage potential, having this little recoil deviation is genuinely unusual. Most weapons trade damage for controllability; the Maverick refuses to make that compromise.
The Trade-Off: Here’s the honest part: the X9 Maverick is medium-tier for handling and mobility. It sits comfortably in the middle of the assault rifle spectrum. That’s not terrible, but it means you’re not out-rushing SMG users or sprinting around corners aggressively. The weapon demands a measured playstyle where you’re holding positions, pre-aiming corners, and capitalizing on your accurate bursts rather than playing reactive close-range encounters.
The Optimal X9 Maverick Loadout
Build Code: S01-AV21G-JAAJ5-1
Core 5-Attachment Setup
This foundation transforms the Maverick into an accuracy and range monster:
| Attachment | Slot | Purpose |
|---|---|---|
| Lethal Tools ELO | Optic | Super clean sight for crispy burst placement — zero visual clutter |
| Defense-H Suppressor | Muzzle | Keeps you off the minimap + adds a lil’ recoil smoothing |
| 17.6″ Chiral-02 Barrel | Barrel | Big range extension — keeps those one-burst dreams alive at distance |
| Quickstep Foregrip | Underbarrel | Controls the tiny horizontal wiggle + stabilizes burst timing |
| 3MW Motion Strike Laser | Laser | Helps hipfire in panic moments and boosts movement-ADS synergy |
Why This Configuration Works: The ELO optic is chosen for its clean reticle—you need precision to make the Maverick work. The barrel is the star here, pushing your effective range out to 22 meters before damage falloff, allowing consistent one-to-two burst eliminations. The Quickstep Foregrip isn’t overkill; it’s fine-tuning an already-excellent recoil profile. The laser gives you hipfire backup without sacrificing ADS speed.
This setup says: “I’m positioning carefully, taking measured bursts, and leveraging range advantage.”
Gunfighter Expansion: 3 Additional Slots
Running the full 8-attachment Gunfighter setup? Use these three additions:
| Attachment | Slot | Purpose |
|---|---|---|
| Daedalus | Rear Grip | Extra recoil control + better handling — keeps your bursts locked-in tight |
| Ethereal Wave Stock | Stock | Big mobility boost: sprint-to-fire, ADS, overall agility — no more sluggish vibes |
| Buffer Spring | Fire Mods | Dials in vertical recoil for ultra-consistent, laser-precise bursts |
These additions preserve the Maverick’s accuracy while compensating for its moderate handling. The Ethereal Wave Stock is particularly important if you’re playing tighter maps where some mobility matters. You’re not becoming an aggressive rusher, but you’re not sluggish either.
What This Loadout Actually Delivers
Accuracy & Recoil:
- Horizontal recoil is controlled to the point of being negligible
- Vertical kick is predictable and manageable across the effective range
- Each burst feels consistent and reliable; you know exactly where bullets are going
- Off-radar firing keeps you hidden from minimap tracking
Damage & Range:
- Effective damage range extends to 22 meters before falloff, maximizing one-burst elimination potential
- Damage-per-shot is unmatched in the AR class
- Time-to-kill is mathematically superior when accuracy is maintained
- You remain competitive against multiple weapon types at medium range
Handling & Positioning:
- Moderate mobility keeps you from feeling sluggish but still encourages deliberate positioning
- Sprint-to-fire speed is improved with Gunfighter additions, keeping you responsive
- ADS speed is snappy enough for reactive situations
- Hipfire is now viable for close-range surprises
How to Actually Dominate With the X9 Maverick
The Maverick doesn’t play like standard assault rifles. Master these fundamentals and you’ll unlock its true potential.
Positioning Philosophy: This is the key. The Maverick rewards static positioning over aggressive rushing. Find headglitch positions, tighter sight lines, and objective areas where you can pre-aim common engagement points. Maps like Launch and Nuketown have countless positions where the Maverick becomes unstoppable.
Engagement Strategy: Never force close-range encounters. Let opponents come to you. When they peek your corner, that’s when your three-round burst ends them. The burst mechanic means you have a slight delay between shots—something like 100ms between bursts—so don’t expect pure spray-and-pray to work.
Burst Discipline: This is crucial: tap the trigger for single bursts rather than holding down the trigger. You’re not spraying. You’re delivering controlled, deliberate damage. Three rounds, maximum damage, then reset. This discipline is what separates Maverick users who succeed from those who struggle.
Against Different Weapon Types:
- vs. SMGs: Your range advantage is enormous. Don’t let them close distance. Position yourself at 20+ meters
- vs. Other ARs: Your burst damage is superior if accuracy is equal. Win the positioning battle and you win the gunfight
- vs. Snipers: Your TTK is faster; keep moving and don’t let them line up shots
- vs. Tactical Rifles: Your fire rate advantage means they can’t out-damage you in sustained exchanges
Playstyles to Avoid: Don’t play aggressive SMG-style on tight maps—that’s not the Maverick’s domain. Don’t sprint constantly looking for close engagements. Don’t expect to compete in pure 1v1 raw reflexes situations where someone’s already pre-aiming your position.
Tactical Map Awareness
The Maverick shines on specific map sections:
Hijacked – The central bridge and upper deck areas are tailor-made for burst weapons. Clean sight lines reward accuracy.
Launch – Rocket site positioning and chopper sites have excellent headglitch opportunities where the Maverick dominates.
Nuketown – The center road and garage provide perfect range windows for the Maverick’s effective damage range.
Cosmodrome – The open upper areas and building positions reward measured positioning and accurate bursts.
Avoid playing the Maverick in tight corridor-heavy sections where close-range encounters dominate. That’s SMG territory.
Related Guides to Expand Your Loadout Knowledge
The X9 Maverick is one option in Black Ops 7’s diverse arsenal. Explore these complementary guides:
- Best Meta Loadouts for Multiplayer – See how Maverick ranks competitively
- Best AK-27 Loadout Guide – Alternative mid-range AR comparison
- Best Carbon 57 Loadout – Close-range SMG contrast
- Complete Weapon Camos Unlock Guide – Grind camos with this weapon
- Best RK-9 Loadout Build – Traditional AR alternative
- Best Sniper Loadouts Guide – Long-range option comparison
Optimization Tips for Different Players
For Precision Shooters: This is your weapon. Don’t change a thing. The core 5-attachment build is already optimized for accuracy. Focus on learning recoil compensation and burst discipline.
For Casual Players: Consider adding the Ethereal Wave Stock for extra mobility in Gunfighter. You’ll sacrifice some pure accuracy for weapon responsiveness, but you’ll feel less “sluggish.”
For Competitive/Ranked Play: Keep the core setup intact. Accuracy is non-negotiable in competitive. Skip mobility attachments entirely. Every slot goes toward damage range, recoil control, and optic clarity.
For Map Grinding: Use the 5-core attachments without Gunfighter. Faster leveling, consistent performance, and you maintain the Maverick’s identity without overcomplicating.
The Bottom Line
The X9 Maverick is overlooked because burst weapons have fallen out of favor in modern Call of Duty. Players assume lower fire rate means lower viability. But the Maverick’s superior damage-per-shot shatters that assumption. It delivers the best TTK in the assault rifle class to any player with the positioning discipline and shot accuracy to leverage it.
This isn’t a weapon for everyone. It doesn’t reward aggressive rushing, constant sprinting, or pure reflexes-based gameplay. It rewards map knowledge, positioning patience, and shot placement discipline. But for players willing to adapt their playstyle, the Maverick becomes an incredible weapon that rarely feels unfair to fight—just incredibly effective.
Master the burst mechanic, commit to positioning, and the X9 Maverick will carry you through Black Ops 7’s multiplayer landscape. You’ll be eliminating opponents in ways other assault rifles simply can’t match.