Complete guide to all 7 Auger Mines in Borderlands 4. Find every location, boss strategy, and legendary loot drops for the ultimate cave exploration experience.
TL;DR
Borderlands 4 features 7 Auger Mines across 4 regions, each containing unique bosses and legendary loot. Unlock them after completing “Shadow of the Mountain,” then farm bosses like Bramblesong (Convergence shotgun) and Shadowpelt (multiple legendaries) for top-tier gear. Bring element-specific weapons: Incendiary for Flesh, Shock for Shields, Corrosive for Armor.
Ready to dive into the dark, creature-infested depths of Kairos? Auger Mines are some of the most rewarding – and dangerous – locations in Borderlands 4. These underground lairs aren’t just atmospheric dungeon crawls; they’re legitimate endgame farming destinations packed with legendary loot that can transform your build from decent to absolutely devastating.
Think of Auger Mines as Borderlands 4’s answer to mini-raids. Each one tells its own environmental story while testing your combat skills against some seriously nasty bosses. The payoff? Some of the game’s most coveted legendary weapons and gear that you simply can’t find anywhere else.
How to Unlock Auger Mines
Before you can start your underground treasure hunting, you’ll need to progress through the main story until you complete “Shadow of the Mountain.” This mission gates access to all Auger Mines, so don’t expect to rush these early in your playthrough.
Once unlocked, all 7 mines become available simultaneously, letting you tackle them in whatever order suits your current power level and gear needs.
The Complete Auger Mines Breakdown
1. Timid Kyle’s Neglected Opening (Fadefields)
Location: Coastal Bonescape, The Fadefields
Boss: Voraxis
Difficulty: Beginner-friendly
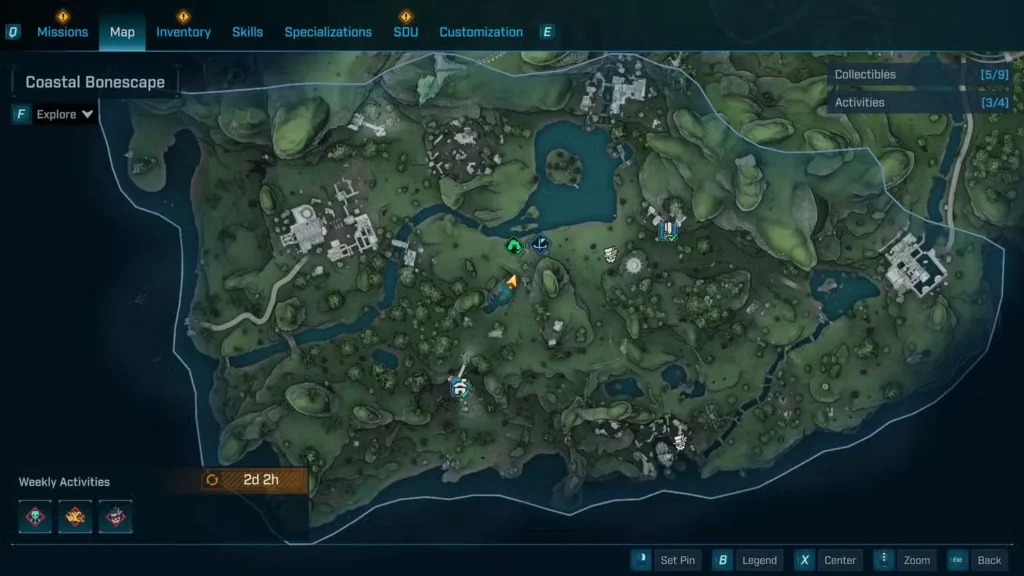
This is your introduction to Auger Mine mechanics, and it’s deliberately accessible. Voraxis is a massive Thresher that loves to burrow underground and surprise you with devastating bite attacks. The trick is patience – wait for it to surface, then unload with Incendiary weapons to exploit its single Flesh health bar.
Pro Navigation Tip: Don’t jump into the obvious red-glowing hole. Loop around to the right for the actual entrance – the game’s trying to trick you here.
Legendary Drops:
- Darkbeast SMG – Piercing bullets with explosion chance make this perfect for crowd control
- Potato Thrower IV Assault Rifle – Don’t let the silly name fool you; this thing hits hard
2. The Claim (Fadefields)
Location: Dissected Plateau, The Fadefields
Boss: The Backhive
Difficulty: Moderate
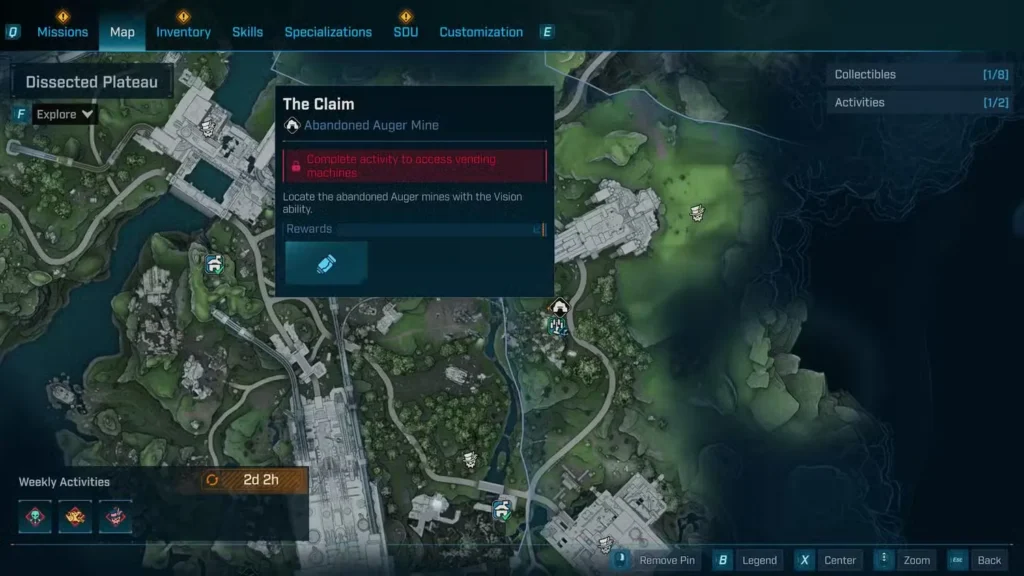
The Backhive is where Auger Mines start getting serious. This massive creature spawns Kratch enemies from its back while you’re trying to damage it, creating a chaotic multi-threat scenario. Focus fire on the main body with Incendiary weapons while managing the adds.
Strategic Note: This mine is near Zadra’s hideout, so complete “A Lot to Process” (mission 4) before attempting.
Legendary Drops:
- Triple Bypass Repkit – Three charges with kill-refill chance make this a survival game-changer
- Rallying Stop Gap Sniper – Trades fire rate for massive damage boost, plus alt-fire shotgun mode
3. The Pigeonhole (Carcadia Burn)
Location: Grindstone of the Worthy, Carcadia Burn
Boss: Skull Orchid
Difficulty: Moderate (with a twist)
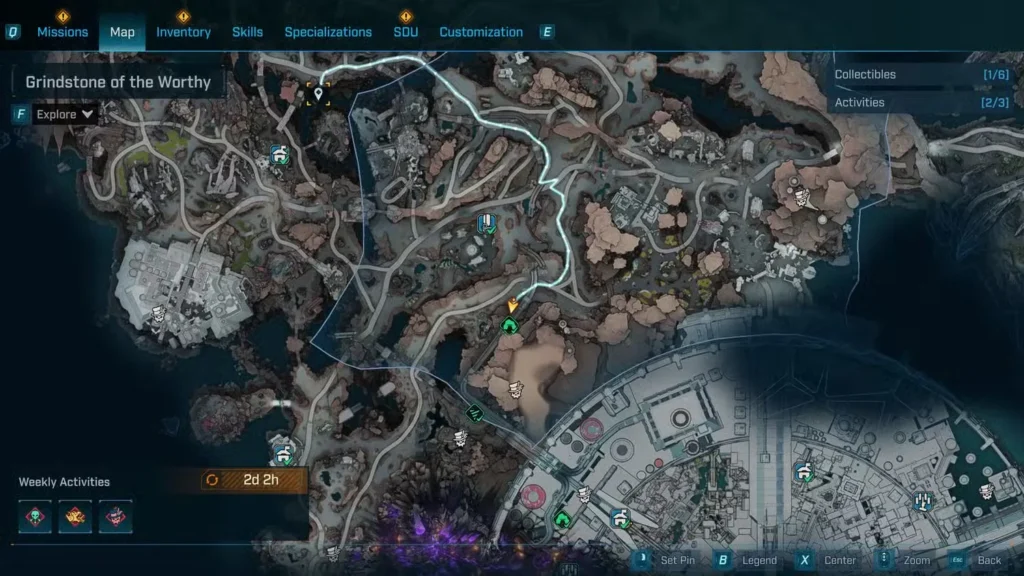
Skull Orchid is a Creep boss that randomly shifts elemental resistances, making it a puzzle fight as much as a damage race. The key is targeting its mouth tendrils – the eyes and head are heavily armored. Bring multiple elemental weapons or focus on kinetic damage.
Combat Tip: When it changes elements, switch your strategy immediately. Don’t waste ammo on resistant phases.
Legendary Drops:
- Spied Dextrous Oak-Aged Cask Shield – Broken shield gives movement/handling buffs plus melee reflection
- Roach Pistol – Solid sidearm for backup situations
4. Trinket Crevass (Carcadia Burn)
Location: Ruined Sumplands, Carcadia Burn
Boss: Rocken Roller
Difficulty: Easy-Moderate
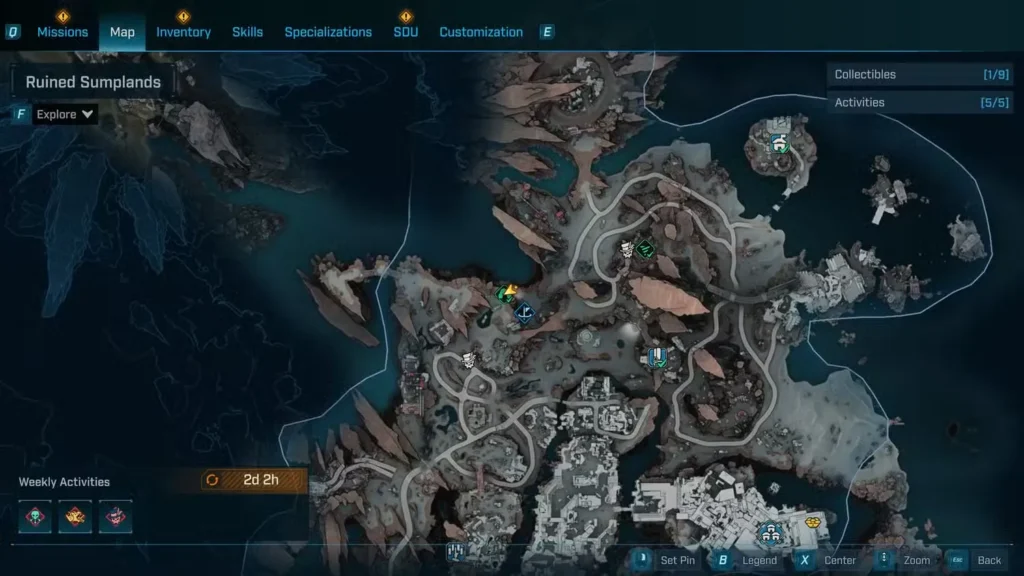
Rocken Roller showcases Borderlands 4’s more creative boss mechanics. This rolling menace has a regenerating Vile health bar protected by destructible crystals. Destroy the crystals to expose the Flesh bar underneath, then burn it down quickly before the Vile bar regenerates.
Movement is Life: Stay airborne and mobile. This boss punishes stationary play.
Legendary Drops:
- Whispering San Saba Songbird Pistol – Weapon-swap damage bonus makes this perfect for aggressive playstyles
- AF1000 – Details coming as more players discover this drop
5. Whistler’s Maw (Terminus Range)
Location: Cuspid Climb, Terminus Range
Boss: Shadowpelt
Difficulty: Hard
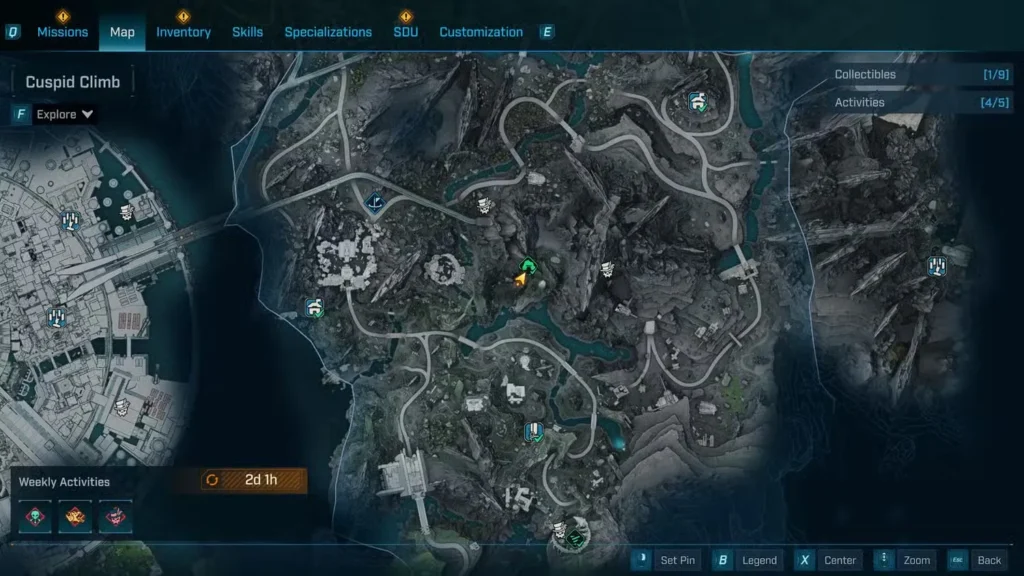
Shadowpelt is arguably the trickiest Auger Mine boss, combining invisibility mechanics with shield regeneration. When its shield recharges, it vanishes completely and relies on hit-and-run tactics. Bring Shock weapons for shields and Incendiary for the Flesh bar underneath.
Advanced Strategy: Learn to track its movement even when invisible – it still makes sound and disturbs environmental elements.
Legendary Drops:
- Slippy Grenade – Melee damage grenades with massive knockback
- Eviscerating Vamoose Sniper – Tracker alt-fire plus charge-up mechanics
- Centering Weatherproof Sparky Shield – Multiple defensive bonuses make this a tank’s dream
6. Bittervein (Terminus Range)
Location: Stoneblood Forest, Terminus Range
Boss: Bramblesong
Difficulty: Hard
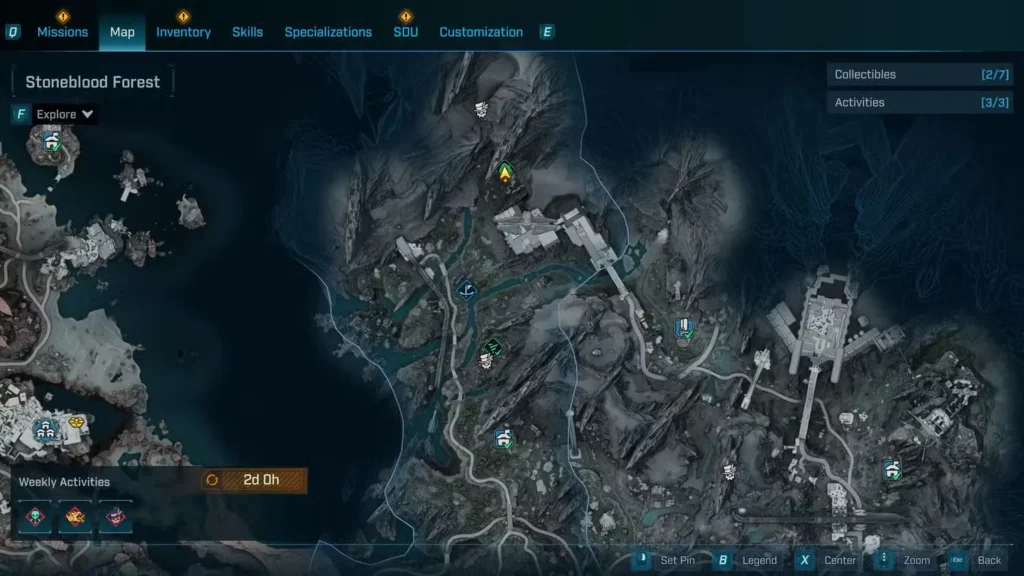
Bramblesong is a fan-favorite farming target, and for good reason. This oversized Kratch has two Flesh health bars and drops the coveted Convergence shotgun. The mine itself features complex platforming with grapple points – think vertically and look up frequently.
Farming Gold Mine: This is one of the best cash farming locations in the game due to consistent legendary drops.
Legendary Drops:
- Ohm I Got SMG – Shield-powered weapon that never needs ammo while shields are active
- Convergence Shotgun – Absolute delete-button for single targets
- Disco Grenade – Expanded radius makes this perfect for crowd control
7. The Toil of Spoiling Vis (Dominion)
Location: Carcadia District, Dominion
Boss: Axemaul
Difficulty: Very Hard
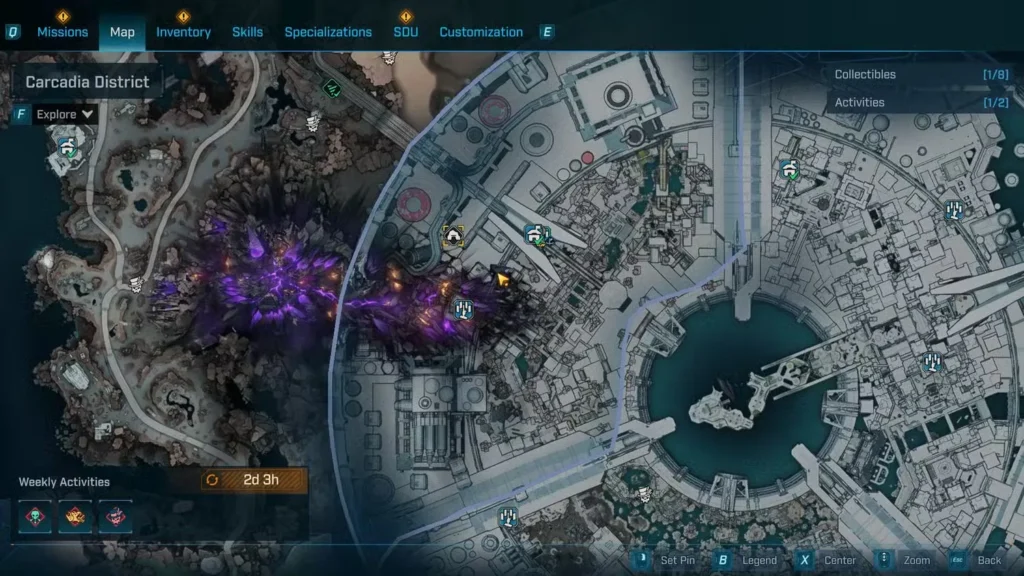
The final Auger Mine is locked behind significant story progression and represents the ultimate challenge. Axemaul combines Armor and Flesh health bars, requiring both Corrosive and Incendiary weapons. This axe-wielding Mangler hits like a truck and demands perfect positioning.
Late Game Access: You’ll need to reach Dominion through story progression before attempting this mine.
Legendary Drops:
- Armored Bod Shotgun – Multi-weapon classification makes this incredibly versatile for builds
- Buzz Axe Grenade – Critical hit chance grenades for massive damage spikes
- Kill Spring – Another rare drop still being catalogued by the community
Essential Auger Mine Strategies
Elemental Preparation is Everything
Different boss types require specific elemental approaches:
- Flesh Bars: Incendiary weapons for maximum damage
- Shield Bars: Shock weapons to break them quickly
- Armor Bars: Corrosive weapons to melt through protection
- Vile Bars: Focus on destroying crystals/weak points first
Navigation Tips for Success
Look Up: Many mines feature vertical elements with grapple points above eye level. Scan ceilings regularly.
Sound Design Matters: Audio cues often indicate hidden paths, approaching enemies, or boss phase changes.
Backtrack Smart: Some mines have shortcuts that unlock after initial completion, making farming runs much faster.
Building Your Auger Mine Farming Route
Not all mines are created equal for farming efficiency. Here’s my recommended progression:
Beginner Route: Timid Kyle’s → The Claim → Trinket Crevass
Intermediate Route: Add The Pigeonhole and Whistler’s Maw
Advanced Route: Include Bittervein and Toil of Spoiling Vis
Pro Farming Tip: Chain multiple mines in a single session using fast travel points to maximize legendary drops per hour.
Integrating Auger Mine Loot with Your Build
The legendary gear from these mines isn’t just collectible – it’s build-defining. The Convergence shotgun from Bramblesong pairs perfectly with Vex builds, while the Triple Bypass Repkit can transform any character’s survivability.
Consider how each legendary fits into your preferred playstyle before committing to long farming sessions. Some weapons work better with specific character specializations, so plan accordingly.
Beyond the Loot: Why Auger Mines Matter
These aren’t just loot piñatas – they’re some of Borderlands 4’s best environmental storytelling. Each mine tells the story of Kairos through its creatures, layout, and atmosphere. The increasing difficulty also serves as a skill check, ensuring you’re ready for the challenges ahead.
Plus, mastering Auger Mine mechanics prepares you for other endgame content like Vault Monster fights and advanced boss farming strategies.
Ready to Go Underground?
Auger Mines represent some of Borderlands 4’s most rewarding content – challenging enough to test your skills, rewarding enough to justify the effort, and atmospheric enough to keep you coming back for more than just the loot.
Gear up, pick your poison, and start spelunking. Kairos’s underground treasures are waiting for a Vault Hunter brave enough to claim them.
Start your underground adventure: Download Borderlands 4 on Steam or PlayStation and begin exploring the depths of Kairos.
Looking to optimize your mine runs? Check our elemental damage guide for boss-specific strategies, or explore our weapon manufacturers guide to understand legendary gear stats.