Master Borderlands 4’s best Specialization skills! Complete tier list, build synergies, and optimization strategies for infinite progression.
Understanding Specialization Skills vs. Categories
Before diving into specific skills, it’s crucial to understand the distinction between Specialization categories and skills. Categories can be upgraded infinitely for flat stat bonuses, while skills are one-time unlocks that provide powerful conditional effects. With only four skill slots available, every choice matters significantly.
This limitation makes Specialization skill selection one of the most impactful decisions in Borderlands 4 character optimization, often defining entire build philosophies around their effects.
Tier 1: Essential Skills for Every Build
Down But Not Out (Sharpshooter) – The Universal Life Saver
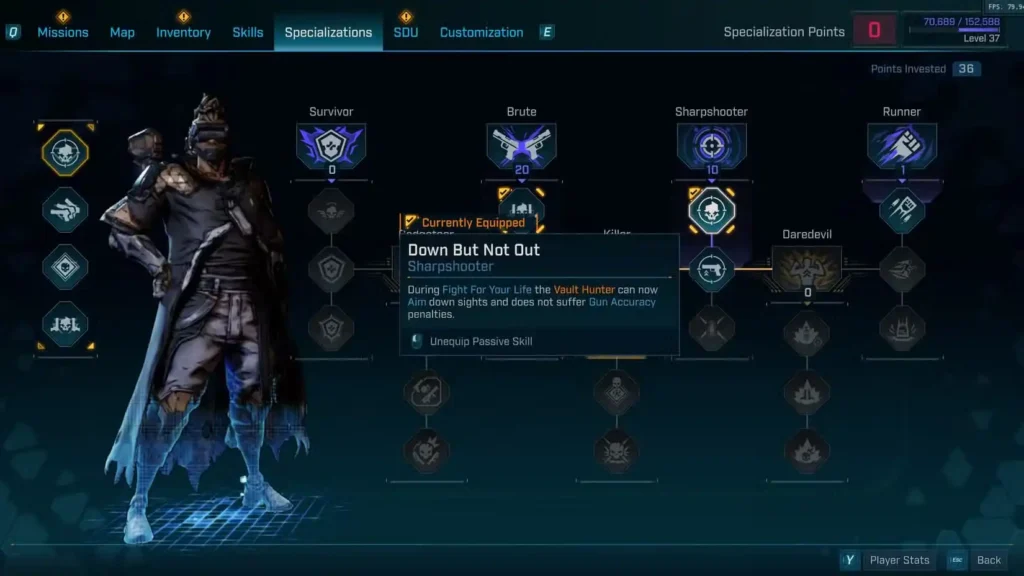
Effect: Enables aiming down sights while downed and eliminates accuracy penalties Why It’s Essential: Fight For Your Life becomes dramatically more manageable Universal Application: Benefits every build regardless of focus or playstyle
Strategic Impact: Down But Not Out transforms the most frustrating aspect of Borderlands combat into a manageable mechanic. The ability to aim precisely while downed means you can actually target weak enemies or critical spots for reliable revival, rather than relying on spray-and-pray tactics.
Build Integration: This skill provides insurance for aggressive playstyles and high-risk builds, enabling more experimental approaches to combat without fear of permanent failure states.
Priority Rating: Mandatory for most players – consider this skill for any build that doesn’t have specific synergy requirements filling all four slots.
Tier 2: Damage Foundation Skills
These skills provide substantial damage increases that form the backbone of most optimized builds:
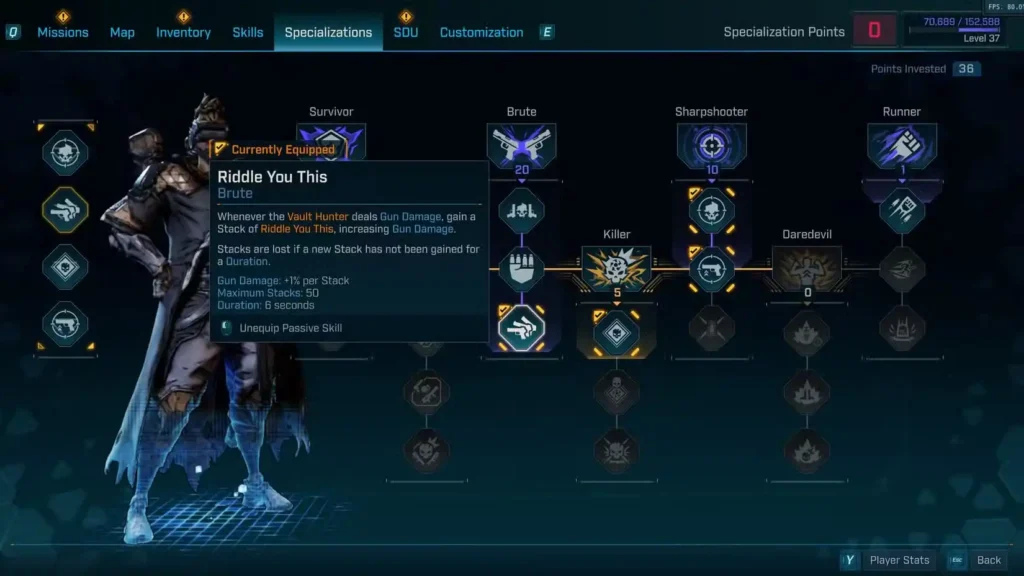
Riddle You This (Brute) – The Versatile Damage Engine
Effect: Stacking gun damage bonus (1% per stack, 50 max) that decays after 6 seconds of inactivity Optimal Weapons: Fully-automatic weapons with high fire rates Build Synergy: Works with virtually any gun-focused build
Strategic Advantages:
- Consistent damage scaling that rewards active combat engagement
- No complex setup requirements beyond maintaining combat activity
- Scales multiplicatively with other damage bonuses
Optimization Tips:
- Prioritize weapons with high fire rates to build stacks quickly
- Maintain aggressive positioning to avoid stack decay
- Combines excellently with weapon manufacturer bonuses
In The Zone (Sharpshooter) – The Precision Specialist
Effect: Stacking gun and critical damage (up to 25% after 5 seconds of aiming) Optimal Weapons: High-damage, small magazine weapons like sniper rifles Build Philosophy: Rewards methodical, precision-focused gameplay
Strategic Application: Perfect for players who prefer calculated engagement over sustained firefights. The 5-second buildup requires patience but provides substantial burst damage potential.
Synergy Considerations:
- Pairs excellently with critical hit builds and elemental specialist approaches
- Requires positioning and timing awareness for maximum effectiveness
The Best Defense (Survivor) – The Consistency Champion
Effect: Up to 30% damage bonus based on highest resource percentage (health or shields) Playstyle Requirement: Consistent resource management and defensive play Build Integration: Excellent for tank builds and defensive specialists
Resource Management Strategy: This skill rewards players who maintain high health/shield percentages, creating interesting decision points about when to heal versus continuing combat.
Contamination (Killer) – The Status Effect Multiplier
Effect: Critical hits increase status effect chance up to 100% bonus (10 stacks) Scaling Context: Becomes increasingly valuable at higher Ultimate Vault Hunter ranks Build Focus: Essential for elemental and status effect builds
Late-Game Importance: As enemy resistances and elemental importance increase in endgame content, Contamination becomes disproportionately powerful for elemental builds.
Tier 3: Specialized Scaling Skills
Action Skill Amplifiers
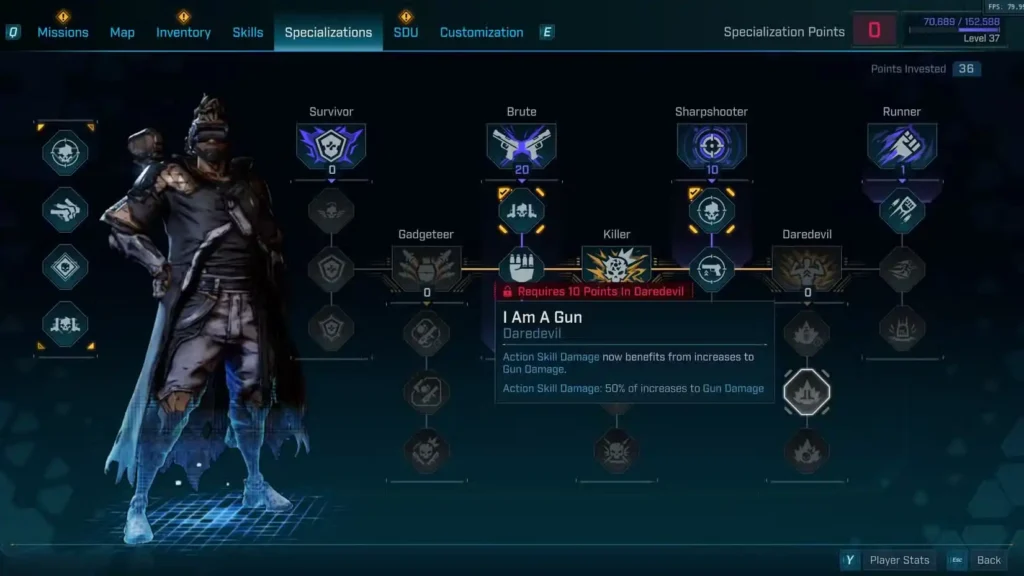
I Am A Gun (Daredevil)
- Effect: Action skills benefit from 50% of gun damage bonuses
- Build Focus: Action skill-centric builds like APOPHIS Lance or other ability-focused approaches
- Scaling Potential: Transforms gun damage investments into action skill improvements
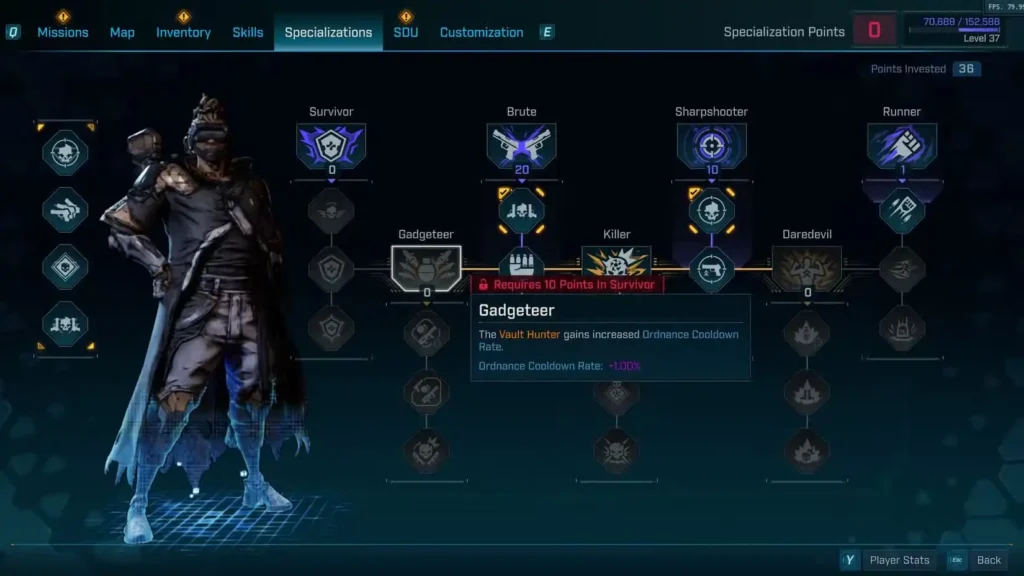
Full Spectrum Arsenal (Gadgeteer)
- Effect: Ordnance weapons benefit from 50% of gun damage bonuses
- Build Focus: Heavy weapon specialists and explosive builds
- Strategic Value: Enables unified damage scaling across weapon types
Bear Arms (Runner)
- Effect: Melee abilities benefit from 50% of gun damage bonuses
- Build Focus: Melee-focused builds and hybrid combat approaches
- Synergy Potential: Allows gun damage investments to scale melee effectiveness
Branch Specialization Strategies
The Daredevil Focus: Action Skill Mastery
The Daredevil branch provides comprehensive action skill enhancement, making it ideal for builds that center around frequent ability usage:
Core Philosophy: Transform action skills into primary damage sources rather than supplementary abilities Build Examples: APOPHIS Lance builds, summoner builds, and other ability-focused approaches Skill Combination: Use all three Daredevil skills plus either DBNO or a general damage booster
Why Daredevil Excels: Borderlands 4’s Vault Hunters rely heavily on action skills, making the comprehensive enhancement provided by this branch extremely valuable for dedicated builds.
The Gadgeteer Focus: Ordnance Specialist
Core Philosophy: Transform ordnance weapons from situational tools into primary damage sources Build Integration: Combines with Firmware sets focused on ordnance enhancement Strategic Depth: Requires understanding cooldown management and positioning for optimal effectiveness
Optimal Four-Skill Combinations
Universal Build (Balanced Approach)
- Down But Not Out (survivability)
- Riddle You This (consistent damage)
- Contamination (elemental scaling)
- The Best Defense (defensive damage scaling)
Action Skill Specialist
- I Am A Gun (Daredevil)
- Additional Daredevil skills
- Down But Not Out
- Riddle You This (for non-action skill damage)
Precision/Critical Build
- Down But Not Out
- In The Zone
- Contamination
- The Best Defense
Ordnance Specialist
- Full Spectrum Arsenal (Gadgeteer)
- Additional Gadgeteer skills
- Down But Not Out
- Damage booster of choice
Progression and Acquisition Strategy
Early Specialization Priorities
First Unlock: Down But Not Out for quality of life improvement Second Unlock: Primary damage booster (usually Riddle You This) Third/Fourth Unlocks: Build-specific specialization skills
Farming Efficiency
Time Investment: Specialization point farming requires substantial time commitment Integration Strategy: Combine specialization farming with endgame activities and legendary farming Patience Requirement: Focus on skills that provide immediate impact before pursuing niche combinations
Long-Term Planning
Build Evolution: Plan skill acquisitions around your intended final build rather than immediate convenience Respec Considerations: Understanding respec mechanics helps with experimentation Multiple Characters: Different characters may benefit from different specialization focuses
Advanced Synergy Considerations
Cross-System Integration
Weapon Synergy: Align specialization choices with preferred weapon manufacturers Bank Storage Planning: Consider gear requirements when planning specialization investments Team Play: Crossplay builds may benefit from complementary specialization choices
Meta Considerations
Content Scaling: Higher difficulty content may favor certain specialization approaches Weekly Activities: Maurice’s Black Market and similar content may influence optimal specialization choices Future Proofing: Consider how specialization choices will scale with potential level cap increases
Common Mistakes and Optimization Pitfalls
Over-Specialization
Problem: Focusing too narrowly on a single aspect while neglecting defensive or utility skills Solution: Ensure at least one defensive skill (usually Down But Not Out) in most builds
Ignoring Synergy
Problem: Choosing powerful individual skills that don’t work well together Solution: Plan complete four-skill combinations rather than selecting skills in isolation
Premature Commitment
Problem: Investing heavily in specializations before understanding your preferred playstyle Solution: Experiment with different approaches before committing to expensive specialization farms
The specialization system in Borderlands 4 provides the deepest character customization in the series, but the four-skill limit makes every choice meaningful. Success comes from understanding both individual skill power and how they combine to create cohesive build philosophies that enhance rather than compete with each other.
Ready to optimize your specialization setup? Check out our character build guides for complete build examples, or grab Borderlands 4 on Steam, PlayStation, or the official website!