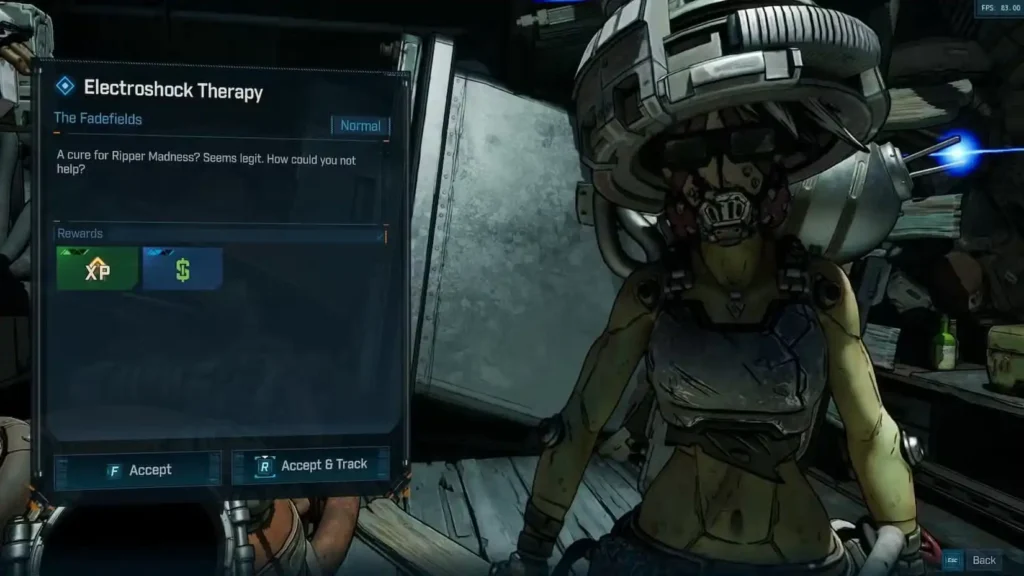
The Electroshock Therapy side quest in Borderlands 4 perfectly captures the franchise’s signature blend of dark humor and bizarre science experiments. This early-game mission introduces players to Professor Ambreleigh, a semi-intelligent Ripper attempting to cure her fellow psychos through questionable medical procedures.
While this quest serves primarily as a leveling opportunity, it features some tricky collection objectives that can confuse players. Here’s your complete step-by-step guide to completing Electroshock Therapy efficiently.
Starting the Electroshock Therapy Quest
Finding Professor Ambreleigh
Location: Just east of Someday Rise Safehouse Difficulty: Easy (No Combat Required)
Professor Ambreleigh stands out as one of the few Rippers capable of coherent conversation. Unlike her psychotic brethren, she maintains enough intelligence to conduct scientific research and engage with Vault Hunters diplomatically.
Quest Initiation:
- Travel to Someday Rise Safehouse via fast travel or on foot
- Head east from the safehouse entrance
- Look for Professor Ambreleigh’s makeshift laboratory setup
- Speak with her to begin the quest dialogue
The Professor’s Request
Ambreleigh explains her ambitious project: developing a cure for Ripper psychosis through her experimental machine. However, her contraption requires specific components that she cannot safely retrieve herself, making you the perfect candidate for a dangerous shopping trip.
Quest Objectives Overview:
- Collect Ordonite sample from Order compound
- Gather Eridium sample from crystal formation
- Obtain Meathead’s head for the final component
- Assemble and activate the experimental machine
For players new to side quest mechanics, our Beginners Guide Essential Tips covers quest management fundamentals.
Collecting Required Samples
Ordonite Sample Location
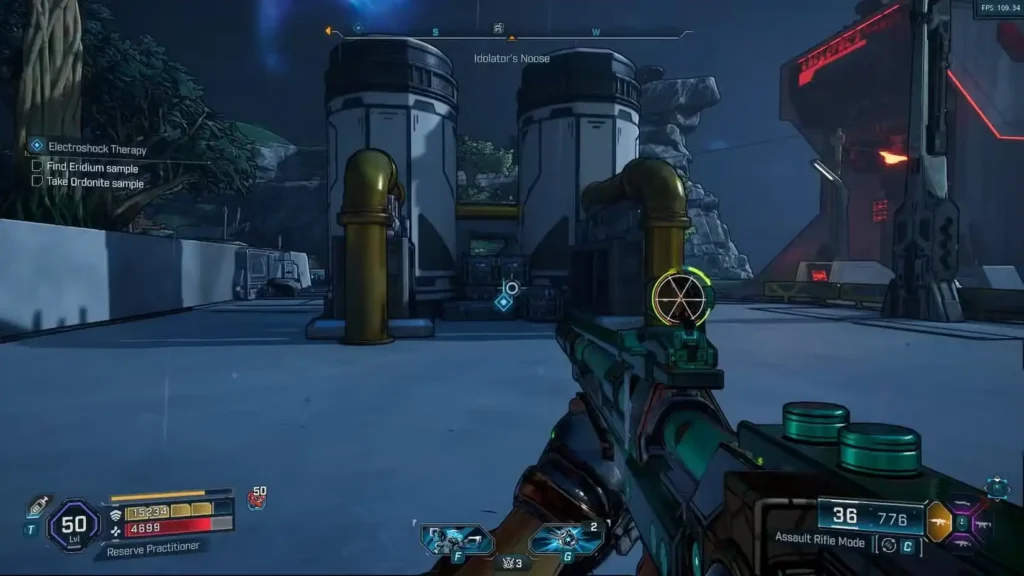
Location: Order compound across from Ambreleigh’s garage Difficulty: Moderate (Combat Required)
The Ordonite sample requires infiltrating an active Order facility directly across from the professor’s location.
Step-by-Step Collection:
- Cross the street from Ambreleigh’s garage
- Engage Order forces defending the compound
- Clear all enemies to avoid interference during collection
- Locate the paired silos with distinctive yellow pipes
- Find the sample placed on crates between the yellow pipe connections
- Collect the Ordonite sample for your inventory
Combat Tips:
- Bring appropriate gear for Order enemy types
- Use cover provided by the compound’s industrial structures
- Watch for reinforcements that may arrive during combat
- Clear the area thoroughly before searching for the sample
Eridium Sample Location
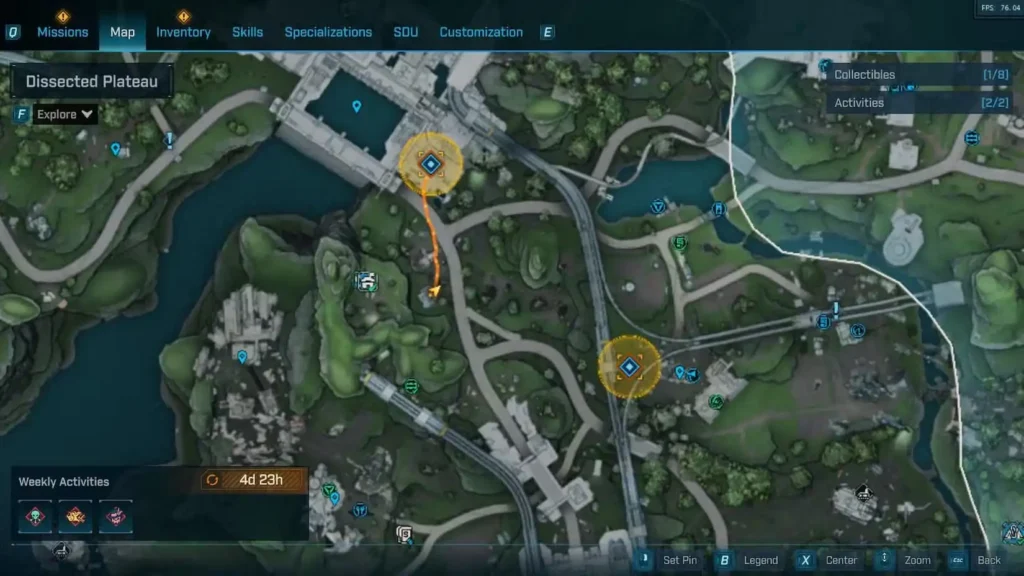
Location: Marked destination farther from the compound Difficulty: Moderate (Combat + Environmental Challenge)
The Eridium sample requires travel to a separate location with its own set of challenges.

Detailed Collection Process:
- Follow map marker to the designated Eridium site
- Engage Ripper forces controlling the area
- Clear all hostile enemies before attempting collection
- Locate the large Eridium crystal growing on machinery near crop rows
- Shoot the crystal if it doesn’t respond to direct interaction
- Collect the Eridium sample (note: this doesn’t count toward total Eridium currency)
Important Note: The Eridium sample from this quest serves purely as a quest item and won’t add to your overall Eridium resource count. Don’t expect this to boost your premium currency reserves.
Environmental Navigation:
- Look for distinctive purple crystal formations characteristic of Eridium
- Check near agricultural areas as indicated by crop row references
- Use the machinery as a landmark for crystal location
- Be prepared to destroy the crystal formation for sample access
Machine Assembly Process
Initial Assembly Attempt
Return to Professor Ambreleigh with both samples collected:
- Approach the experimental machine near the professor’s station
- Attach the Ordonite sample to the designated connection point
- Install the Eridium sample in its appropriate slot
- Prepare to activate the machine
The Missing Component Revelation
Before you can activate the machine, Ambreleigh will interrupt the process, revealing a critical missing element: a Meathead’s head is required to complete the contraption.
Why a Meathead Head: The quest’s dark humor shines through this requirement. Apparently, the professor’s cure requires a “test subject” head to demonstrate the machine’s effectiveness – a typically twisted Borderlands approach to scientific experimentation.
Obtaining the Meathead’s Head
Meathead Spawn Location
Location: Near the bar outside Ambreleigh’s house Difficulty: Moderate (Single Enemy Encounter)
Conveniently, a Meathead will spawn in the immediate vicinity once this objective becomes active.
Combat Strategy:
- Locate the Meathead near the bar area
- Engage using appropriate tactics for this enemy type
- Focus fire on weak points to minimize combat duration
- Avoid unnecessary damage to preserve the head quality
- Collect the head immediately after defeating the enemy
Meathead Combat Tips:
- These enemies are relatively tanky – bring sufficient firepower
- Watch for charging attacks that can deal significant damage
- Use environmental cover around the bar area
- Consider elemental advantages based on your current loadout

Final Machine Assembly
With all components collected, return to Professor Ambreleigh:
- Attach the Meathead’s head to the machine’s final connection point
- Listen to the head’s commentary – it will start speaking once connected
- Follow Ambreleigh’s instructions for final activation
- Perform a melee attack on the attached head when prompted
- Watch the machine demonstration on the unfortunate test subject
Activation Sequence: The final activation requires physical interaction with the mounted head, adding a layer of dark comedy as you literally knock sense into the machine’s organic component.
Quest Rewards and Benefits
Experience and Progression:
- Solid XP rewards appropriate for early-game leveling
- Combat experience from multiple enemy encounters
- Exploration rewards for discovering new locations
- Quest completion contributing to overall progress
Narrative Value:
While mechanically straightforward, Electroshock Therapy showcases Borderlands 4’s commitment to bizarre storytelling and dark humor. The quest demonstrates how even in a post-apocalyptic wasteland, scientific curiosity (however misguided) persists.
Practical Benefits:
- Early-game leveling opportunity for character development
- Combat practice against different enemy types
- Area familiarization with local points of interest
- Resource collection during enemy encounters
For more information about optimizing early-game progression, check our Fast Leveling Complete Guide.
Common Issues and Solutions
Sample Collection Problems:
Ordonite Sample Issues:
- Can’t find the sample: Look specifically between yellow pipes on crates, not elsewhere in the compound
- Enemies respawning: Clear the area completely before searching
- Wrong location: Ensure you’re at the compound directly across from Ambreleigh’s garage
Eridium Sample Issues:
- Crystal won’t break: Try different weapon types or sustained fire
- Sample not appearing: Clear all enemies first, then approach the crystal
- Wrong crystal: Look for the large formation on machinery near crop rows specifically
Meathead Encounter Problems:
Enemy Not Spawning:
- Wait a few moments after receiving the objective
- Check around the entire bar area – spawns can vary slightly
- Leave and return to the area if spawning fails
- Progress through dialogue completely before looking for the enemy
Machine Assembly Issues:
Components Not Attaching:
- Approach from different angles if interaction prompts don’t appear
- Ensure all previous components are properly installed
- Clear inventory space if quest items aren’t being accepted
- Talk to Ambreleigh if the sequence seems stuck
Integration with Broader Gameplay
Side Quest Strategy:
Electroshock Therapy represents an ideal early-game side quest that balances:
- Manageable combat difficulty for developing characters
- Reasonable travel distances that don’t overwhelm new players
- Clear objectives that teach quest completion mechanics
- Entertaining narrative that showcases Borderlands humor
Character Development:
Use this quest to practice:
- Multi-location objective completion
- Enemy encounter management across different areas
- Resource collection and inventory management
- Quest item handling and transportation
Area Exploration:
The quest encourages exploration of:
- Local points of interest around Someday Rise
- Enemy compound infiltration tactics
- Resource node identification for future reference
- Safe house utilization for fast travel optimization
For more side quest strategies and completion tips, reference our Story Mission List Complete Guide.
Advanced Tips and Strategies
Efficient Completion Route:
- Collect both samples in a single trip to minimize backtracking
- Clear enemies systematically rather than rushing between objectives
- Prepare inventory space before starting collection activities
- Coordinate with other nearby side quests for maximum efficiency
Combat Optimization:
- Bring weapons effective against both Order troops and Rippers
- Stock up on ammunition before beginning collection runs
- Use appropriate shields for sustained combat encounters
- Consider elemental advantages for different enemy types
Resource Management:
- Don’t waste valuable ammo on easy collection objectives
- Save healing items for more challenging encounters
- Collect standard loot from defeated enemies during the quest
- Use the opportunity to test new weapons and equipment
Quest Context and Lore Implications
Professor Ambreleigh’s Significance:
This quest introduces the concept of intelligent Rippers, suggesting that the psychosis affecting these enemies isn’t necessarily permanent or complete. Ambreleigh represents hope for rehabilitation, even in Borderlands’ harsh reality.
Scientific Ethics in Borderlands:
The quest’s dark humor highlights the questionable ethics of post-apocalyptic science, where desperate circumstances lead to morally ambiguous research methods.
Worldbuilding Elements:
- Order presence in civilian areas
- Ripper territorial behavior and settlement patterns
- Resource scarcity driving unconventional solutions
- Community survival through cooperation with unlikely allies
Final Thoughts: Embracing the Absurd
Electroshock Therapy exemplifies Borderlands 4’s approach to side content – mechanically simple but narratively engaging missions that provide both practical benefits and entertainment value. While the quest won’t challenge experienced players, it offers newcomers a perfect introduction to the game’s signature blend of violence and humor.
The quest’s straightforward objectives mask deeper themes about redemption, scientific responsibility, and the lengths people will go to help their communities survive. Professor Ambreleigh’s bizarre cure represents hope in a hopeless world, even if her methods are questionable.
Key Takeaways:
- Early-game leveling opportunity with manageable difficulty
- Multi-location collection quest teaching exploration mechanics
- Combat practice against different enemy types
- Narrative showcase of Borderlands’ dark humor and worldbuilding
What’s Next: Use the experience and rewards from Electroshock Therapy to tackle more challenging side quests and continue your progression through Borderlands 4’s content.
Official Resources:
Related Quest Guides:
- Story Mission List Complete Guide
- Beginners Guide Essential Tips
- Fast Leveling Complete Guide
- Unpaid Tab Jamming Device & Save Quent Guide
Remember: in the world of Borderlands, even the most ridiculous scientific experiments can lead to unexpected discoveries!