Complete Fault Hunting mission guide for Borderlands 4. Solve both power circuit puzzles, find facility entrances, defeat Genone boss, and farm legendary loot in Carcadia Burn.
The Fault Hunting side mission in Borderlands 4 is one of those quests that catches players off-guard. You expect a standard “shoot and loot” affair, but instead you’re faced with environmental puzzles, malfunctioning facility doors, and a sentient Order synth named Genone who’s causing seismic chaos across Carcadia Burn.
This mission takes you from the Ruined Sumplands through underground facilities filled with Creeps, culminating in a boss fight against Genone—a unique enemy with multiple health bars and legendary loot drops. The real challenge isn’t just the combat; it’s the two power circuit puzzles that require careful grapple hook manipulation to redirect energy flow and open locked doors.
If you’ve found yourself staring at blue railings wondering which ones to rotate and in what order, you’re in the right place. This guide breaks down every step of Fault Hunting, from finding hidden facility entrances to the exact rotation sequences for both puzzles, plus strategies for farming Genone’s legendary drops afterward.
Let’s solve some circuits and stop those tremors!
Starting Fault Hunting: Finding Leopold
Quest Location: Ruined Sumplands, Carcadia Burn
How to start: Accept the urgent contract posted on a wall in Carcadia
Recommended Level: Mid-game (the quest scales to your level, but the puzzles don’t care about stats)
Getting to the Society for Amateur Seismology Enthusiasts
After accepting the contract in Carcadia, you’ll need to travel west into the Ruined Sumplands to find Leopold at the Society for Amateur Seismology Enthusiasts. This location sounds way more official than it actually is—expect a ramshackle research outpost rather than a proper facility.
Finding Leopold:
- Follow your quest marker to the western Ruined Sumplands
- Look for research equipment and makeshift scientific installations
- Speak with Leopold to learn about the tremors threatening the Electi
Leopold explains that something beneath Carcadia Burn is causing dangerous seismic activity. Your job? Investigate the source, which leads you to the Rumbling Cleft cave system.
Lore context: The Electi are one of Carcadia’s factions, and keeping them safe from underground threats is part of maintaining order in the region. Leopold’s concern about sentient Order synths foreshadows what you’ll encounter deeper in the facilities.
Part 1: Rumbling Cleft Cave – Finding the Facility Entrance
Clearing the Creeps
Enter the Rumbling Cleft cave (marked on your map after speaking with Leopold). The interior is infested with Creeps—those unsettling humanoid enemies that love enclosed spaces.
Combat tips:
- Creeps are weak to Incendiary damage (burn through their flesh health bars quickly)
- Watch for ambushes—they spawn from multiple angles in caves
- Use elemental weapons matching their weaknesses
Clear all Creeps in the initial cave chamber. Once they’re dealt with, a geyser will spawn in the center of the room. Don’t rush onto it just yet—there are optional objectives to complete first.
Optional Objective: Search Area (0/2)
Before launching yourself up the geyser, grab these two optional investigation points:
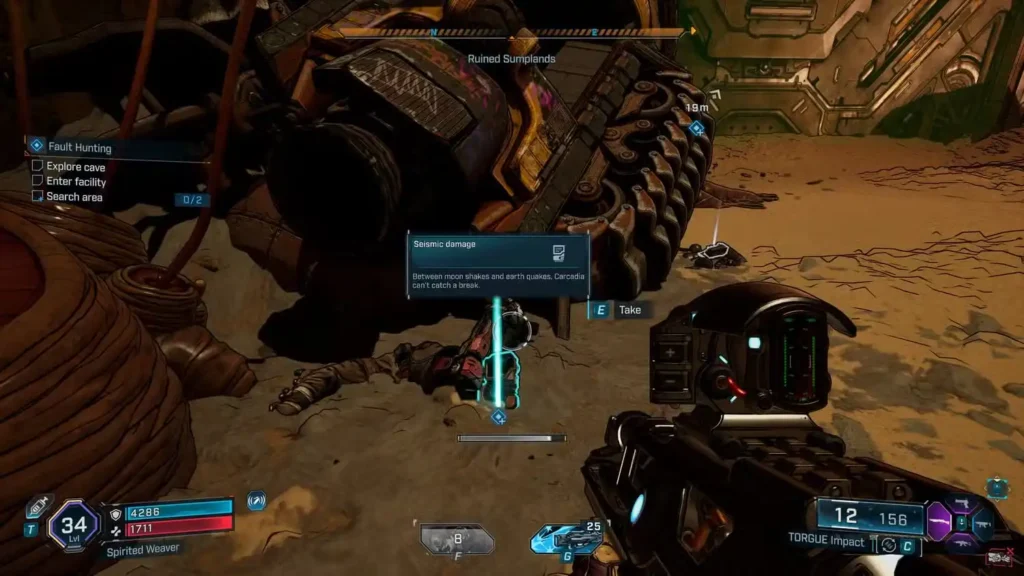
1. Seismic Damage ECHO Log
Location: At the destroyed drill site just before the bunker door
How to find: Look for industrial drilling equipment that’s clearly been damaged. The ECHO Log sits near this wreckage.
Why grab it: Provides backstory on the seismic activity and the research team’s failed attempts to investigate. Plus, optional objectives often reward bonus XP.
2. Examine the Bunker Door
Location: The large sealed door in the cave chamber
How to find: It’s hard to miss—a massive reinforced door that’s clearly your eventual destination.
Why examine it: Completes the search objective and gives you narrative context about the facility beyond.
Completion tip: If you’re a completionist working toward 100% achievements, always grab optional objectives. They contribute to overall mission completion percentages.
Using the Geyser to Reach the Upper Ledge
With optional objectives complete, it’s time to use that geyser for some vertical traversal.
Step-by-step:
- Walk into the geyser – Your character will be launched high into the air
- Face northeast while airborne – Look for a ledge jutting out from the cave wall
- Double-jump for extra height – Press jump twice at the apex of your geyser launch
- Glide with your jetpack – Maneuver toward the northeast ledge using your glide ability
- Land on the ledge – You should touch down on a platform with a path leading deeper into the cave
Traversal tips:
- If you overshoot or undershoot, the geyser respawns quickly—just try again
- This is good practice for movement mechanics you’ll use throughout Borderlands 4
- If you’re struggling with platforming, check our beginner’s guide for movement tutorials
Once on the upper ledge, follow the linear path deeper into the facility. You’re about to encounter the first puzzle.
Part 2: The Facility – Malfunctioning Door & First Puzzle
Opening the Malfunctioning Facility Door

Progress through the cave passage until you reach the facility proper. You’ll immediately encounter a problem: the door won’t open properly.
The issue:
The door is malfunctioning, repeatedly opening slightly before slamming shut. You can’t walk through, and brute force won’t work.
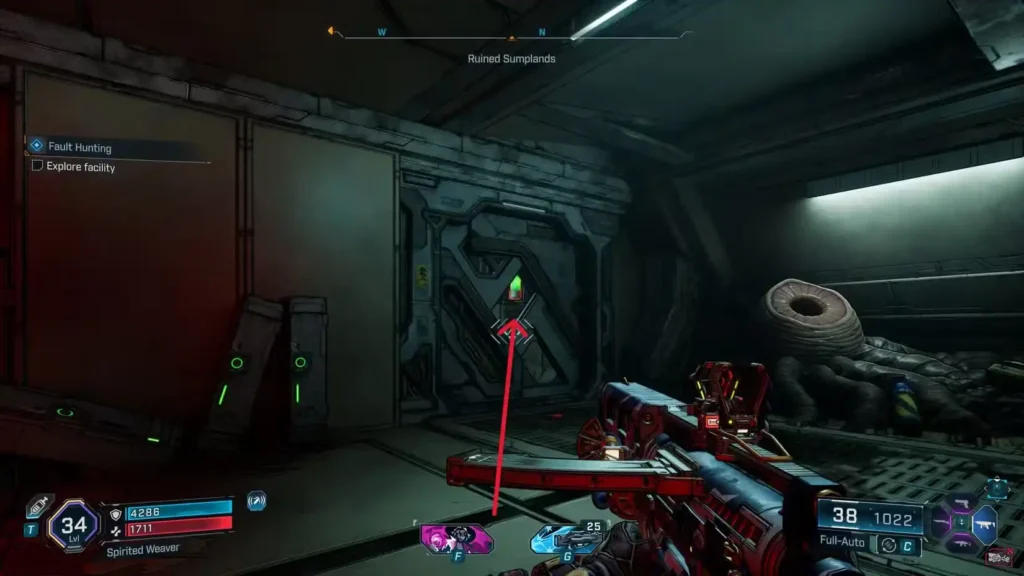
The solution:
- Position yourself to the LEFT of the door (facing it)
- Watch the door cycle – It opens a few inches, then closes
- When the door opens, shoot the power source – It becomes visible through the gap
- The power source is inside, to the right of the door frame
What to shoot:
Look for a glowing electrical component or power conduit visible through the gap. A few shots should disable the malfunction and force the door fully open.
Weapon recommendation: Any weapon works here—no specific element needed. Just make sure you can aim accurately through the narrow gap.
Optional Objective: Search the Server Room
Drop down through the now-open door into the next chamber—the server room. Before proceeding to the puzzle, grab the optional objective:
What to examine:
On the floor of the server room, you’ll find a scene of carnage: dead Creeps and a destroyed Order bot surrounded by equipment.
How to complete:
Simply approach the scene and interact with it to examine the evidence. Your character will comment on what happened here, adding narrative depth.
Context: This scene reinforces that something unusual is happening—Order synths fighting Creeps in an abandoned facility suggests the synths have gone rogue or are following their own agenda.
After examining the scene, head to the south side of the room to find the first major puzzle.
Puzzle #1: Direct Power to the Server Console
This is Fault Hunting’s first brain-teaser. You need to redirect electrical power from a generator to the server console by manipulating conductive railings.
How the Puzzle Works
Mechanics:
- There’s a power source generating electricity
- Blue railings conduct electricity and can be rotated
- Your goal is to create a complete circuit from the power source to the server console
- Use your grapple hook to grab and rotate railings into the correct positions
Visual cue: When the circuit is complete, electricity will visibly flow along the blue railings from source to destination.
Puzzle #1 Solution: Railing Rotation Sequence
Starting from the railing closest to the power source and working outward, rotate each railing the specified number of times:
Railing rotation order:
- First railing (closest to power source): Rotate ONE time
- Second railing: Rotate THREE times
- Third railing: Rotate THREE times
How to rotate:
- Aim your grapple hook at a railing
- Pull the railing – it rotates 90 degrees per pull
- Repeat pulls until you’ve achieved the correct number of rotations
Checking your work:
Once all three railings are properly positioned, electrical current should flow from the power source, through each railing in sequence, and reach the server console. You’ll see visual effects confirming the circuit is complete.
Troubleshooting: If electricity isn’t flowing, double-check each railing’s rotation count. Start over from the first railing if needed—the puzzle resets when you manipulate the railings, so you can’t “break” it permanently.
Hacking the Server Console (and Fighting Creeps)
With the circuit complete:
- Approach the server console
- Interact to deploy ECHO-4 – Your drone companion will begin hacking
- Prepare for combat – As soon as the hack starts, Creeps spawn
Combat encounter:
- Enemy type: Creeps (Flesh health bars)
- Recommended element: Incendiary
- Strategy: Clear them quickly so they don’t interrupt your mission flow
- Difficulty: Moderate—standard Creep encounter
After defeating the Creeps, return to ECHO-4 and complete the hack. This reveals the next objective: finding Genone’s actual facility.
Leaving the Facility
You have two exit options:
Option A: Follow the south room that opened after the puzzle. This leads to a natural cave exit.
Option B: Use fast travel from your map to quickly reach your next destination.
Either way, your next stop is the Yawning Yard in Lopside, Carcadia Burn.
Part 3: Finding Genone’s Hidden Facility
Location: Yawning Yard, Lopside
Region: Carcadia Burn
Specific area: Yawning Yard in the Lopside district
Fast travel tip: If you’ve unlocked nearby safehouse locations, use them to minimize travel time
Secret Cave Entrance
Genone’s facility isn’t marked on your map—you need to find a hidden entrance.
How to find it:
- Travel to the Yawning Yard marked on your quest tracker
- Head to the edge of the cliff overlooking a lower area
- Face the cliff edge and look down
- Drop down carefully (you won’t take fall damage from this height)
- Look for a cave entrance carved into the cliff face at the lower level
Visual cue: The cave entrance should be relatively obvious once you’re at the lower elevation. It’s a dark opening in the rock with facility infrastructure visible inside.
Genone’s Invitation
Approach the facility door and it will automatically open—Genone is inviting you in. Ominous, but convenient.
Immediate threat: As soon as you enter, Creeps attack. Clear them out before exploring deeper.
Combat setup: Refresh your ammo and shields at this point. The boss fight is coming soon, so make sure you’re prepared.
Fighting Synth Prototypes
Continue through Genone’s facility corridors. Eventually, you’ll encounter Synth Prototypes—essentially beefed-up Order soldiers with better stats and more aggressive AI.
Synth Prototype combat tips:
- They’re tankier than standard Order troops
- Treat them like mini-bosses—focus fire and use cover
- Watch for Shock-based attacks (common among Order units)
- Recommended loadout: Strong legendary weapons if you have them
Clear all Synth Prototypes to proceed to the second puzzle room.
Puzzle #2: Direct Power to the Locked Door
This puzzle is more complex than the first, with more railings to manipulate and an optional bonus chest to unlock.
Puzzle Layout
Power source: Generator on the south side of the room
Main objective: Locked door on the east side of the room
Bonus objective: Second door leading to a Red Chest (legendary loot!)
Mechanics: Same as Puzzle #1—use your grapple hook to rotate blue railings and complete an electrical circuit from the generator to the doors.
Puzzle #2 Solution: Main Door (East Side)
This solution opens the main door leading to the Genone boss fight. Starting from the first railing at the power source:
Railing rotation sequence:
- First railing: Rotate ONCE
- Second railing: Rotate ONCE
- Third railing: Rotate ONCE
- Fourth railing: Rotate ONCE
- Fifth railing: Rotate ONCE
Wait—all the railings rotate once? Yes! This puzzle is actually simpler than it looks. Each railing only needs a single 90-degree rotation to align the circuit properly.
Verification: Once all five railings have been rotated once, electricity should flow from the south generator to the east door, unlocking it.
Puzzle #2 Bonus: Red Chest Door (Optional)
If you want that sweet legendary loot from the Red Chest, you’ll need to solve a second configuration. The exact sequence varies slightly, but generally involves redirecting power to a different door in the room.
Finding the Red Chest door:
Look around the puzzle room for a second locked door (typically northwest or on an adjacent wall to the main door). This leads to a small chamber containing the Red Chest.
Why bother?
Red Chests have excellent drop rates for purple/legendary gear. If you’re farming for legendary weapons or class mods, this is worth the extra minute.
Pro tip: You can solve both door puzzles in sequence—open the main door first, then reconfigure the railings for the Red Chest before proceeding to the boss.
Part 4: Genone Boss Fight
Pre-Boss Preparation
Before dropping into the boss arena, make sure you’re fully prepared:
Required elements:
- Shock weapon – For stripping Genone’s shield (first health bar)
- Corrosive OR Cryo weapon – For damaging Genone’s armor (second health bar)
Why these elements?
Genone has a two-phase health system: Shield → Armor. Using the correct elements dramatically reduces fight time. If you need an elemental damage refresher, check our complete element guide.
Recommended loadout:
- Primary: Shock SMG or assault rifle (high fire rate for shield stripping)
- Secondary: Corrosive shotgun or Cryo sniper (armor penetration)
- Grenade: Any high-damage option
- Shield: Defensive with high capacity
Inventory check:
- Full ammo reserves
- Health items stocked
- Grenade mods equipped
- Skills optimized for boss fights
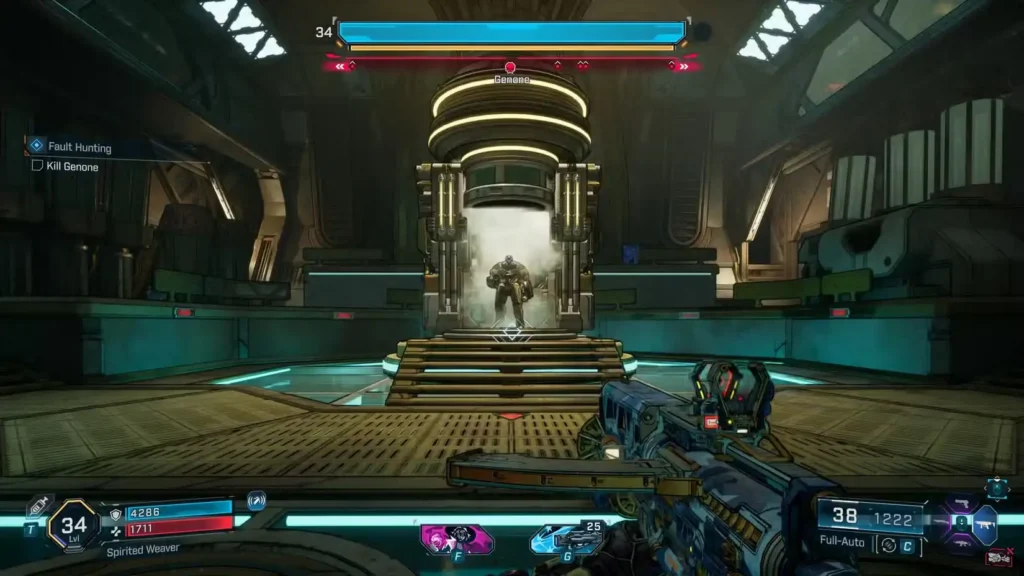
Entering the Boss Arena
From the puzzle room, proceed through the now-unlocked east door. You’ll enter a chamber that immediately seals behind you and begins filling with gas.
Don’t panic: The gas is not lethal—it’s environmental flavor, not an actual threat. Ignore it completely.
Navigation:
- Move north through the gas-filled room
- Look for a ladder on the far wall
- Climb the ladder to reach the upper level
- You’re now in the pre-boss room—the arena entrance is just ahead
This is your last chance to prepare. Check your loadout one final time, then drop down into the boss arena when ready.
Genone Boss Fight Strategy
Boss: Genone (Sentient Order Synth)
Difficulty: Moderate to Hard (depending on level and gear)
Health System: Shield → Armor (two phases)
Phase 1: Breaking the Shield
Health bar: Blue (Shield)
Weakness: Shock damage
Strategy:
- Switch to your Shock weapon immediately
- Focus fire on Genone – Ignore adds initially
- Stay mobile – Genone uses Shock-based splash damage attacks
- Avoid area-of-effect zones – Look for visual indicators on the ground
- Burn through the shield as quickly as possible
Genone’s attacks (Phase 1):
- Shock splash damage – AoE attacks that create hazard zones
- Ranged electrical attacks – Direct-fire shock projectiles
- Melee if you get close – Keep distance
Additional enemies:
Order troops spawn to support Genone. You have two options:
- Ignore them and focus on the boss (risky but faster)
- Clear them first to avoid being overwhelmed (safer but slower)
Recommendation: If you’re getting pressured by adds, take 10-15 seconds to clear them. Use them for Second Wind revivals if you get downed.
Phase 2: Destroying the Armor
Once Genone’s shield breaks, his armor phase begins.
Health bar: Yellow (Armor)
Weakness: Corrosive OR Cryo damage
Strategy:
- Immediately switch to Corrosive or Cryo weapon
- Continue staying mobile – His attacks remain dangerous
- Watch for attack pattern changes – Phase 2 may introduce new moves
- Burn through armor health bar
Phase 2 differences:
- Genone may become more aggressive
- Additional Order reinforcements might spawn
- Attack frequency increases as his health drops
Critical advice: Don’t get greedy with damage. If your shield is low, prioritize survival over DPS. A dead Vault Hunter deals zero damage.
Genone’s Legendary Loot Pool
After defeating Genone, check the arena for drops. He has two dedicated legendary items:
1. Oscar Mike (Legendary Weapon)
- Weapon type varies by drop
- Unique legendary stats and effects
2. Recursive (Legendary Gear)
- Could be shield, grenade, or class mod
- Special recursive mechanics or bonuses
Drop rate: Not guaranteed—you might need to farm Genone multiple times to get both items. This is normal for legendary farming in Borderlands.
Part 5: Shutting Down the Facility
Finding the Control Room Keycard
With Genone defeated, you’re not quite done yet. The facility needs to be powered down to prevent future seismic issues.
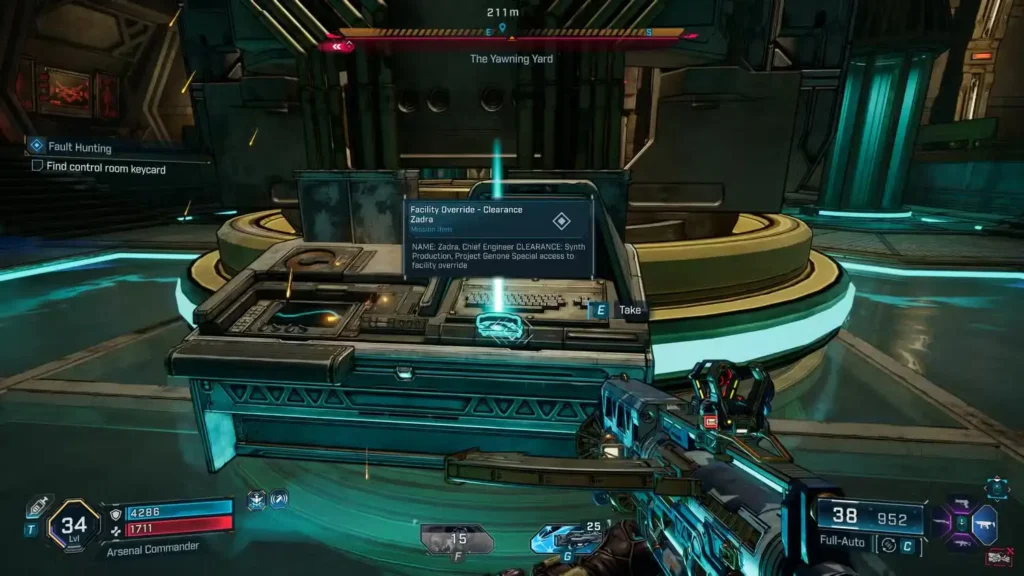
Where to find the keycard:
- Loop around to the back of the cylindrical structure that held Genone during the fight
- Look for an interactive item: “Facility Override – Clearance Zadra”
- Pick up the keycard
Lore note: The “Clearance Zadra” designation references Zadra, a character from the main Borderlands 4 story. This keycard grants you admin-level access to the facility.
Accessing the Control Room
With keycard in hand:
- Climb the stairs on the south wall of the arena
- At the top, look for a computer panel/terminal
- Interact with the panel – Your keycard automatically unlocks the door
- Enter the control room
Powering Down the Facility
Inside the control room:
- Locate the main power switch (large, obvious lever or button)
- Flip the switch to shut down all facility operations
- Watch the facility power down (lights dimming, machinery shutting off)
Quest complete!
Rewards:
- Cash – Scales to your level
- Experience points – Solid XP toward your next level cap
- Potential legendary drops – Check the area for any final loot
- Completion satisfaction – Those puzzles weren’t easy!
Farming Genone for Legendary Loot
Now that you’ve completed Fault Hunting once, you can return to farm Genone for his dedicated legendary drops.
How to Farm Genone
Method 1: Quit to Main Menu
- Save your game after killing Genone
- Quit to main menu
- Reload your save
- Fast travel to Lopside, Yawning Yard
- Re-enter Genone’s facility and fight him again
Method 2: Fast Travel Reset
- Kill Genone
- Fast travel away to a distant location
- Wait 10-15 minutes (real time)
- Return to Genone’s facility
- Boss should respawn
Which method is faster?
Quit/reload is more reliable and consistent. Fast travel method sometimes doesn’t reset the boss properly.
Optimal Farming Loadout
For efficient Genone farming:
Speed-kill setup:
- High DPS Shock weapon for shield phase
- High DPS Corrosive/Cryo for armor phase
- Legendary gear that boosts elemental damage
- Class mods with boss damage bonuses
Time per kill: 2-5 minutes depending on your level and gear quality
Expected runs for both legendaries: 10-30 kills (RNG dependent)
Is Genone Farming Worth It?
Pros:
- Dedicated legendary drops (Oscar Mike and Recursive)
- Relatively quick boss fight once you know the pattern
- Good cash farming opportunity
- Practice for elemental weapon swapping
Cons:
- Requires two elemental types for efficiency
- Need to complete the entire facility each time (unless you’ve unlocked shortcuts)
- RNG can be brutal on legendary drop rates
Verdict: If you need either of Genone’s legendaries for your build, it’s absolutely worth farming. Otherwise, move on to other endgame activities until you specifically need his drops.
Fault Hunting Tips & Tricks
For First-Time Players
Puzzle tips:
- Take screenshots of puzzle layouts before attempting solutions
- If stuck, try rotating all railings back to starting positions
- The grapple hook has infinite uses—don’t be afraid to experiment
Combat tips:
- Stock up on Shock and Corrosive ammo before starting
- Use the Creeps as Second Wind opportunities during boss fight
- Stay at mid-range during Genone fight—not too close, not too far
Efficiency tips:
- Complete all optional objectives for maximum XP
- Grab the Red Chest during Puzzle #2 for bonus loot
- Fast travel after puzzle #1 rather than walking out of the cave
For Farming Runs
Speed strategies:
- Skip all optional objectives (you don’t need them after first completion)
- Ignore minor enemies when possible—rush to Genone
- Optimize your loadout specifically for Genone’s two phases
- Consider respecting your skills for maximum boss damage
Related Carcadia Burn Content
While you’re in Carcadia Burn for Fault Hunting, consider tackling other nearby content:
Other activities:
- Complete additional side quests in the region
- Hunt for ECHO Logs and collectibles
- Explore Auger Mines for legendary bosses
- Find Lost Capsules for SDU tokens
- Unlock nearby safehouse locations for fast travel coverage
Quest chains: Fault Hunting is a standalone side mission, but several other Carcadia quests involve Order facilities and synth enemies. Completing them all provides a fuller picture of the region’s story.
Final Thoughts
Fault Hunting exemplifies what makes Borderlands 4 on PlayStation and other platforms feel fresh compared to earlier entries. The combination of environmental puzzles, vertical traversal, and multi-phase boss fights creates memorable missions that go beyond “shoot everything that moves.”
The circuit puzzles might seem intimidating at first, but they’re actually fairly straightforward once you understand the grapple-and-rotate mechanic. The real challenge is remembering to bring the correct elemental weapons for Genone’s two-phase health system—going in with the wrong loadout can turn a 3-minute fight into a 10-minute slog.
If you’re farming Genone for his legendaries, be patient with the RNG. Legendary drop rates in Borderlands 4 can be fickle, but that’s what makes finally getting that perfect Oscar Mike or Recursive so satisfying.
Now get out there, solve those circuits, stop the tremors, and show Genone what happens when Order synths go rogue. Happy hunting, Vault Hunter!
Need more mission guides? Check out our complete story mission list, or browse our legendary farming strategies for maximum loot efficiency. For general gameplay help, start with our beginner’s guide!