Complete Borderlands 4 Order Bunkers guide – all 6 locations, boss strategies, Locust station solutions, and legendary loot farming spots with detailed walkthroughs.
What Are Order Bunkers and Why They Matter
Order Bunkers represent some of the most rewarding endgame content in Borderlands 4, offering unique boss encounters and guaranteed legendary loot farming opportunities. Think of them as Borderlands 4’s version of raid bosses, but with a puzzle twist – each bunker requires you to solve a Locust station puzzle before you can even enter.
These aren’t your typical side activities. Each Order Bunker houses a distinct boss with unique mechanics, multiple legendary drops, and respawnable farming potential that makes them essential for anyone serious about building the perfect loadout.
Important Prerequisites:
- Complete the main mission “One Fell Swoop” to unlock all Order Bunkers
- Have access to late-game areas and movement abilities
- Recommended level 25+ for comfortable clearing
The Complete Order Bunker Breakdown
1. Blacklime Bunker – The Howl, Fadefields
Boss: Core Observer
Legendary Drops: Bully, Defibrillator, Divided Focus
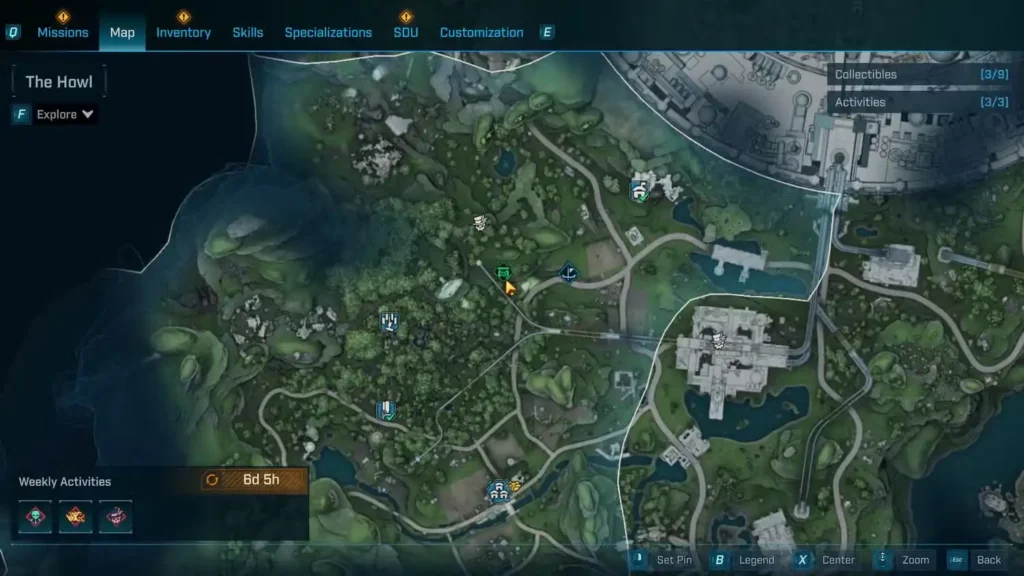
Getting Inside: The Blacklime Bunker entry puzzle is all about creative platforming. Start by positioning yourself on the rocky platform closest to the distinctive tree-topped rock formation. The key is using the double-jump and mantle combination to reach the elevated platform where the Locust station waits.
Pro Navigation Tip: Don’t rush the platforming section. Take time to line up your jumps properly – falling means starting over, and the respawn point isn’t conveniently located.
Boss Strategy – Core Observer: This mechanical menace follows a classic shield-armor-shield pattern that demands weapon flexibility:
- Phase 1 (Shield): Shock weapons are your best friend
- Phase 2 (Armor): Switch to Corrosive for armor melting or Cryo for crowd control
- Phase 3 (Shield): Back to Shock for the final push
Why This Boss Matters: Core Observer is an excellent test of your weapon-swapping skills and elemental understanding. Master this fight, and you’ll be prepared for Borderlands 4’s toughest endgame content.
2. Tipping Point – Idolator’s Noose, Fadefields
Boss: Mimicron
Legendary Drops: Complex Root, Luty Madlad, UAV
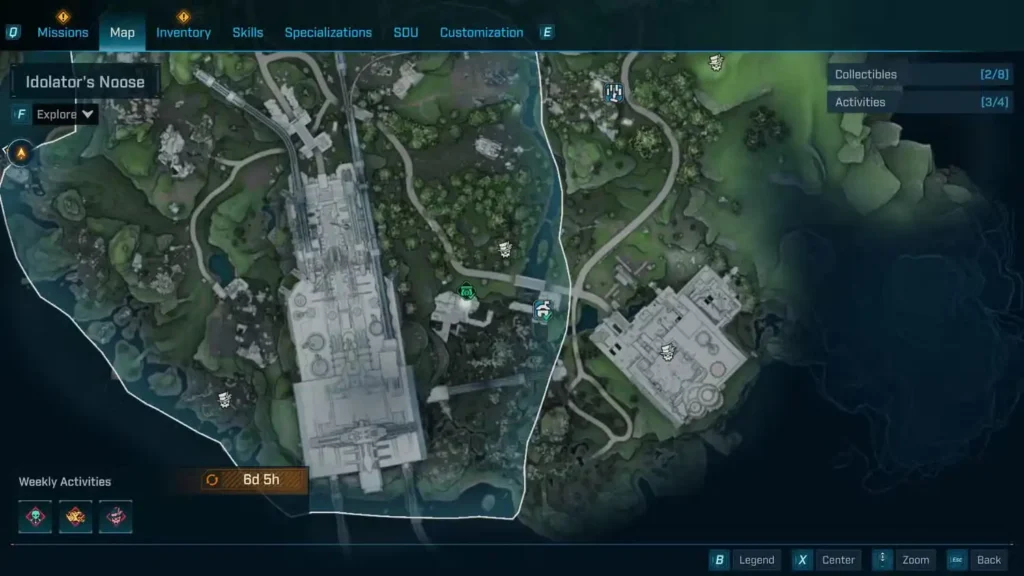
Solving the Entry Puzzle: Tipping Point’s entrance is hidden inside industrial machinery. With your back to the main bunker door, head right to locate the massive ventilation fan. The trick is going inside the fan housing and taking another right to find the ladder. Many players miss this because they assume the fan is just environmental decoration.
Interior Navigation: Once inside, you’ll encounter Borderlands 4’s signature environmental puzzles. The buttons and batteries needed to progress are all conveniently located in the same room – no backtracking required. This bunker tests your observation skills more than your platforming abilities.
Boss Strategy – Mimicron: Mimicron brings a unique twist to boss encounters with its clone generation mechanic:
- Main Boss: Shield followed by Armor (use Shock then Corrosive/Cryo)
- Clones: Each clone spawns with its own shield – prioritize these with Shock damage
- Strategy: Focus clones first, then damage the main boss during clone downtime
Farming Efficiency: Mimicron has one of the fastest respawn timers, making it ideal for legendary farming sessions.
3. Craven’s Nook – Heart of the Mountain, Terminus Range
Boss: Callous Harbinger of Annihilating Death
Legendary Drops: Atling Gun, Kaleidosplode, Hot Slugger
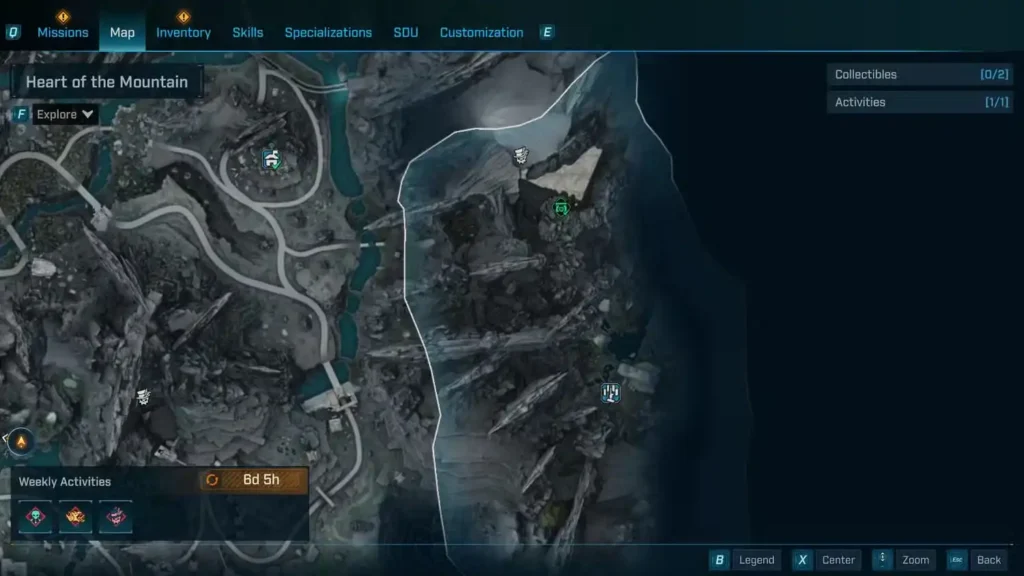
Finding the Hidden Entrance: Craven’s Nook requires careful cave navigation in the Heart of the Mountain. The critical moment comes when you can first grapple to a platform – immediately veer left instead of following the obvious path. Most players miss this bunker because they follow the main cave route.
Locust Station Location: The Locust station sits on a rock formation below the cliff face, left of the bunker door. It’s easy to spot once you know where to look, but nearly invisible if you’re focused on the door itself.
Interior Challenges: The ventilation system entry on the left wall can be tricky to spot. Look for the slightly different texture indicating a removable vent cover. The elevator shaft climbing section tests your grappling skills under pressure.
Boss Strategy – Callous Harbinger: Despite the intimidating name, this boss follows a straightforward pattern:
- Large Shield Phase: Extended Shock weapon usage required
- Armor Phase: Corrosive melts through quickly, Cryo provides crowd control
- Positioning: Use the arena’s vertical elements to avoid ground-based attacks
4. The Wireworks – The Low Leys, Terminus Range
Boss: The Divisioner
Legendary Drops: Inkling, Sideshow
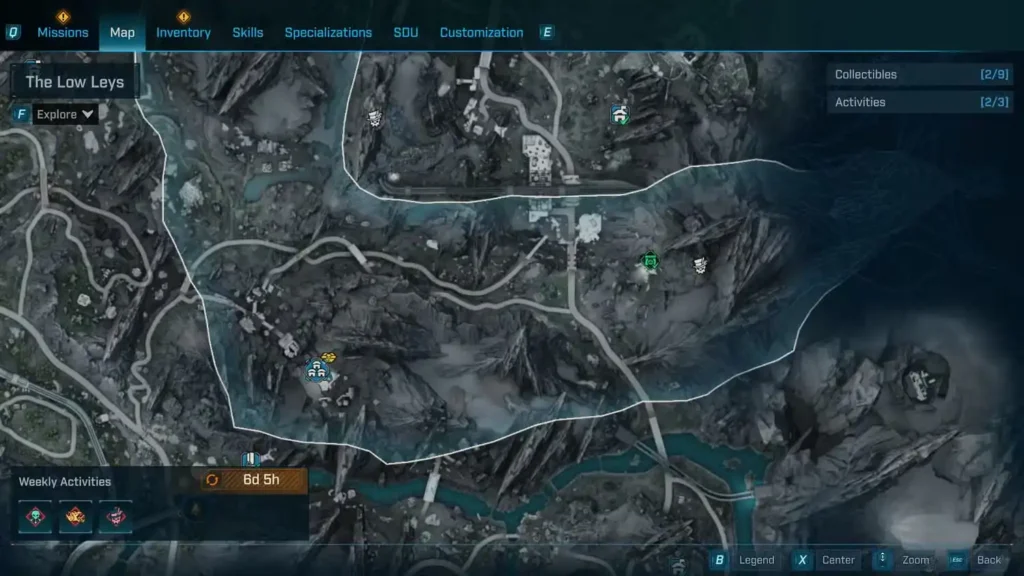
Accessing the Bunker: The Wireworks offers the most straightforward entry puzzle. Follow the snowy mountain path until you reach the cliff overlook, then use the gliding mechanics to platform across the rock formations. The climbing wall section is clearly marked, making this bunker perfect for players new to Order Bunker mechanics.
Locust Station Strategy: After climbing the wall, immediately look down to spot the Locust station. The grappling mechanics here are forgiving, so don’t worry about precision timing.
Boss Strategy – The Divisioner: The Divisioner introduces players to Borderlands 4’s most creative boss mechanic:
The Shield Trick: The initial shield is a decoy – destroying it spawns Renditions (smaller copies) Rendition Management: Each Rendition has its own shield (use Shock damage) True Victory Condition: Only by destroying Renditions do you damage the main boss’s armor Advanced Strategy: Limit Rendition spawns by timing your shield breaks carefully
Why This Fight Matters: The Divisioner teaches advanced target prioritization that becomes crucial in later endgame content.
5. The Crawlcroft – Grindstone of the Worthy, Carcadia Burn
Boss: Fractis
Legendary Drops: Chuck, Protean Cell, UAV

Navigation Challenge: The Crawlcroft is hidden within an Order base inside Carcadia Burn. The key is recognizing that not all Order bases are hostile encounters – some hide valuable secrets. Follow the cave system through the base to discover the hidden bunker entrance.
Locust Station Access: Look for metal bars underneath the grapple platform, opposite the main door. The Locust station is tucked away but accessible with careful positioning.
Boss Strategy – Fractis: Fractis employs a classic misdirection strategy:
- Golden Clone Phase: Destroy the shielded golden version first (Shock damage)
- True Boss Phase: Target the flesh health bar with Incendiary weapons
- Timing: The golden clone respawns periodically, so manage your damage windows
Farming Note: Fractis drops some of the most versatile legendary weapons, making repeat runs worthwhile.
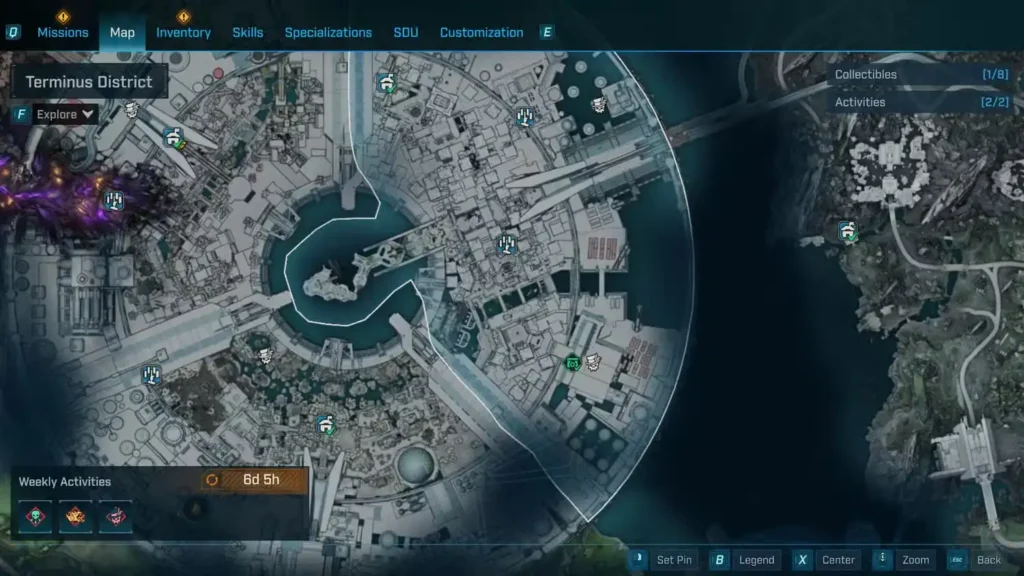
6. Ironwall Resolve – Terminus District, Dominion
Boss: Directive-O
Legendary Drops: Bonnie and Clyde, Whiskey Foxtrot, Rowan’s Charge
Prerequisites:
- Access to Dominion (story progression required)
- Complete Beth’s side mission “One Gassy Issue” in Lakeside Properties, Fades District
- This is the only Order Bunker with a quest prerequisite
Entry Solution: The Locust station hides among trash piles to the left of the main staircase leading to the bunker door. This environmental storytelling detail makes the location memorable once discovered.
Interior Complexity: Ironwall Resolve features the most complex interior layout with multiple forcefield deactivation puzzles. The key is systematic exploration – clear one room completely before moving to the opposite side.
Boss Strategy – Directive-O: Directive-O serves as the “tutorial boss” for Order Bunker mechanics:
- Shield Phase: Standard Shock weapon effectiveness
- Armor Phase: Corrosive or Cryo weapons work equally well
- Positioning: Use the arena’s cover effectively for a stress-free fight
Essential Order Bunker Tips for Efficient Farming
Weapon Loadout Optimization
Always Carry:
- Primary Shock weapon for shield phases
- Corrosive weapon for armor melting
- Incendiary backup for flesh enemies
- Cryo option for crowd control when overwhelmed
Farming Route Efficiency
Fastest Farming Circuit:
- Start with Tipping Point (shortest respawn timer)
- Hit The Wireworks (simple mechanics, quick clear)
- Finish with Ironwall Resolve (guaranteed legendary variety)
Movement Ability Requirements
Most Order Bunkers assume you have access to:
- Double jump and mantling for platforming sections
- Grappling hook for Locust station retrieval
- Gliding capabilities for cross-gap navigation
If you’re missing any of these abilities, focus on character progression before attempting bunker runs.
Advanced Bunker Strategies
Solo vs. Cooperative Play
Solo Advantages:
- No loot sharing conflicts
- Ability to take your time with puzzles
- Personal farming efficiency
Cooperative Benefits:
- Faster boss clear times
- Elemental coverage flexibility
- Revival safety net for challenging encounters
Legendary Loot Optimization
Understanding drop patterns helps maximize farming efficiency:
High-Value Targets:
- Complex Root (Tipping Point) – Versatile endgame weapon
- Kaleidosplode (Craven’s Nook) – Explosive specialist weapon
- Bonnie and Clyde (Ironwall Resolve) – Dual-wielding potential
Farming Strategy: Focus on bunkers dropping weapons that complement your current build specialization.
Integration with Broader Endgame Content
Order Bunkers represent just one piece of Borderlands 4’s endgame puzzle. Consider how they fit into your broader progression:
- Legendary farming complements golden key strategies
- Boss encounters prepare you for vault monster challenges
- Weapon variety supports diverse build experimentation

Troubleshooting Common Issues
Locust Station Problems
“Can’t find the Locust station”: Each bunker hides the station in a specific environmental context. Look for platforms, trash piles, or elevated positions near (but not at) the main door.
“Locust won’t stick to the door”: Ensure you’re close enough to the door when throwing. The magnetic lock has limited range.
Boss Difficulty Spikes
Struggling with specific bosses? Check your elemental damage understanding and consider respeccing your character for better survivability.
Platform-Specific Considerations
Whether you’re playing through Steam, PlayStation, or other platforms, Order Bunker mechanics remain consistent. However, some platforming sections may feel different between controller and keyboard/mouse setups.
The Order Bunker Endgame Loop
Once you’ve cleared all six Order Bunkers, they become part of your regular endgame routine. The combination of guaranteed legendary drops, unique boss mechanics, and puzzle-solving elements makes them more engaging than traditional farming routes.
Weekly Farming Schedule:
- Monday-Wednesday: Focus on high-value legendary bunkers
- Thursday-Friday: Experiment with challenging boss mechanics
- Weekend: Complete farming circuits for build optimization
Long-term Benefits:
- Weapon mastery through repeated elemental switching
- Mechanical skill development for harder content
- Legendary collection for experimental builds
Maximizing Your Order Bunker Experience
Order Bunkers offer some of the most rewarding content in Borderlands 4, combining puzzle-solving, boss encounters, and guaranteed progression rewards. The key to success lies in understanding each bunker’s unique personality – from Blacklime’s platforming challenges to The Divisioner’s clone management mechanics.
Whether you’re farming for specific legendaries, testing new builds, or simply enjoying Borderlands 4’s creative encounter design, Order Bunkers provide content that remains engaging long after your first clear. Master these six encounters, and you’ll have both the skills and equipment needed to tackle whatever endgame challenges await on planet Kairos.
Quick Reference Checklist:
- ✅ Complete “One Fell Swoop” main mission
- ✅ Unlock all movement abilities
- ✅ Prepare elemental weapon variety
- ✅ Complete Beth’s “One Gassy Issue” for Ironwall Resolve
- ✅ Plan farming routes based on desired legendary drops
Ready to become an Order Bunker master? These six challenges await, each promising legendary rewards for those skilled enough to solve their secrets.