Master all three Vault Monsters in Borderlands 4 with our complete boss guide. Strategies, weakspots, and tips for defeating Inceptus, Radix, and Origo for legendary loot.
TL;DR – Vault Monster Quick Reference
🏛️ Total Vault Monsters: 3 optional bosses (first time in series!)
🗝️ Entry Requirement: 3 Vault Key Fragments per region
💪 Difficulty Level: Near raid boss strength with unique mechanics
⚡ Universal Weakness: Shock damage effective against all three
🎯 Loot Value: High-tier legendary rewards worth the challenge
Quick Boss Overview:
- Inceptus (Fadefields): Armored Corrosive beast – remove armor plates with grappling hook
- Radix (Carcadia Burn): Electric rock-thrower – maintain distance and watch for environmental hazards
- Origo (Terminus Range): Fire/Ice wyvern – stay airborne using air vents
The Evolution of Vault Monsters in Borderlands 4
For the first time in Borderlands history, we’re not limited to a single climactic Vault boss. Borderlands 4 introduces three distinct Vault Monsters, each representing a significant departure from the traditional “one big alien at the end” formula.
What Makes These Special:
- Optional but rewarding: You choose when and how to tackle these challenges
- Unique regional themes: Each monster reflects its region’s environmental dangers
- Mechanical complexity: These aren’t simple bullet sponges – they require strategy
- Raid-tier difficulty: Approaching the strength of traditional raid bosses
- Farmable content: Repeatable encounters for legendary loot acquisition
This design philosophy transforms Vault hunting from a single climactic moment into an ongoing endgame pursuit, perfect for players seeking challenging, rewarding content.
Vault Key Fragment Collection Strategy
Understanding the Entry System
Before facing any Vault Monster, you need 3 Vault Key Fragments from that specific region. This requirement serves multiple purposes:
Progression Gating: Ensures you’ve thoroughly explored each region before accessing its ultimate challenge
Preparation Time: Gives you opportunities to level up and acquire better gear
Regional Mastery: Encourages complete area exploration and content engagement
Efficient Fragment Collection
Exploration Tips:
- Combine fragment hunting with SDU Token collection for maximum efficiency
- Check story mission areas you might have rushed through
- Use fast travel points strategically to cover maximum ground
- Consider fragment locations as checkpoints for gear and level assessment
Preparation Checklist:
- Character Level: Ensure you’re at appropriate level for the region
- Gear Quality: Stock up on elemental weapons suited for each monster
- Build Optimization: Consider respeccing for specific encounters
- Resource Management: Bring plenty of healing items and ammunition
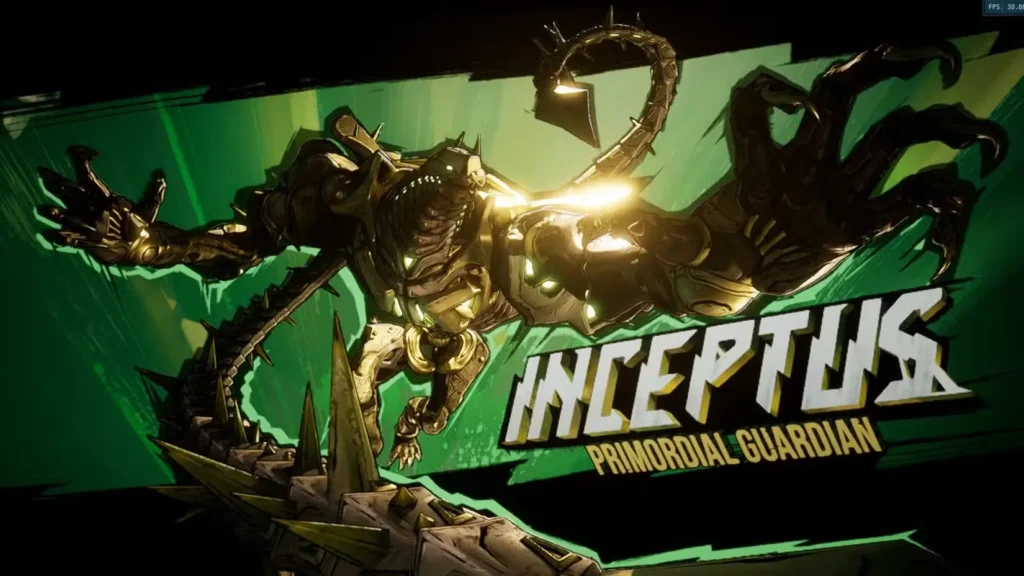
Inceptus – The Armored Menace of Fadefields
Location and Access
Vault Location: Near Zadra’s Backup Plan in the Fadefields
Regional Theme: Corrosive-focused combat with armor mechanics
Encounter Type: Close to mid-range engagement with grappling hook emphasis
Combat Analysis: Armor and Adaptation
Inceptus represents Borderlands 4’s commitment to interactive boss mechanics. Unlike traditional “shoot until dead” encounters, this fight requires active environmental interaction to maximize damage potential.
The Armor System:
- Default State: No weakspots, heavily armored throughout
- Interaction Required: Grappling hook removes shoulder and knee armor plates
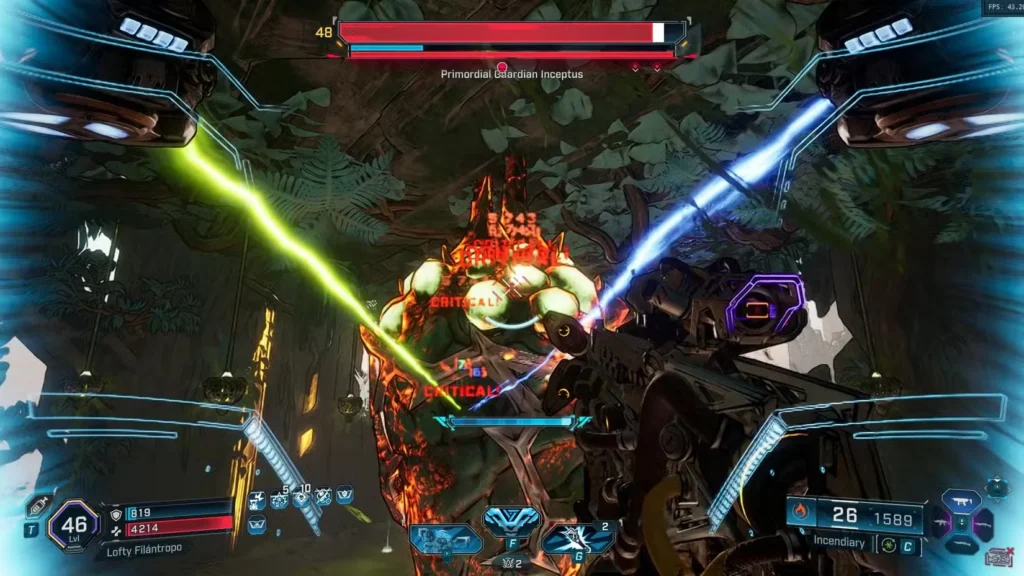
- Revealed Weakspots: Large pustules that take critical damage from any attack
- Strategic Timing: Armor removal requires positioning and opportunity windows

Phase-Based Combat Strategy
Phase 1: Armor Removal and Ground Combat
Priority Sequence:
- Identify armor plate locations – shoulders and knees are primary targets
- Position for grappling – maintain medium distance for hook accuracy
- Remove plates systematically – focus on one area at a time for maximum exposure
- Exploit weakspots – concentrate fire on exposed pustules for critical damage
Movement and Positioning:
- Tail Stab Defense: Sideways dashing provides reliable evasion
- Leaping Swipe Counter: Double jumping clears the horizontal attack range
- Optimal Range: Close enough for grappling accuracy, far enough for dodge reaction time
Phase 2: Cocoon and Ceiling Combat
Environmental Transition: When Inceptus reaches approximately 50% health, the encounter shifts dramatically:
- Cocoon Formation: Inceptus retreats to ceiling-mounted cocoon
- Floor Hazard: Entire ground area fills with damaging acid
- Vertical Combat: Engagement becomes primarily aerial
Aerial Combat Strategy:
- Immediate Grappling: Target overhead lanterns for safe positioning
- Cocoon Targeting: Focus fire on the cocoon’s base structure
- Critical Damage Window: Cocoon base takes enhanced damage during this phase
- Stun Opportunity: Sufficient damage breaks cocoon, stunning Inceptus briefly
Phase 3: Return to Ground Combat
After the cocoon phase, combat returns to the original ground-based format, but with some key differences:
- Reduced Armor: Some plates may remain removed from Phase 1
- Increased Aggression: Attack patterns become more frequent and intense
- Weakspot Accessibility: Previously exposed pustules remain vulnerable
Optimal Loadout for Inceptus
Primary Weapon Recommendations:
- Atlas Underbarrel Attachments: Exceptional for hitting large weakspots while maintaining mobility
- High-damage single-shot weapons: Maximize critical hit potential on exposed pustules
- Fast-firing options: Useful during armor removal phases when positioning is challenging
Elemental Strategy:
- Shock Weapons: Primary damage source – effective against Inceptus’s health pools
- Incendiary Backup: Secondary element for armor damage and general effectiveness
- Avoid Corrosive: Inceptus likely has resistance to his own elemental type
Tactical Equipment:
- Grappling Hook Mastery: Practice accuracy and timing for armor removal
- High-mobility builds: Enhanced dodging capabilities for tail attacks
- Health/Shield management: Sustained combat requires strong survivability
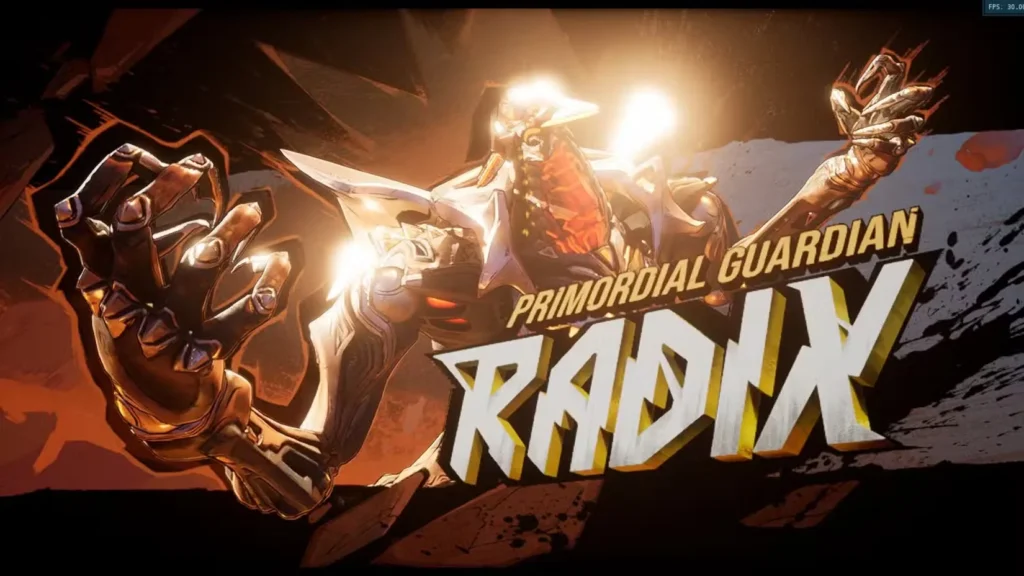
Radix – The Electric Earthshaker of Carcadia Burn
Location and Encounter Design
Vault Location: Southwest of Carcadia
Regional Theme: Electrical environmental hazards with geological combat
Encounter Type: Long-range engagement with heavy environmental awareness requirements
Combat Philosophy: Environmental Mastery
Radix transforms the battlefield into an active participant in combat. Success requires situational awareness and environmental prediction rather than pure damage output.
Core Mechanics:
- Boulder Projectiles: Large rocks launched with electrical force
- Ground Shockwaves: Area-of-effect attacks that travel across the arena
- Lightning Storms: Aerial electrical attacks requiring positioning awareness
- Floating Boulder Hazards: Environmental obstacles that inflict massive contact damage
Weakspot Strategy: The Glowing Throat

Target Identification:
- Primary Weakspot: Red, glowing throat area
- Availability: Accessible throughout entire encounter (unlike Inceptus’s armor system)
- Targeting Strategy: Aim for general head area when throat isn’t clearly visible
- Positioning Opportunities: Watch for head-lifting animations that expose throat clearly
Distance Management: The key to Radix success lies in optimal range maintenance:
- Too Close: Triggers ground slam attacks and boulder collision damage
- Too Far: Reduces accuracy for throat targeting
- Sweet Spot: Medium range allowing throat shots while avoiding slam triggers

Environmental Hazard Navigation
Boulder Management:
- Floating Hazards: Maintain awareness of orbital boulder positions
- Collision Avoidance: Massive damage on contact requires constant spatial awareness
- Launch Indicators: Watch for glowing boulders that signal incoming projectile attacks
Shockwave Defense:
- Multiple Wave Attacks: Radix can generate successive ground waves
- Elevation Solutions: Use Glider to rise above wave attacks
- Rocky Cover: Natural arena formations provide alternative protection
- Timing Windows: Waves travel at predictable speeds allowing calculated movement
Lightning Storm Survival:
- Area Indicators: Visual cues show incoming lightning strike zones
- Movement Priority: Continuous movement reduces strike probability
- Cover Utilization: Use arena geometry to break line-of-sight with electrical attacks
Advanced Positioning Tactics
Glider Integration:
- Vertical Advantage: Elevated position improves throat targeting angles
- Hazard Avoidance: Aerial movement bypasses most ground-based attacks
- Emergency Escape: Quick elevation gain when overwhelmed by environmental hazards
Rock Formation Strategy:
- Natural Platforms: Use arena rocks for elevation and cover
- Predictive Positioning: Move to rocks before multi-wave attacks begin
- Emergency Shelter: Larger formations provide temporary safety during intense phases
Optimal Loadout for Radix
Weapon Recommendations:
- Long-range precision weapons: Sniper rifles excel for throat targeting
- Rapid-fire options: SMGs and assault rifles for sustained pressure
- Area-of-effect weapons: Useful when throat targeting becomes difficult
Elemental Strategy:
- Shock Primary: Effective against Radix’s electrical nature
- Corrosive Secondary: Alternative elemental pressure
- Avoid Electrical: Likely resistance to his own element type
Mobility Focus:
- Enhanced movement speed: Critical for environmental hazard avoidance
- Glider optimization: Extended flight duration and maneuverability
- Dash capabilities: Quick directional changes for boulder and wave avoidance
Origo – The Elemental Wyvern of Terminus Range
Location and Aerial Combat Design
Vault Location: Terminus Range region
Regional Theme: Dual elemental mastery with vertical combat emphasis
Encounter Type: Three-dimensional aerial engagement with elemental hazard zones

Dual Element Mechanics: Fire and Ice Mastery
Origo introduces dynamic elemental shifting, creating an encounter that changes fundamental rules mid-combat:
Elemental Modes:
- Incendiary Attunement: Fire-based attacks leaving persistent flame trails
- Cryo Attunement: Ice-based attacks creating slowing damage zones
- Mode Switching: Origo alternates between elements throughout the fight
- Resistance Scaling: High resistance to both Incendiary and Cryo damage

Weakspot System: Crystal Targeting
Crystal Mechanics:
- Location: Multiple crystals positioned along Origo’s back
- Accessibility Challenge: Only targetable when Origo is grounded
- Aerial Concealment: Flight positioning hides crystals from most angles
- Ground Phase Strategy: Maximize damage during brief landing windows
Targeting Optimization:
- Positioning Importance: Angle of attack affects crystal visibility
- Damage Windows: Limited time frames require high-damage weapon choices
- Multiple Targets: Several crystals allow for spread damage or focused destruction
Breath Attack Hazard Zones
Attack Pattern Analysis:
- Direct Damage: Initial breath attack inflicts immediate elemental damage
- Persistent Zones: Attacks leave behind dangerous ground areas
- Elemental Variation: Fire trails vs. ice patches based on current attunement
- Duration: Hazard zones persist for extended periods, limiting arena mobility
Fire Trail Mechanics:
- High Damage: Incendiary zones inflict significant continuous damage
- Movement Restriction: Forces players to navigate around flame areas
- Visual Clarity: Obvious fire effects make avoidance straightforward
Ice Patch Mechanics:
- Slowing Effect: Cryo zones reduce movement speed dramatically
- Damage Over Time: Continuous health reduction while in contact
- Tactical Disadvantage: Reduced mobility increases vulnerability to other attacks

Air Vent System: Vertical Mobility Solution
Environmental Interaction:
- Grappling Hook Activation: Target ground vents to expose air currents
- Launch Mechanism: Vents propel players vertically for extended glider use
- Hazard Avoidance: Primary method for bypassing ground-based elemental zones
- Strategic Positioning: Aerial advantage improves crystal targeting opportunities
Glider Combat Integration:
- Extended Flight: Air vents enable sustained aerial engagement
- Hazard Clearance: Flying over elemental zones eliminates ground hazard concerns
- Crystal Access: Aerial positioning may provide alternative crystal targeting angles
- Dive Attack Avoidance: Vertical mobility crucial for avoiding Origo’s aerial attacks
Dive Attack Recognition and Counter
Attack Indicators:
- Mid-Flight Pause: Origo stopping aerial movement signals incoming dive
- Positioning Cues: Origo aligns above player position before attacking
- Timing Window: Brief moment between pause and actual dive attack
Evasion Strategy:
- Dash Timing: Well-timed sideways dash provides reliable avoidance
- Prediction Skills: Anticipate dive based on movement patterns
- Emergency Options: Grappling hook to air vents provides emergency escape
Arena Awareness: Instant Death Hazards
Environmental Dangers:
- Arena Boundaries: Falling off edges results in immediate death
- Recovery Options: Grappling hook can return players to solid ground if used quickly
- Positioning Strategy: Maintain central arena position to avoid accidental falls
- Combat Awareness: Don’t let combat focus override spatial awareness
Universal Weakness: Shock Damage Exploitation
Blue Health Bar Significance:
- Shock Vulnerability: All of Origo’s health segments are weak to electrical damage
- Elemental Priority: Shock weapons should be primary damage source
- Resistance Bypass: Shock damage ignores Origo’s fire/ice resistances
- Optimal Strategy: Focus exclusively on shock-based weapons for maximum efficiency
Optimal Loadout for Origo
Weapon Recommendations:
- Shock-exclusive arsenal: Prioritize electrical weapons for vulnerability exploitation
- Aerial-capable weapons: SMGs and assault rifles work well during glider phases
- High-damage precision: For maximizing crystal damage during brief ground phases
Mobility Equipment:
- Enhanced glider capabilities: Extended flight duration and improved maneuverability
- Grappling hook mastery: Quick and accurate air vent targeting
- Movement speed bonuses: Faster ground movement for hazard avoidance
Survival Priorities:
- Health management: Extended fight duration requires strong healing capabilities
- Environmental resistance: Fire and ice resistance can reduce hazard zone damage
- Emergency options: Quick healing items for unexpected damage spikes
Universal Strategies Across All Vault Monsters
Pre-Fight Preparation
Character Optimization:
- Level Appropriateness: Ensure character level matches regional difficulty
- Build Assessment: Consider character-specific optimizations for each encounter
- Skill Specialization: Evaluate whether respecs would improve performance
Gear Preparation:
- Elemental Coverage: Stock weapons for each monster’s weaknesses
- Backup Options: Prepare alternative weapons for different combat phases
- Defensive Equipment: Prioritize shields and items that enhance survivability
Combat Fundamentals
Movement Mastery:
- Grappling Hook Proficiency: Essential for all three encounters
- Dash Timing: Critical for avoiding signature attacks from each monster
- Glider Efficiency: Important for Radix and essential for Origo
Environmental Awareness:
- Hazard Recognition: Each monster creates unique environmental dangers
- Safe Zone Identification: Learn arena layouts and safe positioning areas
- Emergency Escape: Always maintain awareness of escape routes and emergency options
Farming and Progression
Loot Optimization:
- Difficulty Scaling: Higher difficulties provide better rewards but increased challenge
- Farming Efficiency: Learn patterns to reduce clear times for repeated attempts
- Gear Progression: Use Vault Monster loot to improve equipment for future encounters
Integration with Other Systems:
- Eridium Investment: Consider using Moxxi’s Big Encore for improved drop rates
- Build Development: Vault Monster challenges provide excellent testing for various builds
Advanced Tips for Success
Psychological Preparation
Patience Requirements: These encounters are designed as marathon challenges rather than sprint encounters. Expect:
- Extended fight durations compared to regular bosses
- Multiple phase transitions requiring adaptation
- High damage punishment for positioning mistakes
Learning Curve Management:
- Pattern Recognition: Each monster has predictable attack sequences
- Incremental Improvement: Focus on surviving longer each attempt rather than immediate victory
- Failure Analysis: Learn from deaths to improve subsequent attempts
Equipment and Resource Management
Ammo Conservation:
- Efficient Shooting: Focus on weakspots and high-damage windows
- Elemental Efficiency: Use appropriate elements to maximize damage per shot
- Backup Planning: Bring multiple weapon types to avoid ammo shortages
Health and Shield Management:
- Healing Item Stockpiling: Bring maximum healing supplies
- Shield Selection: Choose shields optimized for sustained combat
- Emergency Protocols: Plan response strategies for low-health situations
Team Strategies (Cooperative Play)
Role Specialization:
- Damage Dealers: Focus on weakspot targeting and sustained DPS
- Support Players: Prioritize team healing and enemy debuffing
- Mobility Specialists: Handle environmental mechanics and hazard navigation
Communication Priorities:
- Attack Callouts: Coordinate focus fire on weakspots and critical phases
- Hazard Warnings: Alert team to environmental dangers and safe zones
- Emergency Coordination: Plan responses for team member revival and emergency situations
Conclusion
Borderlands 4’s Vault Monsters represent a significant evolution in series boss design, transforming from single climactic encounters into ongoing endgame challenges. Each monster requires mastery of different skills:
- Inceptus: Environmental interaction and armor management
- Radix: Situational awareness and hazard navigation
- Origo: Aerial combat and elemental zone avoidance
Key Success Factors:
- Preparation and Planning: Proper gear and character optimization
- Mechanical Mastery: Understanding each monster’s unique systems
- Environmental Adaptation: Learning to use arena features effectively
- Patience and Persistence: Accepting the learning curve for complex encounters
These challenges provide some of the most rewarding combat experiences in Borderlands 4, offering legendary loot and satisfying victories for players willing to master their mechanics. Whether you’re a beginner learning the ropes or an experienced Vault Hunter seeking the ultimate challenge, these monsters offer engaging content that grows with your skill level.
Related Guides:
- Complete Boss Farming Guide for farming strategies
- Elemental Damage Guide for optimal weapon choices
- Character Build Guide for encounter optimization
Official Game Links: