Side quests in Duet Night Abyss often lead you down fascinating narrative rabbit holes, and Hello, Icelake is a perfect example. This multi-part quest turns you into a detective of sorts, tasking you with returning three mysterious items to their rightful owners. What starts as a simple favor for Margie evolves into three interconnected stories that reveal the hidden struggles of Icelake’s residents.
If you’re ready to dive into one of DNA’s more emotionally resonant side quests, this guide will walk you through every step—from triggering the quest to completing all three investigations and passing those tricky impression checks.
How To Unlock the Hello, Icelake Quest
Before you can start playing detective, you’ll need to meet some prerequisites and navigate a conversation skill check.
Requirements to trigger Hello, Icelake:
- Complete “On a Gentle Breeze” – This is part of the Noctoyager Chapter 1 main storyline
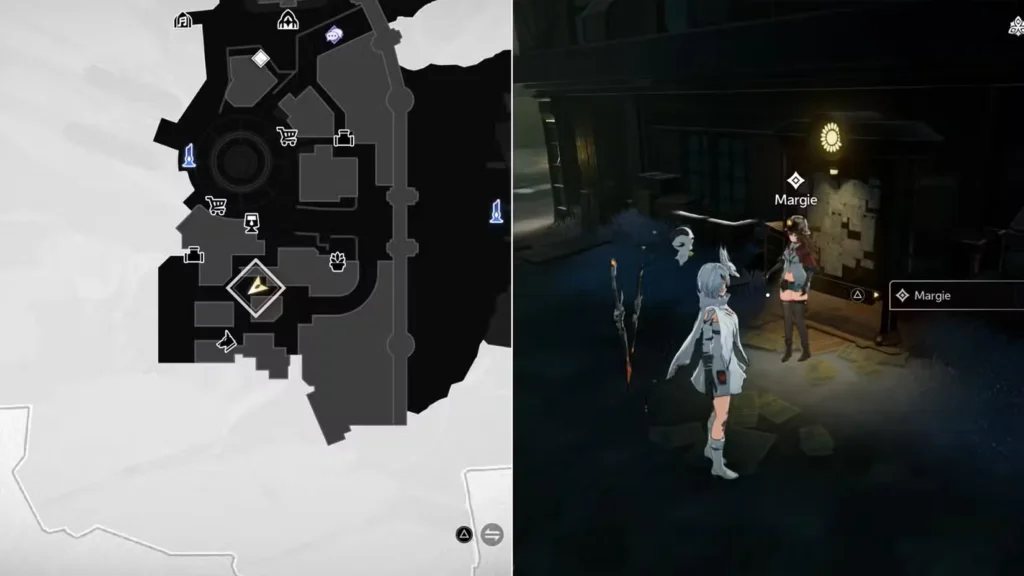
- Find Margie – She’s standing near the Outsider’s house, right in front of a bulletin board
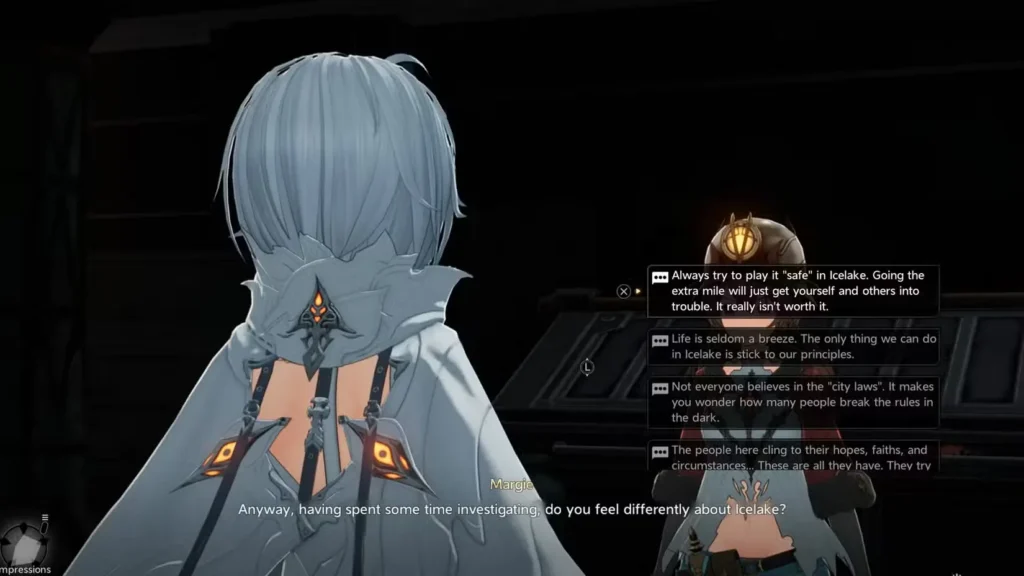
- Pass an impression check – You’ll need to succeed at a 120 difficulty check in either Morality, Empathy, or Wisdom
When you first talk to Margie, she’ll ask about your experience living in Icelake so far. This isn’t just small talk—your dialogue choices here actually increase specific impression attributes. Pay attention to which stat you want to boost, as these attributes come up frequently throughout the game.
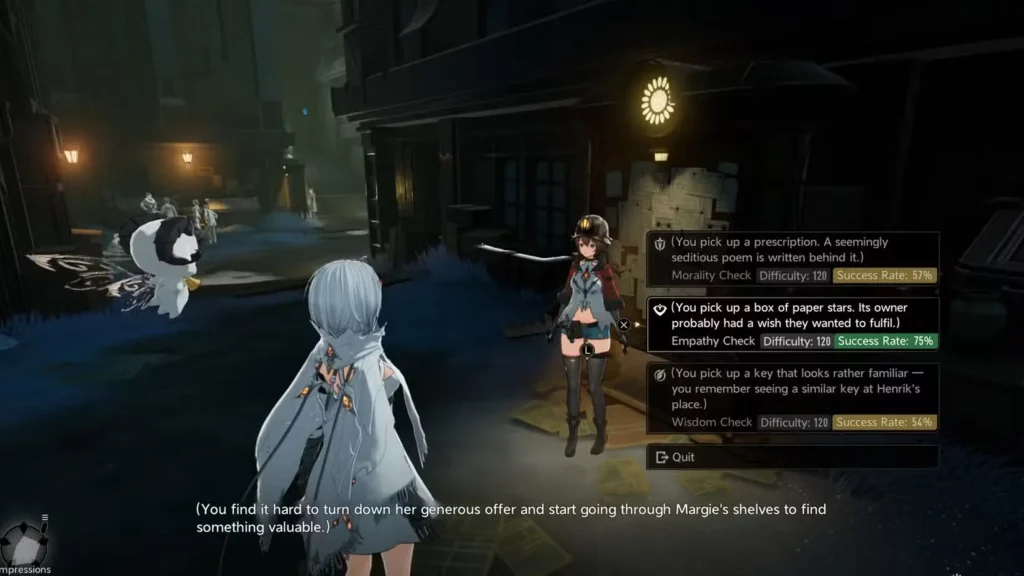
The real gate to the quest comes when you need to pass that 120 difficulty check. If you’ve been spreading your impression points around evenly, you might struggle here. Focus on leveling up at least one of these three attributes (Morality, Empathy, or Wisdom) to ensure you can access the quest content. If you’re still building your character and haven’t thought much about impressions, check out the Psyche system guide to understand how these checks work.
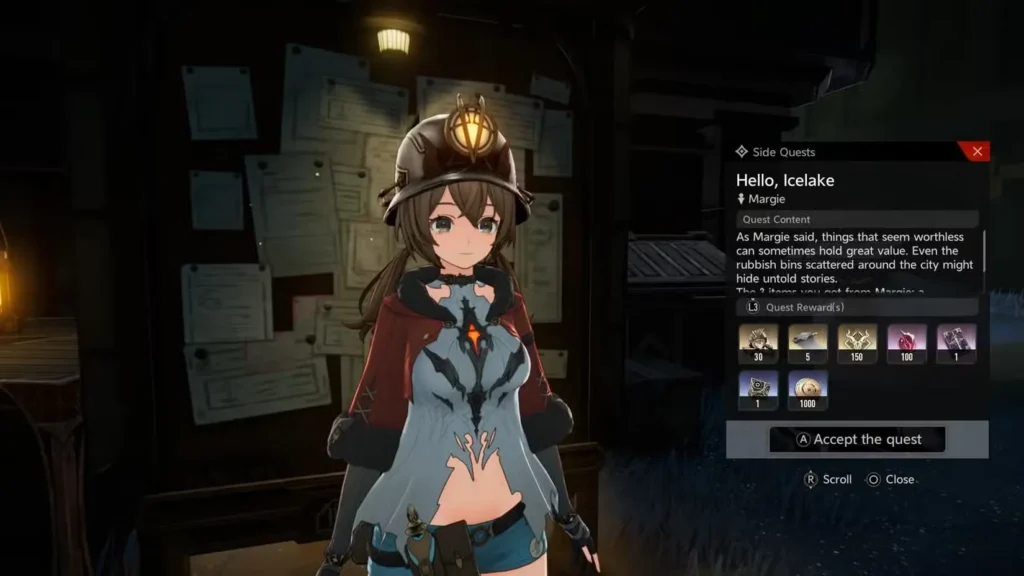
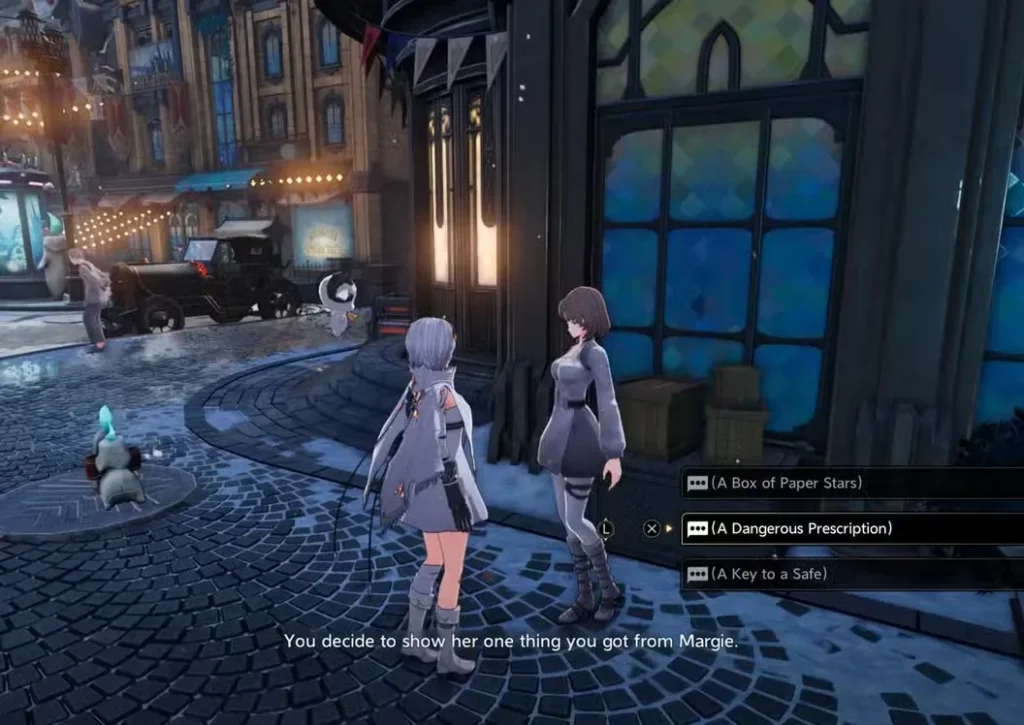
Once you pass the check, Margie hands you three mysterious items. Your job? Figure out who they belong to and return them. Each item triggers its own unique side quest, creating a branching narrative structure that’s really satisfying to unravel.
Investigation #1: A Dangerous Prescription
The first item on your list is a medical prescription that clearly shouldn’t be in random hands. This investigation takes you to some of Icelake’s darker corners.
Step-by-Step Walkthrough:
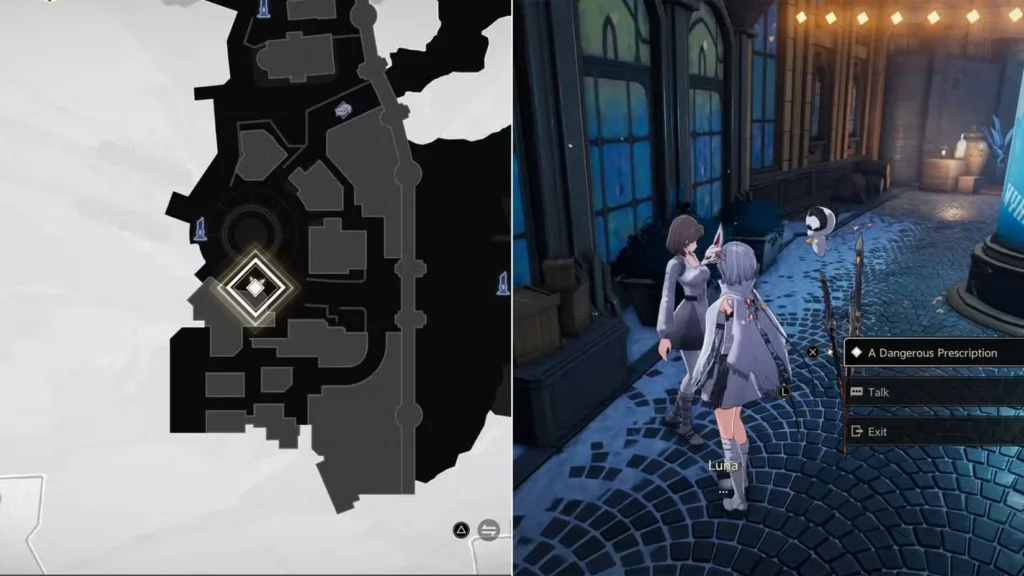
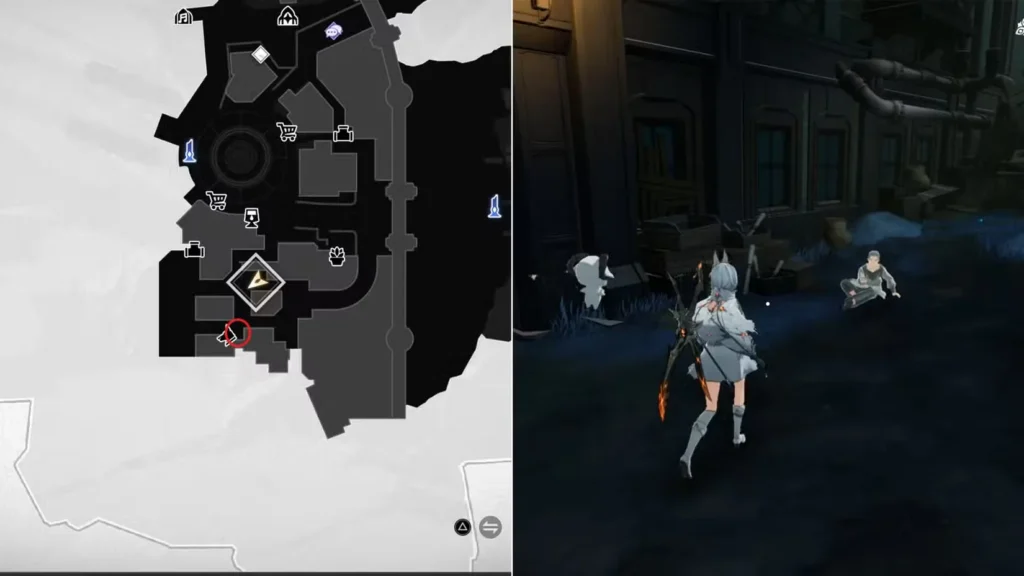
1. Head to the Asphodel Travel to the Asphodel area and approach the entrance. You’ll automatically trigger a cutscene showing Luna being harassed by two aggressive NPCs. The situation is clearly bad, and you’ll need to intervene.
2. Defeat the Thugs Time to put your combat skills to use. Take down both attackers to rescue Luna. If you’re struggling with combat mechanics, the Demon Wedges guide can help you optimize your damage output.
3. Offer the Prescription After the fight, talk to Luna and present the prescription from Margie. This triggers “A Dangerous Prescription” quest officially. Luna reveals her tragic backstory—she was once a bard until thugs forced her to consume poison, destroying her voice and her livelihood.
4. Retrieve Medicine from Hypnos’ House Follow the quest marker to Hypnos’ House. You’ll find medicine there that might help Luna’s condition. This location is important because you’ll return here for the second investigation as well.
5. Make a Critical Choice Return to Luna with the medicine. Here’s where things get morally complex—you have the option to give her the medicine or keep it. This choice matters narratively, and there’s no clear “right” answer. Consider what your character would realistically do in this situation.
What makes this quest compelling: Luna’s story isn’t just about returning a prescription—it’s about a person whose entire identity was violently stripped away. The choice to help or not help her speaks to larger themes about redemption and community responsibility that Duet Night Abyss explores throughout its narrative.
Investigation #2: A Key To The Final Contract
The second item is a mysterious key, and this investigation unfolds entirely within Hypnos’ House—conveniently, you’re already there if you just finished Luna’s quest.
Complete Walkthrough:
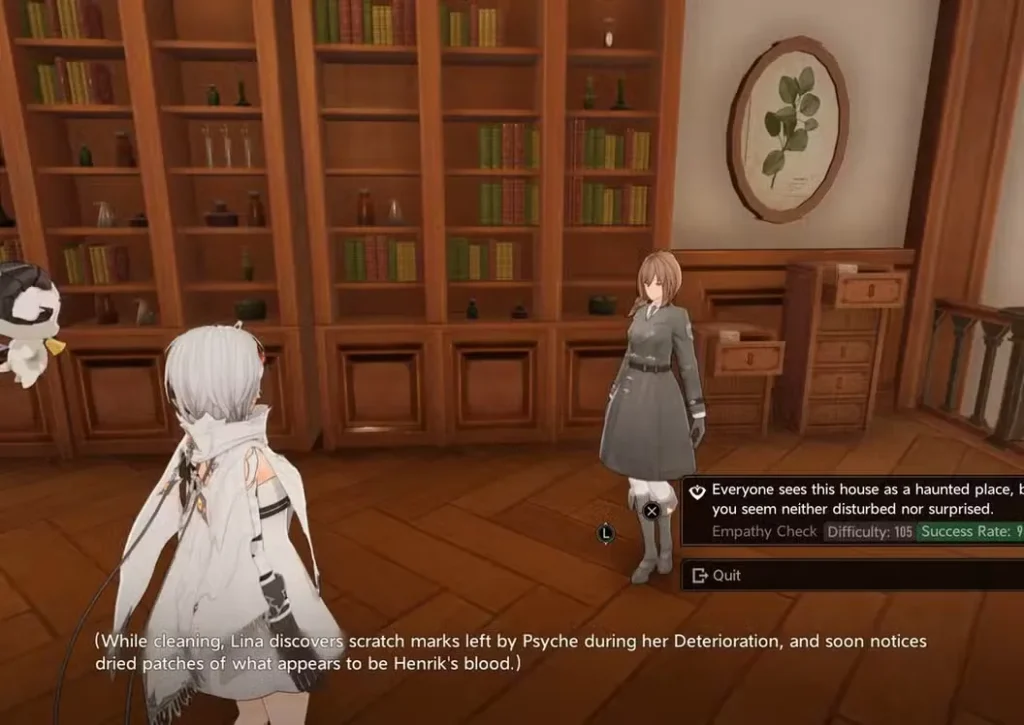
1. Find Lina on the Second Floor Head upstairs in Hypnos’ House. You’ll find Lina cleaning—she’s a dedicated housekeeper who clearly takes pride in maintaining the property.
2. Pass Two Impression Checks This is where your impression stats really matter. You need to succeed at both an Empathy check and a Wisdom check to get Lina to open up about the key. If you failed the initial 120 check to trigger Hello, Icelake, you definitely need to invest in these stats before attempting this quest chain.
3. Trigger “The Final ‘Contract'” Quest Once you pass both checks, Lina reveals information about the key, officially starting this side quest.
4. Access Henrik’s Office Navigate to Henrik’s office within the house. Use the key Margie gave you to open a safe—but it’s not as simple as just unlocking it.
5. Solve the Puzzle The safe has a mini-puzzle protecting its contents. These puzzles in DNA aren’t overly complex, but they require attention to detail. Take your time examining all the clues available.
6. Discover Henrik’s Will The safe contains Henrik’s last will and testament. In a touching revelation, Henrik left everything to Lina as a final gesture of gratitude for her years of loyal service and dedication. It’s a surprisingly emotional payoff for what started as a simple key investigation.
Why this quest hits different: In a world full of betrayal and darkness, finding a story about genuine appreciation and loyalty feels refreshing. Lina’s dedication being recognized, even posthumously, adds a layer of warmth to Icelake’s otherwise bleak atmosphere.
Investigation #3: A Box Of Paper Stars
The final item is perhaps the most mysterious—a box filled with carefully folded paper stars. This investigation requires some legwork across Icelake.
Full Quest Guide:
1. Travel to the Outsider’s House Head to the Outsider’s house location and look for an old scavenger character hanging around nearby.
2. Gather Initial Information Talk to the scavenger. He’ll share an intriguing detail—he witnessed a well-dressed woman crying while throwing away the box of paper stars. This immediately raises questions: Why would someone dispose of something clearly made with care and effort?
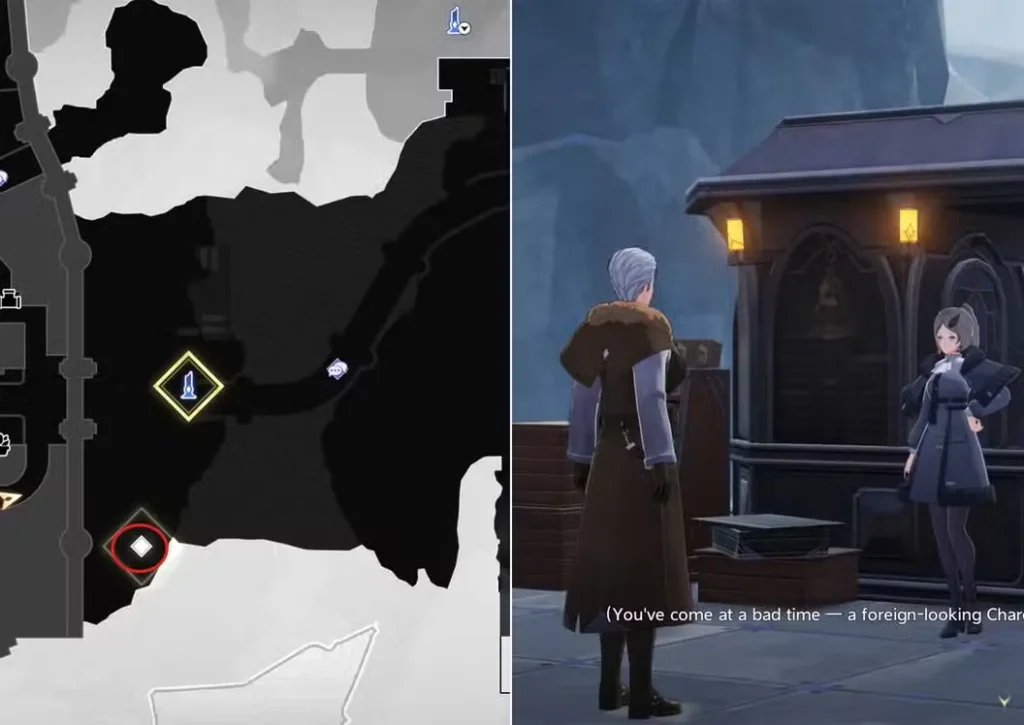
3. Follow the Quest Marker The trail leads you outside of Icelake proper, to a ticket booth on the outskirts. This is where the story comes together.
4. Pass a 130 Difficulty Wisdom Check Here’s the highest difficulty check in the entire Hello, Icelake quest chain. You need to succeed at a 130 difficulty Wisdom check to officially start the “Stars of Hidden Dreams” quest. If you’ve been investing in Wisdom for the previous checks, you should be okay. If not, you might need to level up or come back later.
5. Talk to the NPCs at the Ticket Booth Speak with the two characters present. They’ll provide context about the paper stars and the woman who discarded them.
6. Complete the Final Puzzle Like Henrik’s safe, this quest ends with a mini-puzzle. Solve it to wrap up the Stars of Hidden Dreams questline and complete your third investigation.
The emotional weight: Paper stars are traditionally symbols of wishes and hope. Someone taking the time to fold an entire box of them, only to tearfully throw them away, speaks to broken dreams and lost aspirations. It’s a melancholic note that resonates with the game’s broader themes about perseverance in the face of despair.
Returning to Margie: Completing Hello, Icelake
After you’ve successfully completed all three investigations—A Dangerous Prescription, The Final Contract, and Stars of Hidden Dreams—it’s time to report back to Margie.
Final Steps:
- Return to Margie’s location near the bulletin board by the Outsider’s house
- Report your findings about all three items and their owners
- Answer Margie’s question about living in Icelake again
- Choose dialogue options that boost your preferred impression attribute
The second conversation with Margie mirrors the first—she asks again how you’re finding life in Icelake. Your responses continue building impression stats, so choose based on which attributes you want to strengthen for future skill checks.
Tips for Success
Essential advice for Hello, Icelake:
- Invest in impression stats early – Don’t spread points too thin across all attributes
- Focus on Wisdom – It appears in multiple checks throughout this quest chain
- Complete main story first – Finish “On a Gentle Breeze” before attempting this
- Prepare for combat – The thugs in Luna’s quest can be challenging if you’re undergeared
- Take notes – The puzzle solutions might require remembering details from conversations
- Don’t rush – Each sub-quest has meaningful story content worth experiencing
If you’re playing co-op with friends, coordinate who’s handling impression checks if you’re working through quests together. Also, if you’re building support characters like Rebecca, you might want to prioritize combat stats differently than if you’re focusing on passing social checks.
Why Hello, Icelake Matters
What elevates Hello, Icelake above typical “fetch quest” content is how each item tells a complete story. You’re not just returning lost property—you’re witnessing three different human dramas playing out in Icelake’s shadows:
- Luna’s story explores trauma and the possibility of healing
- Lina’s story reveals quiet dignity and unexpected rewards for loyalty
- The paper stars represent abandoned dreams and the weight of unfulfilled wishes
These narratives interconnect thematically while remaining distinct, creating a richer understanding of Icelake as a living community rather than just a quest hub. It’s this kind of thoughtful storytelling that makes exploring DNA’s side content worthwhile beyond just the rewards.
Final Thoughts
Hello, Icelake is one of those side quests that reminds you why you fell in love with RPGs in the first place. It takes a simple premise—return three items—and transforms it into an exploration of community, loss, loyalty, and hope. The impression checks add mechanical depth, while the branching investigations give you agency in how you experience the story.
Make sure you’ve got your impression stats leveled appropriately before diving in, especially that 130 Wisdom check for the paper stars investigation. And don’t skip the dialogue—the real reward here isn’t just quest completion, but the stories you uncover along the way.
Have you completed Hello, Icelake yet? Which of the three investigations resonated most with you? Luna’s tragic backstory, Lina’s unexpected inheritance, or the mystery of the discarded paper stars? Each one offers something different, and that’s what makes this quest chain special.