Find every legendary weapon in Dying Light: The Beast! Complete guide with exact locations, puzzle solutions, and unlock requirements for all special weapons and blueprints.
Your Arsenal of Destruction Awaits
In the unforgiving world of Dying Light: The Beast, standard weapons will only get you so far. When you’re facing down hordes of infected or the Baron’s elite soldiers, you need firepower that lives up to the legendary name. The good news? Castor Woods is packed with incredible legendary weapons – if you know where to look.
This comprehensive guide covers every single legendary weapon available in the game, from puzzle-locked firearms to throwable axes that return like boomerangs. Whether you’re hunting for the iconic EXPcalibur sword or seeking the perfect legendary SMG, we’ll show you exactly how to claim each devastating weapon.
What makes legendary weapons special:
- Massive damage output that trivializes regular enemies
- Unique abilities not found on standard weapons
- Superior durability for extended combat sessions
- Collectible value for completionist players
- Late-game viability when facing toughest challenges
Understanding Legendary Weapon Categories
Dying Light: The Beast organizes legendary weapons into distinct categories, each requiring different acquisition methods:
Special Legendary Weapons
These unique weapons require environmental puzzles, exploration challenges, or specific unlock conditions. They’re often one-of-a-kind items with special properties.
Upgradeable Legendary Weapons
Standard weapon blueprints that can be enhanced to legendary quality through manual pages, materials, and upgrading systems.
DLC Exclusive Weapons
Pre-order bonuses and special edition content that provides immediate access to powerful gear.
Understanding these categories helps you prioritize your legendary weapon hunting based on your playstyle and current game progress.
Special Legendary Weapons – The Elite Collection
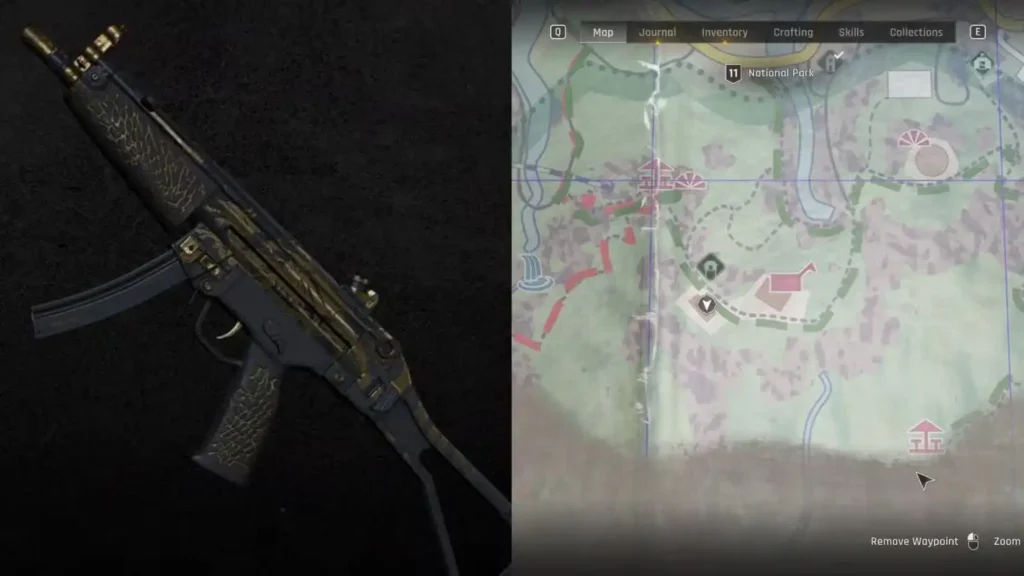
The Needle (SMG) – Power Puzzle Challenge
Location: Mountain Reserve Ranger Station (Northeast of Mountain Shelter Tower Safe Zone)
This legendary SMG combines puzzle-solving with intense combat encounters, making it one of the most rewarding weapons to obtain.
Step-by-step acquisition:
- Navigate northeast from Mountain Shelter Tower Safe Zone (Grid D5)
- Important timing: Attempt this during daytime only – nighttime makes the encounter extremely dangerous
- Look for the unmarked ranger station with cabin and closed garage building
The power restoration puzzle:
- Check the cabin outside the main building (right side of complex)
- Generator activation: Turn on the diesel generator inside the cabin
- Cable management: Pick up the power cable and connect it to the panel on the left side of the garage (outside the building)
- Combat preparation: The garage opening attracts multiple Virals – have healing ready
Final steps:
- Clear the infected that emerge from the ranger station interior
- Lockpicking required: Pick the lock on the door in the far left corner
- The Needle SMG sits on a shelf along with valuable SMG ammunition
Strategic value: Excellent for crowd control and sustained firefights against human enemies.
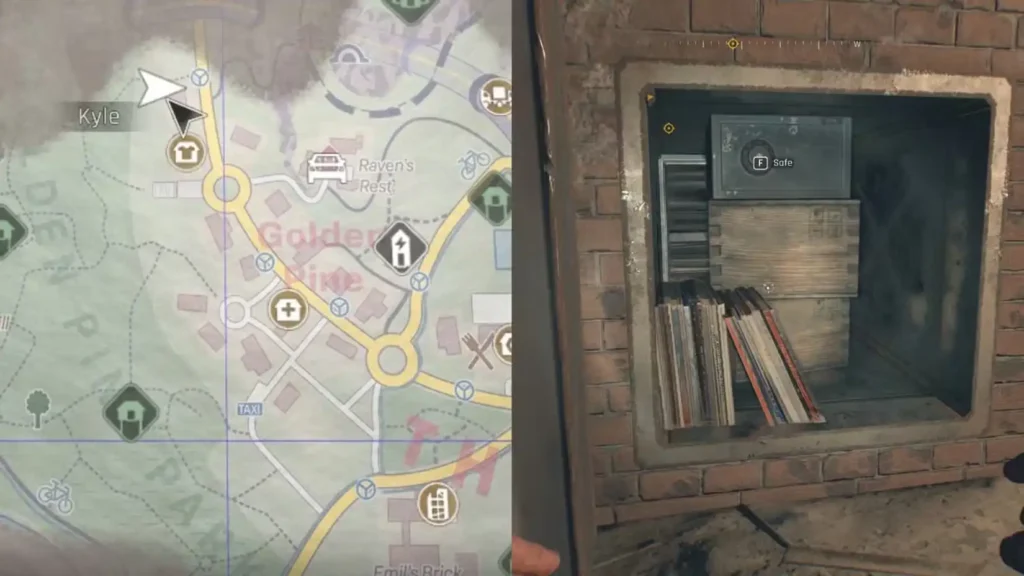
Sunray (Revolver) – The Safe Cracking Job
Location: Villa Area, Golden Pine region (Northeast map section)
This revolver acquisition teaches valuable safe-cracking skills while providing a powerful sidearm.
Navigation to Golden Pine:
- Head to the villa area in the northeast section of the map
- Locate the upper roundabout in Golden Pine
- Landmark identification: Look northwest for two isolated houses
- Target the house without the Dark Zone (Vanity Store)
The fuse hunt:
- Enter through the broken window in the backyard
- Navigate to the bathroom inside the house
- Zombie encounter: Kill the sleeper zombie and loot the fuse from the body
- Safety tip: Clear the house thoroughly before proceeding to avoid surprises
Cellar puzzle solution:
- Open the cellar hatch in the backyard
- Electrical work: Replace the blown fuse in the electrical panel
- Safe location: Find the breach in the cellar wall containing a hidden safe
- Combination: Input 2-2-19 to claim the Sunray Revolver
Bonus discovery: The Bloody Bunnies poster adds environmental storytelling depth.
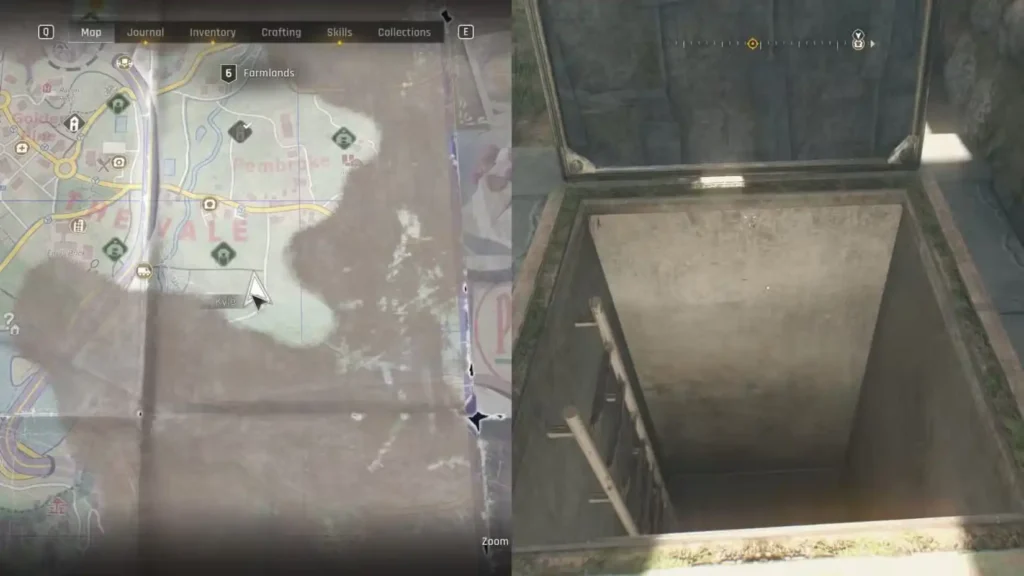
The Eraser (Auto Rifle) – Advanced Power Management
Location: Farmlands Area, Southeast of Farms Tower Safe Spot
This assault rifle requires the most complex puzzle sequence, rewarding dedicated players with exceptional firepower.
Initial approach:
- Start at Farms Tower Safe Spot for navigation reference
- Direction: Travel diagonally southeast until spotting ruins with heavy zombie presence
- Enemy identification: Look for a Toad zombie spitting from a small balcony – this marks the correct location
Phase 1 – Power cable acquisition:
- Combat first: Clear all zombies from the ruins area
- Examine the former Toad position to find the first power panel
- Important: Note the hatch below this panel – you’ll return here
Shed infiltration:
- Locate the small shed near the ruins
- Entry method: Access through the vent on the backside (may require breaking crates)
- Generator activation: Turn on the diesel generator inside
- Collect the power cable from the generator area
Phase 2 – Basement puzzle:
- Connect the cable to the power panel in the ruins
- Hatch access: Open and descend into the basement level
- Physical puzzle: Push the large shelf to reveal an air duct passage
- Crawl through to discover the second power panel
Phase 3 – Final connection:
- Return to surface level and disconnect the cable from the first panel
- Cable routing: Drag the cable down to basement level
- Navigate back through the vent system to reach the second panel
- Final connection: Link the cable to unlock all basement doors
- The Eraser Auto Rifle waits in the newly accessible room
Combat effectiveness: Devastating against both infected and human enemies with excellent range and damage.
The Statement (Shotgun) – Sunflower House Secret
Location: Pembroke Area (Grid squares B7-B8)
This shotgun provides a straightforward but rewarding collection experience.
Precise navigation:
- Map reference: Follow the ‘r’ in “Pembroke” from top to bottom (moving south)
- Grid intersection: Target the vertex between B7 and B8 grid squares
- Landmark: Look for isolated buildings with distinctive sunflowers planted against exterior walls
Entry and power sequence:
- Vent access: Remove the lid from the vent on the right bottom side of the building
- Crawl inside and unlock the tool shed door from the interior
- Generator work: Activate the diesel generator and collect the power cable
- Panel connection: Connect cable to the panel on the building directly across from the shed door
Claiming the prize:
- Open the now-powered garage door
- Final combat: Eliminate the zombie inside the garage
- The Statement Shotgun rests on the workbench – a perfect close-combat weapon
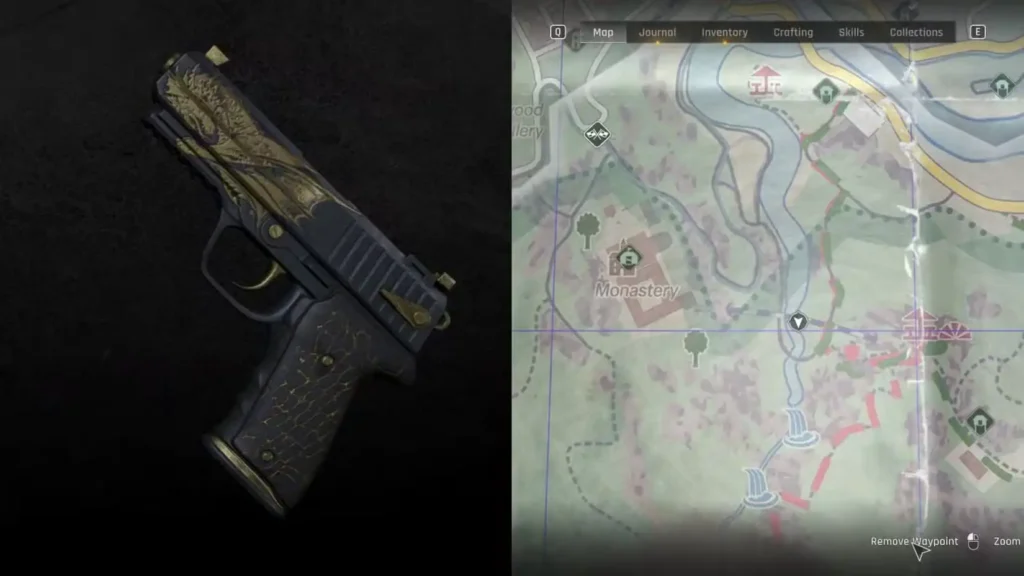
The Elite (Pistol) – Bridge Container Puzzle
Location: Red Bridge between Monastery Area and Mountain Shelter zone
This pistol acquisition combines exploration, puzzle-solving, and resource management.
Container reconnaissance:
- Bridge location: Position yourself on the Red Bridge crossing the river
- Container identification: Look for abandoned cargo train containers with locked doors
- Survival instinct tip: Use survival instinct to identify which container holds a zombie
Key card acquisition:
- Pick the lock on the zombie-containing container
- Combat encounter: Defeat the zombie inside
- Essential loot: Collect the key card from the defeated zombie – this is crucial for the final step
Power system activation:
- Locate the second locked container and pick its lock
- Generator setup: Find the open container with a sleeping zombie and fuel canisters
- Combat preparation: Activate the generator, which attracts Virals
- Clear the Virals and collect the power cable
Final sequence:
- Cable routing: Drag the power cable to the second unlocked container
- Zombie dodge: Avoid the zombie emerging from the remaining closed container
- System completion: Connect the cable and insert the key card into the panel
- The Elite Pistol is your reward for this complex sequence
Strauss & Broda Machete – The Persistence Test
Location: Industrial Zone, ‘Taxi’ building
This legendary machete tests player patience with its unique unlock mechanism.
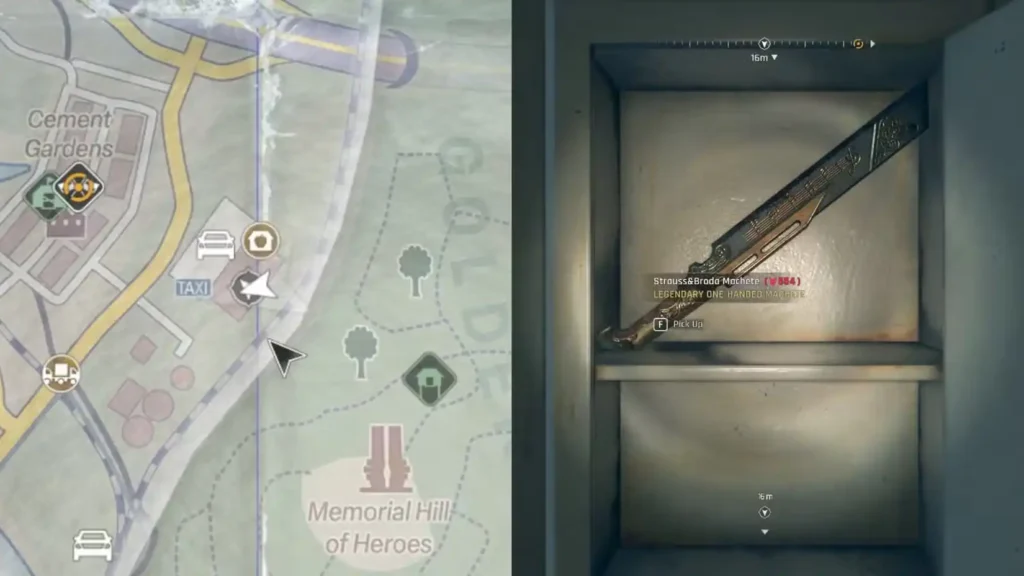
Building navigation:
- Map landmark: Look for the building labeled ‘Taxi’ in the Industrial Zone
- Climbing route: Use the exterior stairs on the building’s lateral side to reach the rooftop
- Lockpicking challenge: Pick the hard lock leading to the small terrace shed
The patience puzzle:
- Unique interaction: Find the wall-mounted locked box with ‘Knock’ prompt
- Persistence required: Knock repeatedly – expect at least 50+ attempts before the box opens
- Reward patience: The Strauss & Broda Machete is worth the repetitive effort
Combat characteristics: Excellent melee weapon with unique visual design reflecting its craftsmanship origin.
EXPcalibur II – The Ultimate Quest
Location: Rock formation east of Monastery (requires 8 Stone Sigils)
The legendary sword deserves its own epic quest line, detailed in our complete EXPcalibur guide.
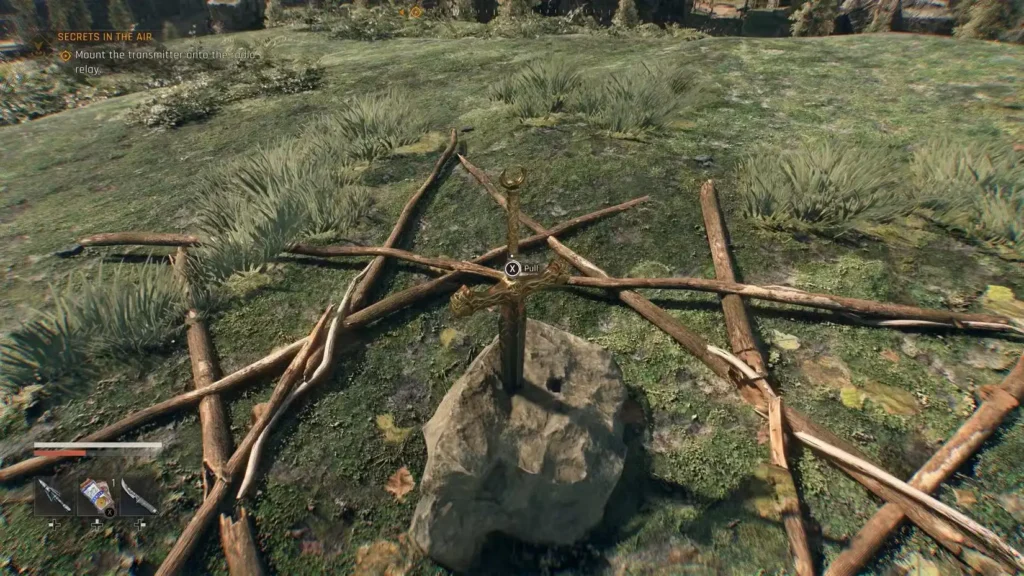
Quest overview:
- Collection phase: Gather eight Stone Sigils scattered across Castor Woods
- Ritual location: Navigate to the rock formation southeast of Monastery
- Placement puzzle: Arrange all sigils in the pentagram surrounding the embedded sword
- Boss battle: Defeat the Zombie Charger that spawns after sigil placement
- Sword extraction: Hold the interaction prompt for several minutes to claim EXPcalibur II
Why it matters: The most iconic weapon in the game with massive damage and XP bonuses.
Ciupaga (Throwable Axe) – The Returning Weapon
Location: Mountain Resort, above Mountain Shelter Tower Safe Zone
This unique throwable axe returns after being thrown, making it endlessly reusable.
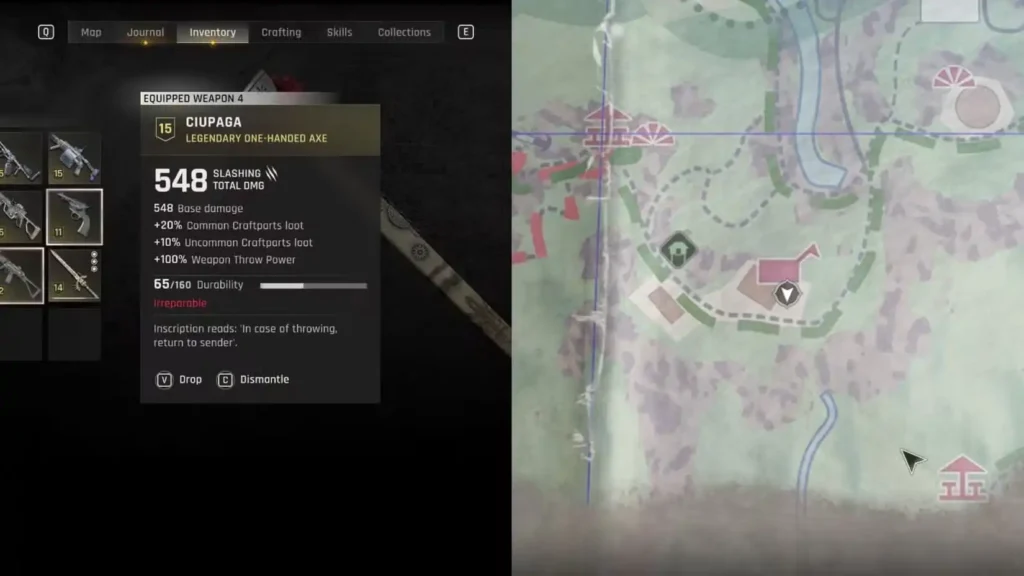
Access route:
- Starting point: Mountain Shelter Tower Safe Zone (Grid D5)
- Vertical navigation: Climb to the Mountain Resort above the safe zone
- Specific location: Reach the balcony outside the third floor attic
- Wall mount: Look above the blocked window to spot the Ciupaga mounted on the wall
Quest integration: Players following the “Stay Human” secondary quest are automatically led to this location – perfect opportunity to collect this unique weapon.
Combat mechanics: Functions like a boomerang, returning to your hand after each throw for unlimited use.
Last Hand of Glova – The Hidden Tunnel
Location: Red Bridge area (opposite side from The Elite Pistol)
This weapon requires finding a secret passage hidden behind environmental storytelling.
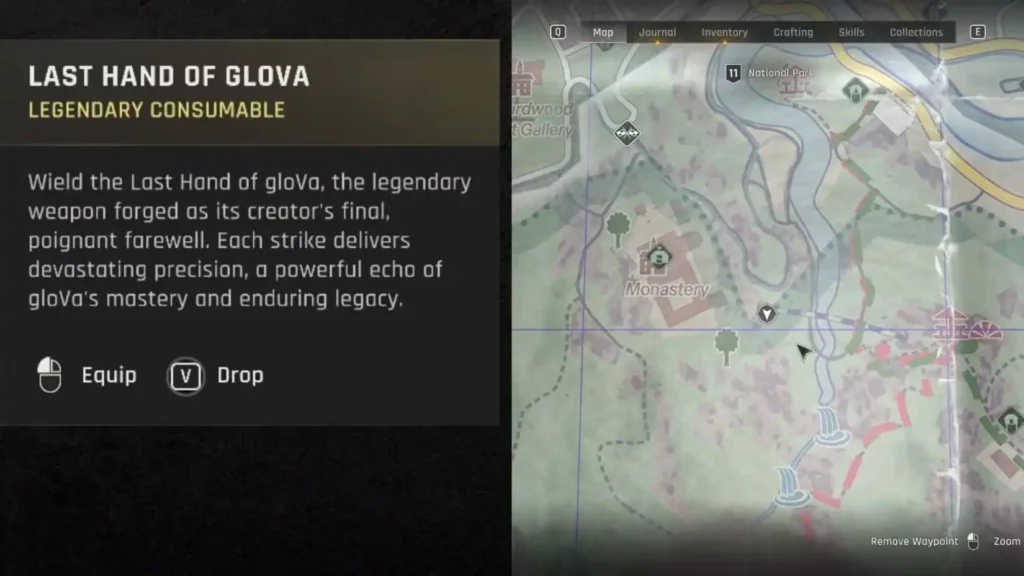
Secret entrance discovery:
- Bridge navigation: Return to the Red Bridge where you found The Elite Pistol
- Opposite exploration: Check the crumbling tunnel on the opposite side of the bridge
- Hidden symbol: Look for a wall marked with the “9¾” symbol painted in green
- Secret passage: Walk through the marked wall – it’s a hidden entrance
Underground exploration:
- Destructible environment: Break through Minecraft-style blocks as you progress deeper
- Combat encounter: Clear zombies from the door-blocked area
- Train discovery: Continue into the tunnel to find an abandoned train car
- Blueprint location: The Last Hand of Glova blueprint sits on crates with valuable ingots
Reference value: The “9¾” symbol references popular culture while hiding valuable loot.
DLC Exclusive Weapons – Instant Power
Pre-Order Rewards (Survivor of Harran DLC)
Players who pre-purchased the game receive immediate access to three legendary weapons:
Jade’s Memory Handgun
- Automatic unlock: Added to stash upon reaching Monastery Safe Zone
- Tribute weapon: References beloved character from previous Dying Light games
- Reliable sidearm: Excellent backup weapon throughout the campaign
The Follower Crossbow
- Stealth advantage: Silent ranged combat option
- Ammo efficiency: Bolts can often be recovered and reused
- Versatile utility: Effective against both infected and human enemies
Harran Combat Knife
- Fast melee: Quick attack speed for crowd control
- Durability: Superior longevity compared to standard knives
- Nostalgic value: Connects to the original Dying Light experience
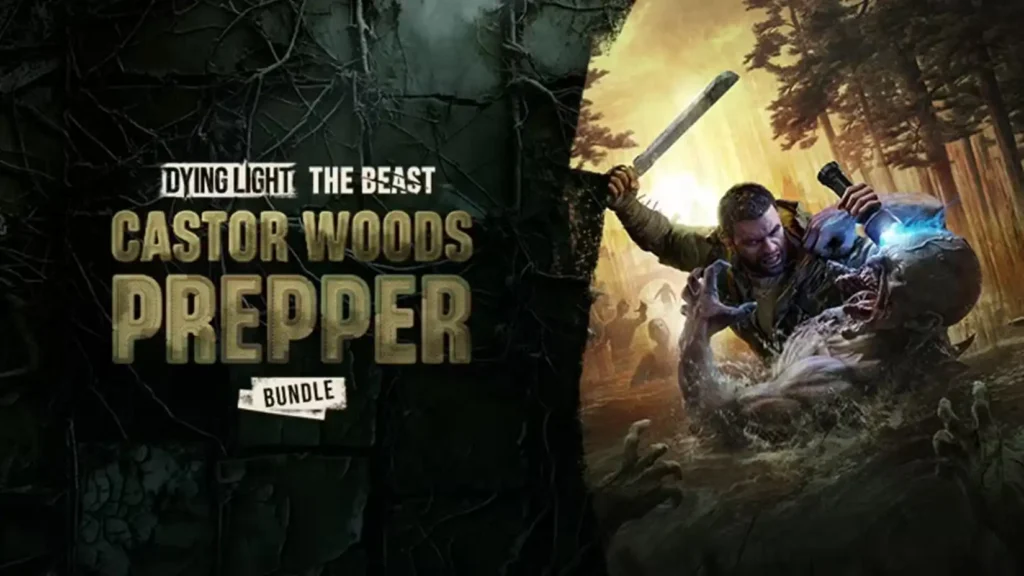
Castor Woods Prepper Bundle
Survivor SMG
- Secondary legendary SMG: Provides alternative to The Needle
- Bundle exclusive: Only available through specific purchase option
- Combat role: Excellent for sustained firefights
Access method: All DLC weapons appear in the Reward Tab of your stash system once the Monastery Safe Zone is unlocked.
Upgradeable Legendary Weapons – The Growth System
These weapons start as standard blueprints but can be enhanced to legendary quality through the game’s upgrade system:
Puzzle-Locked Blueprints
Sawblade Launcher
- Unlock method: Complete Silos Safe Spot jumping puzzle
- Blueprint location: Claim from workbench after puzzle completion
- Combat role: Devastating area-of-effect weapon
Goodnight
- Same location: Also obtained from Silos Safe Spot jumping puzzle
- Upgrade path: Enhanced through manual page system
- Unique properties: Special attack patterns and damage bonuses
Skill Tree Unlocks
Flamethrower
- Progression unlock: Available through skill tree advancement
- Area control: Excellent for clearing infected clusters
- Resource management: Requires fuel maintenance
Grenade Launcher
- Advanced unlock: Later skill tree progression
- Explosive damage: Handles tough enemy groups effectively
- Tactical usage: Best saved for challenging encounters
Safe Zone Rewards
Hunting Bow
- Location: Monastery Workbench blueprint
- Upgrade potential: Legendary quality through manual pages
- Stealth hunting: Silent takedowns and long-range precision
Extinguisher
- Unlock method: Complete Library Tower Safe Spot puzzle
- Enhancement system: Manual page upgrades to legendary
- Unique mechanics: Special fire-suppression properties
For detailed safe zone unlocking, check our Library Tower guide.
Trader Purchases
Several legendary weapons become available through trader interactions:
Late Game Traders:
- Town Hall trader: Composite Bow, Reaper
- Exiles’ Cave trader: Hunting Crossbow, The Separator, Reaper, Zen
Level scaling note: Some trader weapons only reach legendary quality at higher player levels, making them long-term investments.
Quest-Specific Rewards
Reforged Khanjar
- Requirement: Complete “Killing Spree” quest
- Location: Town Hall Safe Spot reward
- Combat value: Excellent melee weapon with unique design
Break Knuckles
- Blueprint source: Abandoned House Safe Spot (east of Mountain Relay)
- Enhancement: Upgrade to legendary through manual page system
- Melee focus: Hand-to-hand combat specialization
Resource Management for Legendary Weapons
Maintaining and upgrading legendary weapons requires strategic resource allocation:
Essential Resources:
- Manual pages – Primary upgrade material for many legendaries
- Crafting materials – Various metals, components, and rare materials
- Currency – For purchasing trader weapons and upgrade services
Resource Farming Strategies:
- Manual page locations – Check our manual pages farming guide
- Material gathering – Use our resource farming locations guide
- Financial resources – Optimize earnings with our money farming guide
Strategic Weapon Selection
With so many legendary options, choosing the right weapons for your playstyle matters:
Combat Role Specialization:
Stealth Players:
- Hunting Bow, The Follower Crossbow, Harran Combat Knife
- Focus on silent eliminations and precision attacks
Assault Players:
- The Eraser, The Needle, Flamethrower
- Maximize direct combat effectiveness
Versatile Players:
- EXPcalibur II, The Elite, Sunray Revolver
- Balanced options for varied combat scenarios
Crowd Control Specialists:
- Sawblade Launcher, Grenade Launcher, The Statement
- Area denial and group elimination focus
Maximizing Your Legendary Arsenal
To get the most from your legendary weapon collection:
Upgrade Prioritization:
- Early game: Focus on accessible weapons like Hunting Bow
- Mid game: Pursue puzzle weapons like The Needle and Sunray
- Late game: Complete EXPcalibur quest and acquire trader weapons
Skill Integration:
- Match weapon choices with your skill build
- Consider weapon-specific skills and bonuses
- Plan upgrades around available upgrade materials
Combat Application:
- Learn each weapon’s optimal usage scenarios
- Practice with different weapon types in safe environments
- Develop backup weapon strategies for various situations
Ready to dominate Castor Woods? Start with our beginner survival guide for essential combat basics, then explore our complete quest list to plan your legendary weapon hunting routes.
Official Game Resources:
- Official Dying Light: The Beast Website
- Steam Store Page
- PlayStation Store
- Xbox Store