Get the legendary EXPcalibur sword in Dying Light: The Beast! Find all 8 stone sigil locations with our detailed guide including maps, combat tips, and quest requirements.
The Legendary Blade Returns – But You’ll Have to Work for It
The EXPcalibur (also known as EXPcalibur II) makes its triumphant return in Dying Light: The Beast, and it’s every bit as devastating as fans remember. This isn’t just another weapon – it’s a legendary long-sword that can slice through hordes of infected like butter while providing massive XP bonuses that justify its epic name.
But here’s the catch: unlike previous games where you might stumble upon legendary weapons through exploration, the EXPcalibur requires dedication. You’ll need to hunt down eight stone sigils scattered across Castor Woods, solve environmental puzzles, and face down a challenging boss fight before you can claim this blade as your own.
The payoff? A weapon so powerful it fundamentally changes how you approach combat in the late game.
Why EXPcalibur is Worth the Hunt
Before we dive into the sigil hunting process, let’s talk about what makes this weapon special:
- Massive damage output – Cuts through even tough infected with ease
- XP bonus multiplier – Lives up to its “EXPcalibur” name with enhanced experience gains
- Legendary durability – Lasts significantly longer than standard weapons
- Iconic status – A true trophy weapon that shows your dedication
- Late game viability – Remains effective throughout the entire campaign
This isn’t just a collectible – it’s a game-changing tool that makes the challenging late-game content much more manageable.
Prerequisites and Planning
Before starting your sigil hunt, there are some important requirements to understand:
Story Progress Requirements:
- Most sigils can be collected early in the game
- Death sigil requires completing “The Beast Within” (Mission 3)
- Shadow sigil requires completing “Some Like It Dark” (Mission 8)
Recommended Preparation:
- Strong combat gear – You’ll face multiple enemy encounters
- Lockpicking tools – Some locations contain valuable bonus loot
- Healing supplies – Extended exploration can be dangerous
- Patience – Some locations require precise parkour and problem-solving
Pro tip: Start collecting accessible sigils early, but save the final retrieval for when you’ve unlocked all areas. Check our best early game weapons guide to ensure you’re properly equipped for the journey.
All Eight Stone Sigil Locations
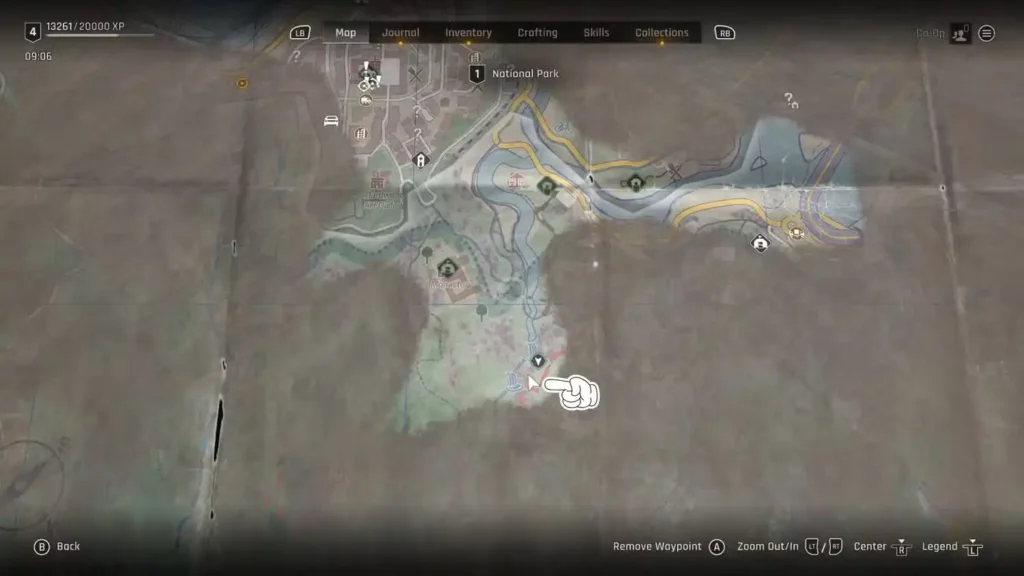
1. The Void Sigil – Waterfall Cave Adventure
Location: Southeast of the Monastery, near the waterfalls
This sigil provides an excellent introduction to the collection process, combining exploration, combat, and environmental puzzle-solving.
Step-by-step retrieval:
- Navigate to the high platform overlooking the waterfalls
- Look for a small cave opening hidden behind the cascading water
- Combat encounter: Clear out several infected inside the cave
- Bonus loot: Grab the purple-rarity baseball bat at the cave’s end
- The sigil: Dive into the small pond and retrieve the Void sigil from the deer skull (look for the antlers)
Exploration tip: This cave often contains additional valuable loot, so thoroughly search before leaving.
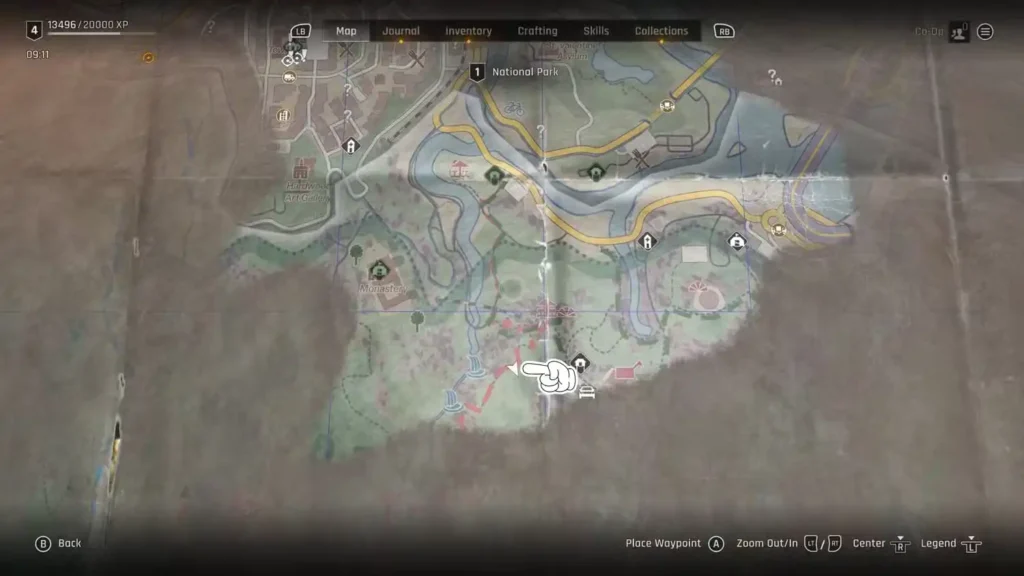
2. The Moon Sigil – Hidden Camp Discovery
Location: Just northeast of the Void sigil location
The Moon sigil rewards players who pay attention to environmental details and alternative routes.
Finding the secret entrance:
- Exit the waterfall cave and head up the path to the right
- Search for a narrow crack in the rock face – easily missed if you’re not looking carefully
- Squeeze through the crack to access the hidden area
Inside the secret camp:
- You’ll discover a peaceful area with distinctive yellow-leaf trees and camping equipment
- Immediate left upon entering – look for a wide stone platform
- The Moon sigil sits prominently on this stone surface
Why this location matters: It demonstrates the game’s emphasis on thorough exploration and attention to environmental storytelling.
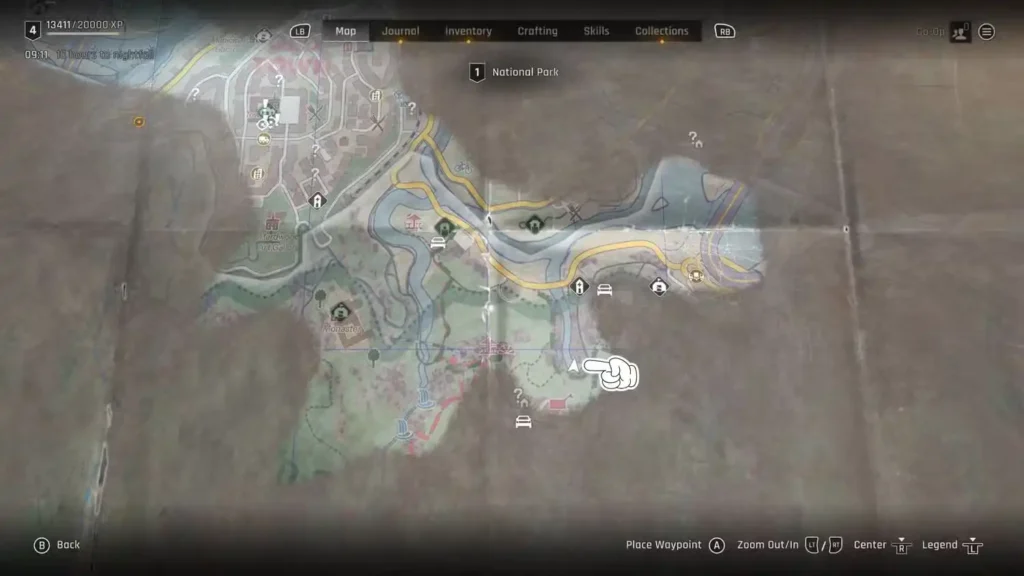
3. Witch’s Mark Sigil – Abandoned Cabin Horror
Location: East of the Moon sigil, following the river through the mountain pass
This location combines scenic route-finding with intense combat encounters.
The journey:
- Follow the winding river path through the mountain pass
- Scenic route warning: Enjoy the views, but stay alert for infected
- Look for an abandoned cabin at the trail’s terminus
Combat strategy:
- Heavy zombie presence around the cabin – plan your approach
- Option 1: Clear the area systematically for safety and loot
- Option 2: Sprint directly to the cabin if you’re confident in your parkour skills
Sigil location: Inside the cabin, immediately right of the entrance on the wall
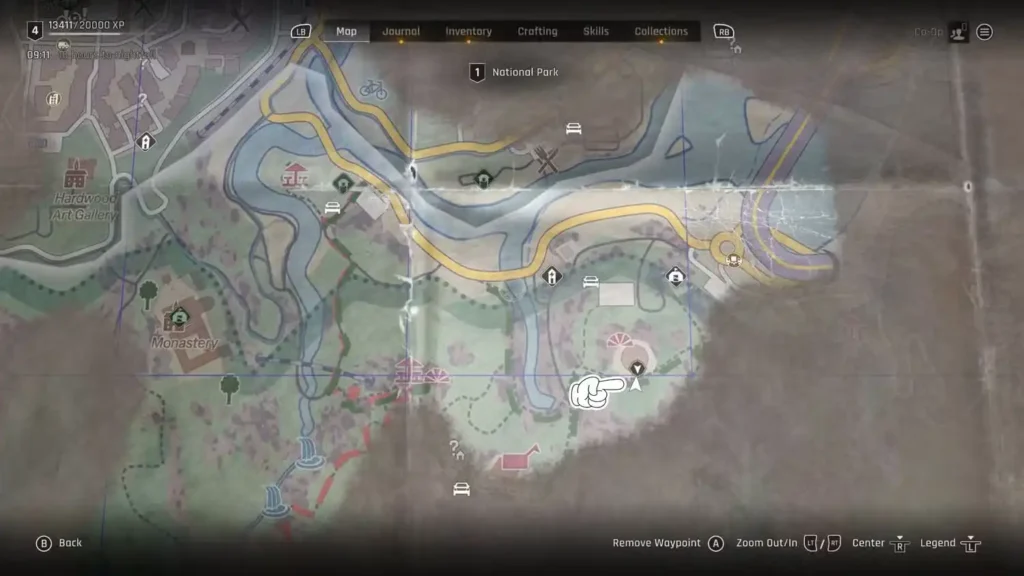
4. Sacrifice Sigil – Stone Slab Mystery
Location: Further east from the Witch’s Mark location
This sigil introduces players to the game’s more mystical elements with ancient stone arrangements.
What to look for:
- Large stone slabs arranged in the open – hard to miss once you’re in the right area
- Small enclosed area to the left of the main stone arrangement
- Navigation tip: The enclosed area might seem like background scenery, but it’s accessible
Inside the enclosure:
- Turn around immediately after entering – the sigil isn’t visible from the entrance
- The Sacrifice sigil is mounted on the middle stone slab wall
Cultural note: The stone arrangements suggest ancient rituals, adding depth to the game’s lore.
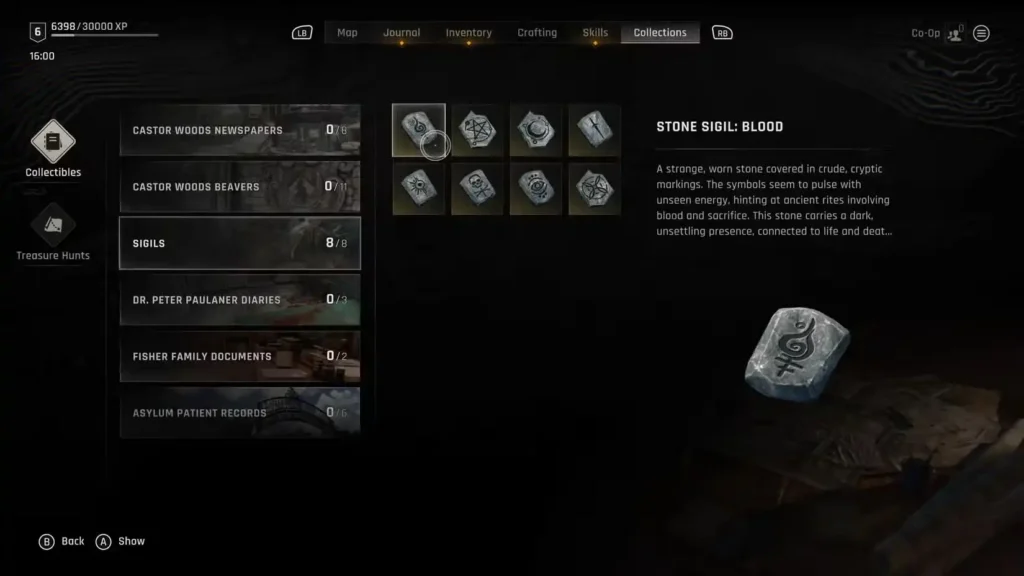
5. Blood Sigil – Asylum Fountain
Location: St. Valentine Asylum courtyard
This sigil provides a break from complex navigation with a straightforward collection process.
Simple but effective:
- Navigate to the asylum’s central courtyard
- Landmark: Large fountain in the courtyard center – unmistakable once you see it
- The Blood sigil is attached directly to the fountain structure
Exploration opportunity: The asylum contains multiple other secrets and valuable loot. Consider our safe codes guide for additional asylum treasures.
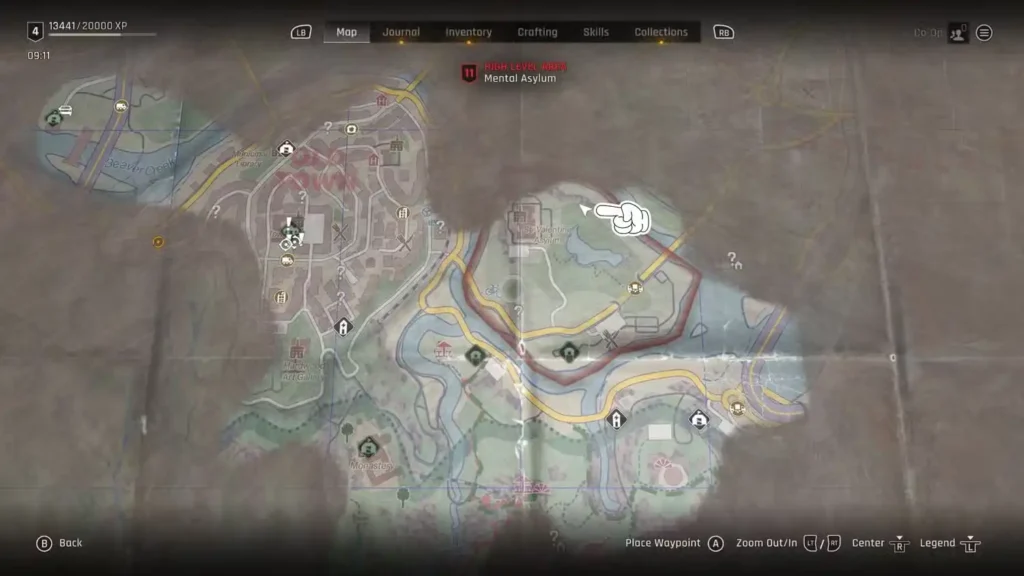
6. Curse Sigil – Memorial Woods
Location: North of St. Valentine Asylum, at Memorial Hill of Heroes
This sigil requires precise navigation and rewards environmental storytelling appreciation.
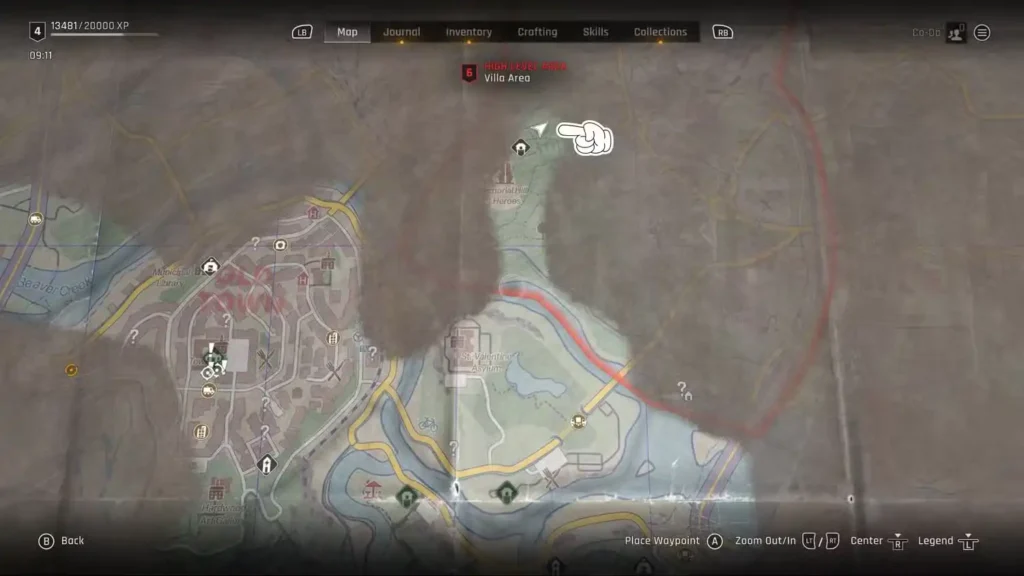
Navigation from asylum:
- Head north until you reach the Memorial Hill of Heroes
- Orientation tip: Face the memorial structure directly
- Turn right toward the treeline (not the obvious memorial area)
In the woods:
- Push deeper into the forest – don’t stop at the tree edge
- Landmark: Look for a clearing with prominent tree roots in the center
- Macabre discovery: A skeleton lies beside the roots
- The Curse sigil is lodged in the skeleton’s mouth – disturbing but necessary
7. Death Sigil – Church Crypt (Story Locked)
Location: Old Town church interior Requirement: Complete “The Beast Within” (Mission 3)
This sigil represents the game’s integration of story progression with exploration rewards.
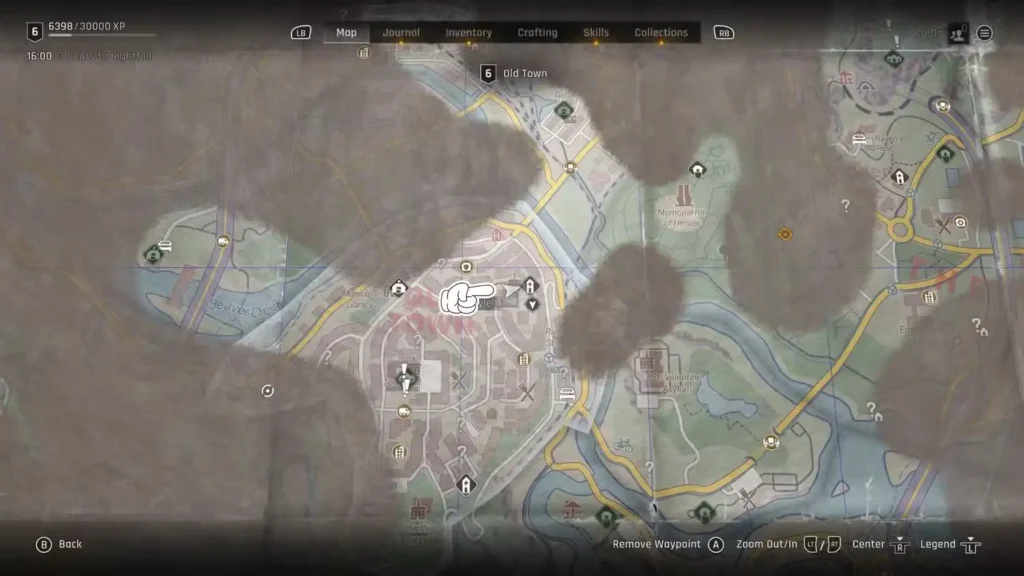
Story context: The church becomes accessible only after significant plot development, making this sigil a mid-game reward.
Church navigation:
- Enter through the main church entrance
- Immediate right: Look for a small opening – easy to overlook
- This opening leads to the church’s crypt level
In the crypt:
- Navigate to the right side of the underground area
- Angel statue: The Death sigil is positioned on or near this religious sculpture
- Atmospheric note: The crypt’s design reinforces the game’s dark themes
8. Shadow Sigil – Cave of Exiles (Late Game)
Location: Cave of Exiles interior Requirement: Complete “Some Like It Dark” (Mission 8)

The final sigil serves as a late-game reward, ensuring players have significant story investment before claiming EXPcalibur.
Late game timing: By the time you can access this sigil, you’ll have developed advanced combat skills and equipment, making the final boss fight more manageable.
Simple collection:
- Enter the now-accessible Cave of Exiles
- Near entrance: The Shadow sigil is positioned close to the cave mouth
- Surrounding elements: Look for cushions and candles – atmospheric details that make the sigil easy to spot
Claiming Your EXPcalibur – The Final Challenge
With all eight sigils collected, it’s time for the grand finale. The EXPcalibur location northeast of the Monastery isn’t just a weapon pickup – it’s a complete encounter.
Reaching the Sword Stone
Location navigation:
- Head northeast from the Monastery to the marked mountain area
- Climbing challenge: Use the vine-covered outcroppings as your route upward
- Path finding: Move around the mountain to find the optimal climbing route
- Parkour skills: This ascent tests your movement abilities – take your time
The Ritual Site
Once you reach the summit, you’ll discover an ancient ritual site with the EXPcalibur embedded in stone at its center.
Sigil placement process:
- Star pattern: Eight positions around the sword correspond to your collected sigils
- Placement order: Any order works – the game doesn’t require specific positioning
- Visual feedback: Each placed sigil activates part of the ritual circle
Boss Fight – Prove Your Worth
Enemy spawn: Placing all sigils triggers a guardian creature that must be defeated before you can claim the sword.
Combat strategy:
- Preparation is key: Use your best weapons and healing items
- Movement advantage: The ritual platform provides space for tactical maneuvering
- Patience wins: Don’t rush – focus on consistent damage and survival
For detailed combat techniques, check our combat skills guide and survival strategies.
The Sword Extraction
After defeating the guardian, you can finally claim your prize:
Extended interaction: Unlike regular weapon pickups, extracting EXPcalibur requires a lengthy button hold – similar to previous Dying Light games.
Completion reward: The white circle around the interaction prompt must fill completely before the sword releases.
Making the Most of Your EXPcalibur
Now that you’ve earned this legendary weapon, here’s how to maximize its potential:
Combat Applications:
- Crowd control: Excellent for clearing groups of infected
- Boss encounters: High damage makes tough enemies manageable
- XP farming: Enhanced experience gain speeds character progression
Maintenance and Upgrades:
- Durability management: Even legendary weapons need occasional repair
- Upgrade opportunities: Check our upgrade priority guide for optimization tips
- Complementary skills: Pair with appropriate skill tree choices for maximum effectiveness
Alternative Legendary Weapons
While hunting for EXPcalibur, you might also want to explore other legendary weapon options:
- Other sword variants – Check our complete sword guide
- Resource farming for crafting materials – Scraps and blades locations
- Financial preparation for weapon upgrades – Money farming methods
So – Was It Worth It?
The EXPcalibur collection quest represents everything great about Dying Light: The Beast’s approach to legendary items. It combines exploration, combat, puzzle-solving, and story progression into one epic journey that rewards dedicated players with a truly special weapon.
The sigil hunt takes you to some of the game’s most interesting and atmospheric locations, ensuring you’ll discover secrets and stories you might otherwise miss. By the time you claim the sword, you’ll have a much deeper appreciation for Castor Woods’ environmental storytelling and hidden depths.
Continue your legendary weapon journey: Explore our complete quest guide for more epic challenges, or check out our XP optimization guide to make the most of EXPcalibur’s experience bonuses.
Official Game Resources:
Official Dying Light: The Beast Website
PlayStation Store