Starting your journey as Kyle Crane in Dying Light: The Beast can feel overwhelming, but the Life After Life quest sets you on the right path toward building alliances and getting that sweet revenge against the Baron. This early mission is your first real taste of what the game has to offer – and trust me, it’s got some tricky moments that might leave you scratching your head.
Let me walk you through everything you need to know to breeze through this quest, including that confusing smoke investigation part that trips up a lot of players.
What Makes Life After Life Important
This isn’t just another fetch quest – Life After Life is essentially your introduction to Dying Light: The Beast’s core mechanics. You’ll encounter your first major combat scenario, learn about safe zones, and start building the network of allies Kyle desperately needs. Plus, you get your hands on your first firearm, which is pretty exciting for newcomers to the series.
The quest kicks off after you escape the Baron’s facility in Castor Woods and meet Olivia, who points you toward a nearby town where you can find more survivors willing to help your cause.
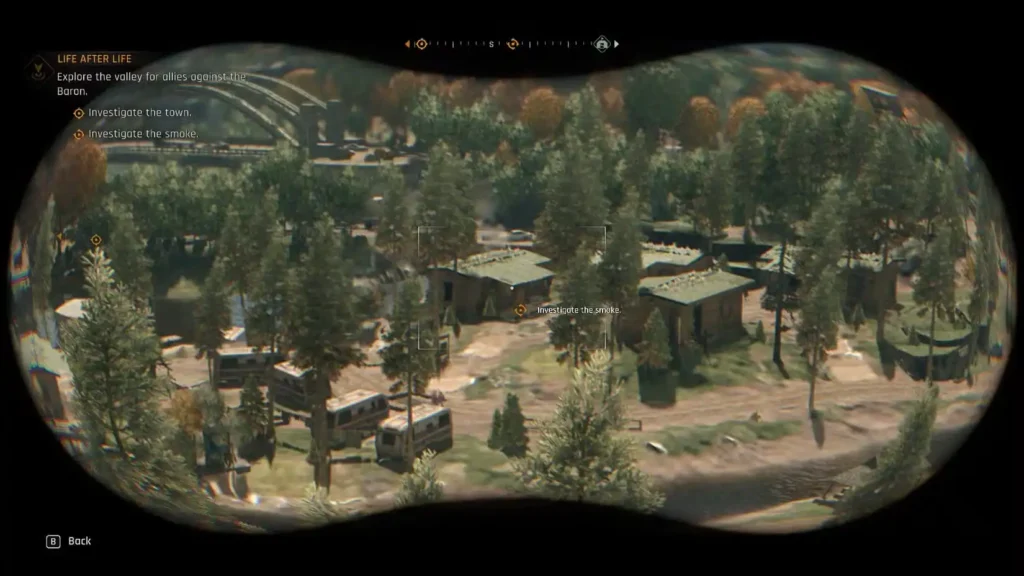
Step 1: The Optional Smoke Investigation
Here’s where many players get confused early on. When you start the quest, you have two choices:
- Head straight to the town Olivia mentioned
- Investigate mysterious smoke coming from a cottage at a nearby campground
Pro tip: Always check out the smoke first since it’s closer and gives you some extra combat practice without much risk.

What You’ll Find at the Campground
The campground isn’t exactly a peaceful retreat – you’ll run into a horde of Biters with a smaller group surrounding the cottage you need to investigate. Here’s how to handle it:
- Clear out the zombies first (great opportunity to practice your early game combat skills)
- Climb through the fence blocking the cottage’s main door
- Meet the survivor inside who’ll initially try to attack you
- After a brief scuffle, he’ll direct you to the town hall
Important timing note: Don’t dawdle too long or wander too far from the campground. If you do, you’ll get a radio transmission from the town hall that overwrites both objectives, potentially making you miss some early loot.
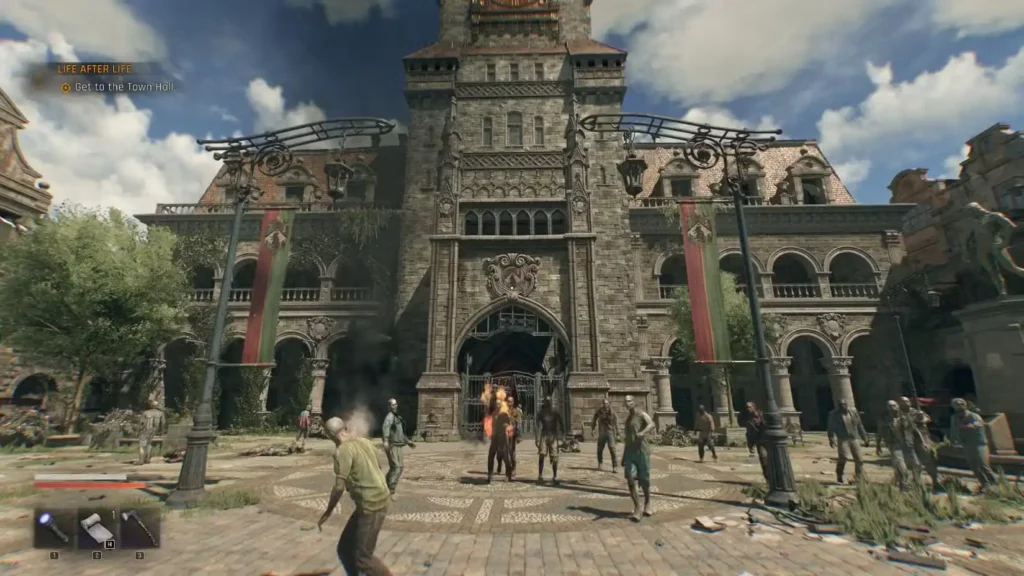
Step 2: The Town Hall Showdown
Following your quest marker through town leads you to the central town hall, but don’t rush straight there. Take some time to explore the rooftops and attics around the area – you’ll often find better weapons and valuable crafting materials that’ll help in the upcoming fight.
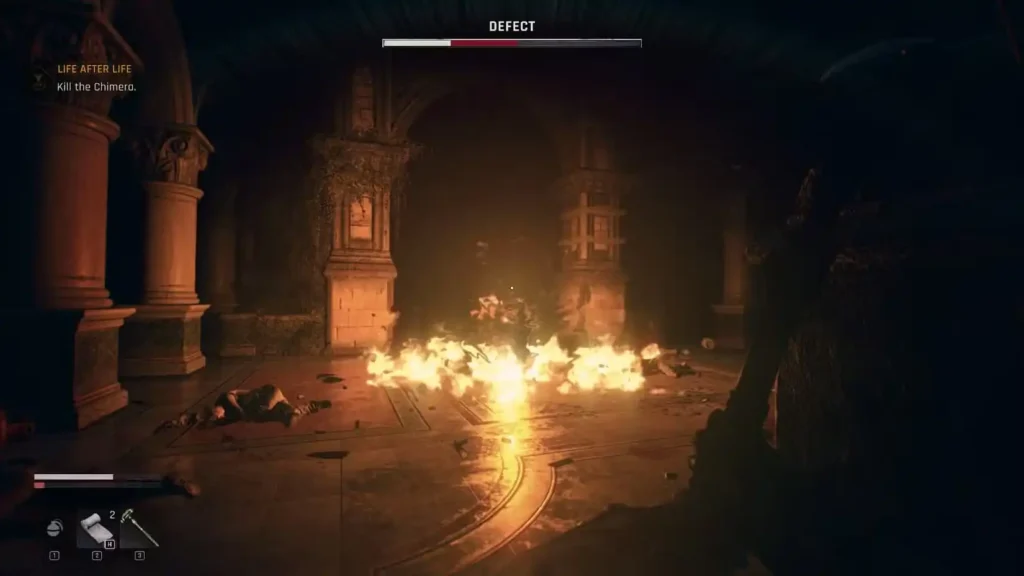
Dealing with the Defect Boss
Once you reach the town hall courtyard, you don’t actually need to clear out all the regular zombies. Just hop over the gate and head inside for a cutscene where you’ll receive your first gun. It’s not much to look at, but every bullet counts in the early game.
The real challenge here is the Defect – a chunky Chimera that loves slam attacks. Here’s my recommended strategy:
- Watch your positioning – those slam attacks are easier to dodge when you have room to maneuver
- Craft Molotov Cocktails – grab the alcohol bottles scattered around the courtyard
- Save your ammo and weapon durability – fire damage over time from Molotovs does most of the work
- Finish with melee attacks once it’s weakened
If you’re playing on higher difficulty settings, remember that death comes with XP penalties, so play it safe rather than sorry.
Step 3: The Tower Climb Challenge
After defeating the Defect, you’ll meet Jacob and learn that their Sheriff went up the tower to restart the power system but never returned. Time for some parkour!
Navigation Tips for the Tower
The tower climb can be confusing, especially for newcomers to the series. Here’s what to look for:
- Cloth markers tied to climbable objects
- Paint marks on ledges and handholds
- Look in all directions – up, down, and across gaps
- Use the box in the circular room to reach higher platforms
- Follow the railings along the walls methodically
You’ll encounter a bitten Ranger partway up who’ll give you some ammo – a nice little boost for what’s coming next.
At the top, you’ll find the Sheriff fighting off Biters. She’s initially wary but will accept your help once you prove you’re on their side.
Step 4: Power Line Restoration
This is where things get technical. After using the zipline to reach the town hall roof, you need to restore power by connecting a line from the junction box back to the tower.
Power Line Management
The trickiest part of this section is managing the power cable:
- Interact with the junction box first
- Go through the small vent in the power room
- Make your way to the tower base and climb back up through the clock face
- Avoid crossing the line against obstacles – it has limited length
- Untangle carefully if the line gets twisted, or you’ll need to reset completely
Personal insight: I’ve seen players rush this part and get frustrated when the cable keeps getting tangled. Take your time and plan your route – the power line mechanics are actually pretty realistic and rewarding once you get the hang of them.
Quest Completion and Rewards
Once you successfully restore power, you and the Sheriff return to the main survivor group for a lengthy cutscene that wraps up the quest. But before you rush off to your next adventure, make sure to:
- Complete the weapon modding tutorial – this is crucial for upgrading your gear effectively
- Grab the weapon blueprint near the workbench inside the town hall
- Explore the new safe zone – the town hall becomes your first major refuge
Why This Quest Matters for Your Playthrough
Life After Life does more than just advance the story – it introduces you to several key gameplay systems that you’ll use throughout your entire playthrough. The combat encounter with the Defect teaches you about boss fight patterns, the tower climb introduces advanced parkour mechanics, and the power restoration shows you how environmental puzzles work in the game.
Plus, establishing this safe zone gives you a reliable place to farm resources and manage your inventory as you explore more dangerous areas.
Essential Links and Resources
Ready to dive deeper into Dying Light: The Beast? Check out these helpful guides:
Official Game Links:
- Official Dying Light: The Beast Website
- Steam Store Page
- PlayStation Store
- Xbox Store
Related Guides:
- Complete Missions and Quests List
- XP Farming Guide for Fast Leveling
- Money Farming Methods
- Best Skills for Early Game
The Life After Life quest might seem straightforward, but mastering its mechanics will set you up for success throughout the rest of your zombie-slaying adventure. Take your time, explore thoroughly, and don’t be afraid to experiment with different approaches – that’s half the fun of Dying Light: The Beast!