Flare Pool stands out as one of the most challenging dungeons in Metroid Prime 4: Beyond. This lava-filled facility will test your skills across multiple visits, and trust me—you’ll need to come back here at least three times to grab everything. The dungeon progression is tied directly to some major upgrades, including the crucial Fire Shot that opens up new areas across Sol Valley.
What makes Flare Pool unique is how it gates your progress. You’ll make a quick first visit to snag the Fire Chip, complete Ice Belt to get the necessary heat resistance, then return for the full dungeon run. Finally, you’ll need to come back one more time with late-game abilities to collect every last item for that sweet 100% completion.
Let’s break down everything you need to know about conquering Flare Pool.
Finding Flare Pool in Sol Valley
Head Southeast Across the Desert
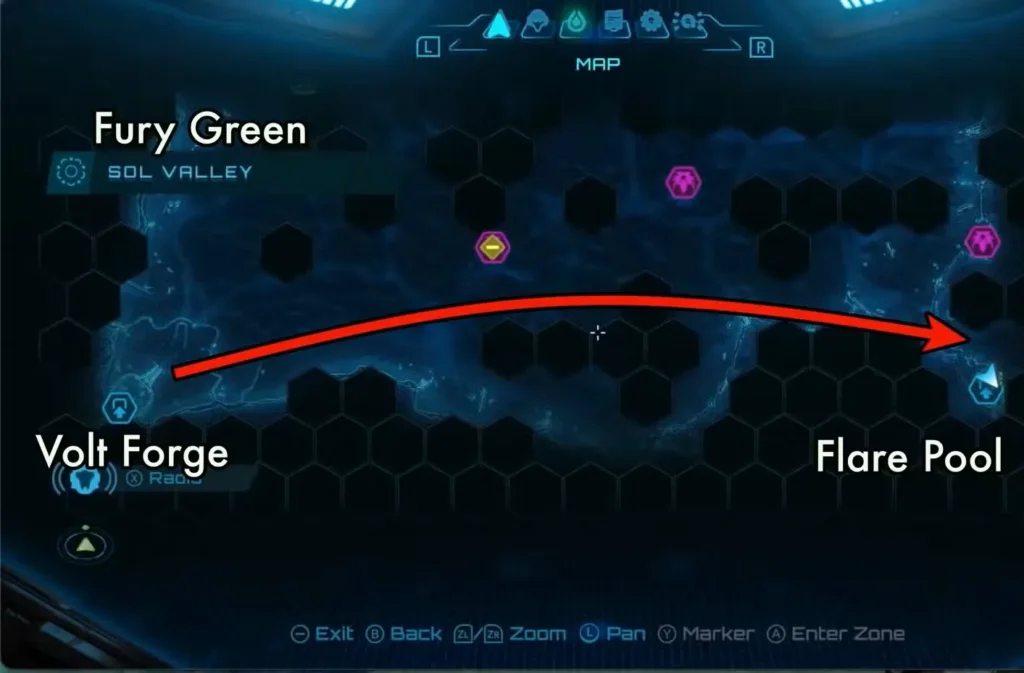
After wrapping up Fury Green and Volt Forge, you might feel a bit lost on where to head next. The game seems to offer multiple paths, but really, there’s only one way forward. Ice Belt is technically next, but without the Fire Shot, you’ll hit a wall pretty quickly.
Flare Pool is located in the southeast corner of Sol Valley. Since you won’t have any elemental weapons yet, there’s not much point in exploring every nook and cranny on your way there. You’ll be back later anyway.
Pro tip: Start collecting Green Crystals during your trek. You’ll need tons of them by endgame, so grab them whenever you spot them.
Flare Pool First Visit – Getting the Fire Chip
Fire Chip & Missile Expansion 1
Your first trip to Flare Pool is brief but essential. The main objective? Grab the Fire Chip so you can unlock the Fire Shot back at base camp. Without it, you can’t progress to Ice Belt.
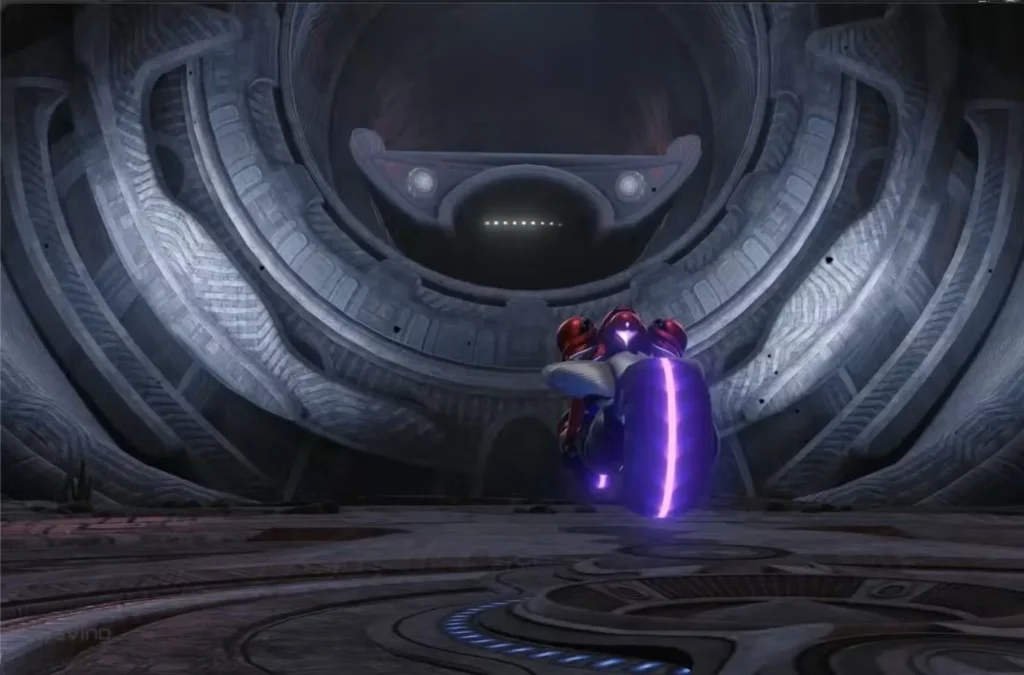
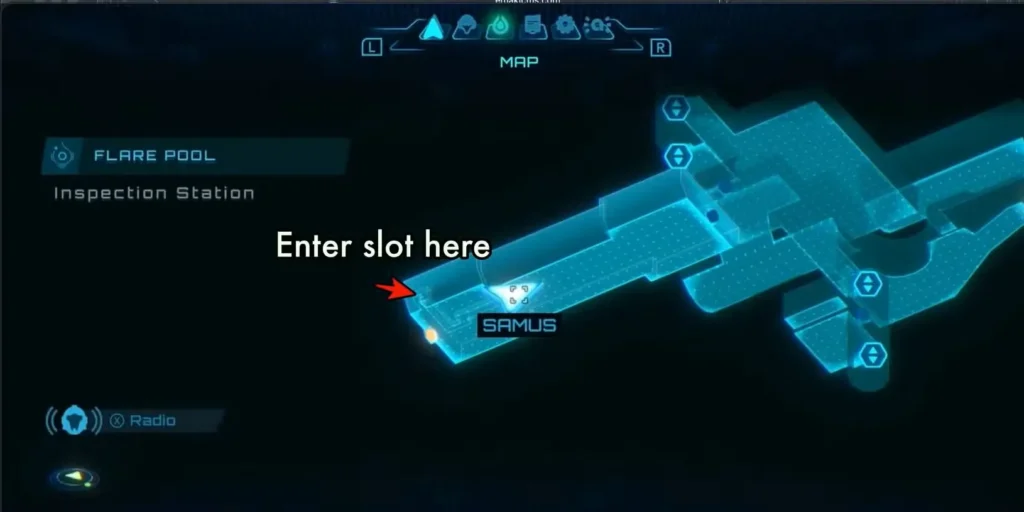
Entering the Dungeon
Use the Vi-O-La spinner to access the main tunnel entrance. You’ll arrive in the Volcano Entrance chamber, where you’ll encounter your first scannable creatures:
- Vaernan – Small reptiles crawling on the floor
- Swarm Flyer – Floating creatures near the ceiling
- Heatstrap – Crustaceans clinging to walls
Make sure to scan everything! These entries count toward your 100% completion.

Missile Expansion Location
Right after entering the Volcano Entrance, look to your right. You’ll see that familiar purple glow of a psychic object. Scan it to reveal three Psychic Platforms, then use your Psychic Boots to jump across and grab the Missile Expansion tucked in a small alcove.
Navigating to the Fire Chip
Move through these chambers in order:
- Magma Overflow – Near the end, you’ll spot the Lava Pressure Control Terminal. Don’t worry about it yet—you need the Boost Ball to operate it.
- Shoreline Access – There’s a door on the right, but it’s locked for now. Keep moving forward.
- Lava Lake Bridge – Use Vi-O-La to extend the bridge. As you cross, a cutscene triggers where the bridge gets destroyed. Time to backtrack the way you came.
- Shoreline Access (Return) – Psy-Bot Soldiers spawn here. Deal with them, then enter the door to Scrapyard Access. There’s a Save Station immediately on your right—use it.
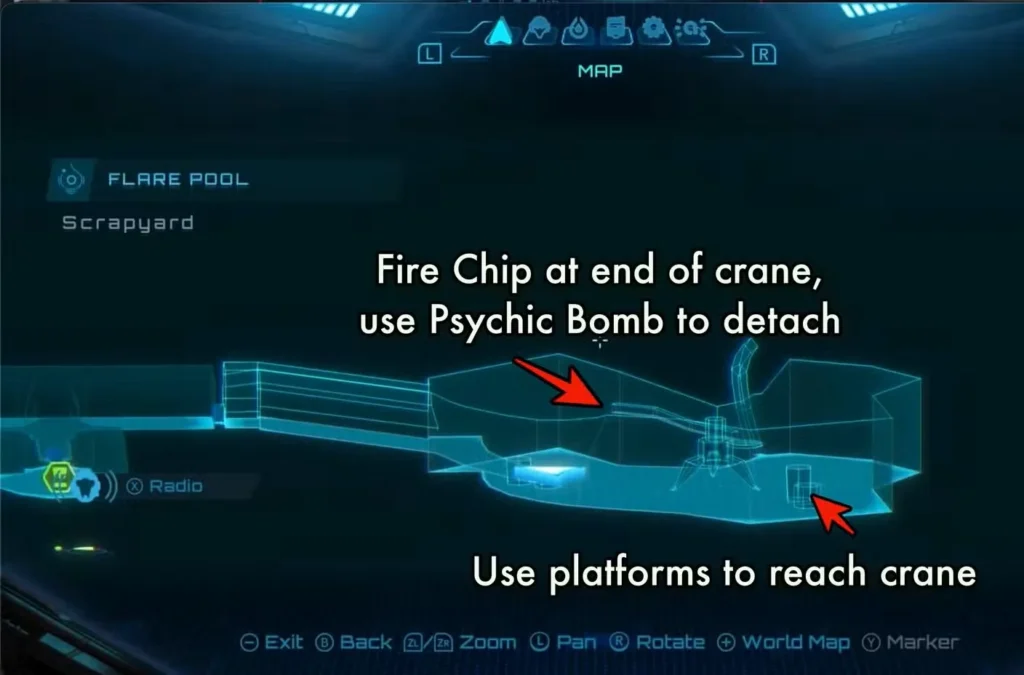
Scrapyard – Fire Chip Location
The Scrapyard is where things get interesting. Here’s how to reach the Fire Chip:
- Head to the southwest corner of the chamber
- Climb the platforms to reach the crane’s deck
- Switch to Morph Ball mode and roll toward the crane arm’s tip
- Use bombs to clear any blockages
- At the tip, drop another bomb to make the plasma cutter fall
- Head down and interact with the glowing red object
Important: Before leaving, take note of the Shot Expansion on the magnetic track above the crane. You’ll need the Psychic Power Bomb from the Great Mines dungeon to clear the wreckage blocking access.
What to Do After Your First Flare Pool Visit
Unlock the Fire Shot at Base Camp
Head back to Fury Green Base Camp and talk to Myles MacKenzie. He’ll convert the Fire Chip into the Fire Shot upgrade.
Optional Side Quest: If you want, grab a few expansion items around Fury Green using your new Fire Shot to clear webbing. The extra ammo helps, but it’s not mandatory right now.
Complete These Tasks in Order:
- Finish Ice Belt dungeon – You’ll unlock the Boost and Ice Shot upgrades here. The Boost is absolutely required to re-enter Flare Pool.
- Return to Volt Forge Tower 3 – Collect the Varia Suit upgrade. This lets you and Vi-O-La survive the intense heat needed to cross the Lava Lake.
Once you’ve got both of these, you’re ready for the real Flare Pool experience.
Flare Pool Second Visit – Main Path Walkthrough
Entrance Shot Expansion
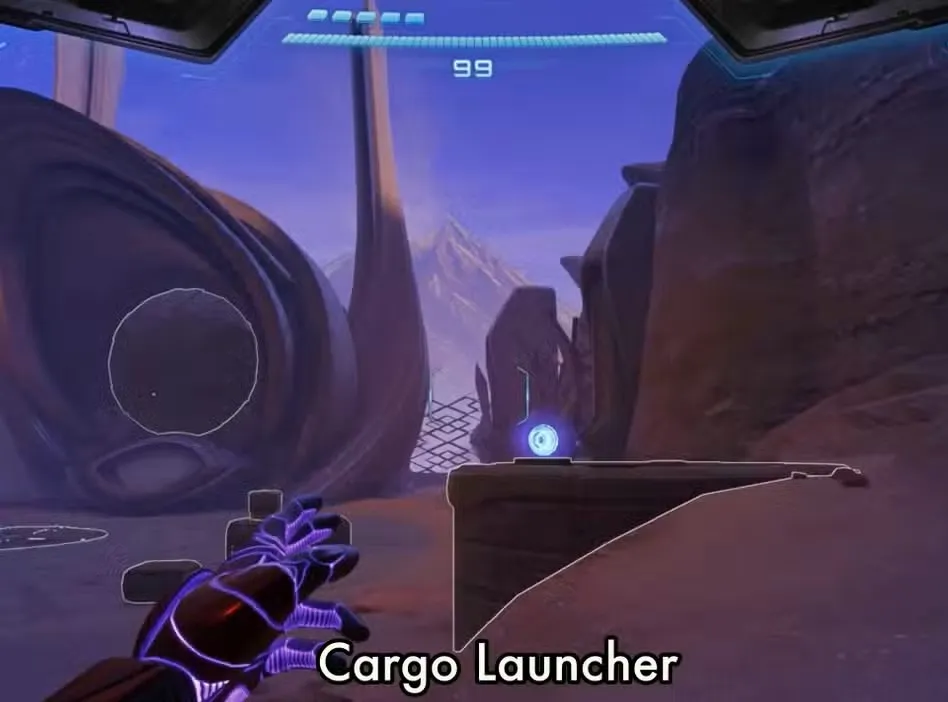
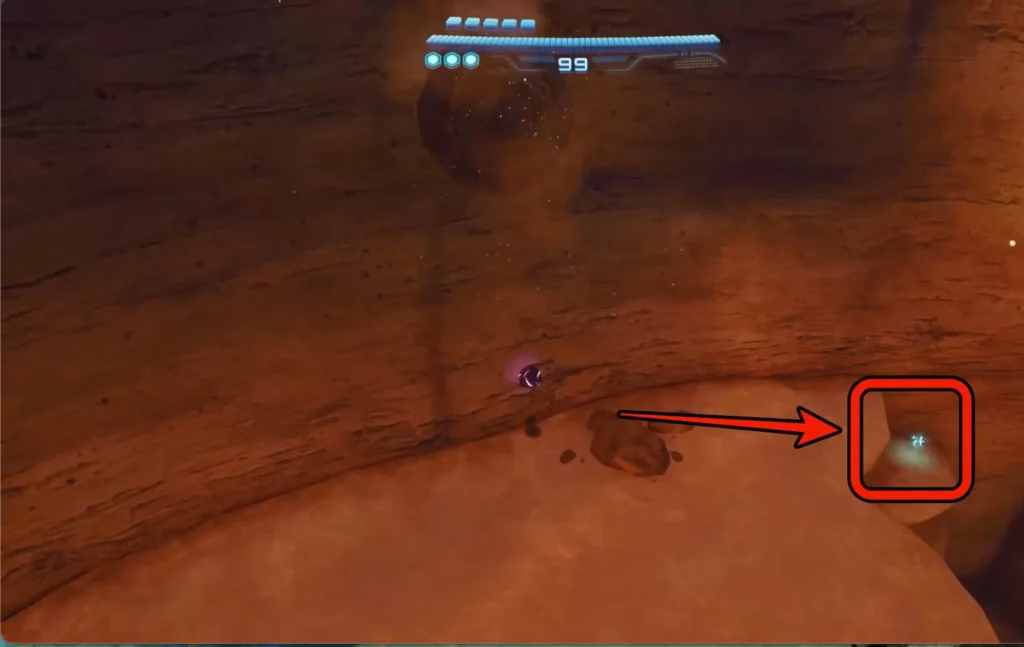
Before diving back into the dungeon, there’s a quick collectible outside:
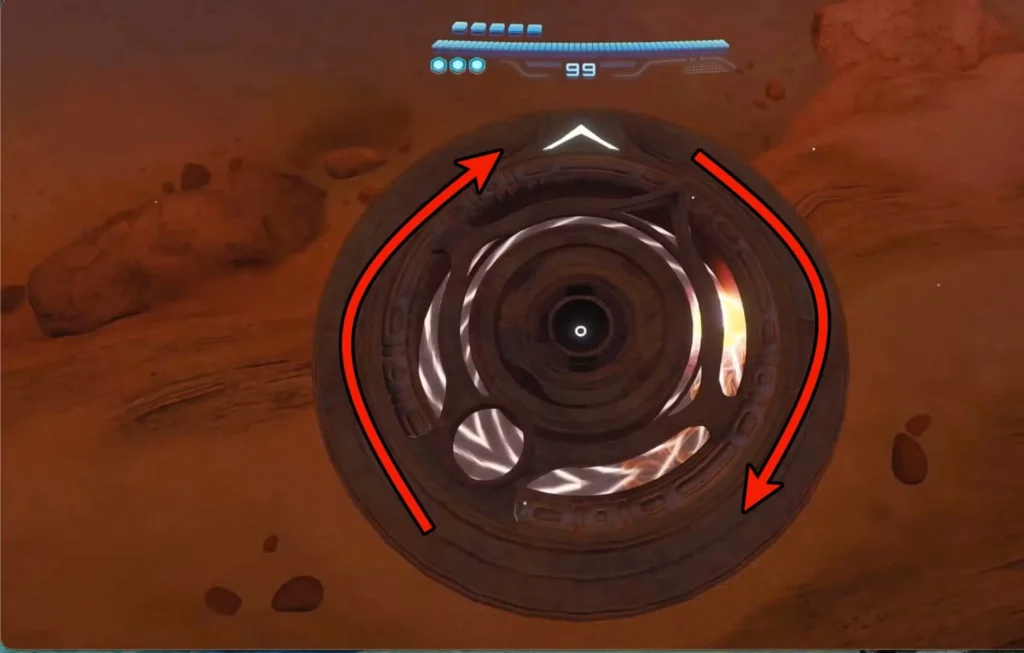
- Spot the Small-Sized Cargo Launcher as you approach
- Use the Psychic Boost Ball in the Morph Ball slot
- Boost counter-clockwise to power it up
- Enter the second slot that appears to launch yourself onto the cliffs
- Grab the Large Shot Expansion on the small ledge
While you’re up there, jump to the next platform and scan the Lamorn Sculpture for a Psychic Recording with some juicy lore.
Breaking Through the Lava Wall
That wall of lava blocking your path? Time to deal with it:
- Shoot the lava with an Ice Shot
- Blast the rock wall that appears with a Missile
- Head through the temporary opening
Once past the wall, look left for the Lava Pressure Control Terminal. Use the Boost ability to close the pipe permanently—no more lava flow blocking your way.

Lava Lake Bridge – Scout Bot & Shot Expansion
Head down to the lava lake below the bridge. You’ll notice a large rock blocking a chamber—ignore it for now. You need Super Missiles from the Great Mines to access that area.
Use Vi-O-La to cross the lava lake. At the opposite end, there are two landing spots:

Right Side (Visit First):
- Scan the purple psychic object to reveal a Psychic Boost Rail
- Ride the rail to collect a Shot Expansion floating over the lava
- Find the Scout Bot just past the security pylons (you’ll return later to activate it)
- Note the second Shot Expansion at the top of the structure—you need Psychic Spider Ball to reach it
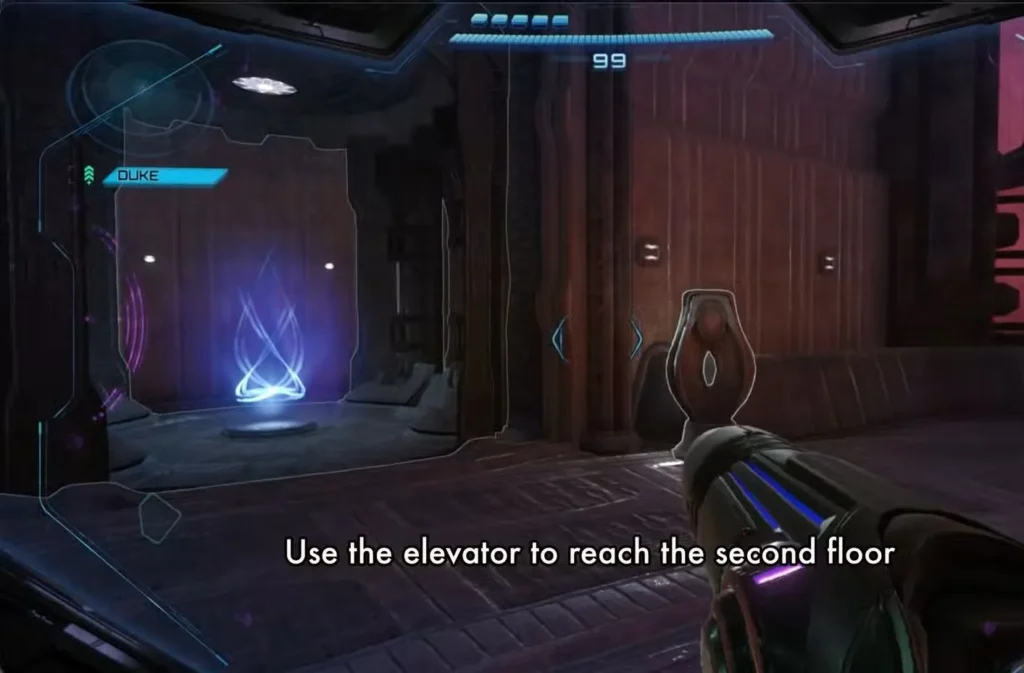
Left Side: Head to the exit and take the elevator up.
Galactic Federation Distress Beacon
As you cross the pathway over the lava, you’ll receive a GF Distress beacon. There’s an NPC in the Boiler Room who needs help.
Undercarriage Navigation:
- At the blocked door, look down at the wall’s base on the right
- Burn the grate covering the Morph Ball slot with Fire Shot
- Enter the slot to drop into Ventilation Works
- Use the Boost Spinner to lift the shutter
- Turn right and scan the Lamorn Beam Turret (freeze it with Ice Shot for an easy takedown)
- Scan the security switch near the door to unlock a future shortcut
- Destroy the window blocking the tunnel with a charged shot
- Drop back into the ventilation tunnel
Half-Pipe Section:
Switch to Morph Ball and use Boost to gain speed up the half-pipe. One side has a magnetic track leading to a Missile Expansion—mark it for when you get Psychic Spider Ball. Exit through the top and take the next elevator.
Upper Undercarriage – Shortcut & Shot Expansion
You’ll see two options:
- Right: Beam gate (main path)
- Ahead: Gate locked with two latches (shortcut + collectible)
Take the shortcut first:
- Use Psychic Lasso to remove both latches
- Take the elevator down
- Destroy the broken grate with a missile to reach the Shot Expansion
- Scan the switch by the security door to open another shortcut
- Return upstairs and continue through the beam gate

Inspection Station Shot Expansion
Navigate over the ruined truck. Before the exit, look right for a Morph Ball slot partially hidden by a small container. Burn the grate, enter the slot, and use a Psychic Bomb to clear debris. The Shot Expansion is straight ahead. Backtrack and head to the next chamber.
Entry Bay – Heavy Maintenance Tank Boss Fight
Data Log 1 Location

Before the boss triggers, head right from the entrance. Behind the ruined Light Delivery Truck, you’ll find “Delivery Status” Data Log on a desk.
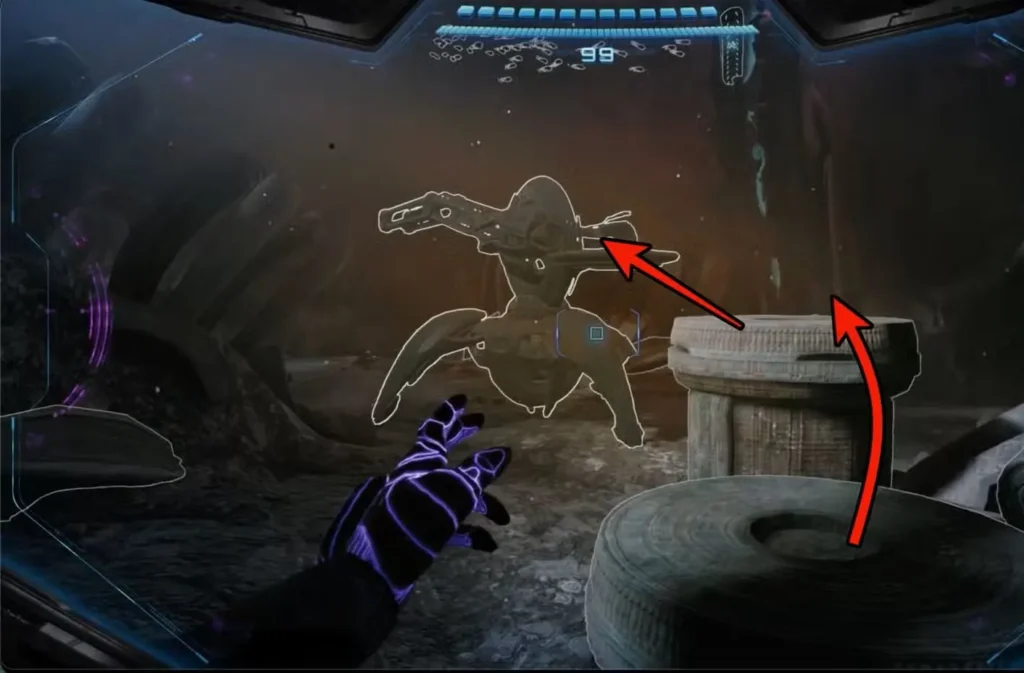
Heavy Maintenance Tank Strategy:
This miniboss hits hard with a devastating laser beam. Here’s how to handle it:
- The laser does massive damage—don’t try to tank it
- You can sometimes go under it with Morph Ball, but it’s inconsistent
- Safest strategy: Jump over the laser and spam missiles
- Keep moving and maintain distance
After defeating it, look for the door marked with a sign pointing to the Save Station (on your right if facing the direction you entered from the Inspection Station). Watch out for the Lamorn Beam Turret right after the first corner.
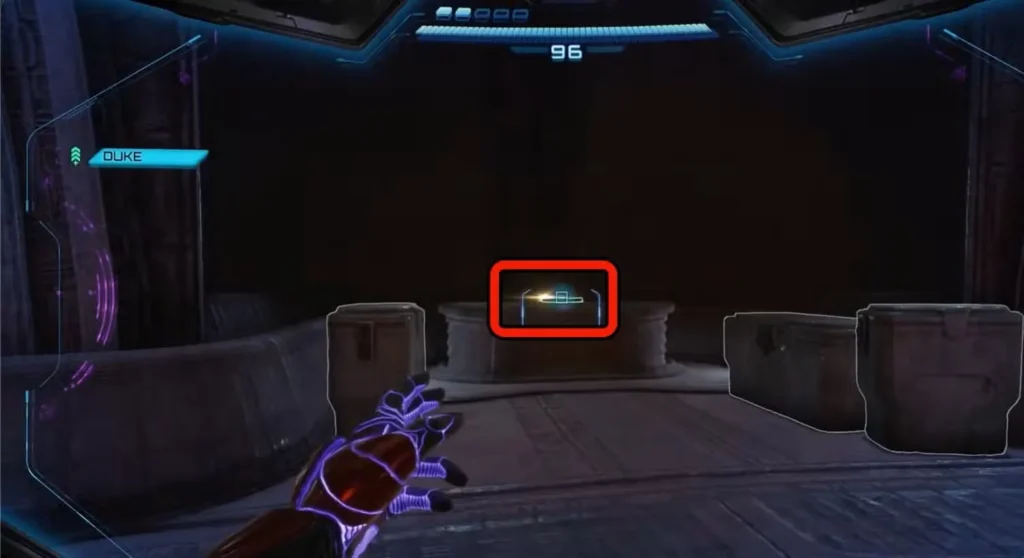
Recruiting Ezra Duke
From the Entry Bay, head straight across to the small door opposite the Save Station entrance. This leads to the Thermal Siphon path toward the Boiler Room.

In the first Boiler Room chamber:
- Right side: Door with a Thunder Blocker (need Thunder Shot to open)
- Left side: Conduit Access Hatch (use Morph Ball to enter)
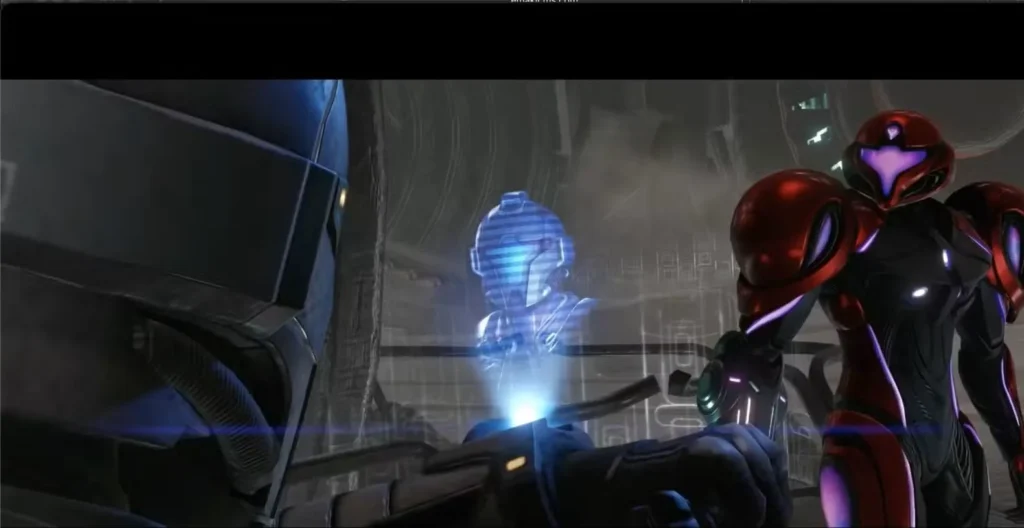
Go through the hatch to reach the Lava Heat Boiler chamber. There’s nothing you can do here yet, so use the next hatch to exit. This brings you to Ezra Duke, your first NPC companion.
Important: Scan Ezra Duke AFTER the introduction cutscene. If you scan too early, it won’t register in your log.
Freezing the Boiler
Scan the hologram stand at Ezra’s workstation. This reveals a spinner in the boiler room. Head back through the hatch and use the spinner to expose the boiler core.
Boiler Core Strategy:
- Shoot all four sides with Ice Shot to freeze them
- Watch out for fire plumes that erupt as you attack
- Once all four sides are frozen, the core shuts down
- Note the second Thunder Blocker door in this chamber—you’ll return with Thunder Shot later
Armstrong Distress Signal & Energy Extraction
Exit the Boiler Room and head back through the Thermal Siphon corridor (watch for two Maintenance Tank enemies). When you reach the Entry Bay, you’ll get a distress call from Armstrong, another GF member.
With Duke as your companion, you can now open the large security doors leading out of Entry Bay through the Cooling Room.
Energy Extraction – Data Log 2
After clearing the Cooling Room security door, enter Energy Extraction. Along the left wall in a small alcove, you’ll find the “Extraction Process” Data Log on a desk. Several Psy-Bots appear powered down—they’ll wake up later.
Psychic Charge Beam Section
Duke will wait at a locked door. Ignore him for now and take the elevator to the second floor.
- Destroy the Lamorn Beam Turret
- Interact with the console near the window
- This opens a panel revealing a Psychic Charge Beam target
- Destroy the broken window section
- Use the guided beam to hit the target
- This unlocks the door where Duke is waiting
Missile Expansion Note: Look up in the corner—there’s a magnetic track leading to a Missile Expansion. You need Psychic Spider Ball to collect it.
Unlocking the Area Map

Head back down to Duke and go through the Energy Injection door. The map shows two directions—take the left path first. Watch for a turret after the first turn.
At the end of the hall, you’ll find the Area Map device in a chamber. Scan the console to unlock it. There’s an exit from this chamber, but it’s locked by a Thunder Blocker.
Return to the hall and take the other corridor into the main Energy Injection chamber for a brief cutscene.
Energy Injection – Data Log 3
In Energy Injection:

- Head up the ramp
- Follow the curved path around
- Go down the ramp on the opposite side of the large machine
- Find the third Data Log “Energy Extraction Process” on a desk across from the elevator
Upper Levels:
Take the elevator to the second floor. Samus experiences some kind of psychic attack, waking all the Psy-Bots in the area. Fight your way up the winding ramp—Ice Shot works great here since frozen bots fall from great heights over the central chamber. Take the next elevator at the top.
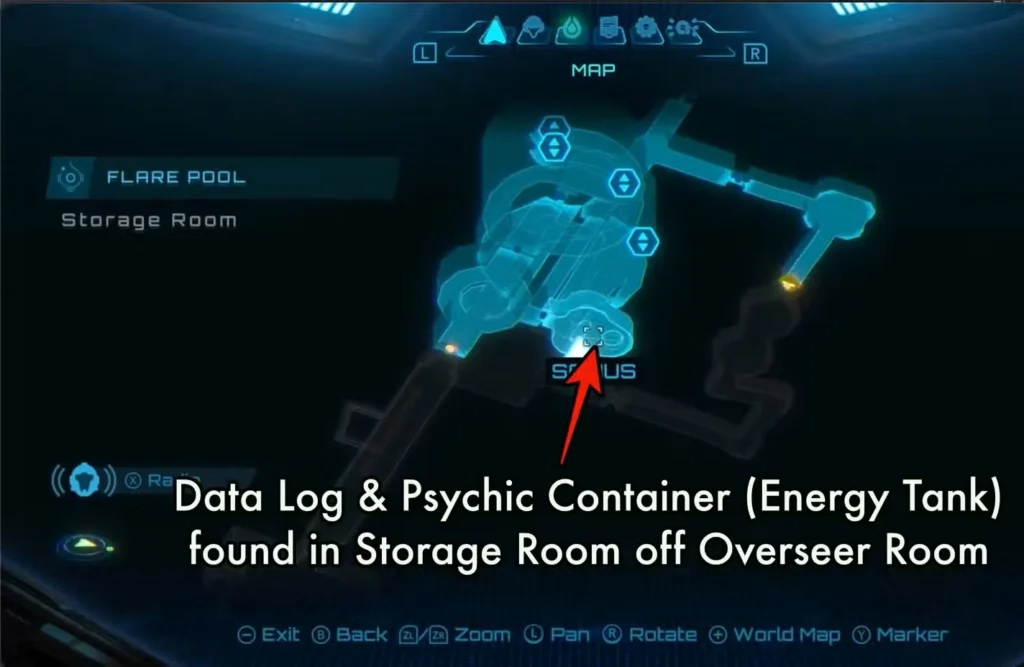
Overseer’s Chamber – Final Data Log & Collectibles
After another Psy-Bot assault, you’ll reach the Overseer’s Chamber. Before progressing:
Final Data Log: The “Facility Shutdown” Data Log sits on a desk in the small side room.
Energy Tank: Behind the Thunder Blocked fast-travel tunnel, there’s a Psychic Container holding an Energy Tank.
Missile Expansion Puzzle:
This one’s tricky:
- Use Psychic Lasso to remove the cover from the bomb slot
- Float a bomb into the slot
- Wait for three nodes to emerge from the side
- Use Psychic Charge Beam to hit all three simultaneously
- The Missile Expansion appears in the center chamber above
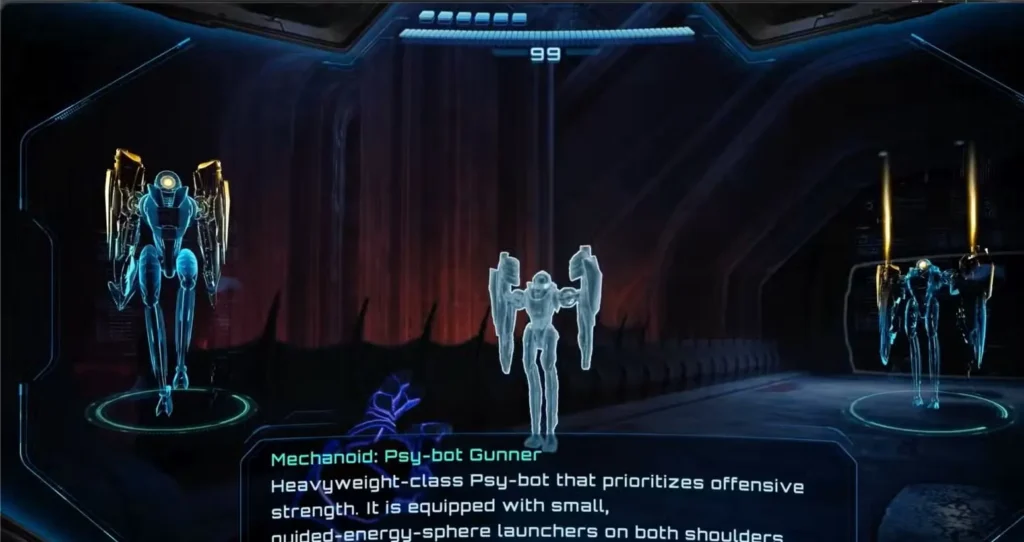
Control Room Bridge – Psy-Bot Gunner Fight
Exit the Overseer Room onto the Control Room Bridge. After dealing with two Psy-Bot Soldiers, a new enemy type appears: the Psy-Bot Gunner. Scan it immediately for your log.
After defeating the first gunner, the final wave spawns at the bridge’s end:
- Two Shield-bearing Psy-Bots
- Another Psy-Bot Gunner
Strategy: Use Psychic Lasso to rip the shields away, then take them down with standard weapons.
Control Room & Save Station
Enter the Control Room and face the Lamorn Heavy Turret (scan before destroying). After clearing the Psy-Bot soldiers, scan the console near the window to reveal your next objectives.
Save Station: Head through the newly unlocked door on the north side before taking the tram. The actual tram station you need is on the south side of the Control Room.
Rescuing Armstrong & Releasing the Clamps
The tram takes you to the South Clamp section where you meet Nora Armstrong. Watch the cutscene and scan her afterward.

South Clamp Puzzle:
- Use Psychic Lasso to pull the lid off the large circular device
- Enter as a Morph Ball
- Spin around the device in the same direction as the moving light
- Once charged, return to the tram for the next destination
North Clamp:
This machine isn’t powered. Go around back and scan the gate. Duke and Armstrong open it for you to enter a Morph Ball slot leading below the machine.
Timed Bomb Puzzle:
- Plant a bomb in the first slot (Morph Ball form)
- Race to the top of the structure
- Plant the second bomb before time runs out
- This restores power to the machine
Use the now-powered machine just like the South Clamp. With both clamps released, you’ll get a notification to return to Access Gate at Lava Lake Bridge. Take the tram back.
Hover Shuttle Transport Boss Fight
CRITICAL: If you don’t scan the Hover Shuttle Transport during this fight, you’ll never get another chance! This is required for 100% completion.
The tram gets attacked during transit and crashes into the Control Room station. Use the Save Station before continuing.
Exit through the Control Room. When you reach the Control Room Bridge, the Hover Shuttle Transport attacks. Here’s what to watch for:
Attack Patterns:
- Psy-Bot Drop: The ship deploys several Psy-Bots when it first arrives
- Projectiles: Fast-moving explosive shots that can be destroyed for item drops
- Laser: Extremely deadly tracking laser. Hide behind pillars (they’ll be destroyed, but you can still get protection at the right angle)
Strategy:
- The ship is only vulnerable from the front
- Missiles and basic attacks work best
- Other weapons don’t deal much damage
- Take every opening you get to unload on the front
Once destroyed, the ship creates a shortcut back to Entry Bay near Lava Lake Bridge.
Psy-Bot Shocker: At Entry Bay, you’ll encounter a new enemy type. Scan the Psy-Bot Shocker, then freeze it with Ice Shot while blasting away. Use the Save Station, then head to Lava Lake Bridge.
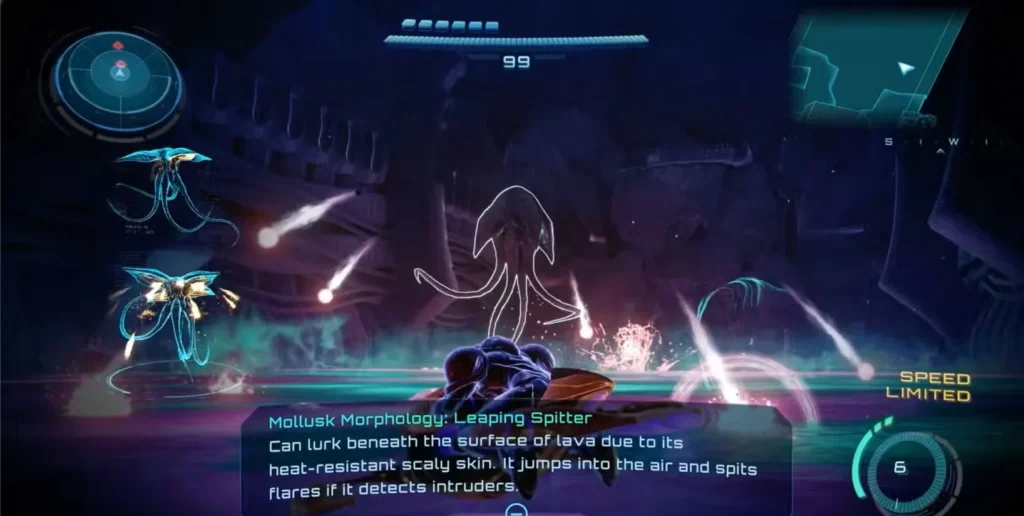
Path to the Boss
At Lava Lake, scan the Leaping Spitter jumping from the lake. You’ll likely need to ride Vi-O-La onto the lake to complete the scan. Once done, enter the tunnel that was previously blocked.
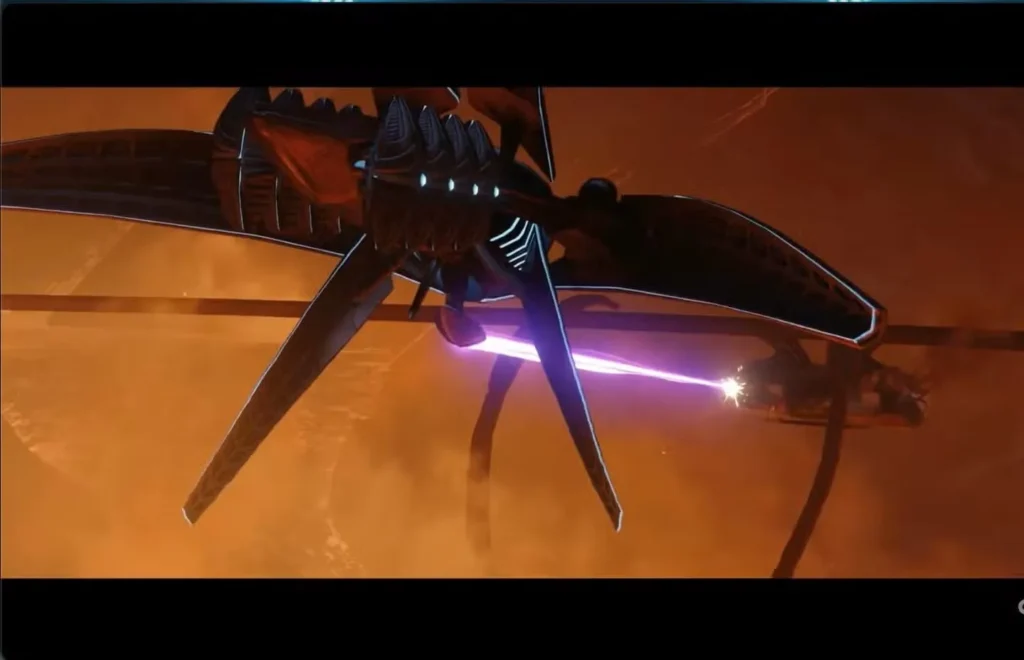
How to Beat Phenoros in Metroid Prime 4: Beyond
Phase 1: Vi-O-La Chase Sequence
Phenoros is a massive serpent-like creature with rows of light-blue targets on its underside visible as it emerges from the lava.
Objective: Destroy all the targets on its underside.
Strategy:
- Use Vi-O-La’s multi-targeting ability by holding A when targets are in range
- Look for red lock-on boxes
- You can take targets out one at a time, but multi-targeting is faster
- Use the bike’s boost if you fall behind
Important: Scan the Blow Hopper creatures during this phase.
Phase 2: On-Foot Combat
Now you’re fighting Phenoros on foot. The core loop:
- Destroy targets on Phenoros’ head
- This creates a vulnerability window
- Attack the mouth during this window
- Repeat
Best Weapons:
- For head targets: Basic attack (highest fire rate, easier to aim while Phenoros moves)
- For mouth attacks: Ice Shot (appears to deal the most damage)
Target Locations:
- Early cycles: Flaps are down, targets mostly on the face sides
- Later cycles: Targets appear on the extended flaps
Attack Patterns & How to Avoid:
- Sweeping Flame
- Horizontal fire beam across the entire arena
- Use Morph Ball to duck under it
- Later, there are two passes—wait before exiting Morph Ball
- Fireballs
- Phenoros rears back and launches slow fireballs
- Destroy them for health and ammo drops
- Snapping Lunge
- Wide jaw opening followed by a forward lunge
- Dodge left or right to avoid
- This exposes side head targets perfectly
- If caught, mash A to escape
- Flame Laser (Later in fight)
- Devastating flame beam aimed directly at Samus
- Dodge immediately left or right
Final Phase:
When Phenoros drops to low health:
- Scan Phenoros (this is your only chance!)
- Use Psychic Charge Beam to guide a shot down its throat
- Destroy the final target inside
Victory! Collect the Grapple Ability (Psychic Grapple) and follow the main path out. The escape sequence is straightforward—just keep moving forward.
Flare Pool Final Visit – 100% Completion Guide
What You Need Before Returning
Before attempting 100% completion, make sure you have:
- Thunder Shot
- Psychic Spider Ball
- Psychic Power Bomb
- Super Missiles
This requires completing the Great Mines dungeon and returning to Volt Forge and Ice Belt for additional upgrades.
Scrapyard Shot Expansion
Remember that Shot Expansion you spotted during your first visit? Now you can grab it.
- Use Power Bomb to clear the rocks blocking the magnetic track
- Use Psychic Spider Ball to climb the track
- Collect the Shot Expansion
Activating the Scout Bot
Before hunting for remaining items, activate the Scout Bot at Lava Lake:
- Shoot the downed bot with a single Thunder Shot
- Scan it when it stands up
- Orange markers appear on your map showing uncollected items
Scout Bot Location: Near the large structure at the opposite end of Lava Lake from the main entrance.
Lava Lake Bridge Shot Expansion
Right next to the Scout Bot, use Psychic Spider Ball tethers to reach a Shot Expansion floating near the large structure.
Expansion Site & Lava Works Collectibles
Accessing Lava Works
At the opposite end of Lava Lake, there’s a large rock blocking the Lava Works door. Destroy it with a Super Missile.
Inside Lava Works:
- Head to the small land patch on the right
- Destroy the small rock blocking the Morph Ball slot
- Enter the slot (don’t grab the Power Bomb Expansion yet)
Behemoth Boss Fight & Mech Arm
Exit the slot and enter the nearby door to the Expansion Site. The Behemoth fight begins immediately.
CRITICAL: If you don’t scan the Behemoth now, you’ll never get another chance!
Strategy:
- Only the eyes take damage
- Focus all your fire on the eyes
- Once defeated, the Mech Arm falls from a nearby ledge
- Interact with the Mech Part to teleport it to Base Camp
Power Bomb Expansion
Exit and use the grapple points to cross the lava. These lead to a spinner that shuts off the lava flow in the Morph Ball tunnel. Use the spinner, then head back into the tunnel.
Now you can use Psychic Tethers to launch up to the Psychic Power Bomb Expansion.
Ventilation Works Missile Expansion
Remember the magnetic track in the Ventilation Works half-pipe from your second visit? Now that you have Psychic Spider Ball, climb the track to grab the Missile Expansion.
Thunder Blocker Chambers – Final Collectibles
First Thunder Blocker (Boiler Room)
These doors branch off the Boiler Room chamber:
- Use Lasso to rip the cover off the machine
- Shoot the center with Thunder Shot multiple times
- Two chambers open, each containing an expansion:
- Shot Expansion
- Missile Expansion
Second Thunder Blocker (Entry Bay/Cooling Room)
The Thunder Blocker just before the security door exiting Entry Bay leads to:
- A shortcut into Energy Extraction
- A Missile Expansion
In the Cooling Room:
- Destroy the ground turret with Lasso
- Check the pod behind it for the Missile Expansion
Final Energy Injection Collectibles
Shot Expansion (Upper Level)
At the very top of Energy Injection, use the grapple to reach the top level. Swing across to the opposite platform—the Shot Expansion is sitting out in the open.
Large Shot Expansion (Lower Level)
This is the trickiest expansion in the dungeon:
- Find the trench running along the lower level
- Locate the spinner with its top covered
- Shoot the yellow rod on the nearby wall with Thunder Shot (opens the cover)
- Enter the spinner with Boost
- Rods emerge from the trench sides as you spin
- Shoot the exposed base of the rods with Thunder Shot (one on each side)
- This lifts the latches locking the Large Shot Expansion in the center
Subobservation Room – Final Missile Expansion
From the Map Station chamber (between Energy Injection and Energy Extraction), go through the Thunder Blocked door. Follow the corridor to the Subobservation Room.
Note: This room has a fast-travel system back to Entry Bay, so save it for last.
Puzzle:
- Use Lasso to pull off the large wall hatch
- Enter from the side in Morph Ball form
- Climb to the top
- Use Bomb double-jump to reach the Missile Expansion
Volcano Heart – Final Three Items
Return to the Volcano Heart (where you fought Phenoros) through the lower Lava Lake Bridge gate. Three items await:
Missile Expansion & Shot Expansion: Both are sitting out in the open. Easy grabs.
Energy Tank:
This one’s special. You’ll see a small container on a piece of ruined rock. Shoot it with Vi-O-La’s weapon. The Energy Tank pops out into the lava, but a new enemy called the Swim Snatcher immediately swallows it.
CRITICAL: Scan the Swim Snatcher before killing it! This is the final missable scan in Flare Pool. If you kill it without scanning, you can’t get 100% completion.
Strategy:
- Scan the Swim Snatcher first
- Chase it down and shoot it multiple times
- Once it’s defeated, the body disappears and drops the Energy Tank
Congratulations! You’ve now achieved 100% completion in Flare Pool!
FAQs
How many times do I need to visit Flare Pool?
At minimum, three times. First visit is to grab the Fire Chip early in the game. Second visit is the main dungeon run after completing Ice Belt and getting the Varia Suit. Third visit is for 100% completion after obtaining Thunder Shot, Psychic Spider Ball, Psychic Power Bomb, and Super Missiles from the Great Mines.
What happens if I miss scanning the Hover Shuttle Transport or Swim Snatcher?
These are permanently missable scans. If you defeat them without scanning, you cannot achieve 100% completion in Flare Pool. The Hover Shuttle Transport appears during your escape from the Control Room, and the Swim Snatcher only appears when you shoot the container holding the final Energy Tank in Volcano Heart.
When can I unlock the Fire Shot?
You get the Fire Shot after your first visit to Flare Pool. Collect the Fire Chip from the Scrapyard, then return to Fury Green Base Camp and speak to Myles MacKenzie. He’ll convert it into the Fire Shot upgrade, which is essential for progressing to Ice Belt.
What’s the best strategy for defeating Phenoros?
In Phase 1, use Vi-O-La’s multi-targeting ability to destroy the blue targets on Phenoros’ underside. In Phase 2, use basic attacks to destroy head targets (for better aim while moving), then hit the exposed mouth with Ice Shot during vulnerability windows. Watch for the Sweeping Flame (duck with Morph Ball), Fireballs (destroy for items), Snapping Lunge (dodge left/right), and the Flame Laser (dodge immediately). Always scan Phenoros before delivering the final blow with Psychic Charge Beam.