Find all 28 area maps in Hollow Knight: Silksong with our complete location guide. Discover Shakra’s locations, map devices, and unlock the Cartographer achievement with strategic exploration tips.
Navigation mastery in Hollow Knight: Silksong isn’t just about knowing where you’re going – it’s about understanding the intricate world of Pharloom well enough to uncover its deepest secrets. With 28 distinct areas to explore, each requiring its own map for optimal navigation, your cartographic journey becomes as important as your combat skills.
The pursuit of all 28 maps isn’t just completionist content – it’s a fundamental aspect of mastering Silksong’s interconnected world design. Each map transforms chaotic exploration into strategic navigation, revealing shortcuts, secrets, and safe paths that can mean the difference between success and frustration.
Understanding Silksong’s Map System Evolution
The Shakra Era: Acts 1-2
In Silksong’s early acts, your primary map source is Shakra – a fierce warrior whose haunting songs echo through Pharloom’s corridors. She’s not just a vendor; she’s a traveling cartographer whose presence indicates you’ve reached significant new territory.
Following Shakra’s Trail:
- Audio cues: Her distinctive singing carries across areas, serving as both atmospheric element and navigation aid
- Visual markers: Throwing Rings scattered along her path provide breadcrumbs for tracking
- Strategic positioning: She always appears in accessible locations within new areas, never behind progression gates
The Device Age: Act 2 and Beyond
As Hornet’s journey progresses, Pharloom’s more advanced regions feature mechanical map devices – a shift that reflects both technological progression and narrative development. These aren’t just different acquisition methods; they represent Silksong’s evolving design philosophy.
Device Interaction Mechanics:
- Rosary-powered machines: Most require 40-90 Rosary investment
- Hidden chambers: Maps often wait in secret rooms testing exploration skills
- Interactive elements: Buttons, tables, and specialized devices add variety to discovery
Strategic Rosary Management for Map Collection
Early Game Priority Planning
With maps ranging from 40-90 Rosaries, resource management becomes crucial for efficient exploration:
Budget-Friendly Starts (40 Rosaries):
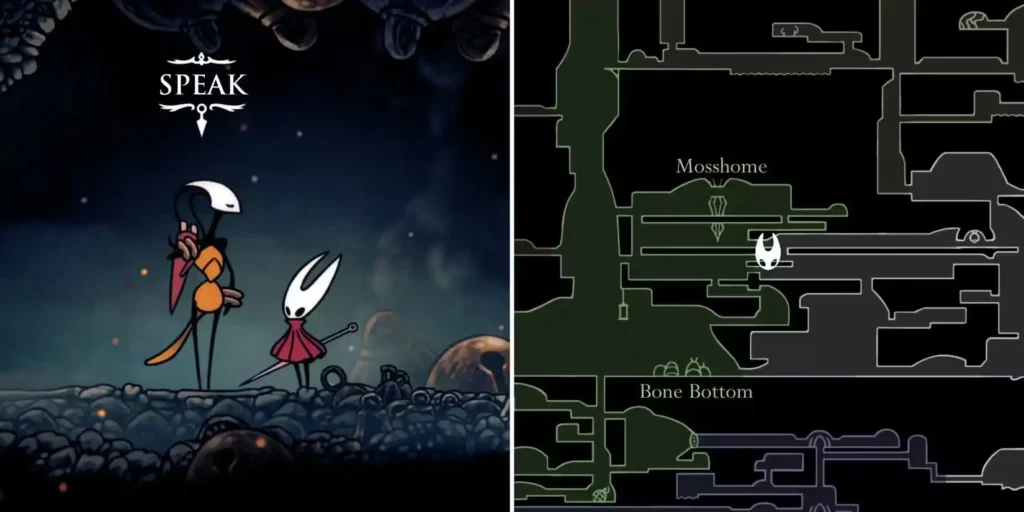
- Bone Bottom Map
- Bellhart Map
- Mount Fay Map
Mid-Range Investments (50 Rosaries):
- The Marrow Map
- Deep Docks Map
- Far Fields Map
Premium Cartography (70-90 Rosaries):
- Wormways, Hunter’s March, Greymoor (70 each)
- Sinner’s Road, Sands of Karak, Bilewater (90 each)
Rosary Farming Integration
Efficient map collection requires understanding Silksong’s economy. Plan your resource gathering around map purchases to avoid getting stuck in unfamiliar territory without navigation aids.
Complete Map Location Breakdown
Act 1: Foundation Areas
Bone Bottom Map

Cost: 40 Rosaries Location: Northwestern Marrow, purchased from Shakra This early map sets the tone for Silksong’s underground exploration. Bone Bottom’s twisting passages become manageable with proper cartographic guidance.
The Marrow Map
Cost: 50 Rosaries Location: Near northwestern bench, purchased from Shakra Essential for navigating this central hub area. The Marrow connects to multiple regions, making this map crucial for efficient travel planning.
Deep Docks Map
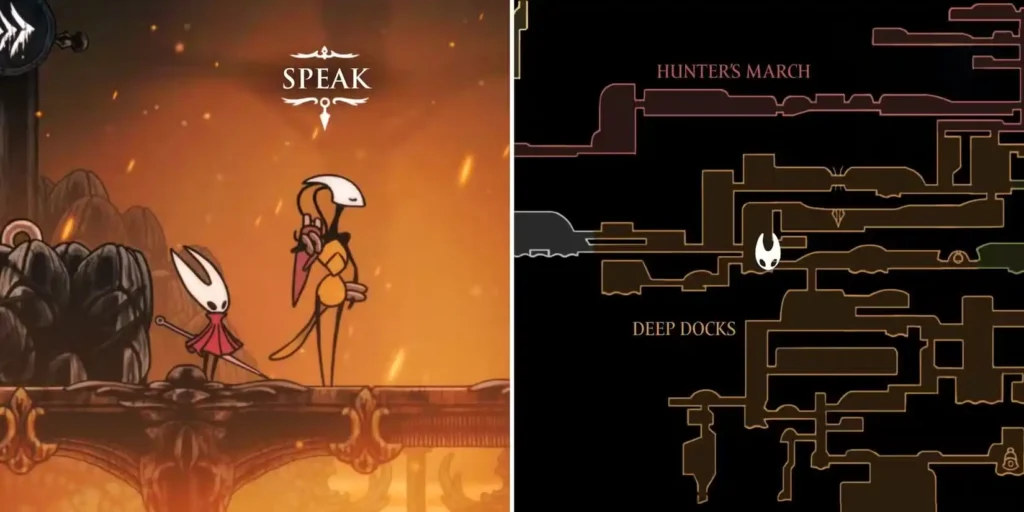
Cost: 50 Rosaries
Location: East of Deep Docks Bellway, purchased from Shakra The industrial complexity of Deep Docks makes this map particularly valuable. Essential for accessing the diving bell area and related progression.
Far Fields Map
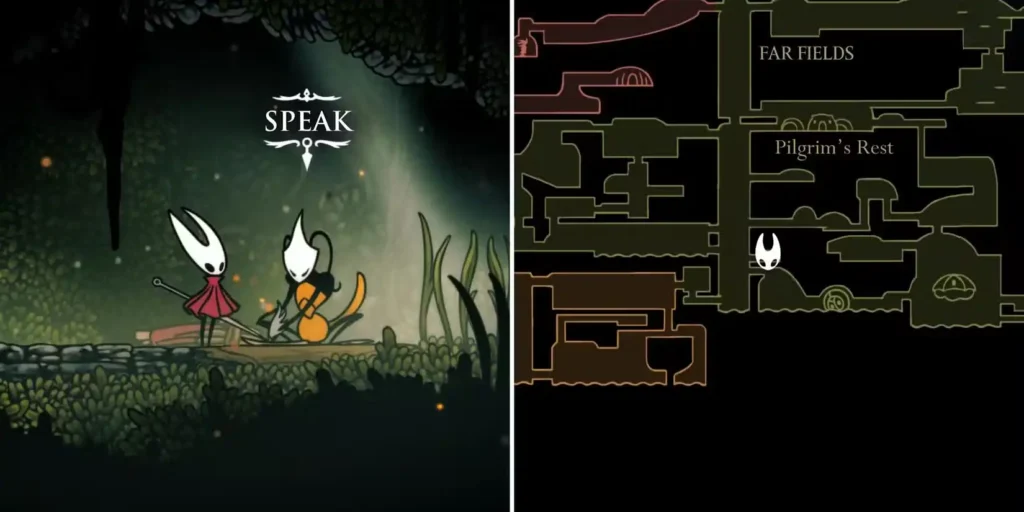
Cost: 50 Rosaries Location: Southwest cave from Far Fields Bellway, purchased from Shakra This expansive outdoor area benefits greatly from mapped navigation, especially for locating scattered collectibles and hidden passages.
Mid-Game Exploration Areas
Wormways Map
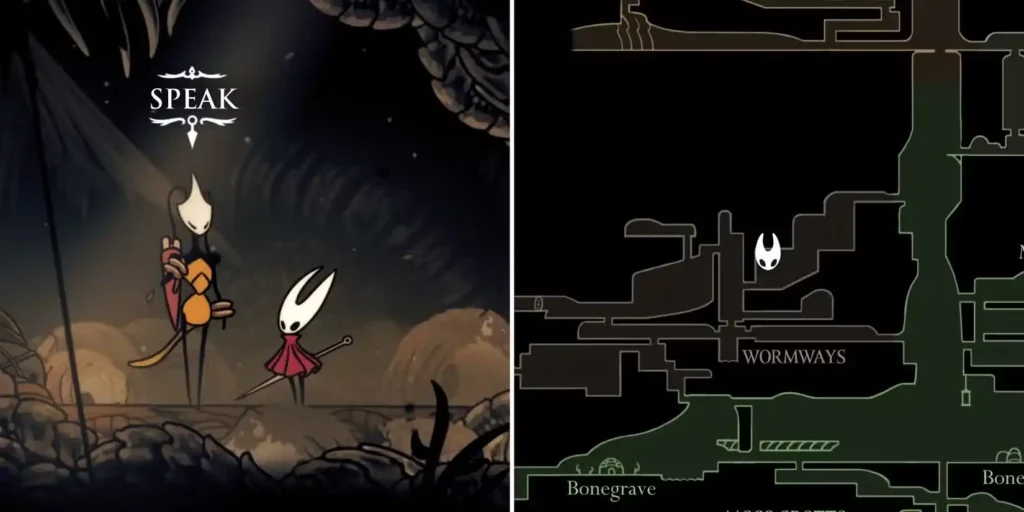
Cost: 70 Rosaries Location: East side upper path from Moss Grotto, purchased from Shakra The tunnel networks here can be maze-like without proper navigation aids. This map becomes essential for advanced movement techniques.
Hunter’s March Map
Cost: 70 Rosaries Location: East side near Deep Docks path, purchased from Shakra Combat-heavy area where knowing enemy positions and escape routes significantly improves survival rates.
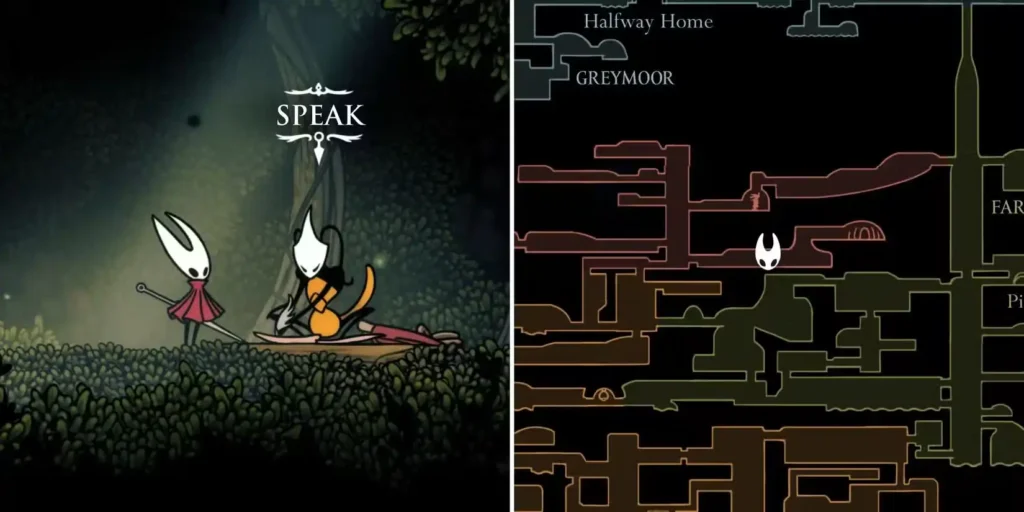
Greymoor Map
Cost: 70 Rosaries Location: Eastern area west of Craw Lake, purchased from Shakra The atmospheric complexity of Greymoor makes navigation challenging without mapped reference points.
Verdania Map
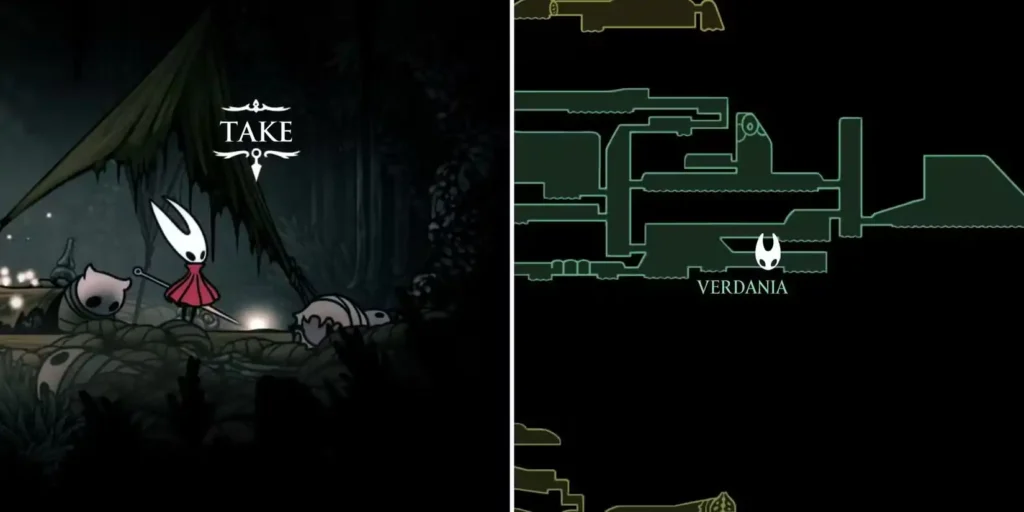
Cost: Free Location: Bug corpse in southeastern camp A rare free map that teaches players to examine environmental storytelling elements for practical rewards.
Bellhart Map
Cost: 40 Rosaries Location: Lower Shellwood beneath Greyroot’s hut, purchased from Shakra Connected to the curse-breaking questline, this map supports both exploration and story progression.
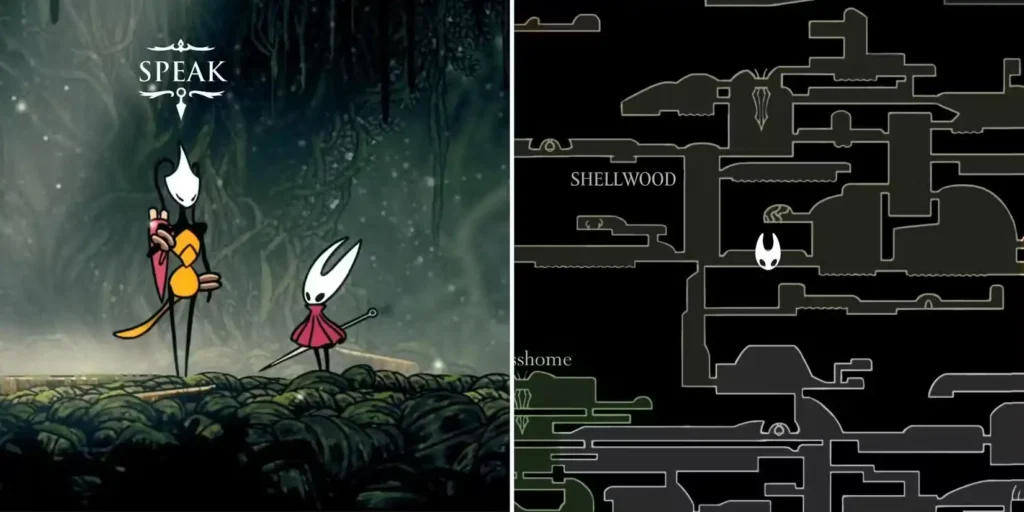
Shellwood Map
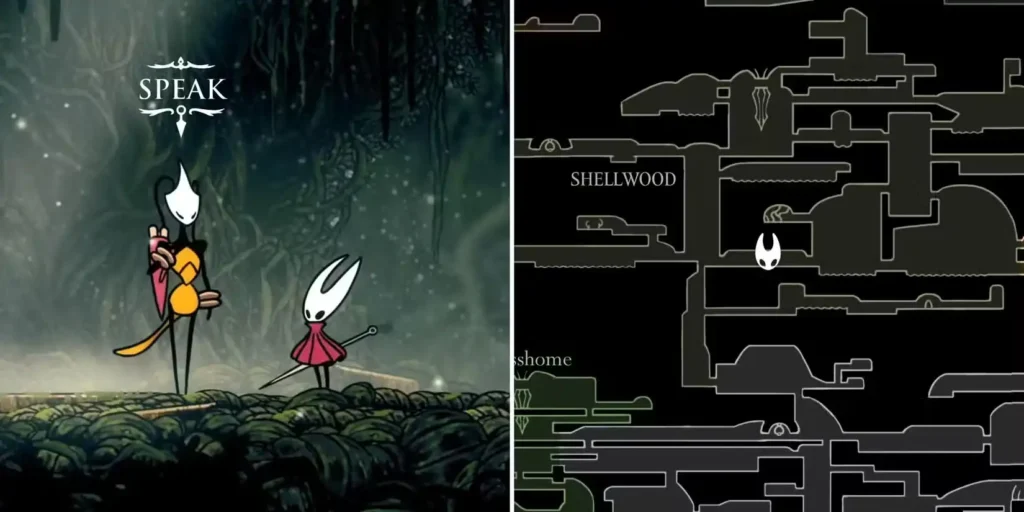
Cost: 70 Rosaries Location: Lower area beneath Greyroot’s hut, purchased from Shakra The vertical complexity of Shellwood makes this map essential for understanding multi-level navigation opportunities.
Advanced Territory Maps
Blasted Steps Map
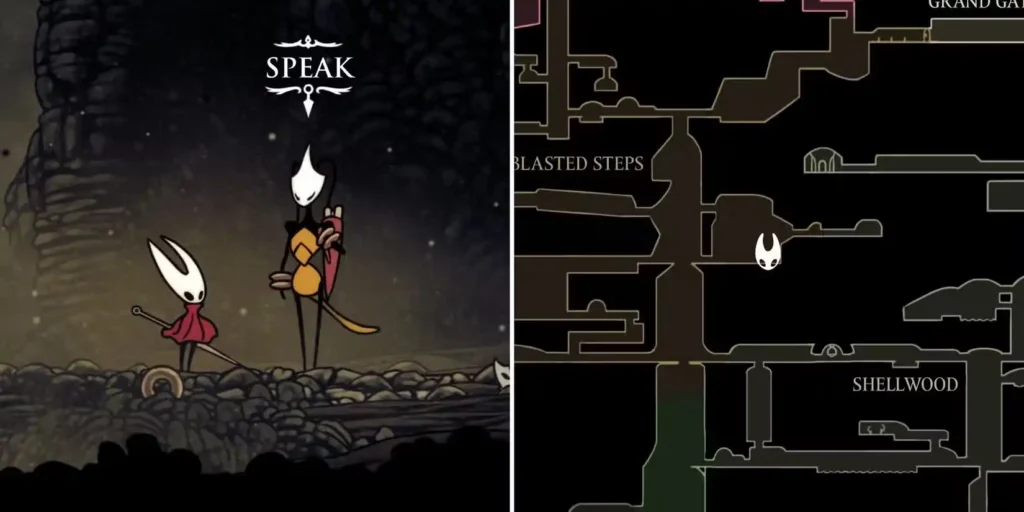
Cost: 70 Rosaries Location: Eastern Blasted Steps, purchased from Shakra Environmental hazards in this area make efficient navigation crucial for survival.
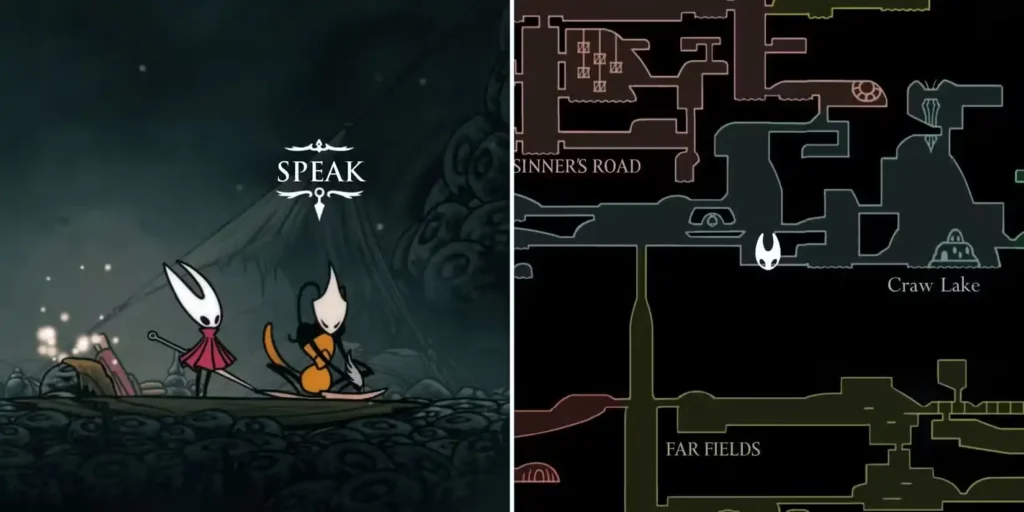
Sinner’s Road Map
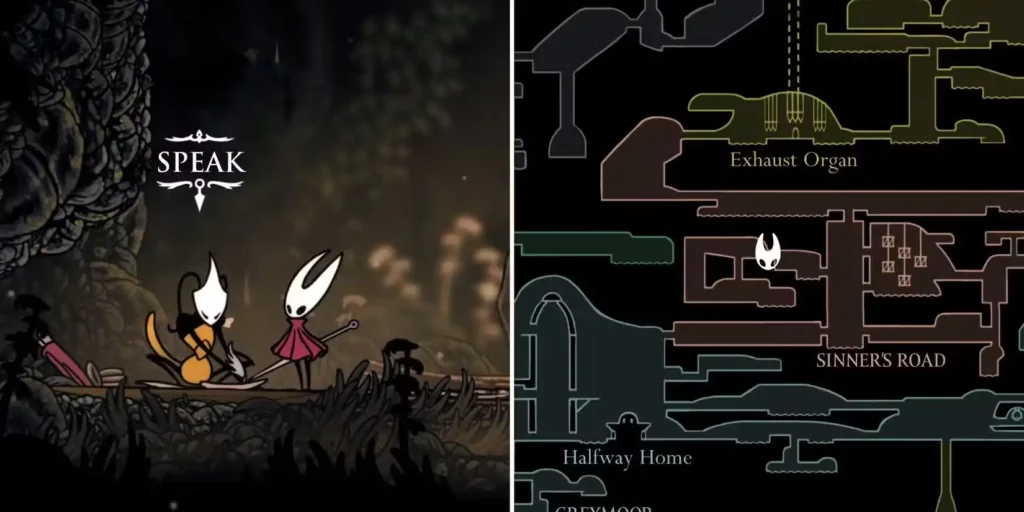
Cost: 90 Rosaries Location: Near northwestern bench by central shaft, purchased from Shakra One of the most expensive maps, reflecting the area’s complexity and danger level.
The Slab Map
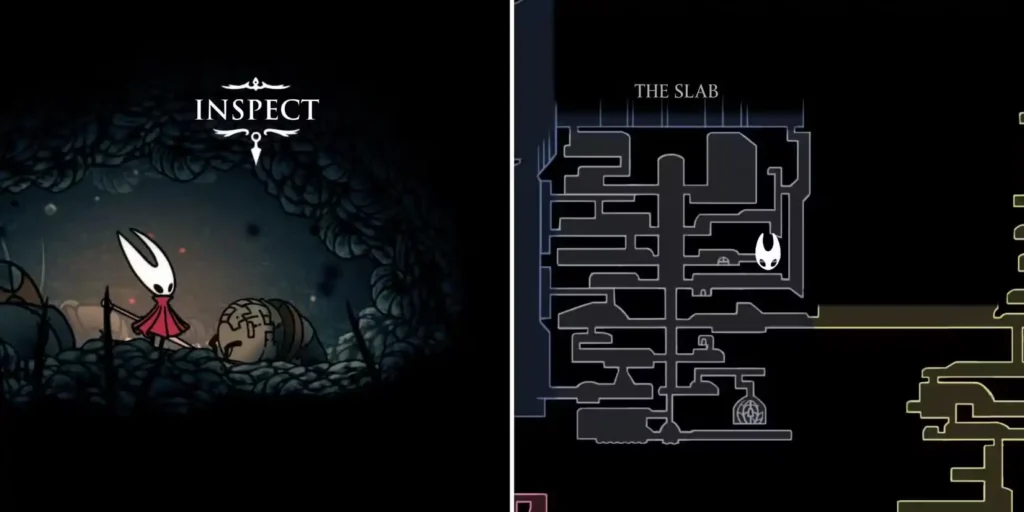
Cost: Free Location: Bug corpse in eastern cell near central bench Another environmental storytelling discovery that rewards thorough exploration of seemingly empty areas.
Mount Fay Map
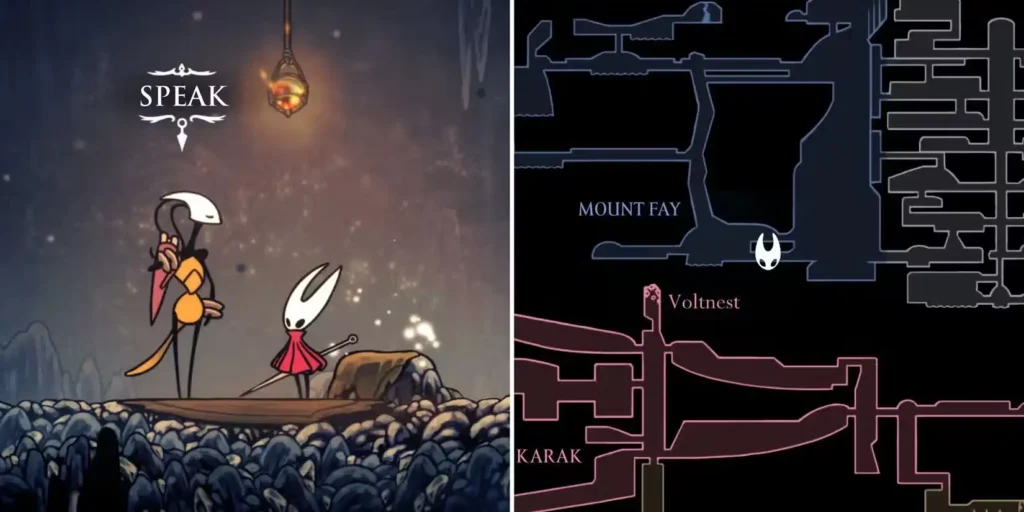
Cost: 40 Rosaries Location: Near lowest bench toward The Slab path, purchased from Shakra Strategic positioning near progression routes makes this map valuable for efficient area transitions.
Sands of Karak Map
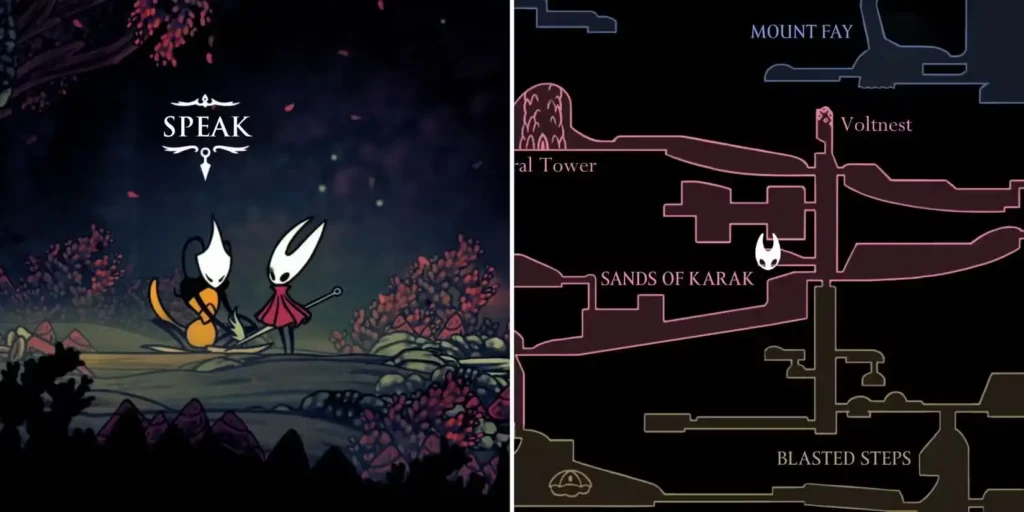
Cost: 90 Rosaries Location: Western chamber of central shaft, purchased from Shakra Premium pricing reflects the challenging navigation requirements of this desert-like environment.
Bilewater Map
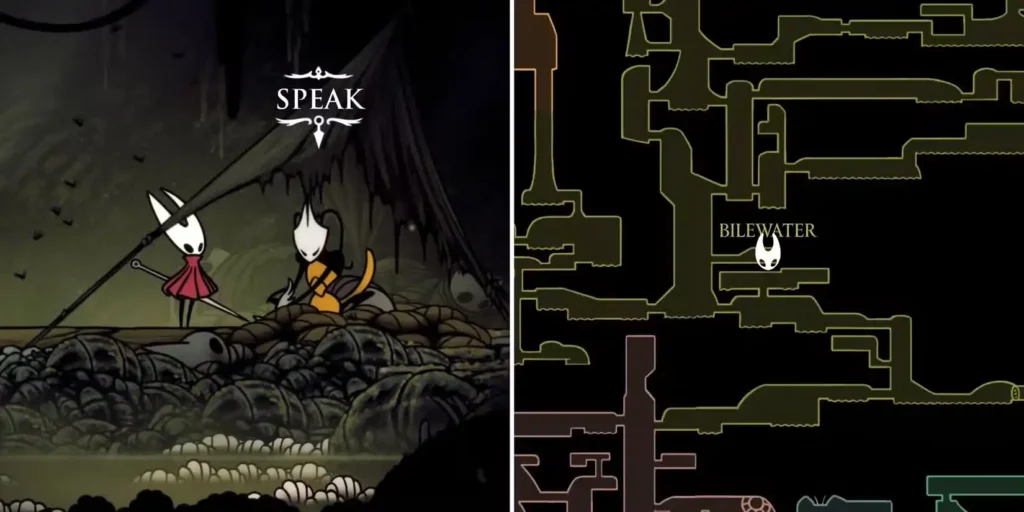
Cost: 90 Rosaries Location: Center area northeast of Bilewater Bellway, purchased from Shakra The toxic environment here makes knowing safe paths essential for exploration success.
Act 2+ Device-Based Maps
Weavenest Atla Map
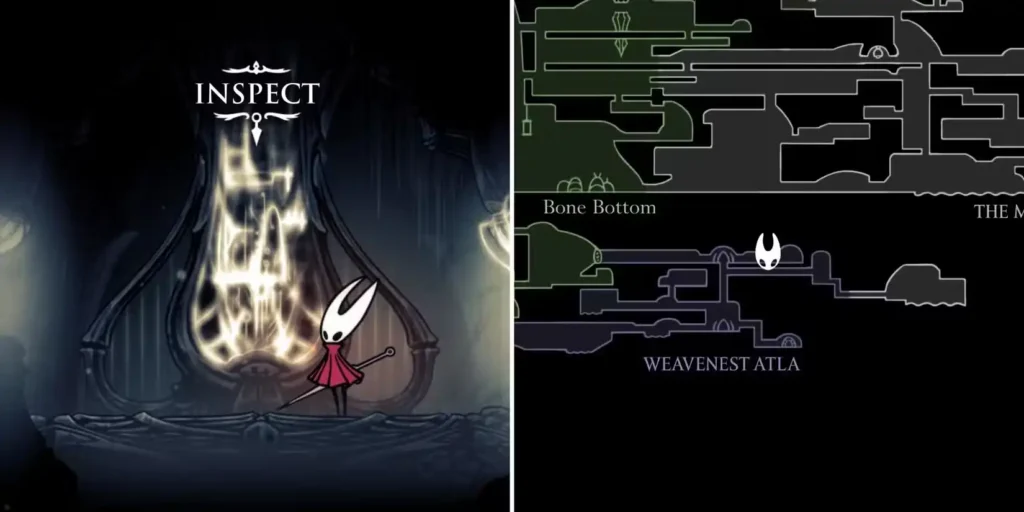
Acquisition: Device interaction after breaking glowing orbs Location: Northeastern area past Needolin door This introduces the mechanical map system while testing puzzle-solving skills and environmental awareness.
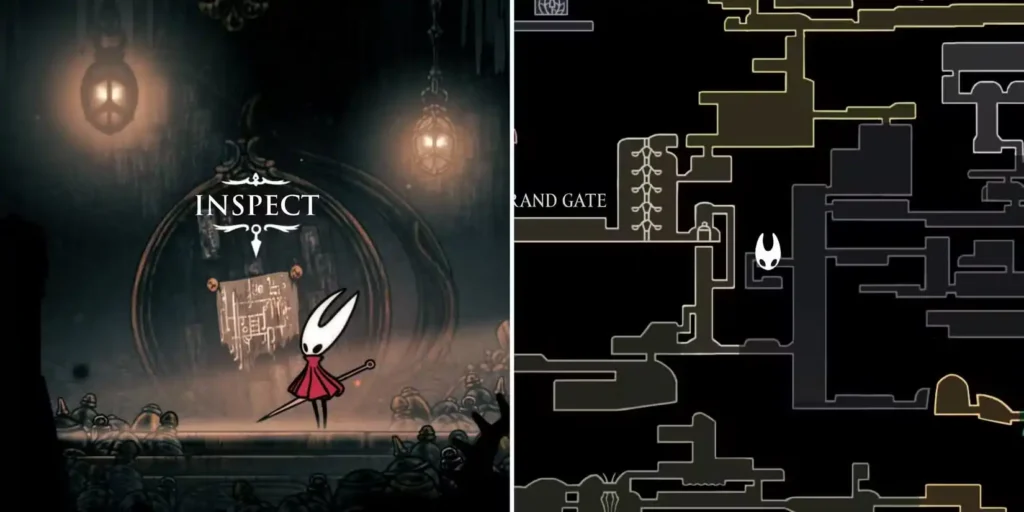
Grand Gate Map
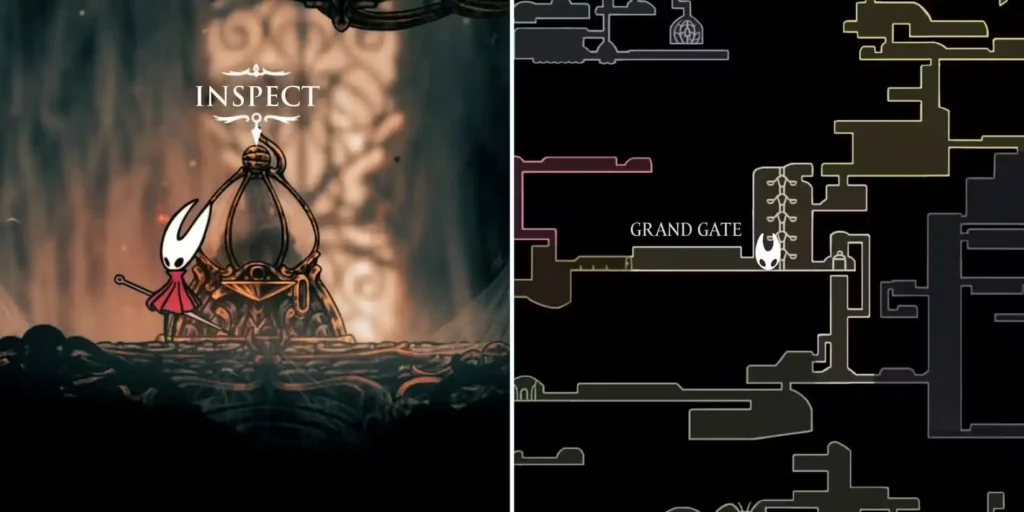
Cost: 40 Rosaries Acquisition: Central machine interaction The device-based system reflects the technological advancement of later game areas.
Underworks Map
Cost: Free Location: Wall-pinned map in western central shaft chamber A simple discovery that teaches players to examine all environmental elements in new areas.
Whiteward Map
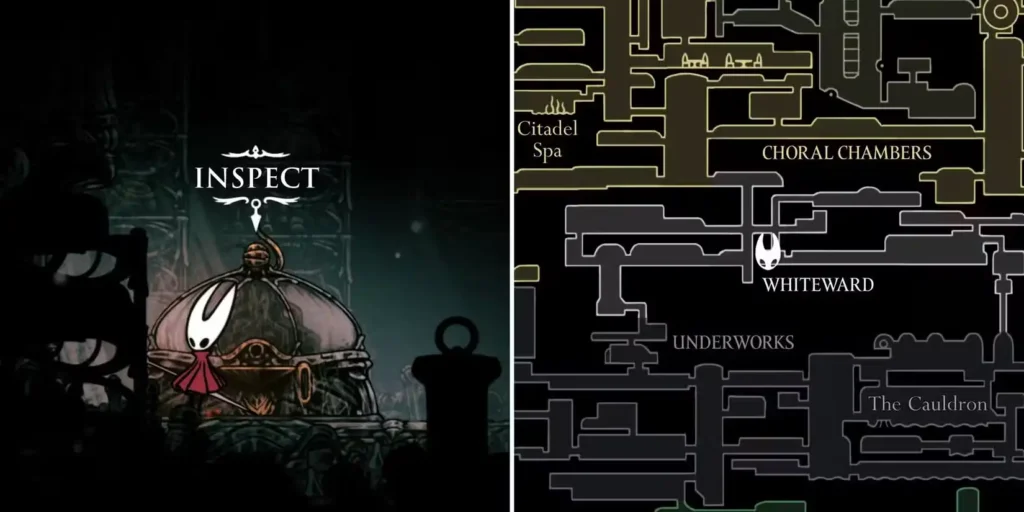
Cost: 70 Rosaries Acquisition: Machine south of area’s only bench Essential for navigating this story-critical area with its complex progression requirements.
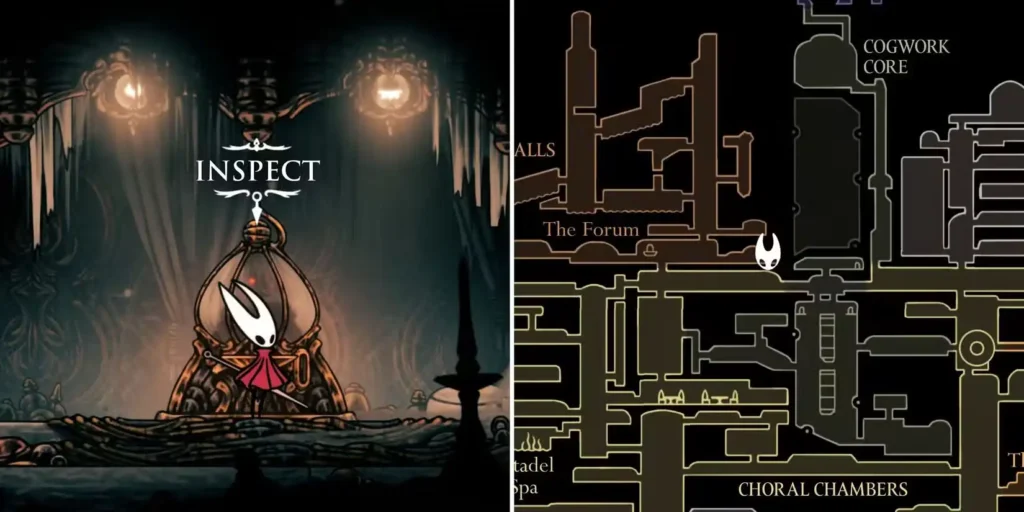
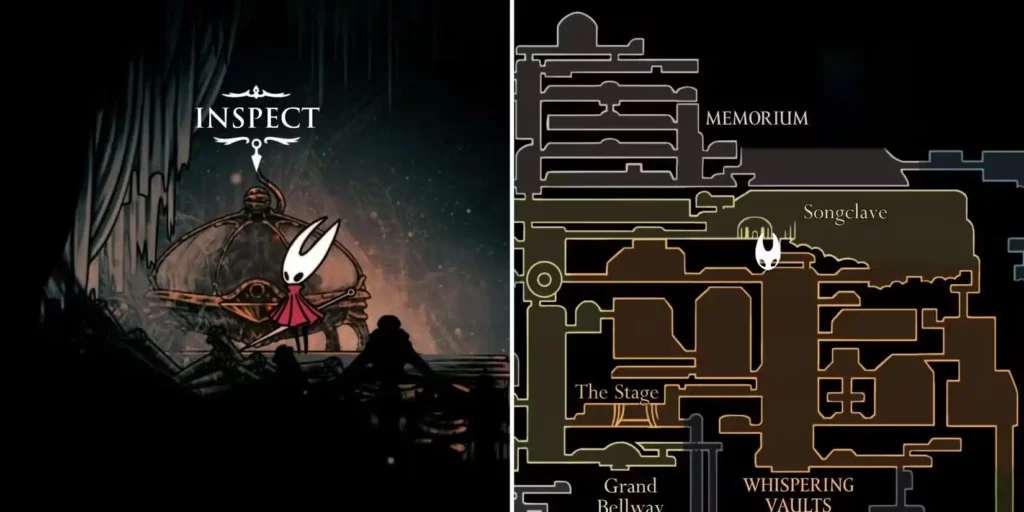
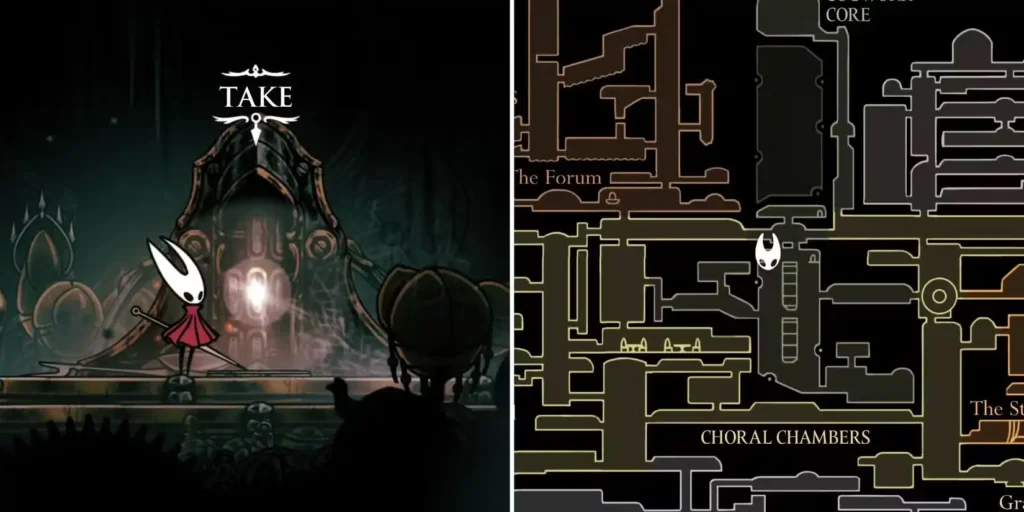
Choral Chambers Map

Cost: 70 Rosaries Acquisition: Machine east of Grand Bellway The musical theme of this area makes navigation particularly atmospheric with proper mapping.
High Halls Map
Cost: 70 Rosaries
Acquisition: Machine east of Choral Chambers path Vertical complexity here makes mapped navigation essential for accessing all areas efficiently.
Whispering Vaults Map
Cost: 70 Rosaries Acquisition: Machine in hidden chamber atop central shaft The secretive nature of this map’s location hints at the area’s mysterious content.
Cogwork Core Map
Acquisition: Button press in hidden area above foldable bench Mechanical puzzle elements reflect the technological theme while testing exploration thoroughness.
Memorium Map
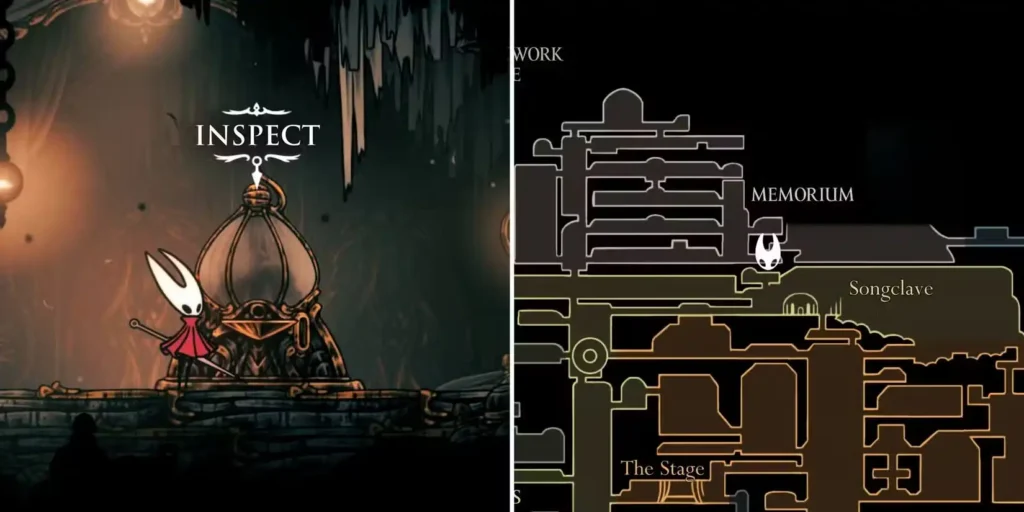
Cost: 70 Rosaries Acquisition: Southeastern map room machine The formal map room presentation emphasizes this area’s importance to Silksong’s narrative structure.
Putrified Ducts Map
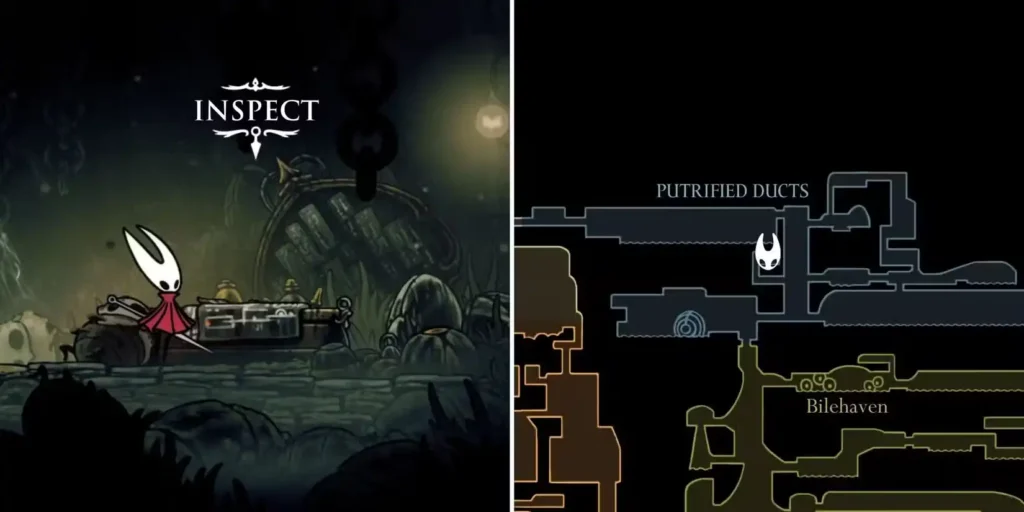
Cost: Free Location: Table in western central shaft room Strategic placement near progression routes makes this easily accessible for story advancement.
The Cradle Map
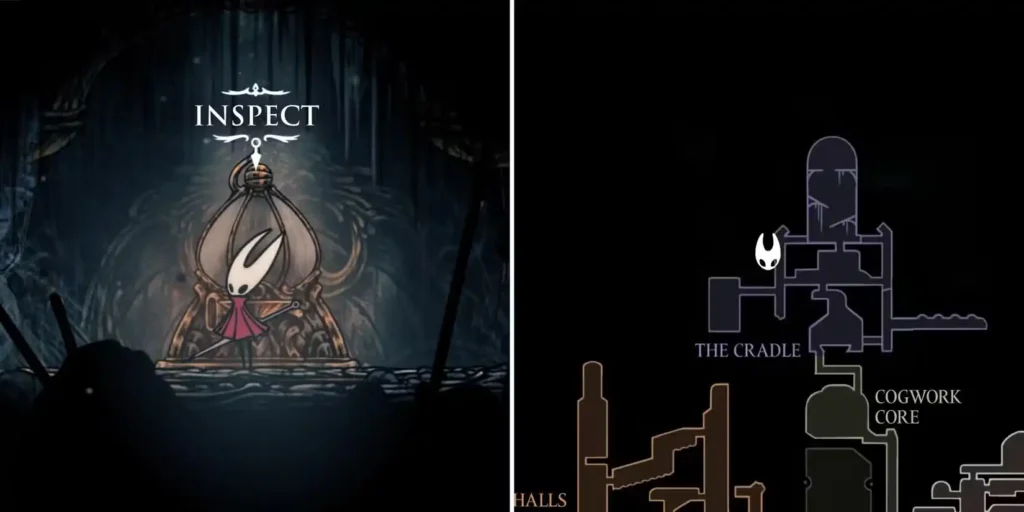
Cost: 70 Rosaries Acquisition: West side alcove machine End-game pricing reflects the challenging content and navigation requirements ahead.
The Abyss Map
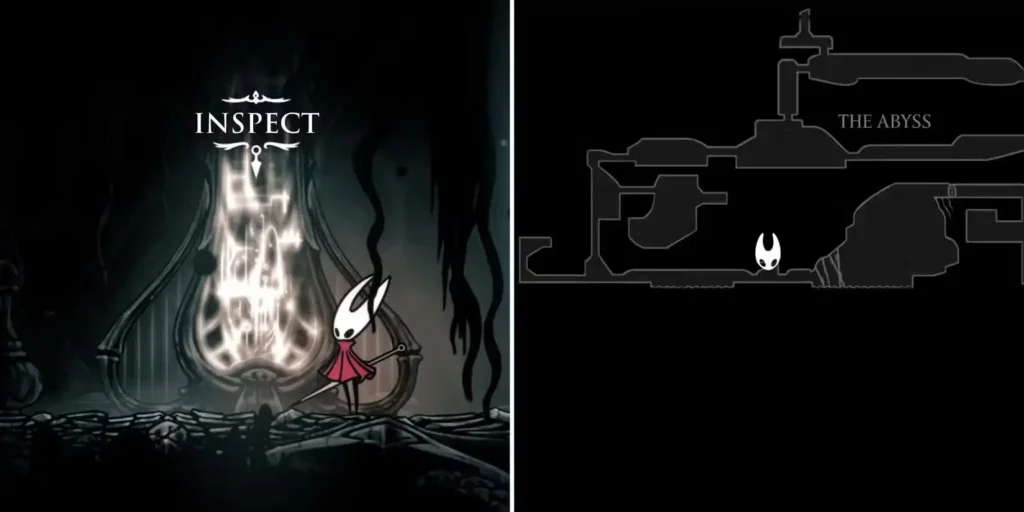
Cost: Free Location: Glowing device above lowest bench The final map in a secret area above the southern bench, accessible only after navigating the treacherous Abyss depths.
Advanced Navigation Strategies
Shakra Tracking Mastery
Audio Navigation: Shakra’s singing serves as more than atmosphere – it’s a functional navigation tool. Learn to distinguish her voice from other audio cues to locate her efficiently.
Ring Trail Following: Her Throwing Rings create breadcrumb paths that reveal optimal routes through complex areas while hinting at secrets along the way.
Timing Considerations: If you lack Rosaries upon first meeting Shakra, note her location for future purchases. She won’t disappear, but efficient timing prevents backtracking.
Device Interaction Optimization
Resource Planning: Budget Rosaries for machine-based maps, especially in Act 2+ areas where costs remain substantial.
Hidden Chamber Skills: Many device maps wait in secret areas requiring advanced movement techniques or puzzle-solving abilities.
Interaction Variety: Different devices use buttons, insertion mechanics, or simple inspection – adapt your exploration approach accordingly.
Economic Efficiency Tips
Early Investment Strategy: Prioritize maps for areas you’ll revisit frequently, especially hub zones connecting multiple regions.
Free Map Prioritization: Always collect no-cost maps (Verdania, The Slab, Underworks, Putrified Ducts, The Abyss) to maximize your Rosary efficiency.
Progression-Gated Planning: Some maps become accessible only after story advancement – don’t stress about immediate collection if progression requirements aren’t met.
Cartographer Achievement Optimization
Systematic Collection Approach
Act-Based Organization: Collect maps as you naturally progress rather than attempting completionist runs through unfamiliar territory.
Resource Management: Budget approximately 1,500+ Rosaries for complete map collection, planning your farming strategies accordingly.
Progression Integration: Many maps support story advancement and exploration efficiency, making collection a natural part of thorough gameplay.
Common Collection Pitfalls
Rushing Device Areas: Act 2+ maps often require specific abilities or story progression – avoid frustration by ensuring prerequisites are met.
Ignoring Free Maps: Environmental maps teach important exploration lessons while conserving resources for premium purchases.
Poor Resource Planning: Running out of Rosaries in new areas without maps significantly hampers exploration efficiency.
Integration with Broader Exploration
Combat Preparation
Mapped areas allow for strategic healing planning and escape route identification during challenging encounters.
Secret Discovery Enhancement
Maps reveal area layouts that hint at hidden passages, secret chambers, and collectible locations that might otherwise be missed.
Steel Soul Mode Considerations
Complete mapping becomes essential for permadeath runs where knowing safe routes and enemy positions can prevent catastrophic mistakes.
Final Thoughts: Mastering Pharloom’s Geography
Collecting all 28 maps in Hollow Knight: Silksong represents more than achievement hunting – it’s about developing intimate familiarity with one of gaming’s most intricately designed worlds. Each map transforms chaotic exploration into strategic navigation, revealing the thoughtful interconnections that make Pharloom feel like a living, breathing place.
The evolution from Shakra’s musical cartography to mechanical map devices mirrors your own growth as an explorer. Early reliance on her guidance gives way to independent discovery and interaction with Pharloom’s technological marvels.
Whether you’re following our beginner’s exploration guide or pushing toward 100% completion, remember that each map acquired makes every subsequent journey more efficient and enjoyable. The investment in cartographic completion pays dividends throughout your entire Silksong experience.
When you finally earn that Cartographer achievement, you’ll have done more than collect 28 maps – you’ll have mastered the art of navigation in one of the most beautifully complex worlds ever created.
Ready to explore every corner of Pharloom? Begin your cartographic journey in Hollow Knight: Silksong on Steam, Nintendo Switch, PlayStation, or Xbox and discover the vast world waiting to be mapped!