What Are Mask Shards in Hollow Knight Silksong?
In the treacherous realm of Pharloom, survival isn’t just about skill – it’s about preparation. While Hornet starts her journey with modest health, the scattered Mask Shards throughout the kingdom hold the key to her ultimate survivability. Think of these fragments as your insurance policy against the increasingly dangerous enemies and bosses that await deeper in Silksong’s interconnected world.
Unlike the original Hollow Knight’s mask system, Silksong’s approach to health upgrades feels more integrated into the exploration and quest mechanics. Each of the 20 Mask Shards tells a story – whether hidden behind environmental puzzles, locked behind merchant transactions, or earned through challenging quests.
Why Every Mask Shard Matters
- Maximum Health Potential: Reach 10 HP total (double your starting health)
- Boss Fight Survivability: Extra mistakes become manageable errors instead of run-enders
- Exploration Confidence: Venture into dangerous areas with reduced risk
- Masked Achievement: Essential for 100% completion
- Combat Flexibility: More aggressive playstyles become viable
Best Order to Collect All 20 Mask Shards
Early Game Priorities (Acts 1-2): Focus on purchasable shards and easily accessible exploration rewards Mid Game Balance (Act 2-3): Combine quest completion with ability-gated discoveries
Late Game Mastery (Act 3+): Tackle the most challenging platforming and combat trials
All Mask Shard Locations by Region
Early Game Essentials (Accessible in Act 1)
Mask Shard #1: Bone Bottom Merchant Your first health upgrade comes with a price tag – 300 Rosaries from the Bone Bottom camp merchant. While this might seem steep early on, prioritizing this purchase sets you up for safer exploration. Consider this an investment in your future survival rather than an expense.
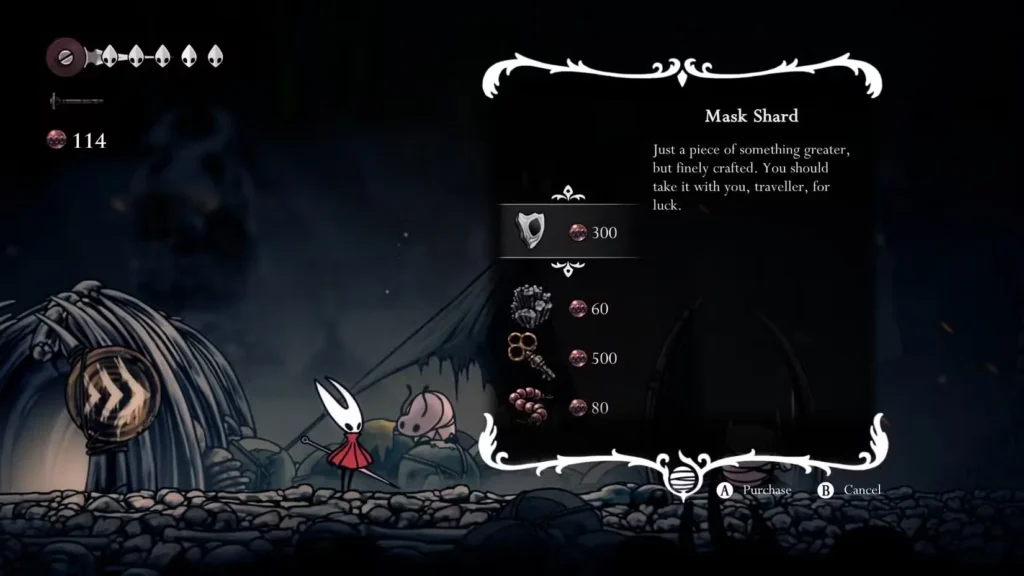
Strategy Tip: Focus on Rosary farming early to afford this crucial upgrade.
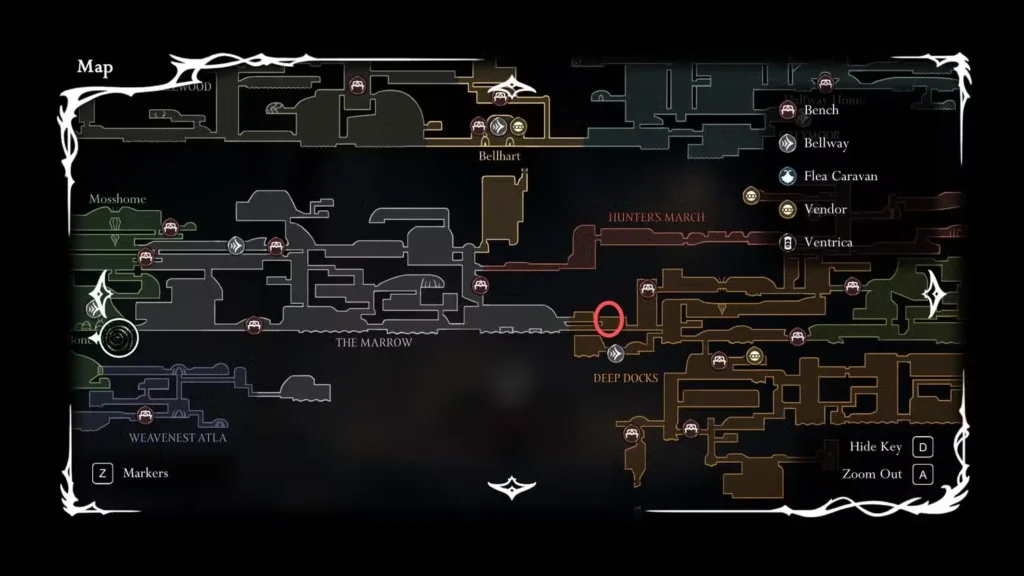
Mask Shard #2: Deep Docks Border Discovery Located on the boundary between The Marrow and Deep Docks, this shard rewards thorough exploration of transition areas. Many players rush through these zones, missing valuable collectibles hidden in plain sight.
Mid-Game Ability-Gated Rewards
Mask Shard #3: Far Fields Wind Current Puzzle This elaborate sequence showcases Silksong’s environmental puzzle design at its finest. After completing the Flexile Spines quest and obtaining the Drifter’s Cloak, you’ll unlock access to this complex wind current navigation challenge.
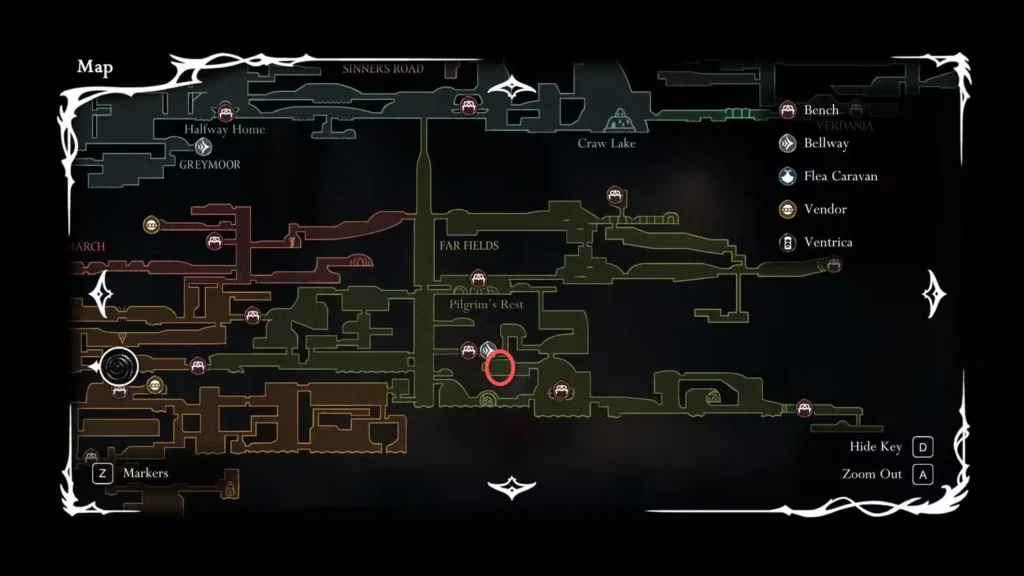
The multi-stage process involves:
- Using wind currents to reach elevated platforms
- Strategically hitting exploding rocks to create new air streams
- Timing jumps between temporary wind boosts
- Discovering the hidden passage through careful observation
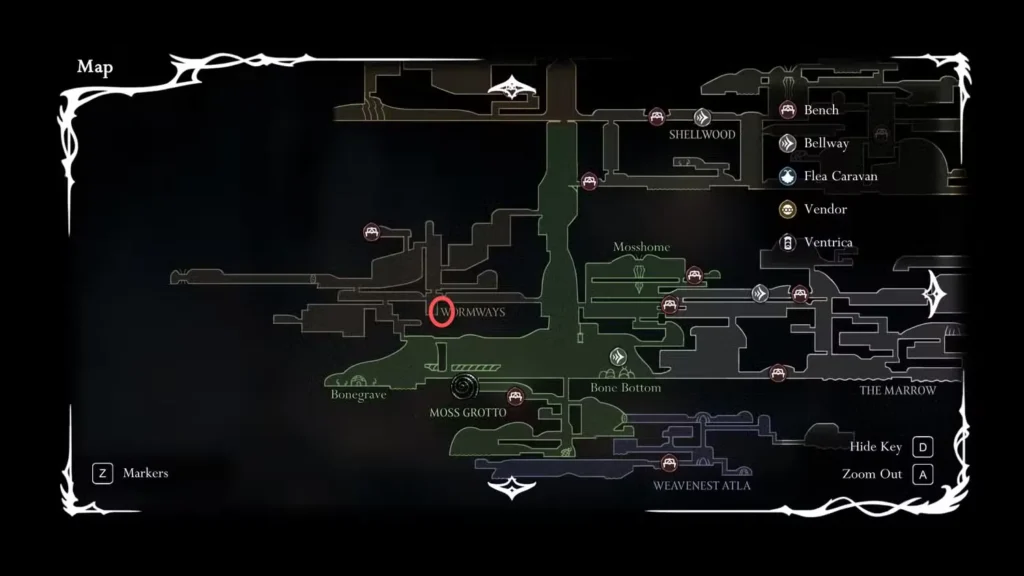
Mask Shard #4: Wormways Hidden Chamber The Wormways area tests your attention to environmental details. From the Simple Key door, the breakable wall underwater might seem insignificant, but it guards one of Silksong’s more cleverly hidden health upgrades.
Mask Shard #5: Shellwood Platforming Trial South of the Cling Grip skill location lies a pure platforming challenge. This east-leading passage culminates in a room that tests everything you’ve learned about Hornet’s movement abilities. The reward feels earned rather than simply found.

Quest-Integrated Health Upgrades
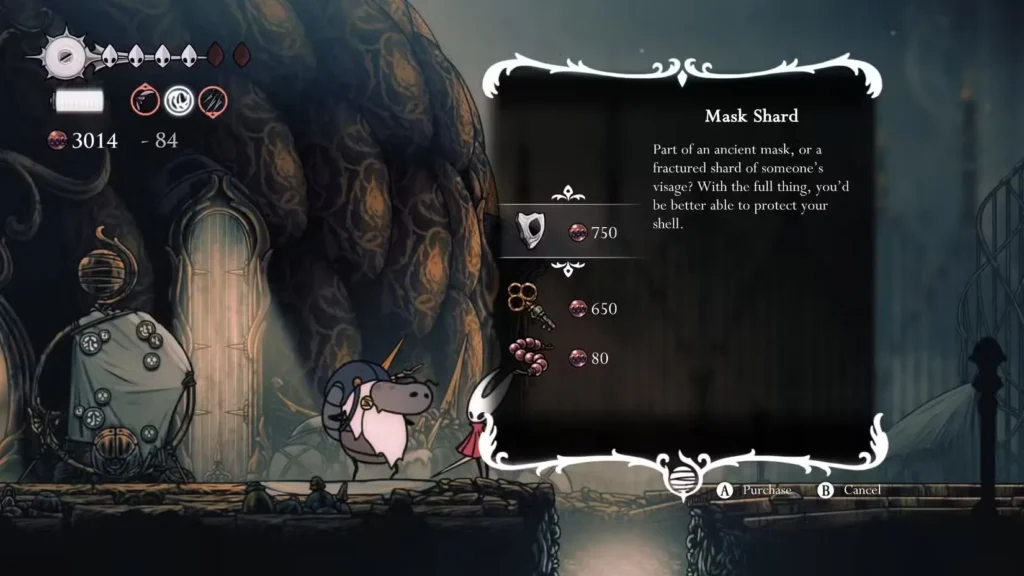
Mask Shard #6: Jubilana’s Premium Goods After completing the Wandering Merchant quest and rescuing Jubilana, she sets up shop in Songclave offering this shard for 750 Rosary Beads. The price reflects the shard’s value, but also encourages engagement with Silksong’s rich side quest content.
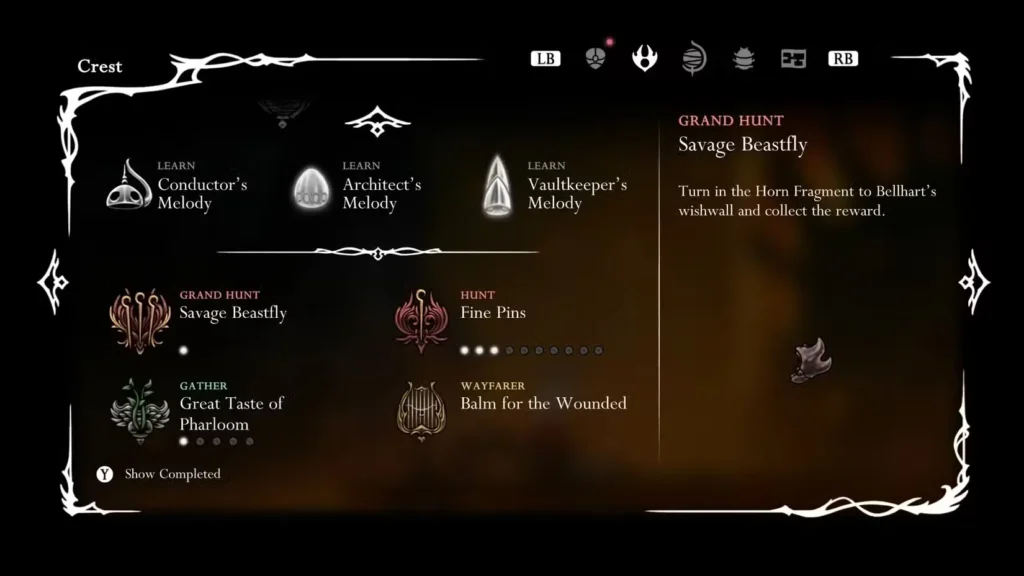
Mask Shard #9: Savage Beastfly Bounty The Savage Beastfly boss fight represents one of Silksong’s most satisfying quest rewards. Accepting this wish from Bellhart’s Wishwall leads to a rematch at the Fourth Chorus boss location, testing your combat growth since that earlier encounter.
Advanced Discovery Challenges
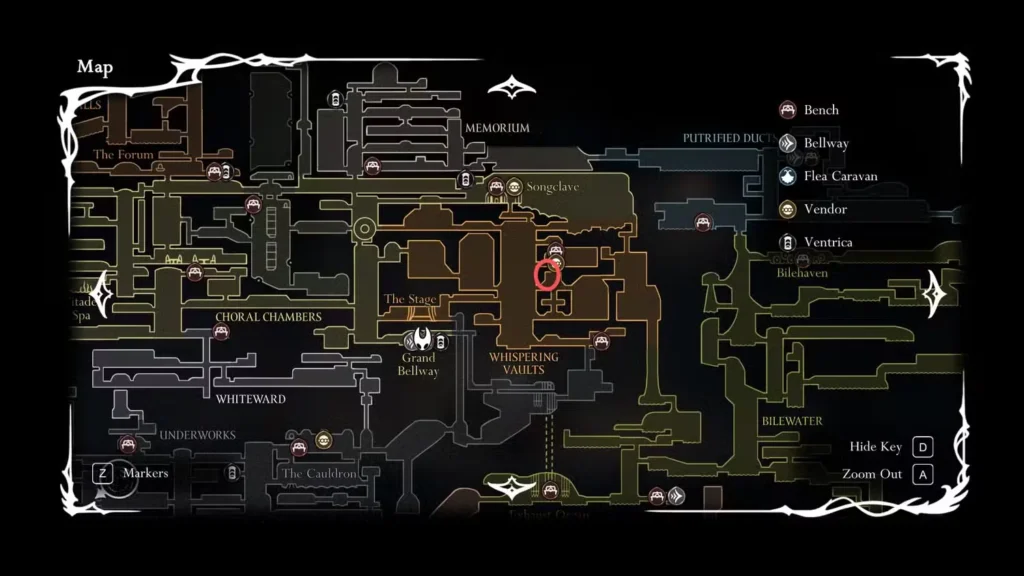
Mask Shard #7: Whispering Vaults Secret Technique This shard uses the same discovery method as the Whispering Vaults map – hitting seemingly solid ceilings to reveal hidden passages. The multi-step process rewards players who’ve learned to question environmental assumptions.
Mask Shard #8: Cogwork Core Arena Trial From the Threefold Melody quest location, this shard requires descending into an arena battle. The combat challenge feels thematically appropriate for the mechanical Cogwork Core area, and the reward placement creates natural exploration flow.
Ability-Dependent Late Game Discoveries
Mask Shard #10: Far Fields Skull Cave The Clawline skill opens access to this skull cave north of the Seamstress location. The grappling hook’s versatility shines here, demonstrating why tool upgrades matter beyond their initial introduction.

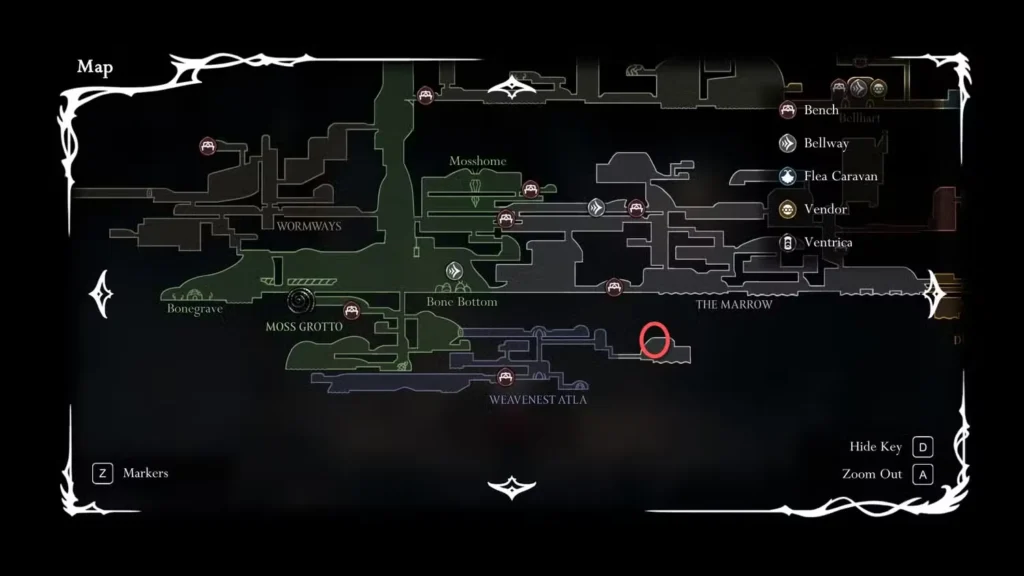
Mask Shard #11: Weavenest Atla Parkour Chamber After warping to lower Weavenest Atla, the double jump ability becomes essential for wall-sticking navigation. The hidden breakable wall leads to a Marrow-themed chamber that perfectly blends aesthetic design with platforming challenge.
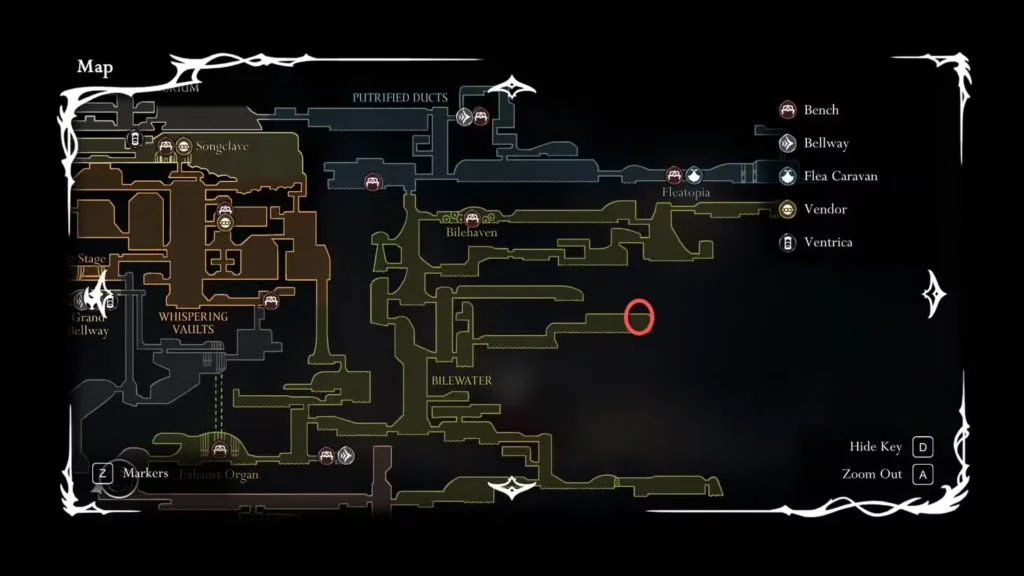
Mask Shard #12: Bilewater’s Eastern Corridor Whether approaching from Putrified Ducts or the Bilewater area, this shard caps off a long eastward corridor. The placement rewards thorough exploration of Bilewater’s more remote sections.
Key-Gated and Special Access Shards
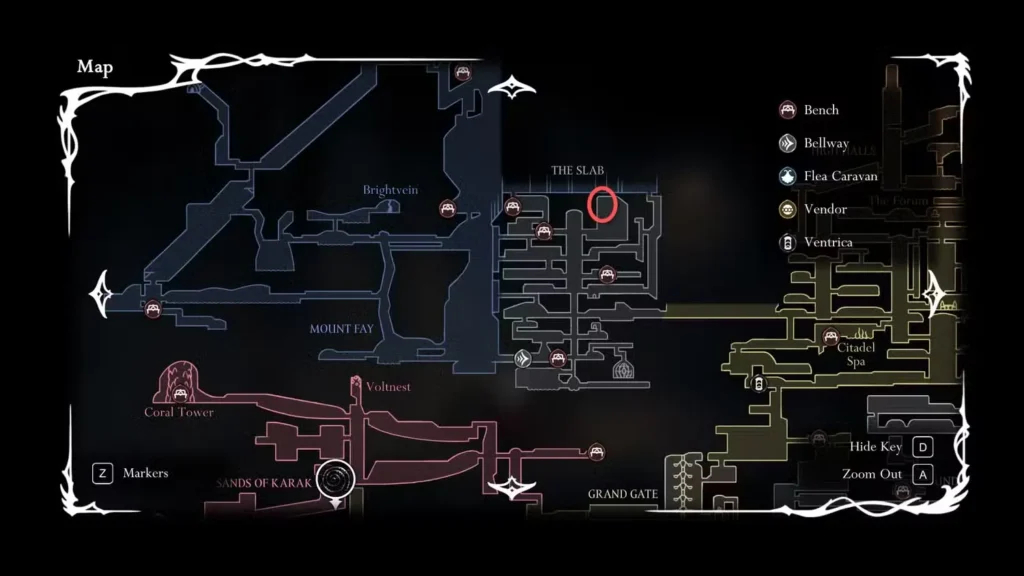
Mask Shard #13: The Slab Prison Break The Key of Apostate unlocks more than just doors – it reveals this health upgrade in The Slab’s upper prison area. The key’s rarity makes this feel like a significant discovery.
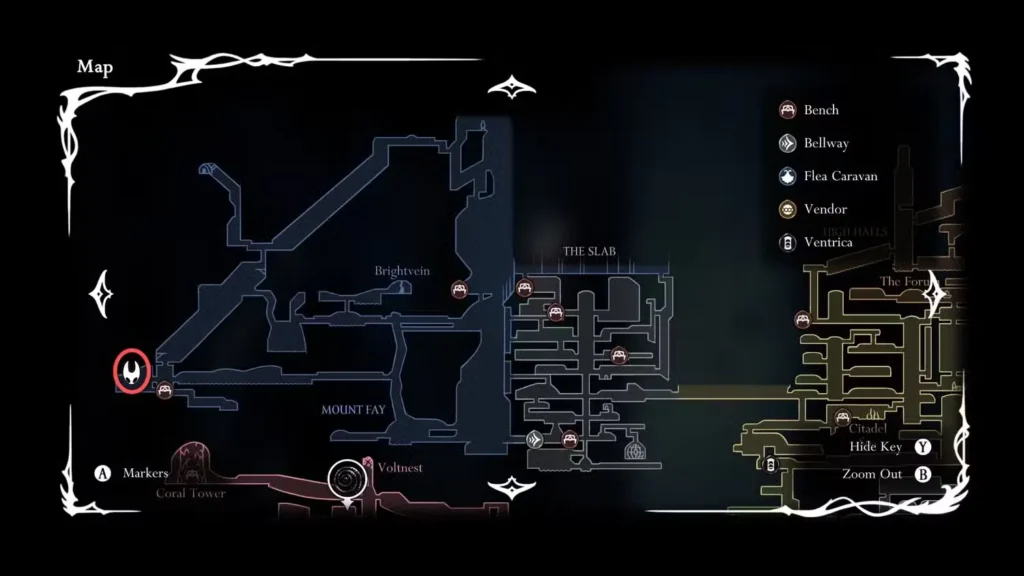
Mask Shard #14: Mount Fay’s Broken Tower Revisiting previous areas with new abilities defines metroidvania design. After obtaining double jump on Mount Fay, returning to the southwestern bench reveals the broken tower’s climbable interior and its hidden reward.
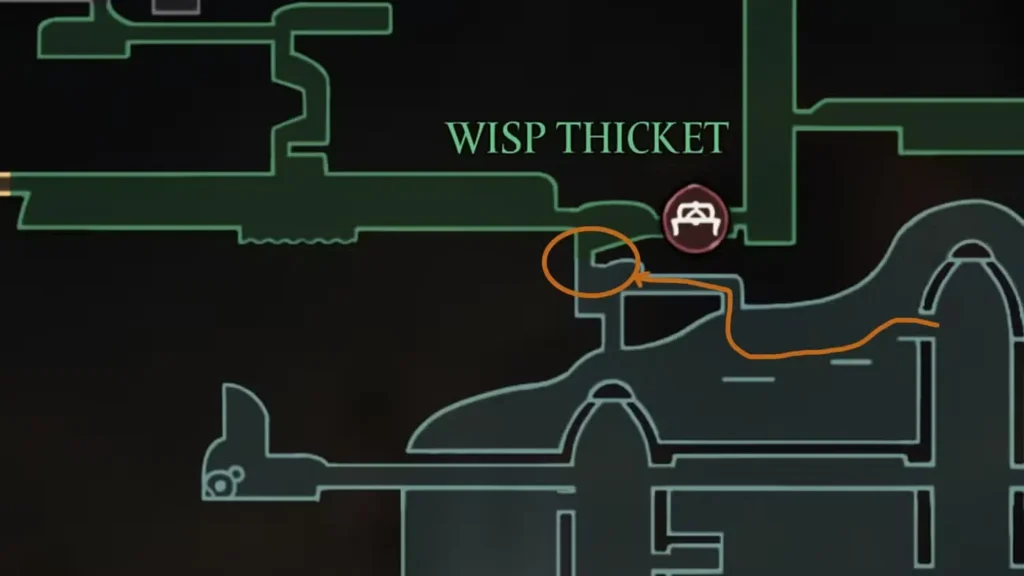
Mask Shard #15: Wisp Thicket’s Aquatic Challenge Reaching Wisp Thicket from Greymoor already demonstrates exploration commitment. The subsequent swimming sequence through maggot water and wall-bouncing challenge creates a memorable discovery experience.
Act 3 Exclusive Rewards
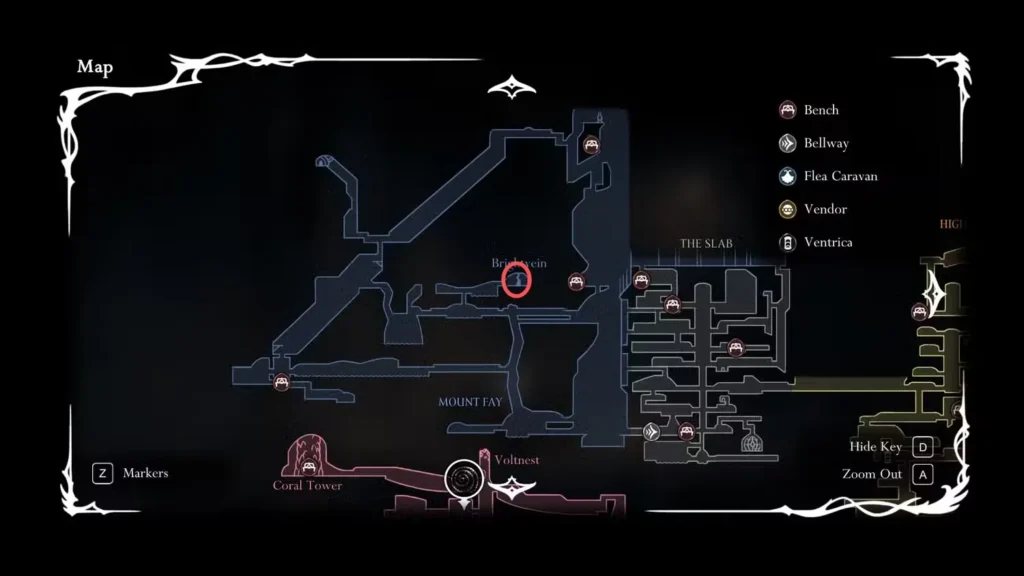
Mask Shard #16: Brightvein’s Icy Ascent Act 3 content gates the final five shards behind significant progression milestones. Brightvein’s secret room in Mount Fay requires the Silk Soar ability to access its ceiling opening, followed by ice-breaking platforming that showcases late-game environmental variety.
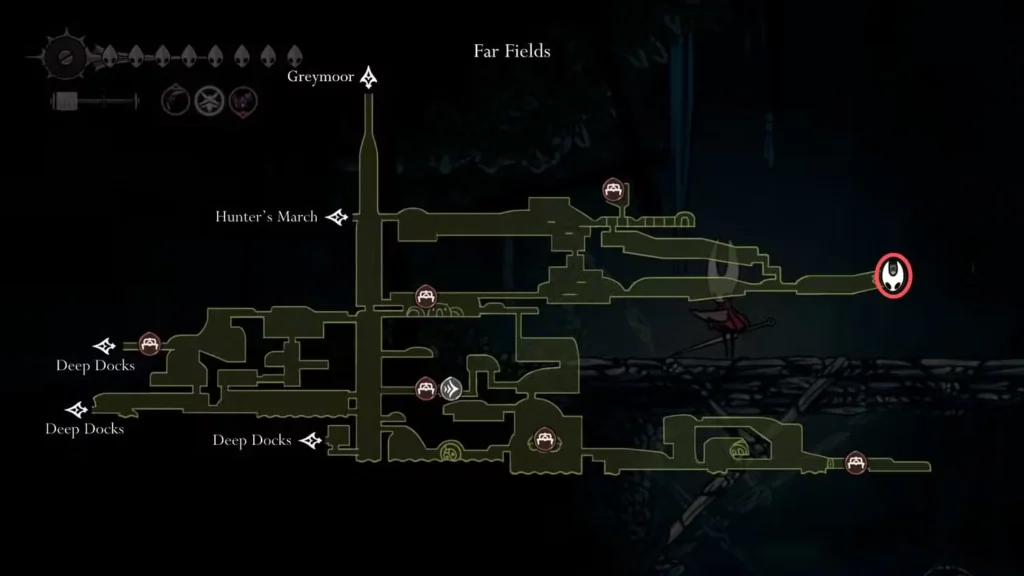
Mask Shard #17: Sprintmaster Swift’s Racing Trials The Sprintmaster racing challenge in Far Fields tests speed and precision across three increasingly difficult races. This shard rewards mastery of Hornet’s movement abilities rather than simple discovery.
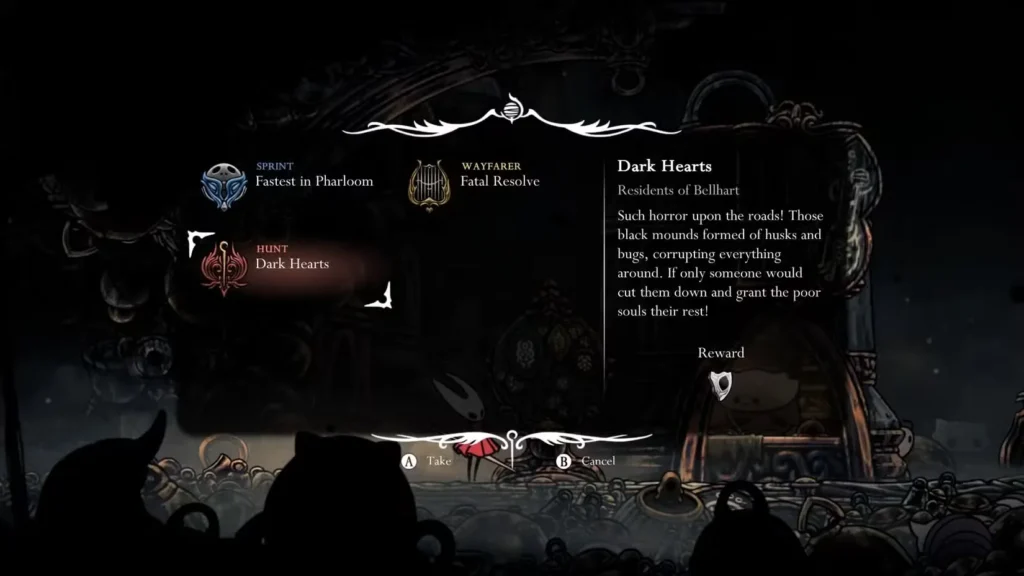
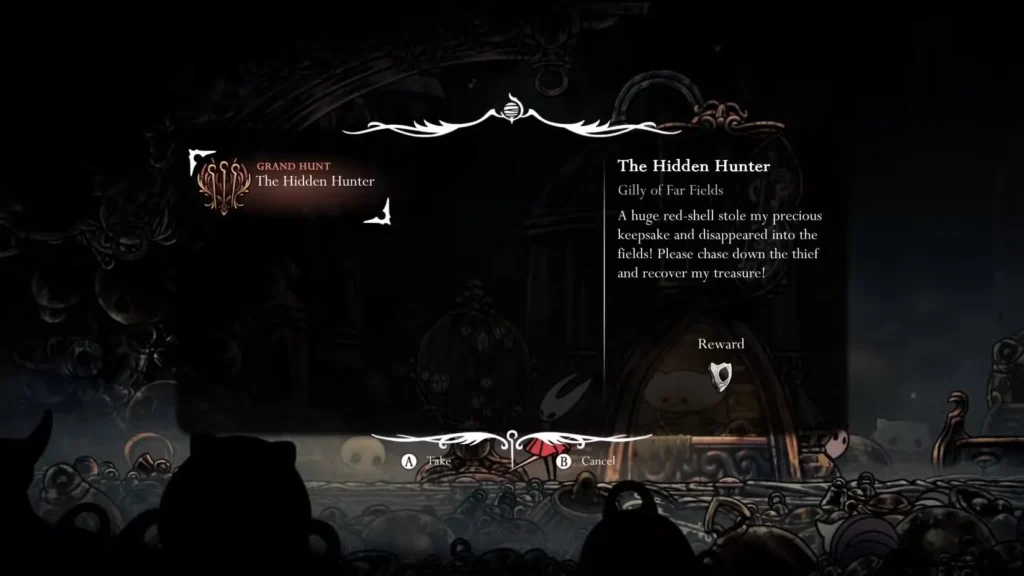
Mask Shard #18-19: Bellhart’s Dangerous Hunts The Dark Hearts quest and Hidden Hunter mission represent Bellhart Wishwall’s most challenging offerings. These late-game hunts test combat skills against formidable foes, making the Mask Shard rewards feel truly earned.
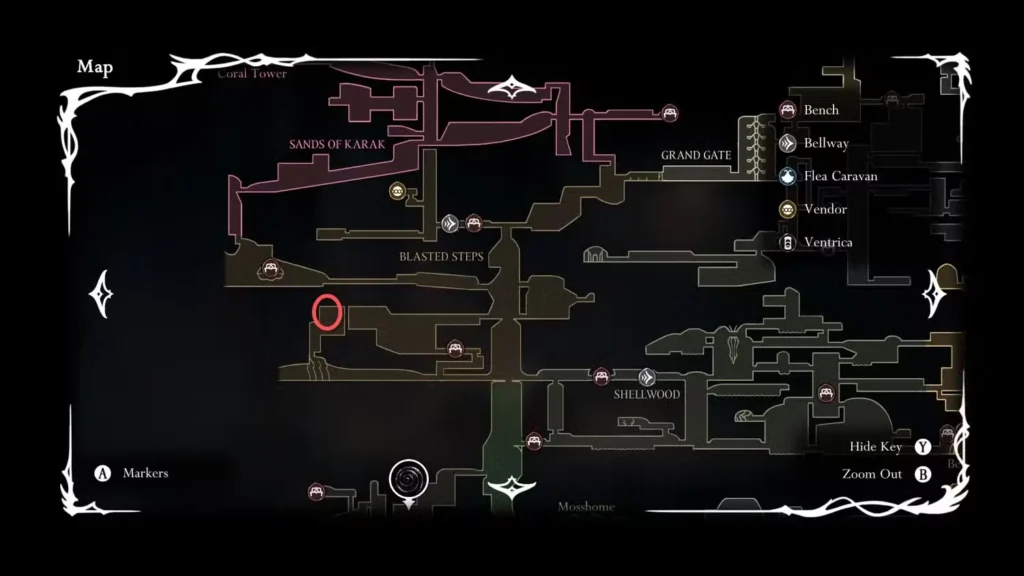
Mask Shard #20: Blasted Steps’ Final Secret Your health upgrade journey concludes where many players first attempted to leave Pharloom. Instead of exiting at Blasted Steps, use Silk Soar to reveal the hidden chamber above. This final shard provides narrative closure while rewarding thorough exploration.
Optimal Collection Strategy
Phase 1 (Early Game): Purchase the Bone Bottom shard immediately, then focus on easily accessible exploration rewards (#2, #4, #5).
Phase 2 (Ability Unlocks): As you gain new movement options, revisit previous areas for ability-gated shards (#10, #11, #14, #15).
Phase 3 (Quest Integration): Complete major side quests to access merchant shards and quest rewards (#6, #9, #18, #19).
Phase 4 (Act 3 Mastery): Tackle the final five shards that require end-game abilities and access (#16, #17, #20).
Combat Impact Analysis
The difference between 5 HP and 10 HP fundamentally changes how you approach Silksong’s challenges. Early boss fights become more forgiving, allowing you to learn patterns without constant restart pressure. Late-game encounters shift from survival tests to strategic battles where you can afford calculated risks.
Boss Fight Examples:
- Bell Beast: Extra health allows aggressive close-combat strategies
- Lace: More room for error during her complex attack patterns
- Hornet vs. Silk Song: Maximum health enables sustained offensive pressure
The Masked Achievement: More Than Completion
Earning the Masked achievement represents mastery of Silksong’s interconnected design. You’ve engaged with the merchant system, completed challenging quests, solved environmental puzzles, and demonstrated platforming skills across multiple difficulty levels. This achievement truly reflects comprehensive game understanding.
Beyond the Basics: Advanced Health Management
With maximum Mask Shards collected, focus shifts to health preservation and recovery optimization. Understanding healing mechanics becomes crucial for maintaining your expanded health pool during extended exploration sessions.
Consider how increased health interacts with:
- Risk-taking in unexplored areas
- Aggressive combat strategies
- Resource management during boss fights
- Confidence in attempting difficult platforming sequences
Investment in Excellence
Mask Shard collection exemplifies Silksong’s reward philosophy – meaningful upgrades earned through diverse gameplay engagement. Whether purchased, discovered, or earned through combat trials, each shard represents progress toward mastery.
The journey from fragile explorer to resilient warrior happens gradually, one Mask Shard at a time. By the time you collect your 20th fragment, you’ll have experienced the full breadth of what Silksong offers: environmental puzzles, merchant interactions, quest completion, combat mastery, and thorough exploration.
Ready to begin your health upgrade journey? Start your adventure on Steam, Nintendo Switch, PlayStation, or Xbox. For more information, visit the official Silksong website.
With maximum health and the Masked achievement unlocked, you’ll be prepared for whatever challenges Pharloom’s deepest secrets might hold!