Collecting all 65 tools in Hollow Knight Silksong is one of the game’s most rewarding challenges – and honestly, one of its trickiest. Unlike the original Hollow Knight where charms were your main focus, Silksong’s tool system is way more complex and diverse. You’ve got four distinct categories to master, each serving completely different purposes in your journey through Pharloom.
What makes this particularly challenging is that many tools are hidden behind obscure side quests, tucked away in secret areas, or require specific story progression to unlock. But here’s the thing – having the right tools can completely transform your Silksong experience, turning difficult encounters into manageable fights and opening up entirely new strategies.
Let me walk you through every single tool in the game, organized by type, with practical advice on which ones to prioritize and how to get them efficiently.
Understanding Silksong’s Tool System
Before diving into the complete list, it’s crucial to understand how Silksong’s tool system works. Unlike Hollow Knight’s charm system, tools are divided into four distinct color-coded categories:
White Tools (Silk Skills): These are your active combat abilities that consume Silk to use. Think of them as Silksong’s version of spells – powerful attacks that can turn the tide of battle when used strategically.
Red Tools (Consumable Weapons): Throwing weapons and consumables that use physical resources. These are perfect for hit-and-run tactics and dealing with specific enemy types.
Blue Tools (Utility Items): Passive effects that enhance your abilities, movement, or resource management. These often provide subtle but game-changing improvements.
Yellow Tools (Equipment): Defensive and enhancement items that modify how Hornet functions. Many of these provide permanent passive benefits.
Understanding these categories helps you build effective loadouts for different situations. For more strategic guidance on tool management, check out our crafting kits guide.
White Tools – Silk-Based Combat Skills
These are your powerhouse abilities – the tools that define how you approach combat in Silksong. Each requires Silk to use, so managing your Silk meter becomes crucial.
Silkspear

Location: Bind the statue in the Mosshome area of Moss Grotto
Effect: Deadly Weaver technique that throws the needle forward with silk-amplified force
This is often one of the first major Silk skills you’ll unlock, and it remains useful throughout the entire game. The range and damage make it excellent for both boss fights and clearing out groups of enemies safely.
Thread Storm

Location: Bind the statue in the Craw Lake area of Greymoor
Effect: Casts the needle in a whirl of Silk, creating a defensive barrier that damages nearby foes
Thread Storm is invaluable for crowd control situations. When you’re surrounded or facing multiple fast-moving enemies, this tool can give you the breathing room you need to reposition.
Cross Stitch

Location: Reward for beating the Phantom boss in the Exhaust Organ area of Bilewater
Effect: Binds Silk around the needle to deflect attacks and instantly counter-strike
One of the most skill-intensive tools in the game, but incredibly powerful when mastered. The timing window is tight, but successfully deflecting an attack and landing the counter feels amazing.
Sharpdart

Location: Bind the statue in Weavenest Karn, west of the Wormways
Effect: Pierce through enemies in a blur of blade and Silk
Perfect for dealing with armored enemies or hitting multiple targets in a line. The piercing effect makes it especially useful against shielded foes.
Rune Rage

Location: Reward for beating the First Sinner boss at The Slab
Effect: Forgotten Weaver technique that sews rending runes upon enemies
This late-game tool deals massive damage over time. It’s particularly effective against bosses with large health pools, as the rune effect continues damaging them even while you focus on dodging.
Pale Nails

Location: Bind Grand Mother Silk’s arm at the top of The Cradle (Act 3)
Effect: Spin talons from thread that seek out enemies
The ultimate Silk skill – these homing projectiles are incredibly powerful and perfect for the game’s toughest encounters. By the time you get this, you’ll need every advantage you can get.
Red Tools – Consumable Weapons
These tools use physical resources rather than Silk, making them perfect for conserving your magical energy while still dealing solid damage.
Straight Pin

Location: Found on a table above Grindle’s cell in The Marrow
Effect: Light throwing tool designed for rapid attacks
Your basic throwing weapon, but don’t underestimate it. The fast throw speed makes it excellent for interrupting enemy attacks or finishing off low-health foes.
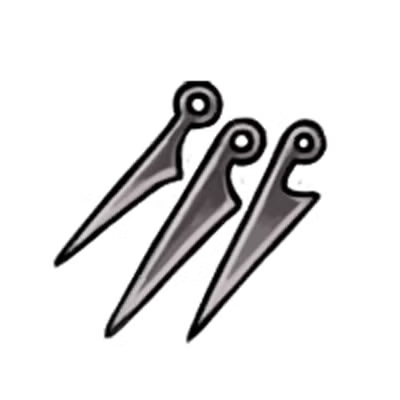
Threefold Pin
Location: Secret cave above the Craw Lake area of Greymoor
Effect: Flat, layered weapon thrown in sets of three
Triple the projectiles means triple the coverage. Great for hitting moving targets or dealing with multiple enemies simultaneously.
Sting Shard

Location: Crafted by Forge Daughter in Deep Docks (requires 1 Craftmetal + 140 Rosaries)
Effect: Lethal trap that pierces enemies on contact
These stationary traps are perfect for controlling enemy movement or setting up ambushes. Place them strategically before boss fights to create damage zones.
Longpin

Location: Behind the pink wasp nest in Shellwood
Effect: Weighted pin designed to pierce tough shells
When you’re facing heavily armored enemies, this is your go-to option. The extra weight gives it serious penetration power.
Curveclaw & Curvesickle
Curveclaw Location: Purchase from Mottled Skarr in Hunter’s March (140 Rosaries)
Curvesickle Location: Complete the target challenge in Far Fields to upgrade your Curveclaw

The Curveclaw’s boomerang effect makes it incredibly versatile, while the Curvesickle upgrade turns it into a devastating weapon for skilled players. Master the timing, and you can hit the same enemy multiple times with one throw.

For more details on this weapon upgrade sequence, check our essential beginner tips guide.
Throwing Ring

Location: Trigger Trail’s End Wish in Bellhart, then find Shakra in northeast Bilewater
Effect: Hardened weapon that rebounds between enemies and surfaces
Shakra’s signature weapon is all about positioning and timing. In the right hands, one throw can damage multiple enemies as it bounces around the battlefield.
Explosive and Specialty Tools
- Pimpillo: Crafted in Greymoor (1 Craftmetal) – Explosive pouch that detonates on impact
- Conchcutter: Found in Coral Tower cave, Sands of Karak – Spiral weapon that ricochets
- Silkshot Series: Three upgrade tiers of an ancient Weaver weapon found in Bilewater
The Silkshot progression is particularly interesting – you can upgrade the same base weapon with three different NPCs to get different versions, each with unique properties.
Blue Tools – Utility and Enhancement
These tools provide passive benefits or active utilities that enhance your exploration and combat capabilities.
Essential Utility Tools
Flintslate
Location: Found on a table in Deep Docks
Effect: Temporarily super-heats the needle blade, adding flame damage
This damage boost is temporary but significant. Save it for tough boss encounters or challenging sections where you need every advantage.
Flea Brew

Location: Reward for finding 5 fleas for Fleamaster Mooshka in The Marrow
Effect: Temporarily increases movement and attack speed
The speed boost affects both your mobility and your DPS, making this incredibly valuable for both exploration and combat. The effect duration is generous, so don’t be afraid to use it liberally.
Plasmium Phial

Location: Complete Alchemist’s Assistant Wish for Zylotol in Wormways
Effect: Allows gaining health beyond natural limits
This overheal effect can be a lifesaver in difficult encounters. It essentially gives you extra masks temporarily, which can mean the difference between victory and defeat.
Protection and Defense Tools
Druid’s Eye/Eyes

Location: Complete Berry Picking Wish / Find all Mossberries (Act 3)
Effect: Forms Silk when taking damage
The upgraded version provides even more Silk generation, effectively turning damage taken into a resource. This creates interesting risk/reward gameplay where taking calculated damage can be beneficial.
Magma Bell
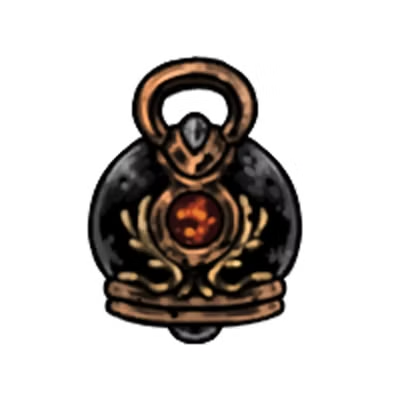
Location: Crafted by Forge Daughter (1 Craftmetal + 110 Rosaries)
Effect: Reduces flame and magma damage
Essential for the Deep Docks area and any volcanic regions. Don’t attempt those areas without this protection – the environmental damage will overwhelm you quickly.
Warding Bell
Location: Found on a platform in Far Fields
Effect: Shields bearer while binding wounds
This healing protection is invaluable throughout the game. Being able to heal safely opens up more aggressive playstyles since you know you can always recover.
For more information on finding this crucial tool, see our Warding Bell location guide.
Yellow Tools – Equipment and Permanent Upgrades
These tools provide permanent enhancements to Hornet’s capabilities, often fundamentally changing how you approach the game.
Movement and Mobility
Multibinder
Location: Purchase from Frey in Bellheart (880 Rosaries) after My Missing Courier Wish
Effect: Extends binding time but increases healing effect
This expensive tool is worth every Rosary. The enhanced healing makes you significantly more durable, while the extended animation gives you more protection during the heal.
Weavelight
Location: Reward for beating Moss Mothers boss in Weavenest Atla
Effect: Increases Silk regeneration speed
Faster Silk regeneration means you can use your powerful Silk skills more frequently. This tool single-handedly changes your combat approach, allowing for more aggressive strategies.
Spool Extender
Location: Purchase from Jubilana in Songclave (720 Rosaries) after Wandering Merchant Wish
Effect: Increases maximum Silk storage
More Silk capacity means more consecutive skill uses. Combined with Weavelight, this creates a powerful synergy for Silk-heavy builds.
Combat Enhancement Tools
Sawtooth Circlet
Location: Crafted by Twelfth Architect (1 Craftmetal + 230 Rosaries)
Effect: Cloak flares spin blades, damaging surrounding enemies
This tool adds a defensive option to your cloak, turning evasive maneuvers into offensive opportunities. The timing takes practice, but it’s incredibly satisfying when mastered.
Quick Sling
Location: Break through false ceiling in Bilewater
Effect: Doubles the number of tools thrown
This fundamentally changes how red tools work. Suddenly, every throwing weapon becomes twice as effective, making consumable-based builds much more viable.
Volt Filament
Location: Reward for beating Voltvyrm boss in Sands of Karak
Effect: Imbues Silk Skills with electric charge
Adding elemental damage to your Silk skills creates new strategic possibilities and helps against enemies resistant to physical damage.
Specialized and Rare Tools
Some tools serve very specific purposes or require extensive effort to obtain, but provide unique benefits that can’t be found elsewhere.
Economic and Resource Tools
Snitch Pick
Location: Purchase from Grindle in Blasted Steps (740 Rosaries)
Effect: Harpoon into foes to steal rosaries and shell shards
This tool literally pays for itself by generating extra resources from every enemy kill. Essential for players who want to purchase everything the game offers.
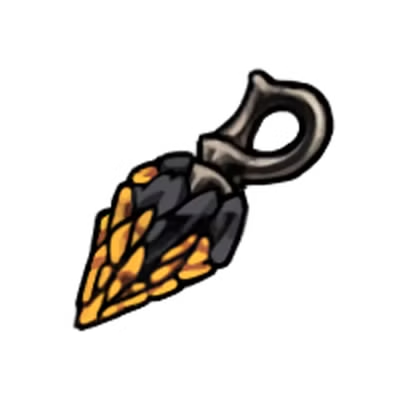
Magnetite Brooch
Location: Purchase from Pebb in Bonebottom (120 Rosaries)
Effect: Pulls loose rosaries toward the wearer
No more missing dropped Rosaries due to tight platforming or fast-paced combat. This quality-of-life improvement is worth its weight in beads.
Dead Bug’s Purse
Location: Found on a bug corpse in Wormways
Effect: Retain some rosaries upon defeat
Insurance against death – particularly valuable in Steel Soul mode or during challenging sections where you’re likely to die repeatedly.
Tool Synergies and Build Strategies
Understanding how tools work together is crucial for advanced play. Here are some powerful combinations:
The Silk Master Build:
- Weavelight (faster regeneration)
- Spool Extender (more capacity)
- Volt Filament (elemental damage)
- Egg of Flealia (reduced costs at full health)
This setup maximizes your Silk skill usage, allowing you to maintain aggressive pressure with frequent skill use.
The Thrown Weapon Specialist:
- Quick Sling (double throws)
- Curvesickle (returning weapon)
- Shell Satchel (more crafted tools)
- Snitch Pick (resource generation)
Perfect for players who prefer ranged combat and resource management over direct melee engagement.
The Defensive Tank:
- Multibinder (better healing)
- Fractured Mask (critical damage protection)
- Warding Bell (healing protection)
- Weighted Belt (less knockback)
This build focuses on survivability, allowing you to face-tank damage while maintaining strong healing capabilities.
For more strategic insights on building effective loadouts, check our merchant buying priority guide.
Pro Tips for Tool Collection
Prioritize exploration rewards over purchased tools: Many of the best tools are hidden in the world rather than sold by merchants. Always explore thoroughly before spending Rosaries.
Complete side quests early: Tools locked behind wishes and quests often become available much earlier than you might expect. Don’t save all the side content for the end.
Manage your Craftmetal carefully: With only limited Craftmetal available, choose your crafted tools wisely. Prioritize tools that provide permanent benefits or fill gaps in your current loadout.
Experiment with combinations: The tool system is designed to reward experimentation. Don’t be afraid to try unusual combinations – you might discover synergies that completely change your playstyle.
Keep track of Steel Soul exclusive tools: Some tools like Shell Satchel are only available in Steel Soul mode, so plan accordingly if you’re going for 100% completion.
Essential Tools for Different Gameplay Phases
Early Game Must-Haves:
- Compass (map marking)
- Warding Bell (healing protection)
- Magnetite Brooch (resource collection)
- Any basic throwing weapon
Mid-Game Power Spikes:
- Weavelight (Silk regeneration)
- Multibinder (healing upgrade)
- Quick Sling (double throws)
- Cross Stitch (if you can master the timing)
Late Game Game-Changers:
- Pale Nails (ultimate Silk skill)
- Druid’s Eyes (maximum Silk generation)
- Spool Extender + Egg of Flealia combo
- Volt Filament (elemental enhancement)
Where to Focus Your Collection Efforts
Given that finding all 65 tools in a single playthrough is extremely challenging, here’s how to prioritize your collection efforts:
Start with utility tools that improve exploration and resource collection. Tools like Compass, Magnetite Brooch, and Warding Bell provide immediate quality-of-life improvements.
Focus on combat tools that match your preferred playstyle. If you love Silk skills, prioritize Weavelight and Spool Extender. If you prefer throwing weapons, get Quick Sling early.
Save expensive purchased tools for last, after you’ve collected all the “free” tools from exploration and quest rewards.
Don’t neglect defensive options. Tools like Fractured Mask and Multibinder might not seem exciting, but they often make the difference in difficult encounters.
The Completionist’s Challenge
Collecting all 65 tools is one of Silksong’s ultimate challenges, requiring thorough exploration, quest completion, and strategic resource management. Some tools are mutually exclusive or only available during specific story segments, so achieving 100% collection often requires multiple playthroughs or very careful planning.
The reward for this dedication goes beyond just completion percentage – having access to every tool allows for incredible build diversity and strategic options. You’ll discover tool combinations and synergies that completely transform how Silksong plays.
Whether you’re aiming for complete collection or just want to optimize your current loadout, understanding these 65 tools is essential for mastering Hornet’s journey through Pharloom. Each tool serves a purpose, and finding the right combination for your playstyle is part of what makes Silksong’s progression system so engaging.
For more detailed progression guides and strategic advice, check out our complete Silksong beginner’s guide to make sure you’re getting the most out of every tool you collect.
The world of Pharloom is full of secrets, and these 65 tools are some of its greatest treasures. Happy hunting!
Ready to start your tool collection journey? Get Hollow Knight: Silksong on Steam, Nintendo Switch, PlayStation, or Xbox. For the latest updates and strategies, visit the official Silksong website.
jérome에 대한 당신의 생각을 공유해줘서 감사합니다.
Regards
Everything is very open with a precise clarification of the
issues. It was really informative. Your site is very useful.
Many thanks for sharing!