Find the Blasted Steps map location in Hollow Knight Silksong with our complete guide. Learn how to navigate this dangerous desert area and locate cartographer Shakra safely.
Navigating the Treacherous Blasted Steps Desert
If you thought Hollow Knight Silksong was challenging before, wait until you reach the Blasted Steps. This unforgiving desert marks the climactic finale of Act 1, and honestly, it’s designed to test every skill you’ve learned up to this point. After your intense battle with the Widow in Bellhart, you’ll find yourself in what might be the most hostile environment Hornet has faced yet.
The Blasted Steps completely flips the script on traditional platforming. Instead of the familiar threat of lava pits, you’re dealing with something far more sinister: sand worms that will instantly devour you if you so much as touch the desert floor. Add in violent wind gusts that can throw off your carefully planned jumps, and you’ve got a recipe for some seriously heart-pounding moments.
Why You Need the Blasted Steps Map ASAP
Here’s the thing about the Blasted Steps – getting lost here isn’t just inconvenient, it’s potentially game-ending. The combination of environmental hazards makes backtracking a nightmare, so having that map is absolutely crucial for your sanity and progress.
Key reasons to prioritize the map:
- Wind patterns become predictable when you can see the full layout
- Safe routes are easier to plan with the complete area view
- Secret areas and upgrades are much easier to spot
- Boss encounter preparation becomes more strategic
Step-by-Step Guide to Finding Shakra the Cartographer
Just like every other area in the game, you’ll need to track down Shakra, the wandering cartographer, to get your hands on the Blasted Steps map. The good news? They’re not hiding in some impossible-to-reach location. The bad news? Getting there safely requires some serious platforming skills.
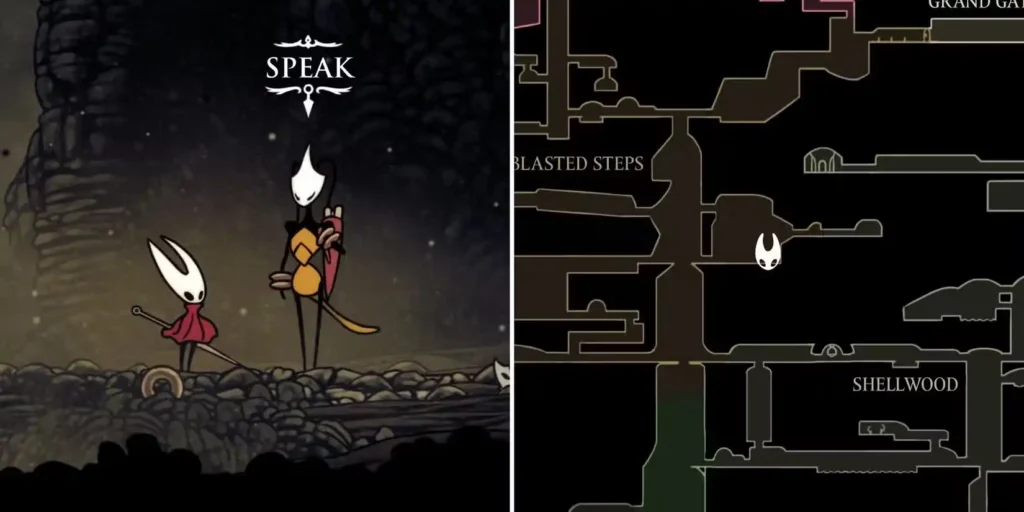
Starting Your Journey from Shellwood
From the Shellwood transition point:
- Begin at the bench – You’ll spawn near a save point, which is perfect for practicing the upcoming challenges
- Head left across small platforms – Take your time here; the wind patterns start subtle but get intense quickly
- Look for the upward-sloping tunnel – This is your gateway to the main Blasted Steps area
- Use your Cling Grip ability – If you haven’t picked this up in Shellwood, you’ll need to backtrack (trust me, it’s essential)
Navigating the Vertical Climb
The Blasted Steps is what I like to call a “vertical nightmare.” Unlike the more horizontal areas you’ve explored, this place demands serious wall-climbing skills:
- Scale the walls carefully – The wind can knock you off mid-climb
- Reach the top of the shaft – Don’t rush this part; falling means starting over
- Move right at the summit – You’re almost to the safe zone
- Continue left to find another bench – Use this as a checkpoint and healing opportunity

The Final Push to Shakra’s Location
From the second bench, you’re entering the true Blasted Steps territory. Here’s where things get really intense:
Navigation tips for the final stretch:
- Move left into the main area – The visual shift is dramatic and intimidating
- Mind the wind gusts – They’re not just annoying; they’re potentially deadly
- Head right when ready – This seems counterintuitive, but trust the path
- Handle the jumping challenges – Each platform requires timing and patience
- Watch for the red drill-head enemy – This flying menace is your landmark
Pro tip: Those wind currents aren’t random. Once you understand the pattern, you can actually use them to extend your jumps and reach otherwise impossible platforms.
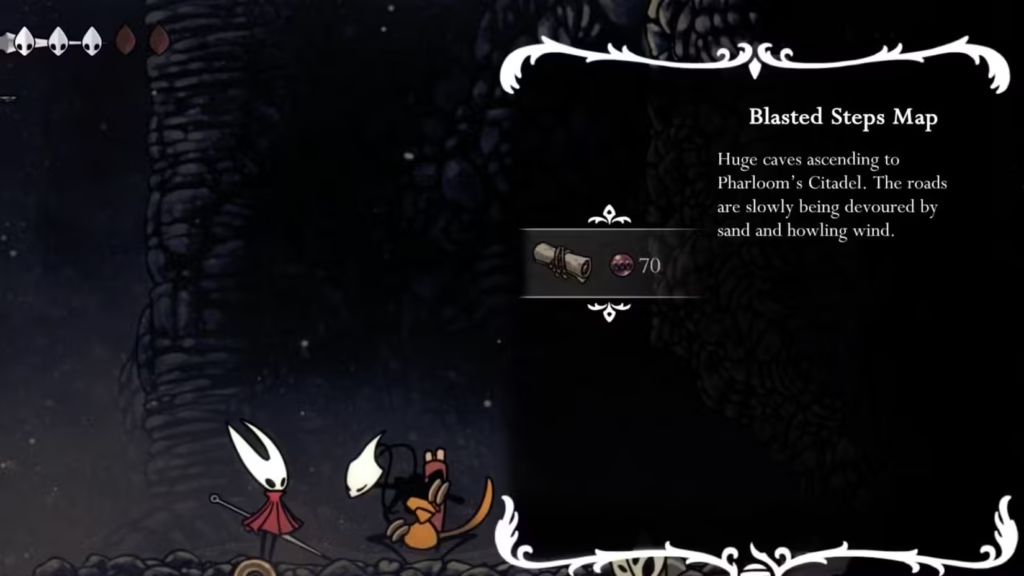
Making the Purchase: 70 Rosaries Well Spent
When you finally spot Shakra waiting in their small cave, you’ll breathe a sigh of relief. The map costs 70 Rosaries, which might seem steep, but considering the alternative of wandering blindly through this death trap, it’s absolutely worth every bead.
Before you make the purchase, make sure you have enough Rosary Beads saved up. If you’re running low, consider doing some quick farming in earlier areas before tackling this purchase.
Essential Preparation Tips for Blasted Steps Success
Combat Readiness
The Blasted Steps isn’t just about platforming – you’ll face some seriously tough enemies:
- Great Conchflies – These aerial threats are relentless
- The Last Judge – Act 1’s final boss awaits
- Various desert-adapted creatures – Each with unique attack patterns
Highly recommended: Grab the Needle Strike charged attack from the Pinstress before venturing here. This upgrade can turn challenging fights into manageable encounters.
Movement Abilities Checklist
Before attempting the Blasted Steps, ensure you have:
- Cling Grip – Absolutely non-negotiable for wall climbing
- Dash ability – Essential for covering gaps against wind resistance
- Double jump (if available) – Makes wind navigation much safer
Alternative Route: The Sinner’s Road Option
Here’s something interesting that many players miss: the Blasted Steps isn’t your only option for progressing through Act 1. There’s an alternate route called Sinner’s Road that some players find more manageable.
However, I’d recommend experiencing the Blasted Steps at least once. The area contains crucial upgrades and story elements that enhance your overall Silksong experience.
What to Expect After Getting the Map
Once you have the Blasted Steps map in hand, you’ll gain access to:
- Complete area layout – No more guessing about safe paths
- Hidden room locations – Several secret areas become obvious
- Optimal boss approach routes – Plan your Last Judge strategy
- Upgrade and collectible positions – Don’t miss important items
Platform-Specific Availability
Ready to experience this challenging desert for yourself? Hollow Knight Silksong is available across multiple platforms:
- Steam – Download on Steam
- Nintendo Switch – Get it on Nintendo eShop
- PlayStation – Available on PlayStation Store
- Xbox – Download from Xbox Store
Final Thoughts: Embrace the Challenge
The Blasted Steps represents everything that makes Hollow Knight Silksong special – it’s brutally challenging, visually stunning, and incredibly rewarding to master. Getting that map early will save you countless deaths and frustration, but don’t let the difficulty discourage you.
Remember, every Hollow Knight Silksong player has struggled with this area. The key is patience, practice, and smart preparation. Once you’ve conquered the Blasted Steps, you’ll feel ready to take on anything Act 2 throws at you.
Ready for more Silksong adventures? Check out our guides on navigating Act 2 and essential early game upgrades to continue your journey through Pharloom.