Complete the Broodfeast quest in Hollow Knight Silksong with our guide. Learn how to efficiently collect seared, shredded, and skewered organs using specific tools and farming strategies.
Understanding the Broodfeast Hunt Quest
The Broodfeast quest in Hollow Knight: Silksong represents one of the game’s most intensive collection challenges, requiring you to defeat over 60 enemies using three specific tool types to harvest their organs. While this might sound grim, the quest actually serves as an excellent introduction to advanced tool usage and demonstrates how different weapons create unique combat opportunities.
What makes this quest particularly interesting from a gameplay perspective is how it forces you to master tools you might otherwise overlook. Many players stick to their preferred weapons, but Broodfeast ensures you’ll experience the full range of Silksong’s combat variety while building proficiency with specialized equipment.
The quest also introduces an important mechanical concept: kill credit attribution. Understanding which tool delivers the final blow becomes crucial not just for this quest, but for mastering combat efficiency throughout your entire Silksong journey.

Meeting the Huntress: Quest Location and Access
Finding Putrified Ducts: The Broodfeast quest begins in the southern section of Putrified Ducts, where you’ll encounter the Huntress. This area represents one of Silksong’s more challenging navigation zones, featuring dense enemy populations and environmental hazards that make exploration genuinely dangerous.
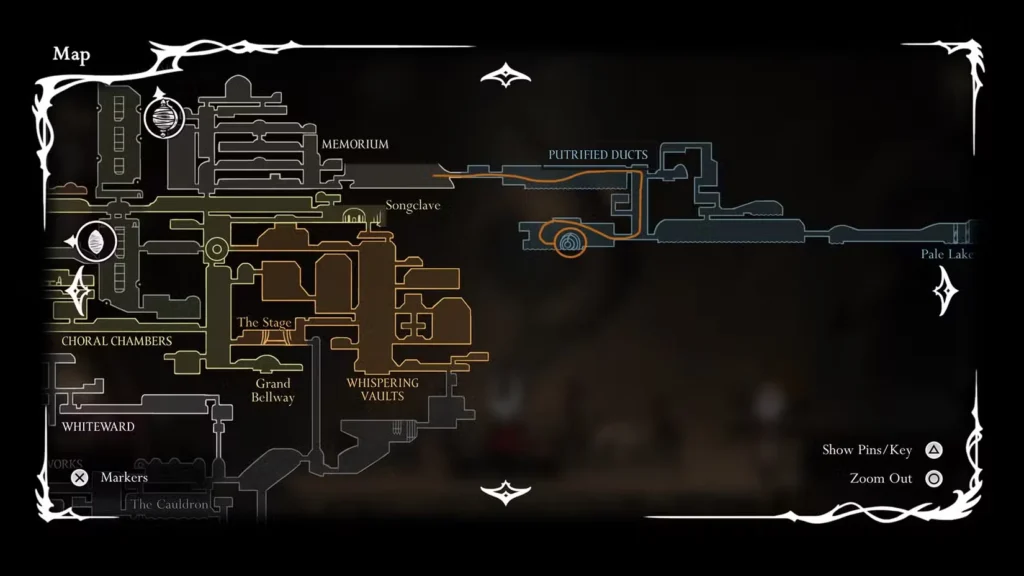
Initial navigation: During your first visit to Putrified Ducts, reaching the Huntress requires traveling to the southwestern corner of the area. The path involves navigating through vine traps and hostile creatures, making this initial journey both a skill test and an introduction to the area’s dangerous atmosphere.
Shortcut establishment: After your first meeting with the Huntress, you can establish a more direct route that allows immediate access from the Putrified Ducts Bench. This quality-of-life improvement becomes essential for efficient quest completion and future visits to the area.
Environmental dangers: Putrified Ducts lives up to its name with numerous vine traps, environmental hazards, and aggressive enemy placements. Take time to learn the area’s layout and danger patterns, as you’ll likely return here multiple times during your Silksong playthrough.
Act Timing and Runtfeast Alternative
Act 2 vs Act 3 timing: The Broodfeast quest remains available if you skip it during Act 2, but transforms into “Runtfeast” in Act 3 due to story developments involving the Huntress and her broods. This name change reflects narrative consequences while maintaining the same mechanical requirements.
Story implications: The transformation to Runtfeast isn’t just a cosmetic change – it represents how Silksong’s world continues evolving based on timing and player choices. Understanding these narrative shifts adds depth to what might otherwise feel like arbitrary quest variants.
Completion strategy: While you can complete this quest in either act, tackling it during Act 2 provides access to rewards that can assist with later challenges. The tools and experience gained from Broodfeast often prove valuable for subsequent content.
Efficient Farming Strategy: The Bench Cycle Method
Core methodology: Instead of wandering randomly through areas hoping to encounter enough enemies, the most efficient approach involves identifying locations with concentrated enemy spawns near benches, then establishing farming cycles that reset spawns through rest.
Location selection criteria: Look for areas with 3-5 enemy spawns within easy reach of a bench. The enemies should be weak enough to defeat quickly but numerous enough to make each cycle worthwhile. Avoid locations with environmental hazards that slow down your farming efficiency.
Cycle optimization: The ideal farming cycle involves: rest at bench → defeat enemies with required tool → collect organs → return to bench → repeat. This method ensures consistent enemy availability while minimizing travel time between encounters.
Multi-tool efficiency: Since you need organs from three different tool types, consider locations where you can efficiently switch between tools during the same farming session. This reduces the total time investment compared to focusing on one organ type at a time.
Seared Organs: Mastering Fire-Based Combat
Tool requirement: 15 seared organs obtained using fire-based tools like the Flintslate or Wispfire Lantern Primary tool: Flintslate (flame-infused needle attacks)
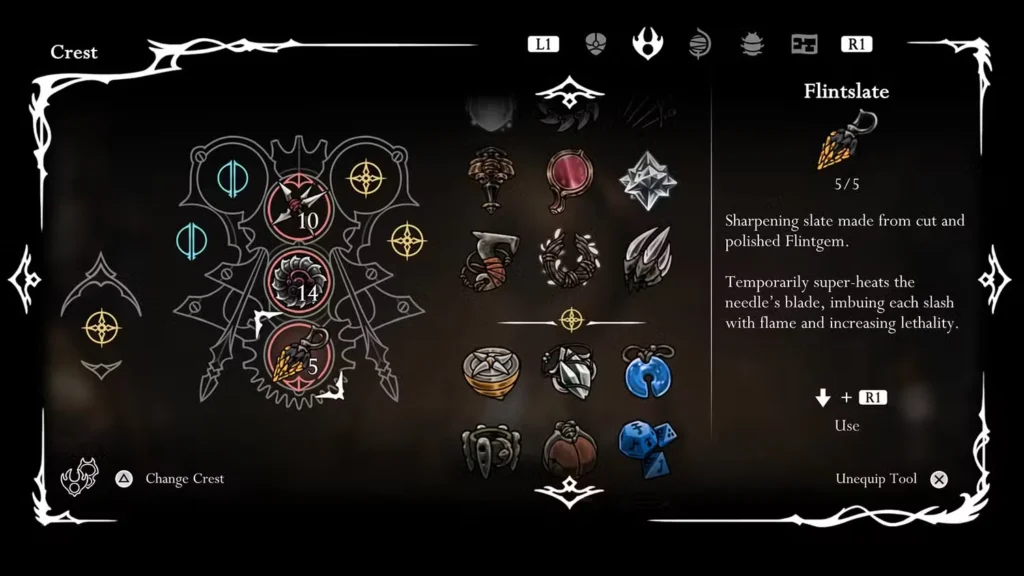
Flintslate mechanics: This tool transforms Hornet’s needle attacks by adding fire damage and burning effects. The visual feedback is satisfying, and the increased damage makes combat more efficient even beyond the quest requirements.
Combat strategy: The key to efficient seared organ collection lies in ensuring the Flintslate delivers the killing blow. Practice timing your attacks so that the fire damage or burning effect secures the final hit rather than follow-up attacks or environmental damage.
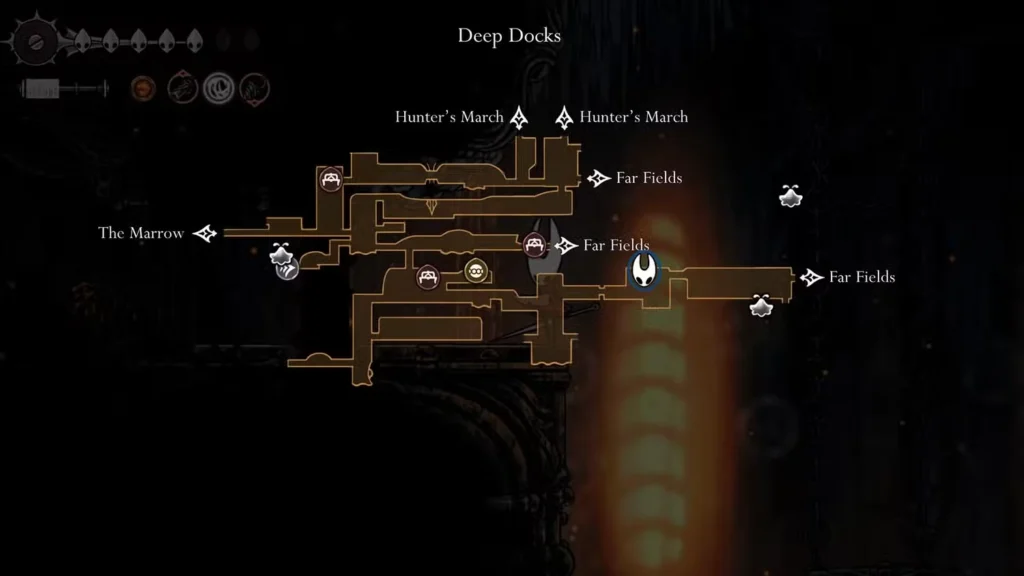
Tool acquisition: The Flintslate becomes available in Deep Docks after unlocking the southern gate with a Simple Key. Plan your progression to ensure you have access to this tool before beginning serious organ farming.
Alternative options: The Wispfire Lantern provides another path to seared organs, though the Flintslate generally offers more reliable results due to its direct attack nature versus the lantern’s area effect mechanics.
Shredded Organs: Cogwork Wheel Mastery
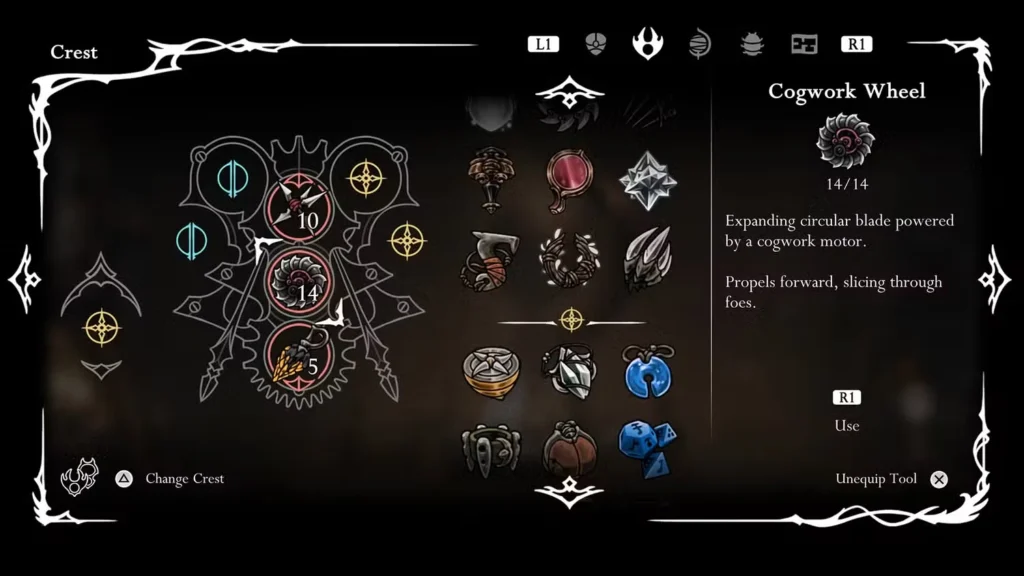
Tool requirement: 35 shredded organs using shredding tools like the Cogwork Wheel or Architect Crest attacks Primary tool: Cogwork Wheel (spinning blade projectile)
Cogwork Wheel mechanics: This tool creates a spinning projectile that moves in front of Hornet, dealing continuous damage to enemies it contacts. The spinning motion creates a distinctive visual effect that makes tracking its damage easy.
Tactical deployment: The Cogwork Wheel excels against groups of weaker enemies or single targets that you can position properly. Learning to predict enemy movement patterns helps ensure the wheel delivers killing blows rather than just softening targets.
Architect Crest synergy: Players using the Architect Crest can potentially earn shredded organs through crest-specific attacks, providing an alternative path that doesn’t require tool switching.
Vendor location: The Cogwork Wheel is available from the Twelfth Architect vendor in the Underworks, making it accessible relatively early in your progression through the Citadel areas.

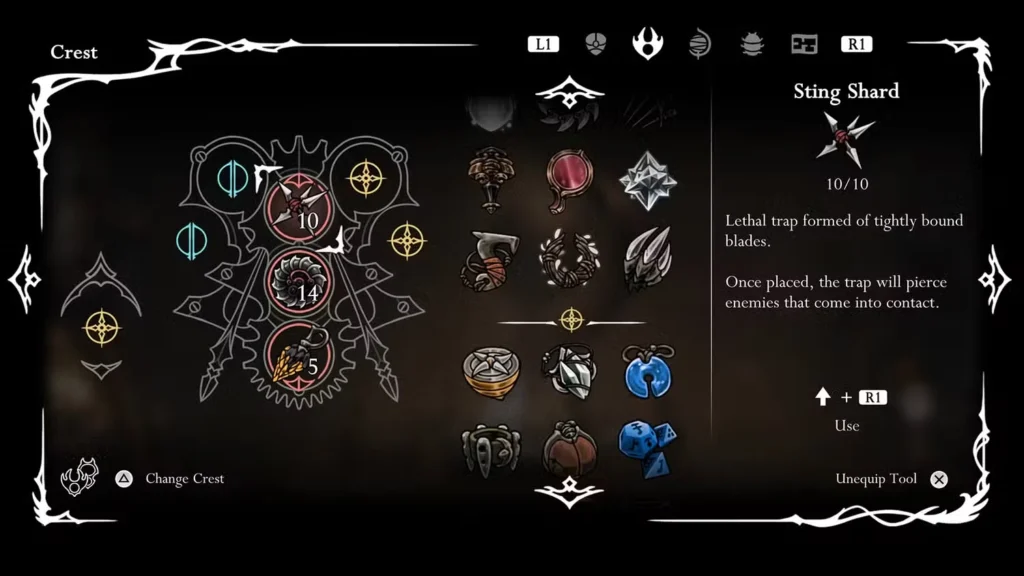
Skewered Organs: Precision Trap Deployment
Tool requirement: 10 skewered organs using skewering tools like the Sting Shard or Longpin Primary tool: Sting Shard (thrown trap that explodes into multiple blades)
Sting Shard complexity: This tool requires more tactical thinking than direct weapons, as you’re essentially setting traps rather than delivering immediate attacks. The thrown shard activates when enemies approach, then explodes into multiple projectiles.
Deployment strategy: Successful Sting Shard usage involves predicting enemy movement patterns and positioning the trap where enemies will naturally path. The explosion timing requires practice, but mastering it provides valuable crowd control capabilities.
Multi-hit mechanics: When the Sting Shard explodes, the multiple blade fragments can potentially hit several enemies simultaneously, making it possible to earn multiple skewered organs from a single trap deployment in dense enemy areas.
Alternative skewering tools: The Longpin provides a more direct skewering approach compared to the Sting Shard’s trap mechanics. Experiment with both tools to determine which suits your combat style and farming efficiency preferences.
Tool Acquisition and Progression Planning
Deep Docks importance: Both the Flintslate and Sting Shard are available from Deep Docks vendors, making progression through this area essential for Broodfeast completion. Plan your exploration to unlock Deep Docks access before attempting serious organ farming.
Simple Key requirement: The southern gate in Deep Docks requires a Simple Key to unlock, which represents a resource investment that pays dividends through access to essential quest tools.
Vendor relationships: Building relationships with various vendors throughout Silksong often unlocks additional tools or improved versions of existing equipment. The investment in these relationships extends beyond immediate quest needs.
Tool diversity benefits: Learning to use the tools required for Broodfeast enhances your overall combat capabilities and provides options for tackling different enemy types and encounter situations throughout the game.
Quest Rewards and Long-term Value
Immediate benefits: Completing Broodfeast provides substantial rewards that justify the time investment, including items that enhance your combat effectiveness and progression capabilities.
Skill development: The quest forces you to master tools and combat techniques that prove valuable throughout your Silksong journey, making the time investment educational as well as rewarding.
Completion satisfaction: Successfully gathering over 60 organs provides a genuine sense of accomplishment and demonstrates mastery of Silksong’s more complex combat mechanics.
Ready to take on the Broodfeast challenge? You can test your tool mastery and collection skills in Hollow Knight: Silksong on Steam, Nintendo Switch, PlayStation, or Xbox. With this guide, you’ll efficiently complete one of Silksong’s most demanding collection challenges while building mastery of advanced combat techniques!