The Clawline is arguably one of the most game-changing abilities you’ll unlock in Hollow Knight: Silksong. This grappling hook mechanic doesn’t just add a new movement option—it completely transforms how you navigate Pharloom’s intricate world. If you’ve been wondering how to swing around like a silk-spinning spider, you’re in for quite the adventure.
Getting the Clawline isn’t a simple pickup. It requires a marathon journey through multiple areas, solving puzzles, and navigating some of Silksong’s most challenging terrain. But trust me, the payoff is absolutely worth it.
What Is the Clawline and Why Do You Need It?
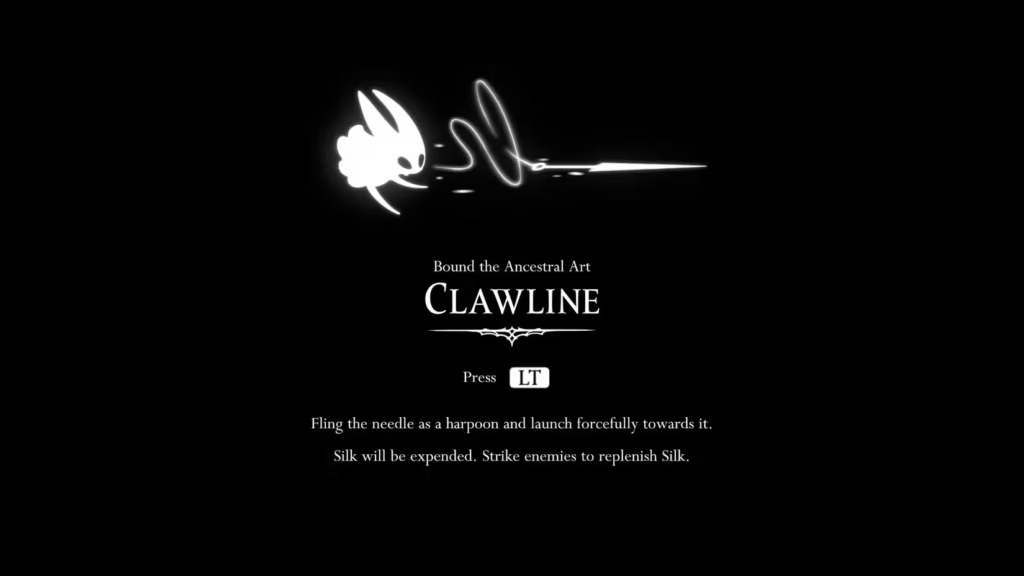
The Clawline is Silksong’s version of a grappling hook—an Ancestral Art that lets Hornet shoot out a harpoon-like appendage to latch onto specific objects. Think hanging hoops, certain wall sections, and even some enemies. Once attached, Hornet gets pulled toward the target, opening up entirely new traversal possibilities.
Default Controls:
- PC: S key
- Xbox: LT button
- PlayStation: L2 button
What makes the Clawline special isn’t just the cool factor (though swinging through areas feels incredible). Many areas in Pharloom become accessible only after you’ve mastered this skill. It’s essentially a key that unlocks whole new sections of the map, making it crucial for progression.
The Journey Overview: What You’re Getting Into
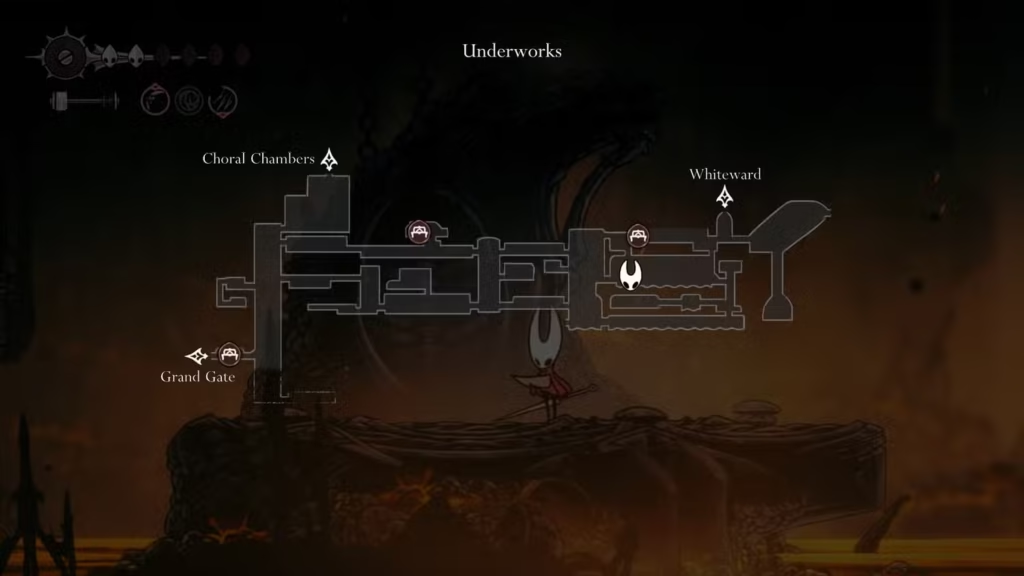
Before we dive into the step-by-step walkthrough, let’s be real about what you’re signing up for. The Clawline quest is one of Silksong’s longer ability unlocks, requiring you to traverse four major areas:
- Western Underworks – Your starting point after the elevator incident
- Choral Chambers – Where you’ll hunt for the crucial White Key
- Whiteward – A brief but important detour
- Eastern Underworks – Your final destination and the Clawline’s location
Each area has its own challenges, from navigation puzzles to combat encounters. Make sure you’ve got your essential tools ready and plenty of healing items in your inventory.
Getting Started: The Grand Gate Incident
Your Clawline journey begins somewhat dramatically. After unlocking the Needolin skill and entering the Grand Gate, head east until you reach a broken elevator. This isn’t a bug or design oversight—Hornet’s supposed to fall here, sending you tumbling down into the Underworks.
Don’t panic when this happens. It’s all part of the plan, even if it doesn’t feel like it at the time.
Step 1: Navigating Western Underworks
Finding Your Bearings
After your unexpected descent, you’ll land near a bench—use it immediately. The Underworks can be disorienting, and you’ll want to establish this as your recovery point.
From the bench, head up until you spot an opening to the left marked with a sign. This leads to a small room containing the Underworks map. Grab it immediately—navigation without this map is a nightmare.
The Eastern Push
Exit the map room and continue upward until you find a route heading right. This eastward path leads to a large vertical chamber where the real climbing begins. Keep ascending until you can head left again.
Pro tip: Look for signs indicating nearby benches. In the Underworks, most benches require Rosary bead payments to activate, so make sure you’ve got some currency saved up.
Continue left until you see bench signage, then ascend to the upper room to find the paid bench. From here, keep heading left and up until the area transitions to Choral Chambers.
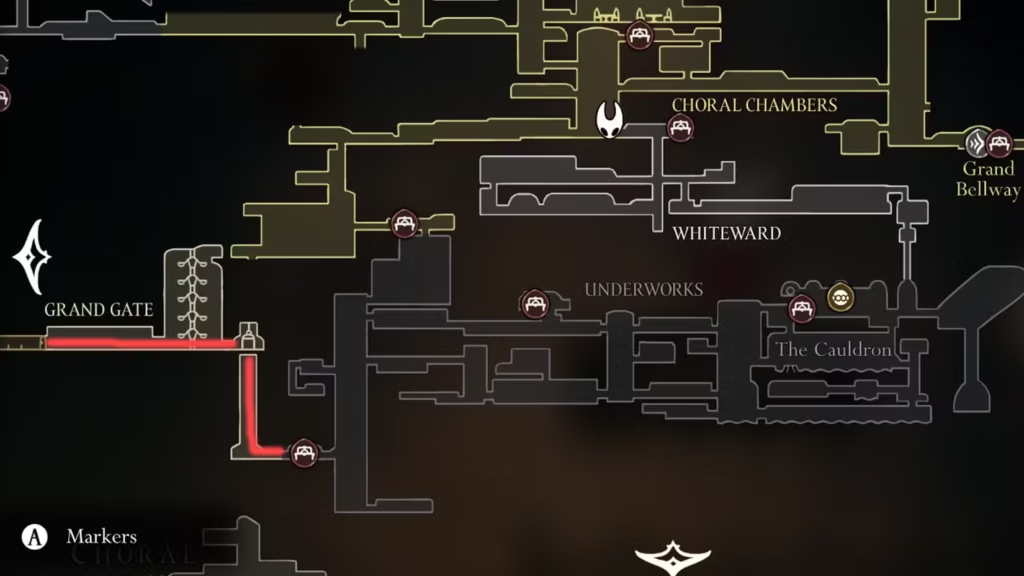
Step 2: Choral Chambers and the White Key Hunt
Mapping the Unknown
When you first enter Choral Chambers, you’ll be flying blind—no map initially available. The good news? The Choral Chambers map is relatively close to the entrance.
Map Location Steps:
- From the bench, go left and descend all the way to the bottom
- Head left to the end, then find the nearest upward path
- Navigate up, right, up, and right again
- Interact with the machine displaying a Citadel model to obtain the map
The White Key Discovery
After securing your map, continue right. You might encounter Lace here—don’t worry, this is part of the normal progression. Keep moving right until you find a room with a key slot marked “A white lock bearing a surgical symbol.” Remember this location—you’ll be back.
For now, continue upward and right to reach the next bench. From there, head east into another massive vertical chamber.
Important detour: Before ascending this chamber, go down and right to find both a bench and a Bellway fast travel point. This connection will save you significant travel time later.
Securing the White Key
Continue ascending the vertical chamber to find a circular mechanism. Pass through this wheel-like structure and head to the far right to discover a shrine with a bench inside.
The White Key you need is located outside this shrine, on the right-most edge of the area. Grab it—this key is essential for accessing Whiteward.
Step 3: Whiteward – A Critical Detour
Using the White Key
With the White Key in hand, backtrack to that locked elevator room in Choral Chambers. Use the key to activate the elevator, which will take you down into Whiteward.
Once at the bottom, head left to the end of the area, then ascend. Your goal is to find a way right until you reach the vertical tunnel where the elevator descends.
Critical note: Don’t reactivate the elevator. You need to access the passage on the right side of this shaft.
Grabbing the Whiteward Map
Descend into the right-side room to find the Whiteward map in the left corner. This map is crucial for navigating this transitional area effectively.
From the map location, continue right until you find a narrow downward passage. This descent returns you to Underworks—but this time, you’ll be in the eastern section.
Step 4: Eastern Underworks – The Final Push
Point of No Return
Welcome to the Eastern Underworks, where you’re essentially trapped until you obtain the Clawline. This is similar to the Far Fields situation where certain areas lock you in until you’ve gained specific abilities.
Start by heading left to rest at the nearby bench. You’ll want to be at full health for what’s coming.
The Wind Current Puzzle
From the bench, navigate left, down, then left again until you spot a wheel-like switch mechanism. Attack this switch repeatedly until it breaks completely—this releases a wind current.
Now comes the fun part: use your Drifter’s Cloak ability to ride the wind current upward. If you haven’t unlocked this ability yet, you’ll need to backtrack and complete that quest first.
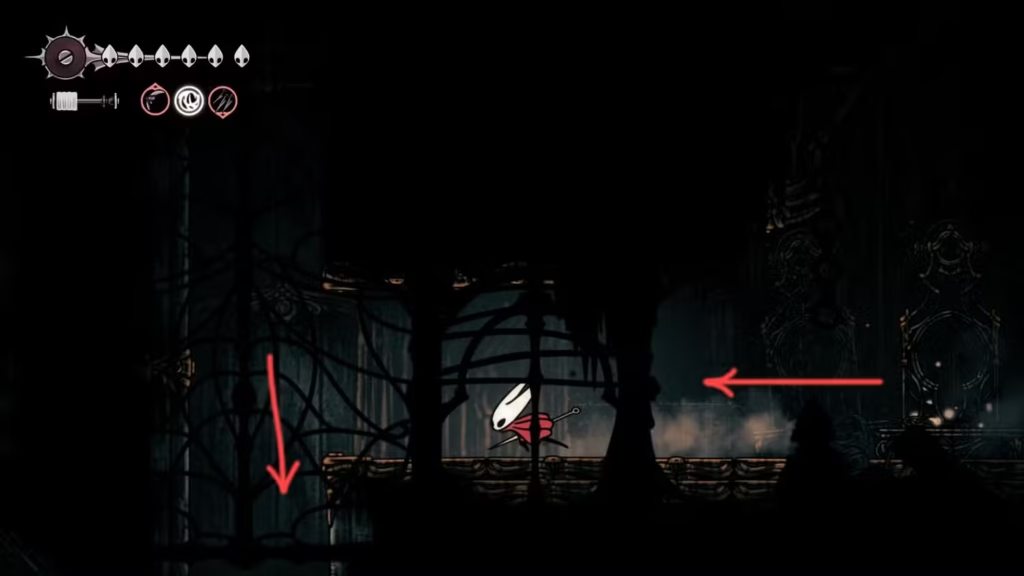
Navigating the Lava Chambers
At the top of the wind current, head left, then descend. Keep going down until you encounter lava floors—these become a recurring theme in this final section.
Navigate right across the lava, then up at the end of the path. Here’s where your wall jump abilities become crucial.
Use wall jumping techniques to ascend until you spot a hatch with an activation switch. Hit this switch to enter another lava-filled chamber.
The Clawline Shrine
Cross this final lava chamber carefully—damage here can be significant if you’re not careful with your movements. At the far end, you’ll discover a statue that you can interact with.
Approach the statue and bind with it. Congratulations! Hornet now possesses the Clawline skill, ready to grapple onto hoops, enemies, and designated wall sections throughout Pharloom.
Mastering Your New Ability
Basic Clawline Techniques
With your new grappling hook, practice these fundamental techniques:
- Hoop Swinging: Look for hanging circular objects—these are your primary grapple points
- Enemy Grappling: Some enemies can be grappled, either for combat advantages or traversal
- Wall Sections: Certain wall areas have grapple points that aren’t immediately obvious
Advanced Applications
The Clawline opens up numerous previously inaccessible areas. Consider revisiting earlier locations where you noticed unreachable platforms or mysterious hoops. Many hidden areas and secret passages become available once you’ve mastered grappling mechanics.
Essential Preparation Tips
Before starting this lengthy quest, make sure you’re prepared:
Required Abilities
- Needolin Skill: Required to trigger the initial elevator sequence
- Wall Jump: Essential for the Eastern Underworks section
- Drifter’s Cloak: Needed for the wind current puzzle
Recommended Resources
- Plenty of healing items
- Sufficient Rosary beads for paid benches
- Patience—this is a long quest with multiple backtracking sections
Combat Readiness
While not heavily combat-focused, this quest does involve traversing dangerous areas with environmental hazards and enemies. Make sure your needle is upgraded and you’re comfortable with Silksong’s combat mechanics.
Common Pitfalls and How to Avoid Them
Getting Lost Without Maps
The biggest mistake players make is rushing through areas without securing maps first. Each area’s map is crucial for efficient navigation, especially when backtracking becomes necessary.
Rosary Management
Don’t spend all your Rosaries before starting this quest. The paid benches in Underworks can catch players off-guard if they’re not prepared financially.
Ability Prerequisites
Make sure you have all required abilities before starting. Getting halfway through only to realize you need an ability you don’t have is incredibly frustrating.
Platform Availability
Ready to start your Clawline adventure? Hollow Knight: Silksong is available on:
- Steam: PC Download
- Nintendo Switch: Switch Version
- PlayStation: PS Store
- Xbox: Xbox Store
Final Thoughts: The Payoff
The Clawline quest represents one of Silksong’s most involved ability unlocks, but it’s also one of the most rewarding. The grappling mechanics add a entirely new dimension to traversal, making previously impossible jumps achievable and opening up creative solutions to navigation puzzles.
Don’t be discouraged by the length of this quest—every step serves a purpose, and the areas you’ll explore are filled with additional secrets, collectibles, and lore. Consider this journey not just a means to an end, but an opportunity to thoroughly explore some of Silksong’s most intricate level design.
The moment you first swing across a gap using your newly acquired Clawline, you’ll understand why this ability is worth the extensive journey to obtain it. Happy grappling!