Conquer Coral Tower’s brutal arena gauntlet and defeat Crust King Khann! Complete guide to obtaining the Heart of Might (Encrusted Heart) in Hollow Knight Silksong’s toughest challenge.
The Ultimate Test of Endurance and Skill
Coral Tower represents one of Hollow Knight: Silksong’s most punishing challenges—a relentless gauntlet that strips away all comfort zones and forces you to prove your mastery of every combat technique you’ve learned. This isn’t just about collecting another heart; it’s about surviving an ordeal that will test your patience, skill, and determination like nothing else in the game.
Understanding the Heart of Might Quest
Why This Heart Matters
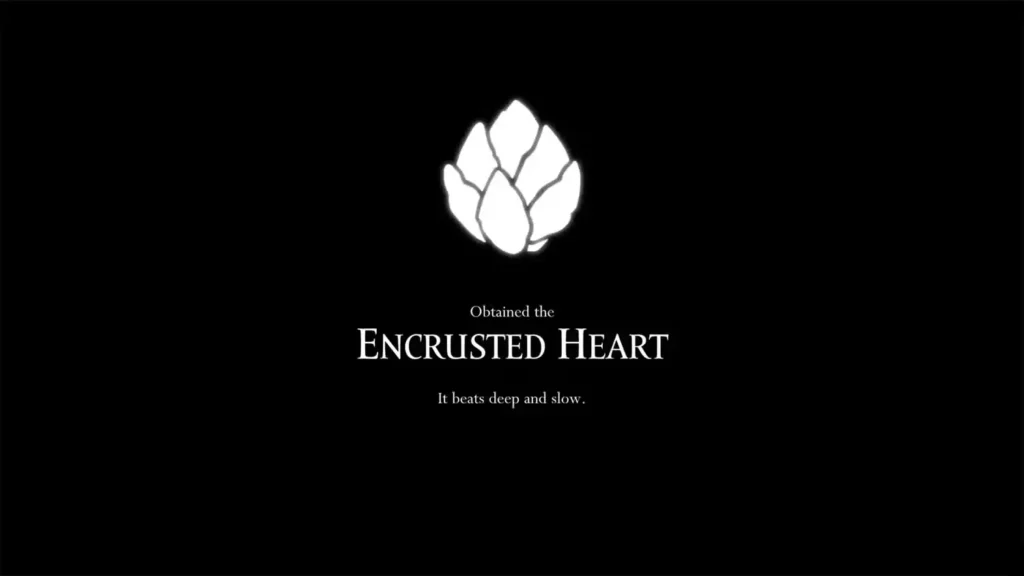
The Heart of Might (also called the Encrusted Heart) serves as one of three essential items needed to progress through the Abyss in Silksong’s later stages. Unlike other progression items that reward exploration or puzzle-solving, this heart demands pure combat excellence through sustained pressure.
What Sets This Apart:
- Pure combat focus – No puzzles or platforming challenges
- Escalating difficulty – Each arena fight increases in complexity
- High stakes progression – Failure means starting over completely
- Resource management – Limited healing opportunities test your efficiency
This quest serves as Silksong’s ultimate skill check, ensuring only prepared players can access the game’s final areas.
Getting to Coral Tower: The Sands of Karak Journey
Navigation Prerequisites
Before attempting Coral Tower, ensure you have:
- Silk Soar ability – Essential for vertical navigation
- Clawline proficiency – Required for the final platforming sequence
- Maximum health upgrades – You’ll need every mask you can get
- Upgraded needle – Higher damage output reduces fight duration
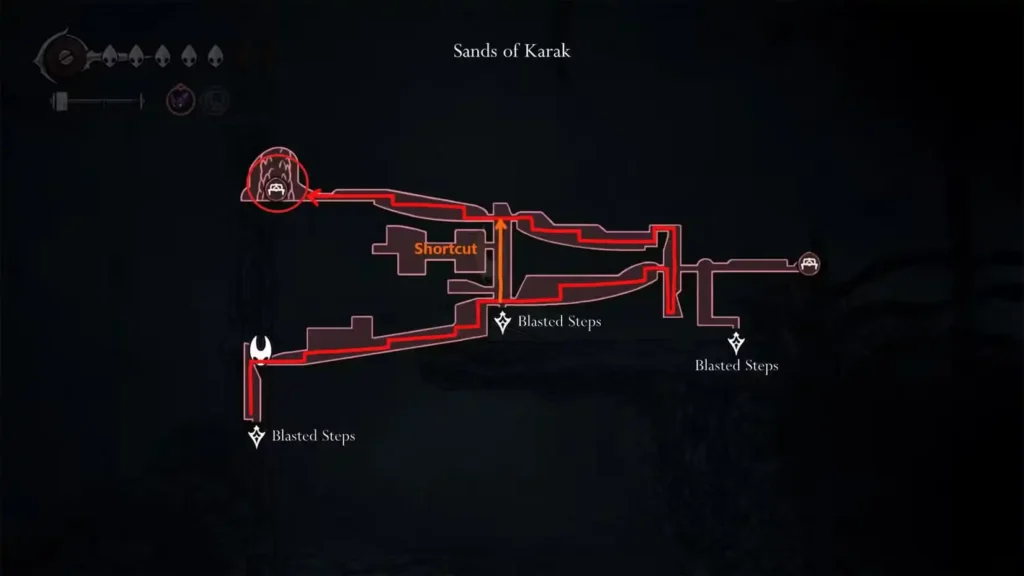
The Blasted Steps Route
Strategic Approach: Starting from Blasted Steps, head consistently eastward through the Sands of Karak region. The unique branching mechanic in this area requires quick reflexes—hit branches to make them grow, then immediately use the new platforms before they retract.
The Critical Shortcut Creation
Why This Matters: Creating the shortcut in the first vertical room becomes absolutely crucial later. While you can technically skip this using advanced Silk Soar techniques, establishing this route early saves countless headaches during repeated attempts.
Step-by-Step Process:
- Drop to the bottom of the eastern vertical room
- Hit the branch quickly and platform to the top without hesitation
- Destroy the rock above the bridge to open the shortcut path
- Test the shortcut before proceeding to ensure it works properly
The Final Platforming Challenge
Technical Sequence: The wall-clinging and Clawline combination at the end requires precision timing. Practice this sequence before entering Coral Tower—you don’t want to fail here and have to repeat the entire navigation process.
Pro Tip: The hidden bench to the right of the slumbering warrior provides your last opportunity to heal and prepare. Take advantage of this breather before committing to the memory sequence.
Entering the Memory: Elegy of the Past
The Transition Sequence
Playing the Elegy of the Past transforms this encounter from a simple boss fight into something far more significant. You’re not just fighting in Coral Tower—you’re experiencing the memory of a fallen warrior, walking in their footsteps through their final trial.
This narrative framing adds emotional weight to what could otherwise feel like a simple combat gauntlet.
Arena Gauntlet Breakdown: Four Fights to Victory
Arena 1: The Opening Statement
Fight Characteristics:
- Wave-based enemy spawning
- Introduction of the white jellyfish healing mechanic
- Relatively spacious arena with full mobility
Strategic Approach: This first fight establishes the rhythm for everything that follows. Focus on learning enemy spawn patterns while conserving silk energy. The white jellyfish enemies that occasionally appear restore silk when hit—prioritize these targets for resource management.
Recommended Tools:
- Cogfly for automatic enemy targeting
- Venom-enhanced tools for increased damage over time
- Area-of-effect abilities for crowd control
Arena 2: Environmental Hazards Introduction
New Mechanics:
- Red spikes appear mid-battle and persist
- Gradually reduced safe movement space
- Large enemy appears to clear spikes at fight’s end
Adaptation Strategy: This fight teaches spatial awareness and positioning under pressure. As the arena shrinks with each spike appearance, your movement options become increasingly limited. Practice wall-jumping techniques to maintain mobility when ground space disappears.
Critical Insight: The spikes aren’t just obstacles—they’re teaching you the spatial restriction concepts that become crucial in later fights.
Arena 3: The Ultimate Positioning Test
Maximum Difficulty:
- Nearly immediate spike coverage of all ground
- Wall-clinging becomes essential for survival
- Ascendant’s Grip tool provides significant advantage
Survival Strategy: This fight represents Coral Tower’s most technically demanding encounter. Without proper wall-clinging abilities, this becomes nearly impossible. The Ascendant’s Grip tool transforms this from a nightmare into a manageable challenge.
Why Ascendant’s Grip Matters:
- Prevents sliding during wall-cling combat
- Allows sustained attacks while maintaining position
- Provides confidence for aggressive play styles
The Crucial Shortcut Unlock
Game-Changing Moment: Destroying the rock after Arena 3 creates a shortcut that bypasses the first three fights. This becomes essential for multiple attempts at the final boss, transforming potential frustration into manageable practice sessions.
Strategic Value:
- Eliminates repeated gauntlet runs for boss practice
- Allows bench rest between attempts
- Reduces overall stress and maintains focus for the final encounter
Arena 4: Platform Limitation Challenge
Unique Mechanics:
- Only three platforms available for positioning
- One platform temporarily disappears mid-fight
- Forces adaptation to changing battlefield conditions
Preparation Strategy: This fight demands flexibility and quick thinking. When the platform disappears, you must immediately adapt positioning without losing combat rhythm. Practice platform-to-platform movement before engaging enemies.
The Final Boss: Crust King Khann
Understanding the Encounter
Khann represents everything Coral Tower has been building toward—a boss that combines mobility, area denial, and aggressive positioning pressure into one overwhelming package.
Attack Patterns:
- Spike Summoning: Covers large arena sections with dangerous terrain
- High Mobility: Frequent jumping creates positioning challenges
- Area Denial: Spikes limit safe movement options throughout the fight
Strategic Approach
Phase Management: Unlike previous arena fights, Khann requires sustained single-target focus while managing environmental hazards. The spike summoning creates temporary safe zones that shift constantly throughout the encounter.
Positioning Priority:
- Stay mobile between spike waves
- Use platform edges for maximum movement options
- Time attacks during Khann’s landing recovery frames
Resource Management: This is your final encounter—use consumables and silk abilities liberally. Saving resources for later fights doesn’t apply here.
Alternative: The Green Prince Route
When to Consider Alternatives
If Coral Tower proves consistently overwhelming, the Green Prince questline offers an alternative path to heart acquisition. However, this route presents its own unique challenges and shouldn’t be considered an “easy mode.”
Comparison Factors:
- Different skill requirements (puzzle vs. combat focus)
- Unique progression challenges
- Similar difficulty level, different approach
The choice between routes often depends on your playstyle preferences rather than objective difficulty differences.
Preparation and Optimization
Essential Upgrades Before Attempting
Combat Effectiveness:
- Maximum needle upgrades for increased damage output
- Full health expansion to survive mistake sequences
- Tool optimization with venom enhancement
Skill Prerequisites:
- Comfortable with all movement abilities
- Efficient healing techniques under pressure
- Parrying proficiency for damage mitigation
Mental Preparation
Mindset Management: Coral Tower demands patience and persistence. Multiple attempts are normal—even experienced players rarely clear this on their first try. Treat early attempts as learning experiences rather than failure sequences.
Stress Management:
- Take breaks between attempts to maintain focus
- Practice individual arena types in other areas when possible
- Remember that the shortcut eliminates most repetition after Arena 3
Platform Availability
Ready to face Coral Tower’s ultimate challenge? Hollow Knight: Silksong is available on:
The Reward of Perseverance
Coral Tower represents Silksong at its most demanding, but also at its most rewarding. The Heart of Might isn’t just a progression item—it’s proof that you’ve mastered the game’s combat systems under extreme pressure.
The journey through these arena fights teaches lessons that apply throughout the rest of Silksong. Resource management, positioning awareness, and sustained performance under pressure become second nature after surviving this gauntlet.
When you finally defeat Crust King Khann and claim the Encrusted Heart, you’re not just progressing the story—you’re joining the ranks of players who’ve proven themselves against one of the medium’s most challenging combat encounters.
The memory of Coral Tower will stay with you long after you’ve moved on to other areas. Every subsequent challenge will feel more manageable because you’ve already survived the ultimate test.
Conquered Coral Tower and ready for more challenges? Explore our complete Act 2 progression guide or check out strategies for other heart collection quests to continue your journey through Pharloom’s most dangerous regions.