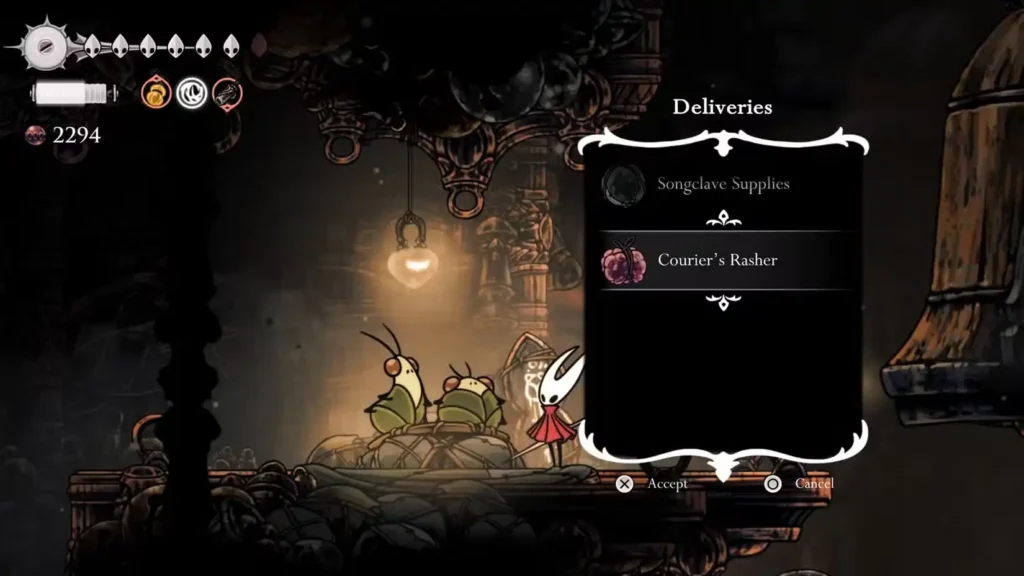
What is the Courier Rasher Delivery Quest in Silksong?
The Courier Rasher delivery quest represents one of Hollow Knight: Silksong’s most demanding logistical challenges, combining time pressure, damage restrictions, and navigation complexity into a single nerve-wracking experience. This isn’t just about getting from point A to point B—it’s about route optimization, resource management, and maintaining composure under pressure.
Courier Rasher Quest Requirements and Parameters
Prerequisites and Setup
Essential Completed Quests: Before attempting the Courier Rasher delivery, you must complete two foundational quests at Bellhart’s Wishwall:
- My Missing Courier – Establishes your relationship with Tipp and Pill
- My Missing Brother – Completes the character rescue storyline
Finding Tipp and Pill: These NPCs appear on top of Frey’s shop in Bellhart only after completing their rescue quests. Their presence indicates you’re ready to tackle delivery missions.
The Great Taste of Pharloom Connection
This delivery forms part of the larger Great Taste of Pharloom quest, which explores the culinary culture and trade networks throughout the kingdom. The Courier Rasher represents a premium delicacy that must reach its destination in perfect condition.
Essential Equipment and Abilities for the Delivery Route
What Makes This Delivery Unique
Time Pressure: Unlike other delivery quests, the Courier Rasher includes a strict timer that adds significant pressure to an already complex navigation challenge.
Damage Restrictions: Taking substantial damage can spoil the delivery, forcing you to restart the entire journey. This transforms every enemy encounter into a potential quest failure.
Fast Travel Prohibition: Bellway fast travel becomes unavailable during the delivery, forcing you to navigate the world manually and face every obstacle between Bellhart and Choral Chambers.
Essential Equipment and Abilities
Required Tools for Success
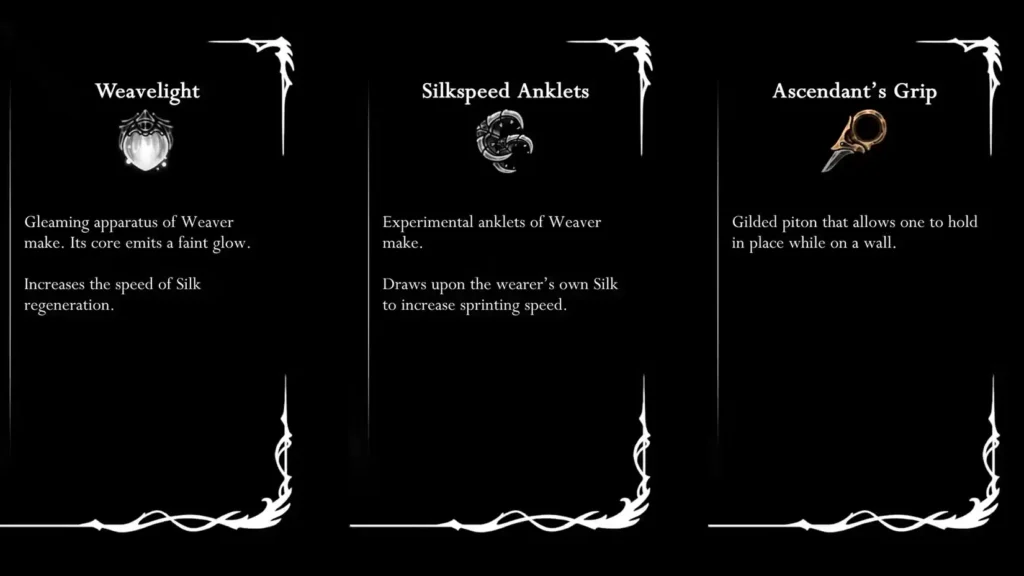
Ascendant’s Grip: This tool transforms wall-clinging from a temporary maneuver into a reliable positioning strategy. During the challenging Blasted Steps section, the ability to stick to walls without sliding becomes crucial for maintaining momentum.
Silkspeed Anklets: The increased running speed directly impacts your timer success. Every second saved through enhanced movement speed provides additional buffer for navigation mistakes or unexpected obstacles.
Weavelight Tool: Silk management becomes critical during extended navigation sequences. The Weavelight tool ensures you have sufficient silk energy for healing, movement abilities, and emergency situations.
Essential Movement Abilities
Clawline Mastery: The grappling hook ability provides crucial shortcuts and navigation options throughout the route. Practice precise hook targeting before attempting the delivery.
Faydown Cloak Proficiency: Double jump capability opens alternative navigation routes and provides safety margins for difficult platforming sequences.
Courier Rasher Delivery Route Breakdown
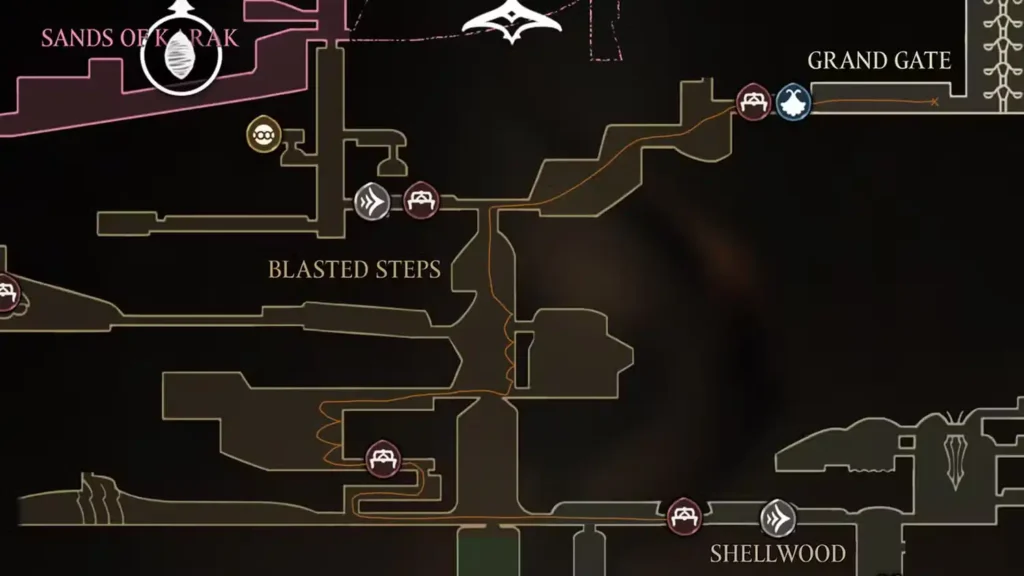
The Optimal Path: Bellhart → Shellwood → Blasted Steps → Choral Chambers
This route minimizes enemy encounters while providing manageable platforming challenges. Alternative routes exist but involve significantly higher risk factors.
Critical Preparation Steps
Shortcut Verification: Before attempting the delivery, ensure all mentioned shortcuts are unlocked. Missing a single shortcut can force longer, more dangerous alternative routes that often result in quest failure.
Enemy Clearance Strategy: Consider pre-clearing enemies along your intended route. While optional, this eliminates damage sources and reduces navigation complexity during the timed delivery.
Map Study: Use the full map (which pauses the game timer) rather than the mini-map during the delivery. This provides crucial navigation time without timer pressure.
Detailed Route Breakdown
Phase 1: Bellhart Navigation
Starting Position: From Tipp and Pill’s location atop Frey’s shop, move right to the elevator accessing Bellhart’s second floor. This initial movement sets the pace for the entire delivery.
Exit Strategy: Use the first exit on the second floor to reach Shellwood efficiently. Alternative exits lead to more complex routes with higher failure rates.
Phase 2: Shellwood Traverse
Environmental Hazards: The Gahlia flower enemy above the exit poses an immediate threat. Jump to the left branch and proceed cautiously while attacking blocking vines.
Vertical Navigation: The branch-hopping sequence requires precision timing. Practice the movement patterns beforehand to maintain speed during the actual delivery.
Area Transition: The leftward run through Shellwood involves multiple area transitions. Maintain consistent movement while staying alert for enemy encounters.
Phase 3: Blasted Steps – The Major Challenge
Why This Section is Critical: Blasted Steps contains the delivery’s most demanding platforming and enemy challenges. Success here often determines overall quest completion.
Initial Climb Strategy: Enter the first hole and follow the path to the first bench. This serves as a mental checkpoint for route verification.
Shortcut Utilization: The platform shortcut on the right requires lever activation. If unavailable, you must complete the longer parkour sequence, significantly increasing difficulty and time requirements.
Cage Navigation Sequence: The hanging cage section demands precise timing and spatial awareness:
- Jump to the first platform, then immediately to the rock above
- Use cage-to-cage movement to maintain momentum
- Target the hanging bell for wall access
- Execute the dual-jump hook maneuver to the left cage
Critical Enemy Encounter: The shielded Judge enemy blocking access to the upper bell presents two tactical options:
- Aggressive Approach: Jump-attack the enemy to reach the bell directly
- Evasive Approach: Leap over the enemy to the left rock for safer bell access
Phase 4: Grand Gate Shortcut
Vertical Navigation: The shortcut from Grand Gate directly to Choral Chambers bypasses the dangerous Underworks route. This represents a significant time and risk reduction.
Prerequisite Requirement: This shortcut must be unlocked previously. Attempting the delivery without this access forces a much longer, more dangerous alternative route.

Phase 5: Choral Chambers Final Approach
Ventrica Chamber Strategy: Avoid the right-side approach due to enemy concentration and complex parkour. The left-side hidden shortcut provides safer passage.
Citadel Spa Access: The shortcut to Citadel Spa requires prior unlocking. This route significantly reduces final approach complexity.
Final Navigation: The climb to Loyal Mergwin’s chamber represents the delivery’s final challenge. Maintain careful movement while avoiding the few remaining enemy encounters.
Advanced Tips for the Courier Rasher Quest
Time Management
Pace Conservation: Start conservatively to avoid early mistakes that waste time. Gradually increase pace as you successfully navigate familiar sections.
Buffer Time Usage: Use gained time from efficient navigation to approach challenging sections more cautiously rather than rushing through dangerous areas.
Damage Avoidance
Enemy Engagement Philosophy: Avoid unnecessary combat when possible. Every enemy encounter increases damage risk and consumes valuable time.
Environmental Hazard Awareness: Platform-to-platform movement poses greater damage risk than enemy encounters. Focus on precise positioning over speed.
Emergency Protocols
Mistake Recovery: If you take significant damage or fall behind schedule, assess whether continuing makes sense or if restarting provides better chances of success.
Route Adaptation: If a planned shortcut becomes unavailable during the delivery, have backup navigation options prepared.
Platform Availability
Ready to test your delivery skills? Hollow Knight: Silksong is available on:
Mastery Through Preparation
The Courier Rasher delivery succeeds through preparation rather than raw skill. Players who rush into this challenge without proper equipment, shortcut access, and route familiarity often experience repeated failures.
The quest’s demanding nature serves a purpose beyond simple difficulty—it teaches resource management, route optimization, and performance under pressure. These skills transfer directly to other challenging content throughout Silksong.
Success brings not only quest completion satisfaction but also confidence in your navigation abilities. Players who master this delivery often find subsequent exploration and travel throughout Pharloom significantly easier and more enjoyable.
The key lies in treating this as a planning exercise first and an execution challenge second. Proper preparation transforms an overwhelming challenge into a manageable, even enjoyable, test of your Silksong mastery.
Completed your delivery and ready for more challenges? Explore our essential beginner tips or check out other complex quest strategies to continue building your Pharloom expertise.