Learn how to safely rest on the trapped Hunter’s March bench in Hollow Knight: Silksong. Complete guide to disabling the trap, reaching the bench, and finding Mottled Skarr’s shop.
Don’t Fall for Pharloom’s Cruelest Bench Trap
The Hunter’s March bench represents one of Silksong’s most devious design choices – a save point that actively punishes players who try to use it. After navigating through challenging platforming to reach what appears to be a safe haven, players are met with a vicious tooth trap that strikes anyone attempting to rest.
Understanding how to disable this trap and safely access the bench is crucial for Hunter’s March progression. Additionally, the area contains hidden secrets including Mottled Skarr’s shop with valuable equipment that many players miss entirely.
Hunter’s March Area Context
When You’ll Encounter This Area
Hunter’s March becomes accessible after defeating the Ant Guardian boss in The Marrow. However, the area presents unique progression challenges:
- Skippable area: You can bypass Hunter’s March entirely by progressing through Far Fields to Greymoor
- Alternative route: Obtaining the Drifter’s Cloak from the Flexile Spines quest makes navigation significantly easier
- Strategic timing: Consider whether you need Hunter’s March content for your current progression goals
Area Context TL;DR: Unlocked after Ant Guardian → skippable via Far Fields → easier with Drifter’s Cloak
Navigation Requirements
Essential abilities for efficient exploration:
- Wind riding capability (Drifter’s Cloak) for optimal bench access
- Plunge attack as alternative method using red bouncy flowers
- Basic platforming skills for vertical tunnel navigation
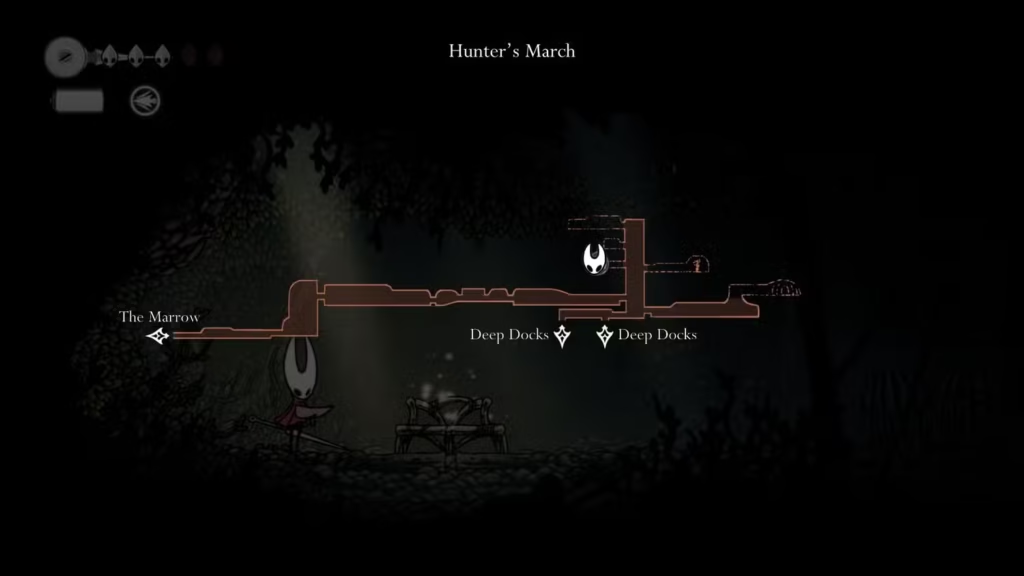
Locating the Hunter’s March Bench
Bench Position and Access Methods
The single bench in Hunter’s March is located in a vertical tunnel near the area’s end. Two primary access methods exist:
Method 1: Wind Current (Recommended)
- Requires Drifter’s Cloak from completing the Flexile Spines quest
- Ride wind currents up the vertical shaft
- Most reliable and safest approach to the bench
- Provides better positioning for exploring surrounding areas
Method 2: Red Bouncy Flower
- Use plunge attack on red bouncy flowers for upward momentum
- More challenging and less consistent than wind riding
- Backup method if Drifter’s Cloak unavailable
- Requires precise timing and positioning
Access Methods TL;DR: Wind current (best with Drifter’s Cloak) → red bouncy flowers (harder alternative)
Visual Identification
Bench location markers:
- Vertical tunnel environment near area boundary
- Standard bench appearance (deceptively normal-looking)
- No obvious trap indicators from initial approach
- Positioned to appear as standard safe zone
The Bench Trap Mechanism
Understanding the Trap
What happens when you attempt to rest:
- Tooth trap activates immediately upon sit attempt
- Deals damage to Hornet instead of providing healing
- No warning indicators before activation
- Trap persists until manually disabled
Design philosophy:
- Subverts player expectations of bench safety
- Forces exploration of surrounding area
- Teaches players to examine environments more carefully
- Rewards thorough investigation over rushing to save points
Trap Mechanics TL;DR: Tooth trap strikes → damages instead of healing → no warning → requires manual disable
Disabling the Hunter’s March Bench Trap
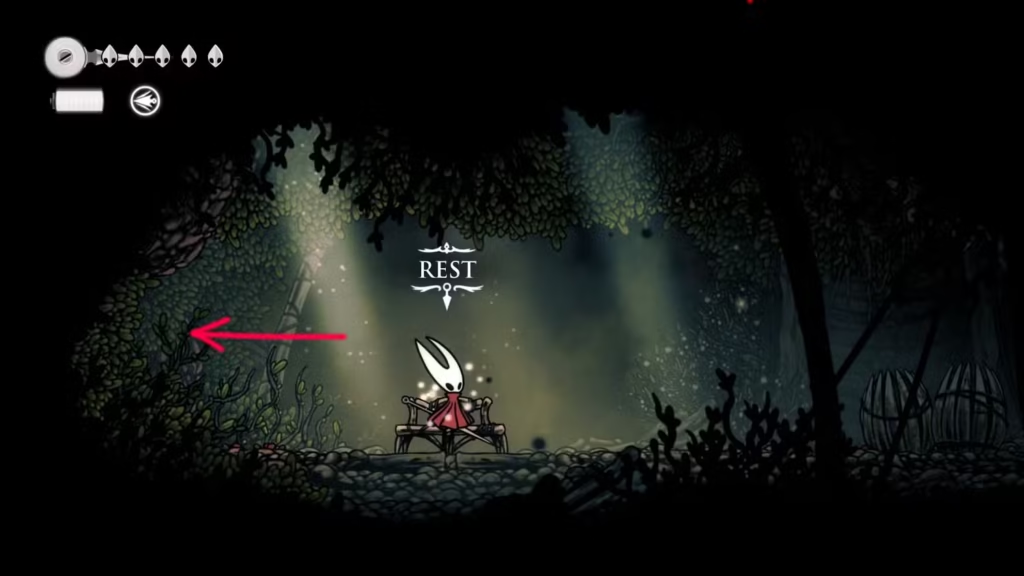
Finding the Hidden Switch Room
Location of trap disable switch:
- Secret room to the left of the bench
- Hidden entrance that may require slight jump to access
- Not immediately obvious from bench position
- Easy to miss without systematic exploration
Navigation to switch:
- Position yourself to the left of the trapped bench
- Walk toward the left wall area
- Try a slight jump if you encounter wall collision
- Enter the secret room once passage opens
- Locate the switch inside the hidden chamber
Switch Access TL;DR: Left of bench → walk toward wall → slight jump if needed → enter secret room → find switch
Switch Activation Process
Disabling the trap:
- Hit the switch inside the secret room
- Trap deactivates permanently for this area visit
- Return to bench – now safe to use
- Rest normally for save, heal, and map update
Important notes:
- Switch effect is permanent for current area session
- Trap resets if you leave and return to Hunter’s March
- Must repeat process after area exits and re-entries
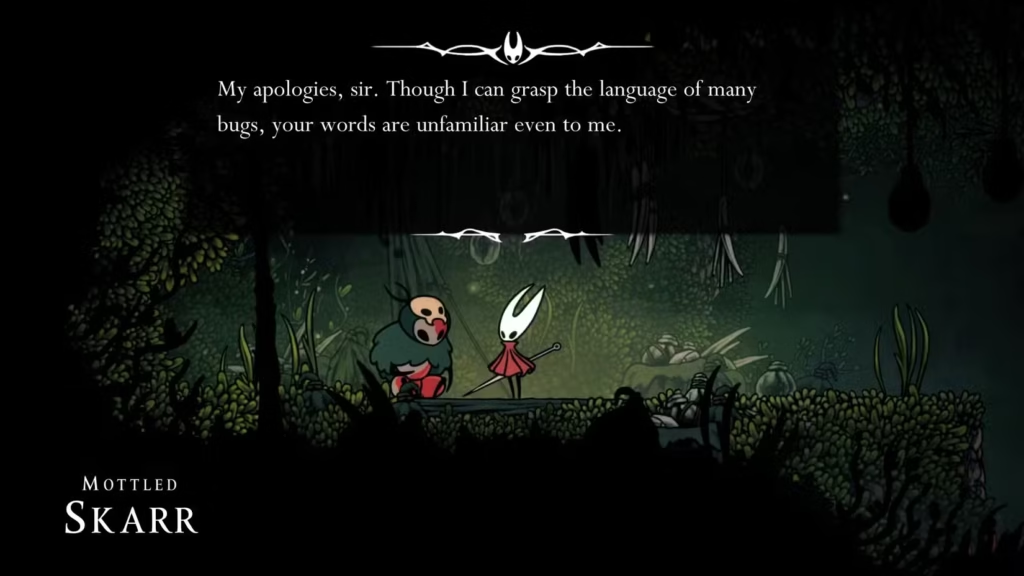
Hidden Content: Mottled Skarr’s Shop
Accessing the Secret Vendor
Location above the bench:
- Ride wind current to ledge above the bench entrance
- Jump slightly and continue left
- Navigate carefully around red spikes and environmental traps
- Discover hidden chamber containing Mottled Skarr
Shop Access TL;DR: Wind current to upper ledge → jump left → avoid spikes → find Mottled Skarr
Mottled Skarr’s Inventory
Available items and strategic value:
Curve Claw (140 Rosaries)
- Function: Specialized tool for taking down flying enemies
- Value: Situational but useful for specific enemy types
- Consideration: Moderate cost for niche utility
Fractured Mask (260 Rosaries)
- Function: Critical damage shield that shatters on impact
- Repair: Can be restored while resting at benches
- Value: High-cost defensive option for difficult encounters
- Strategy: Expensive but potentially life-saving
Shard Bundle (50 Rosaries)
- Function: Breakable item containing 80 Shell Shards
- Value: Excellent conversion rate for crafting materials
- Strategy: Cost-effective way to obtain Shell Shards for crafting
Shop Analysis TL;DR: Curve Claw (niche utility) → Fractured Mask (expensive defense) → Shard Bundle (efficient crafting materials)
Shopping Strategy Recommendations
Budget considerations:
- Shard Bundle offers best value for most players
- Fractured Mask is expensive but valuable for challenging areas
- Curve Claw is situational – evaluate based on flying enemy encounters
Purchase priority:
- Shard Bundle – guaranteed value for crafting system
- Fractured Mask – if you have excess currency and face difficult combat
- Curve Claw – only if flying enemies are problematic
Strategic Considerations for Hunter’s March
Area Skip Decision
Reasons to explore Hunter’s March:
- Mottled Skarr’s shop offers unique items unavailable elsewhere
- Combat practice against area-specific enemy types
- Completionist goals require full area exploration
- Additional resources and hidden secrets
Reasons to skip Hunter’s March:
- Faster progression through Far Fields route
- Drifter’s Cloak makes other areas more accessible first
- Limited unique rewards compared to other progression paths
- Time efficiency for main story advancement
Resource Planning
Currency requirements:
- Mottled Skarr purchases: 50-260 Rosaries per item
- Total potential cost: 450 Rosaries for complete inventory
- Budget accordingly based on current financial resources
Ability prerequisites:
- Drifter’s Cloak significantly improves area navigation
- Consider completing Flexile Spines quest before major Hunter’s March exploration
Common Mistakes and Solutions
Bench Trap Errors
Common mistakes:
- Attempting to rest without exploring for trap disable
- Missing secret room due to insufficient investigation
- Giving up after initial trap encounter
Solutions:
- Always investigate surrounding areas before assuming bench safety
- Look for hidden passages near problematic game elements
- Remember that Silksong rewards thorough exploration
Navigation Difficulties
Access problems:
- Struggling with red bouncy flower timing
- Missing wind currents without Drifter’s Cloak
- Getting lost in vertical tunnel navigation
Solutions:
- Prioritize obtaining Drifter’s Cloak for easier traversal
- Practice plunge attack timing on bouncy flowers
- Use systematic exploration rather than random navigation
Shop Discovery Issues
Missing Mottled Skarr:
- Not exploring above bench area
- Avoiding spike areas too cautiously
- Insufficient wind riding practice
Solutions:
- Thoroughly explore all accessible areas around important locations
- Learn to navigate environmental hazards carefully but boldly
- Master wind riding for comprehensive area coverage
Your Hunter’s March Mastery
The Hunter’s March bench trap exemplifies Silksong’s approach to subverting player expectations while rewarding thorough exploration. Mastering this encounter teaches valuable lessons about investigating suspicious situations and finding hidden content throughout Pharloom.
Essential Hunter’s March checklist:
- ✅ Reach vertical tunnel bench via wind current or bouncy flowers
- ✅ Discover trap mechanism through attempted rest
- ✅ Find secret room to the left of the bench
- ✅ Disable trap using hidden switch
- ✅ Rest safely at now-functional bench
- ✅ Explore upper areas to find Mottled Skarr’s shop
- ✅ Evaluate purchases based on current needs and budget
Master this challenge and you’ll have both a functional save point and access to unique equipment while developing skills for similar hidden content throughout your Pharloom adventure.
Related Guides:
- Flintbeetles Volatile Quest Guide
- Pilgrim Shawls Quest Guide
- Should You Free Grindle?
- Post-Bell Beast Progression
Official Silksong Links: