Find the Key of Apostate in Hollow Knight Silksong’s Putrified Ducts and learn where to use it in The Slab. Complete guide with two routes and puzzle solutions.
TL;DR
The Key of Apostate is located in Putrified Ducts and can be reached via two routes: through the Memorium (top route) or from Bilewater (requires defeating Groal boss). Use it on two locks in The Slab – one for area access and another for a mask shard puzzle. Requires Clawline and Double Jump abilities.
Few items in Hollow Knight Silksong are as crucial for progression as the Key of Apostate. This essential key unlocks major sections of The Slab, transforming what initially feels like a confusing prison maze into a fully explorable area. But getting your hands on it requires navigating one of the game’s most challenging traversal sequences – and potentially facing a formidable boss.
Here’s everything you need to know about finding, obtaining, and using this game-changing key to unlock The Slab’s secrets.
Prerequisites: What You Need Before Starting
Before embarking on your Key of Apostate hunt, ensure you have these essential abilities:
- Clawline – Your grappling hook tool for reaching distant platforms
- Double Jump – Critical for the advanced platforming sequences
- Access to either the Memorium or Bilewater regions
Without these abilities, the Key of Apostate remains completely inaccessible. Don’t attempt this journey until you’ve secured both movement upgrades – the platforming challenges are unforgiving without them.

Two Paths to the Key: Choose Your Challenge Level
The Key of Apostate’s location in Putrified Ducts can be approached via two distinct routes, each with its own risk-reward profile. Your choice often depends on your current progression and comfort with boss fights.
Route 1: The Memorium Path (Recommended)
This is generally the safer and more straightforward approach for most players. The Memorium route focuses on platforming challenges rather than combat encounters.
Step-by-step directions:
- Navigate to the top of Putrified Ducts via the Memorium
- Search for a secret opening in the ceiling – these are easy to miss
- Walk to the end of the Memorium area
- Climb up the wall using your movement abilities
- Destroy the breakable rock to gain access to Putrified Ducts
- Follow the path to the key location
This route avoids the boss fight entirely, making it ideal for players who want to focus on exploration rather than combat. The main challenge lies in identifying the hidden ceiling entrance and executing the platforming sequence correctly.
Route 2: The Bilewater Boss Route
For players seeking additional combat experience and potential rewards, the Bilewater route offers a more action-packed journey. However, it culminates in a mandatory boss fight that can’t be avoided.
The Bilewater Route: A Step-by-Step Traversal Guide
Starting from the Bilewater Bellway, this route tests every aspect of your movement abilities through increasingly complex platforming challenges.
Initial Ascent and Enemy Encounters
- Begin at the Bellway and climb upward using Double Jump
- Reach Shakra’s location through careful platforming
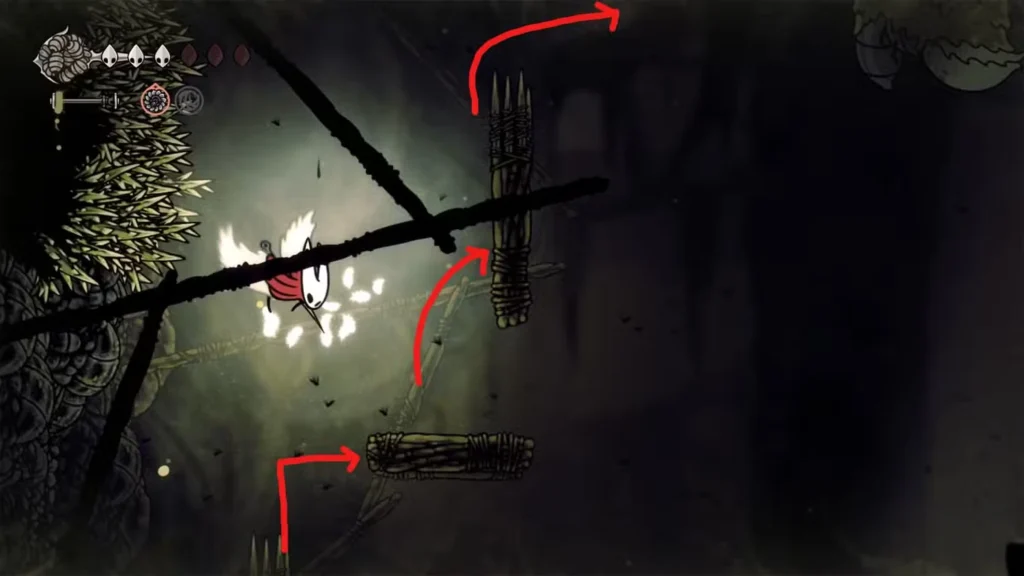
- Use vertical platforms as shields against ranged enemy attacks
- Employ Clawline on green bulbs to swing across gaps safely
- Cling to walls and time your jumps to avoid spike traps
Pro tip: The green bulbs aren’t just decoration – they’re your primary means of crossing large gaps. Master the timing between Clawline deployment and wall-climbing to maintain momentum.
Advanced Platforming Challenges
As you progress deeper into the route, the platforming becomes significantly more complex:
- Navigate through temporary platforms without falling into water hazards
- Glide through tunnels while avoiding environmental traps
- Combine Double Jump and Clawline for extended aerial sequences
- Stay on the left side when possible – it often provides better positioning for green bulb usage
The key to success here is patience over speed. Each section builds on the previous one’s complexity, so rushing leads to unnecessary deaths and frustration.
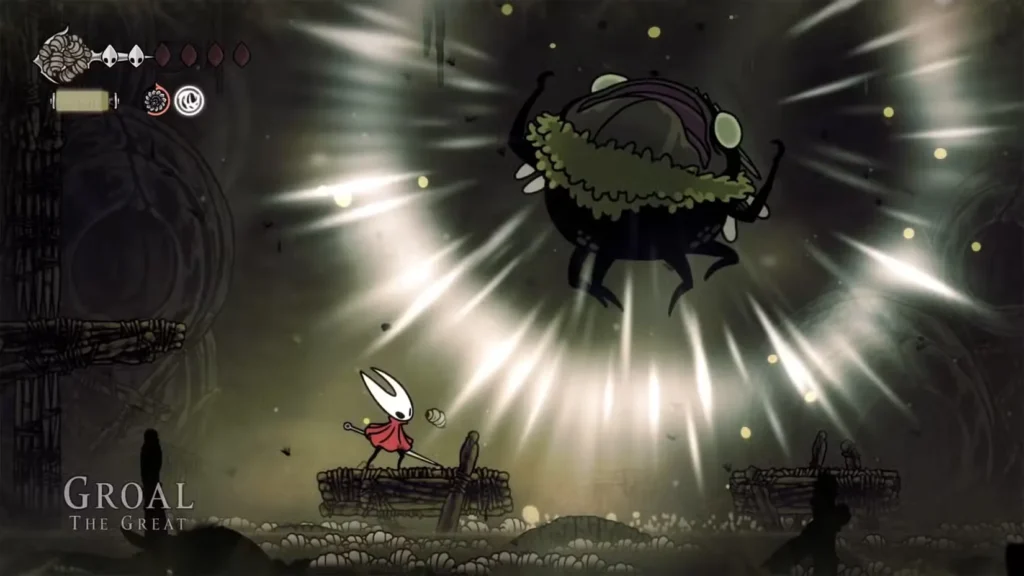
Boss Fight: Groal the Great
The Bilewater route culminates in a mandatory encounter with Groal, a formidable aquatic boss that tests both your combat skills and movement mastery.
Groal’s attack patterns:
- Dive attacks – Plunges into water and emerges unexpectedly
- High jumps – Launches into the air before slam attacks
- Ranged barrages – Fires multiple projectiles at Hornet
- Flying minions – Summons aerial enemies for support
Combat strategy: Use your Clawline to quickly close distance with flying enemies, then focus on Groal’s predictable dive-and-emerge pattern. The boss telegraphs most attacks, giving you time to position for counterattacks.
Important note: You can access this boss from the left side, where a bench provides a convenient checkpoint. This makes the Memorium route more appealing for key acquisition, while the boss fight can be tackled separately if desired.
Claiming Your Prize: The Final Stretch
After choosing your route and overcoming its challenges, the actual key retrieval is relatively straightforward:
- Create a shortcut by cutting the rope after the boss fight (Bilewater route)
- Jump up to arrive at Putrified Ducts proper
- Use platforms to go higher and enter the left tunnel
- Beware the large enemy waiting in the darkness – you can fight or avoid it
- Jump to the left platform and locate the glowing object
- Destroy the glowing object to claim the Key of Apostate
Bonus opportunity: This section of Putrified Ducts also allows you to start the Broodfeast quest, making the journey doubly rewarding.
Using the Key: Two Crucial Locks in The Slab
The Key of Apostate opens two specific locks within The Slab, each serving different purposes in your progression.
Lock #1: Main Area Access
Location: Accessible from The Slab Bellway Purpose: Unlocks the primary exploration area of The Slab
Navigation directions:
- Start from The Slab Bellway
- Climb upward while turning right to reach the lock
- Go through the door and head up first to open shortcuts
- Slide down and proceed right into the lore tablet room
- Use Double Jump and Clawline to climb the tunnel
- Enter the door at the end and continue left to the Heretic Lock
This unlock transforms The Slab from a linear prison escape into an open exploration area, giving you access to additional keys, NPCs, and story content.
Lock #2: The Mask Shard Puzzle
Location: Above the Heretic Lock area Purpose: Access to a challenging puzzle that rewards a mask shard
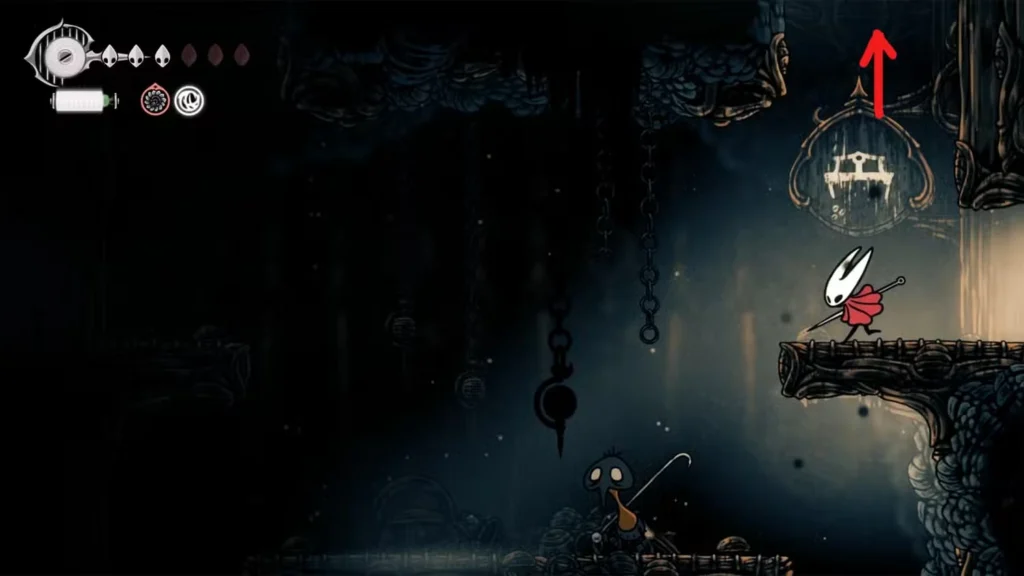
Finding the second lock:
- Head up from the Heretic Lock location
- Look for the bench sign as a navigation landmark
- Continue climbing to the top to reach the second Apostate Lock
- Prepare for a complex button-and-wheel puzzle inside
Solving the Mask Shard Puzzle: A Test of Timing
The puzzle behind the second Apostate Lock is one of Silksong’s more intricate mechanical challenges, requiring precise timing and spatial awareness.
Complete puzzle solution:
- Press the button four times to spawn four rotating wheels
- Double Jump onto the platform above the button area
- Wait for a wheel to approach – timing is crucial here
- Use the wheel as a stepping stone to jump higher and cling to the left wall
- Climb higher to position yourself for the next sequence
- Jump between the two wheels to reach and cling to the right wall
- Wait for another wheel to approach the ledge – patience pays off
- Jump onto the approaching wheel to reach the final platform
- Grab the mask shard – your reward for puzzle mastery
Critical timing tip: The wheels follow a fixed rotation pattern. Spend time observing their movement before attempting jumps. There’s no time pressure, so use patience to your advantage.
Strategic Considerations: When to Tackle This Quest
Timing your Key of Apostate acquisition affects your overall progression strategy. Consider these factors:
Early acquisition benefits:
- Opens up additional exploration paths in The Slab
- Provides access to story content and NPC interactions
- Allows you to complete related quests while in the area
Late acquisition considerations:
- Requires significant ability investment (Clawline + Double Jump)
- Boss fight may be challenging for under-equipped players
- Other progression paths might be more immediately rewarding
Beyond the Key: What Opens Up
With the Key of Apostate in hand, The Slab transforms from obstacle to opportunity. You’ll gain access to:
- Additional story sequences and character interactions
- Hidden areas with valuable collectibles and upgrades
- Quest progression for multiple storylines
- Shortcuts that streamline future navigation through the area
The key essentially unlocks The Slab’s full potential, making it worth the effort regardless of which route you choose to obtain it.
Available across Steam, Nintendo Switch, PlayStation, and Xbox, Silksong’s interconnected progression system means every key matters for the complete experience.
Final Thoughts: A Key Worth the Journey
The Key of Apostate represents everything compelling about Silksong’s progression design – meaningful choices, challenging execution, and substantial rewards. Whether you choose the safer Memorium route or brave the boss-filled Bilewater path, the key opens doors to some of the game’s most rewarding content.
Take your time, master your movement abilities, and remember that both routes lead to the same destination. The journey might test your skills, but the expanded access to The Slab’s secrets makes every challenge worthwhile. With this key in your possession, one of Pharloom’s most mysterious areas finally reveals its full potential.