Discover if the Multibinder tool is worth 880 Rosaries in Hollow Knight Silksong. Complete analysis of effects, best combinations, and purchase timing for new players.
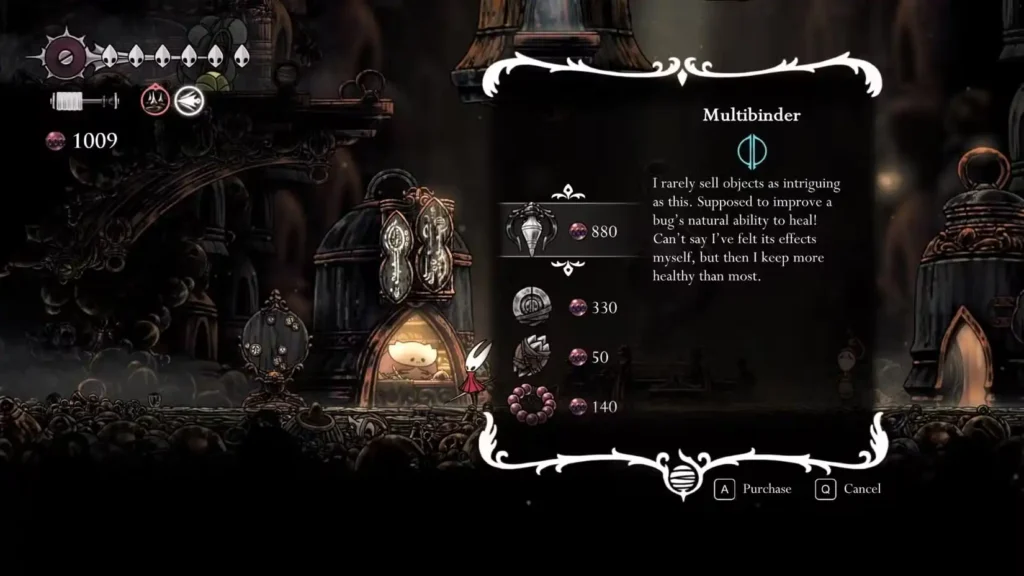
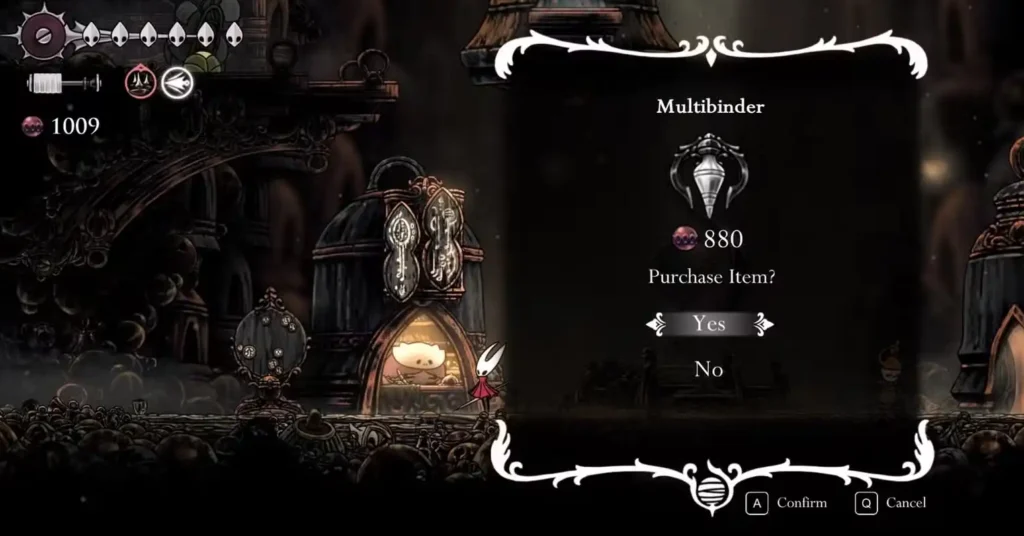
When you’re exploring Bellhart in Hollow Knight: Silksong, you’ll encounter a vendor selling the mysterious Multibinder for a hefty 880 Rosaries. With such a vague item description and steep price tag, many players find themselves staring at this blue tool wondering: “Is this actually worth my hard-earned currency?”
I’ve spent countless hours testing the Multibinder across different scenarios, and I’m here to break down everything you need to know about this polarizing tool. Spoiler alert: it’s more nuanced than you might think.
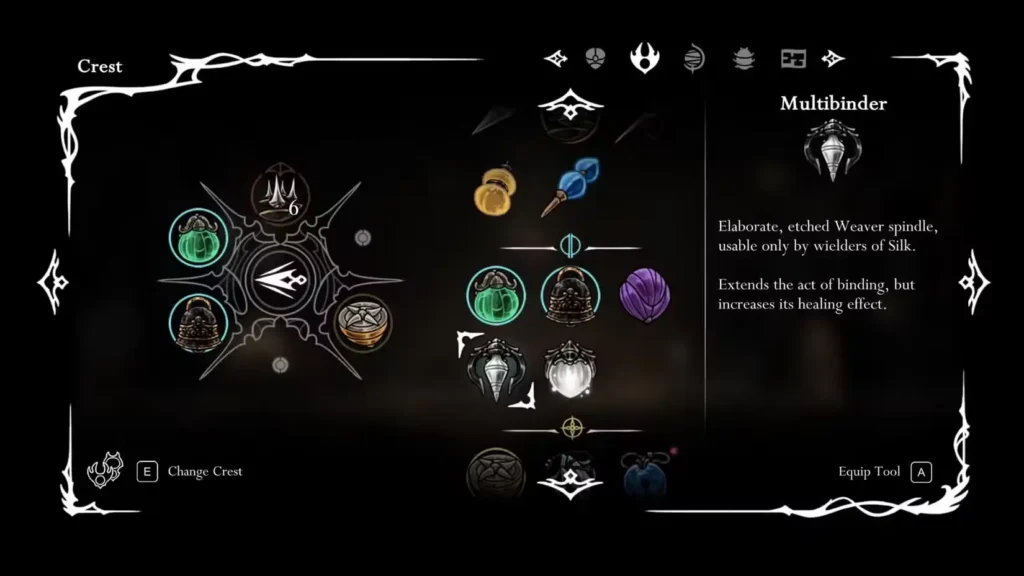
What Exactly Does the Multibinder Do?
The Multibinder’s official description reads “Extends the act of binding, but increases its healing effects” – which tells you almost nothing useful. Here’s what it actually does:
The Core Mechanic:
- Replaces Hornet’s standard 3-mask heal with a 4-mask heal
- Uses the same amount of Silk as normal healing
- Nearly doubles the animation time required
- Heals in two separate 2-mask bursts, not all at once
This split healing mechanic is actually the Multibinder’s secret weapon. Unlike standard healing where interruption means you get zero masks back, the Multibinder’s two-part system means you’ll either receive 0, 2, or 4 masks depending on when you’re interrupted.
Key Performance Points:
- First 2-mask heal completes faster than a standard 3-mask heal
- Second 2-mask heal takes significantly longer
- Animation cannot be canceled once started
- Hornet remains locked in place for the entire duration
Strategic Analysis: When the Multibinder Shines
After extensive testing, I’ve found the Multibinder excels in specific scenarios rather than serving as a universal upgrade. Here’s my honest assessment:
Defensive Playstyles
If you prefer cautious, methodical gameplay over aggressive rushdown tactics, the Multibinder becomes significantly more valuable. The extra mask of healing can be a lifesaver during prolonged encounters where you need maximum recovery per Silk spent.
Boss Encounters with Predictable Patterns
Certain bosses have extended windows where you can safely heal. The Bell Beast boss fight is a perfect example – those long attack animations give you plenty of time to complete the full Multibinder sequence.
Late-Game Resource Management
When Silk becomes more precious in challenging areas like the Abyss, getting 4 masks instead of 3 per heal can make a significant difference in your survival rate.
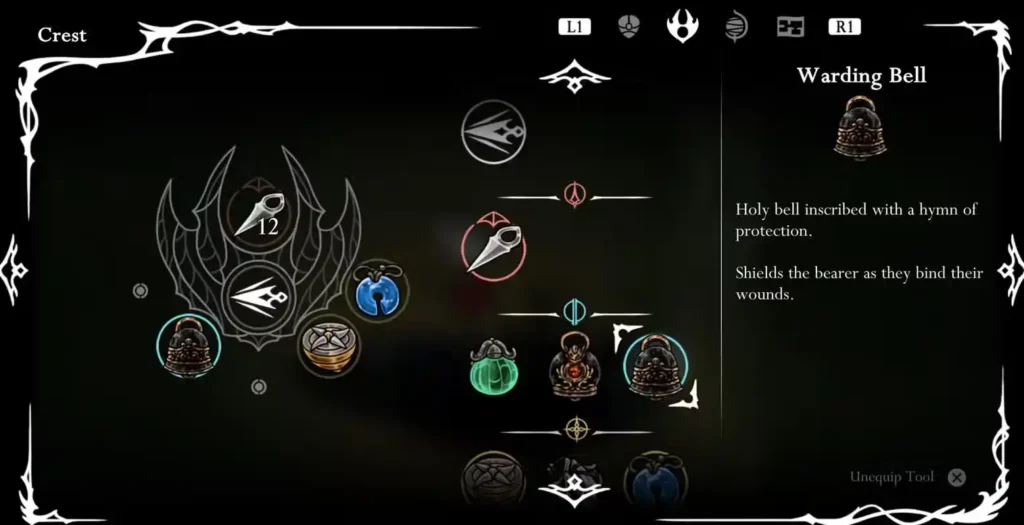
The Warding Bell Synergy That Changes Everything
Here’s where things get interesting. The Multibinder transforms from “situational” to “genuinely useful” when paired with the Warding Bell.
Why This Combination Works:
- Warding Bell prevents damage during healing but doesn’t stop interruptions
- If interrupted during the second heal, you still keep the first 2 masks
- The damage protection means failed heals don’t compound your problems
- You get more consistent healing in chaotic situations
I discovered this synergy during the Moorwing boss fight, and it completely changed my perspective on the tool’s value.
Advanced Optimization: The Injector Band Triple Threat
For players willing to dedicate three tool slots to healing optimization, adding the Injector Band creates a powerful defensive setup:
The Complete Build:
- Multibinder – Enhanced healing output
- Warding Bell – Damage protection during heals
- Injector Band – Reduced binding time
You can find the Injector Band in Whiteward, specifically below the Choral Chambers during Act 2 progression. This combination significantly reduces the Multibinder’s main weakness while maximizing its strengths.
Economic Analysis: Is 880 Rosaries Worth It?
Let’s talk money. 880 Rosaries is no joke, especially in the early game. Here’s my economic breakdown:
Early Game (Act 1):
- Skip it unless you’re specifically building around defensive tools
- Focus on essential upgrades like needle improvements first
- The rosary farming time investment isn’t justified yet
Mid Game (Act 2+):
- Consider purchasing if you have the Warding Bell
- Better farming locations make the cost more manageable
- You’ll have a clearer picture of your preferred playstyle by now
Late Game:
- Definitely worth it for completionist builds
- Resource abundance makes cost negligible
- Useful for challenging areas and boss rematches
Alternative Strategies and Tool Priorities
Before committing to the Multibinder, consider these alternatives that might better suit your playstyle:
Aggressive Players: Focus on tools that enhance your offensive capabilities rather than defensive ones. The Thread Storm skill might serve you better.
Exploration-Focused: Prioritize mobility tools like the Clawline grappling hook or movement abilities.
Balanced Approach: Get essential tools first, then return for the Multibinder once you’ve established your core build.
My Final Verdict
After thoroughly testing the Multibinder across multiple playthroughs, here’s my honest recommendation:
Buy it if:
- You prefer defensive, methodical gameplay
- You already own the Warding Bell
- You’re in Act 2 or later with disposable income
- You struggle with healing timing in boss fights
Skip it if:
- You’re an aggressive player who rarely heals
- You’re still in Act 1 and need basic upgrades
- You prefer mobility and offensive tools
- 880 Rosaries would significantly impact other purchases
The Multibinder isn’t a game-changer, but it’s a solid situational tool that becomes genuinely useful with the right supporting build. Think of it as insurance rather than a power upgrade – it won’t make you a better player, but it might save you from some frustrating deaths.
Where to Learn More
Ready to dive deeper into Silksong’s mechanics? Check out the official game on Steam, Nintendo Switch, PlayStation, or Xbox.
For more strategic insights, explore our complete tools guide and discover the best early game strategies to maximize your Silksong experience.
The Multibinder might not be flashy, but understanding its nuances can definitely improve your survival rate in the dangerous world of Pharloom. Happy exploring, and may your binds be swift and your heals complete!