Exploring Arcadia-7 with nothing but a pistol and some grenades? Yeah, that’s gonna get old real fast. The planet is crawling with hostile Vermin creatures, and if you want to survive the deeper, more dangerous regions, you’re going to need some serious firepower.
That’s where War Bonds come in.
War Bonds are StarRupture’s premium currency for military equipment. They’re how you unlock better weapons, purchase attachments, and generally upgrade your combat capabilities. You can get the basic UPP-7 Pistol and Grenades just by leveling up with the Griffits Blue Corporation, but everything beyond that—the assault rifle, shotgun, and the devastating GRIM—requires War Bonds.
The problem? War Bonds aren’t exactly handed to you. You’ll need to actively hunt for them through multiple methods if you want to unlock your full arsenal. Let me break down every single way to farm War Bonds efficiently in StarRupture.

Method 1: Level Up With the Griffits Blue Corporation
This is your most reliable and predictable source of War Bonds, though it takes time and effort.
Once you reach level 4 with the Griffits Blue Corporation and unlock the Equipment Upgrade Station, the corporation starts rewarding you with War Bonds for hitting certain milestones. Here’s exactly what you get:
- Level 5: 60 War Bonds
- Level 7: 80 War Bonds
- Level 10: 100 War Bonds
Total from corporation levels: 240 War Bonds
Now, here’s the catch—that 240 War Bonds isn’t enough to unlock all weapons in StarRupture. The three purchasable weapons alone cost 265 War Bonds total (70 for the assault rifle, 85 for the shotgun, and 110 for the GRIM). And that’s not even counting weapon attachments and upgrades.
So while corporation progression gives you a solid foundation of War Bonds, you absolutely cannot rely on it alone. You’ll need to get out there and explore.
How to level up the corporation faster:
The fastest way to rack up corporation points is by submitting high-value materials like Titanium Sheets and Wolfram Plates through your Orbital Cargo Launcher. You’ll also need Data Points to unlock advanced recipes, and you can submit Data Points directly through your habitat’s corporation screen to accelerate progression.
Setting up automated ore extraction helps enormously here, as you can continuously produce and ship materials while you’re off exploring and looting for more War Bonds.
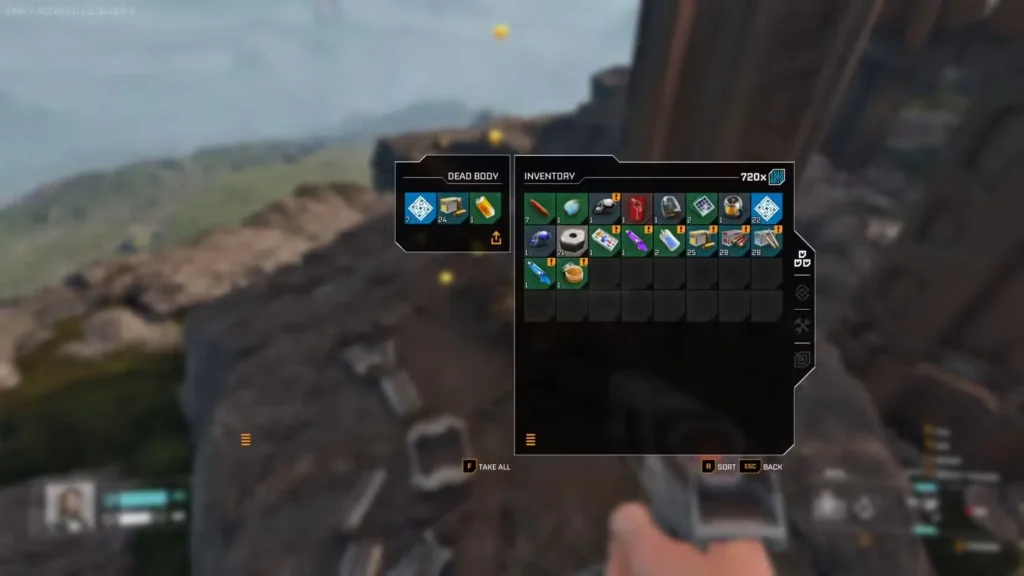
Method 2: Loot Dead Bodies Across Arcadia-7
This is probably the easiest method for getting additional War Bonds once you’ve exhausted your corporation rewards.
Dead bodies are scattered all across the surface of Arcadia-7, and many of them contain valuable loot—including War Bonds.
How to find dead bodies efficiently:
- Unlock the map first – You absolutely need to unlock the map before you start serious looting runs
- Press M to open your map – Dead bodies appear as distinct icons on the map
- Navigate to body locations – Head toward any body icon you haven’t looted yet
- Search the corpse – Press the interact button to loot
Not every dead body will have War Bonds, but even when they don’t, you’ll usually find other useful items:
- Materials you can analyze for Data Points
- Resources like Calcium or Meteorite Hearts
- Equipment or components
- Consumables like health items or water
The randomness can be frustrating, but dead bodies are plentiful enough that you’ll accumulate War Bonds steadily if you make looting runs a regular habit.
Pro tip: Make sure you’ve increased your inventory size before going on extended looting expeditions. Nothing’s worse than finding valuable loot and not having room to carry it back to base.

Method 3: Explore Abandoned Settlements
As you venture further from your starting location, you’ll start encountering the remains of previous human settlements on Arcadia-7. These abandoned structures are goldmines for War Bonds—if you’re willing to work for them.
What makes settlements valuable:
Abandoned settlements contain storage boxes with puzzle locks. Unlike simple loot containers, these require you to solve environmental challenges to access them:
- Broken door puzzles – You might need to crouch and squeeze through a damaged entrance to reach a storage box on the other side
- Platforming challenges – Some boxes are placed in hard-to-reach locations that require precise jumping sequences
- Environmental hazards – You may need to navigate around dangers or find alternate routes through the settlement
The extra effort is worth it, though. Settlement storage boxes have a higher chance of containing War Bonds compared to random loot scattered across the landscape.
Exploration tips for settlements:
- Search thoroughly – Don’t just grab the obvious loot and leave. Check every room, every corner, and every vertical space for hidden storage boxes
- Bring healing items – Settlements can still have environmental hazards or occasionally attract Vermin. Know how to heal before you go in
- Be prepared for combat – Having grenades unlocked helps clear out any threats lurking in confined spaces
- Take your time – Rushing through platforming sections often leads to fall damage or missed loot
Settlements are some of the most rewarding locations to explore for War Bonds, but they require patience and careful searching.
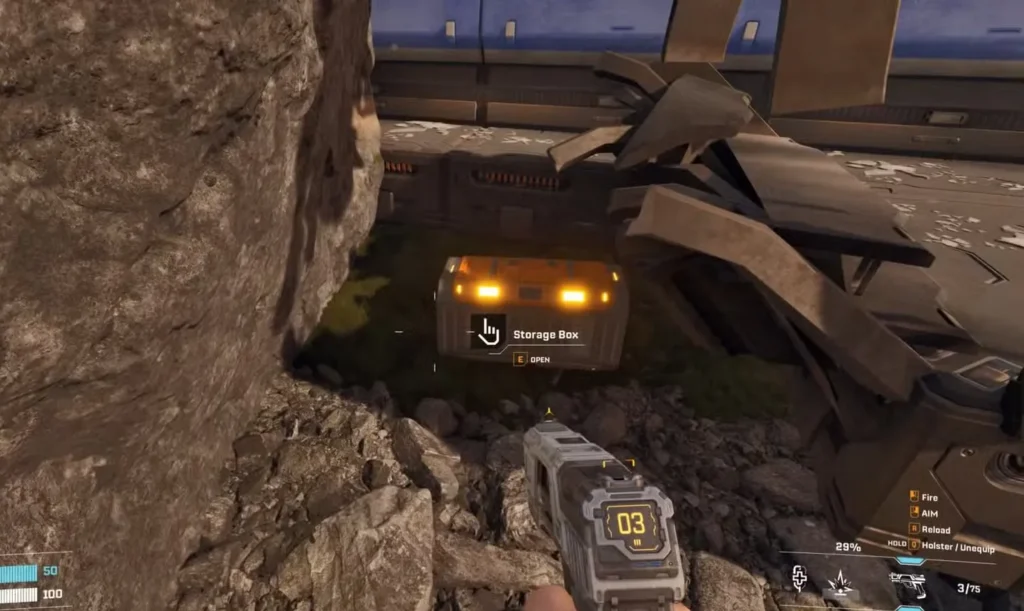
Method 4: Find Hidden Storage Boxes in the Wild
Settlements aren’t the only places hiding valuable storage boxes. Arcadia-7 is full of hidden containers tucked away in unexpected locations.
Common hiding spots:
- Cave systems – Explore underground areas thoroughly; storage boxes are often hidden in side passages or elevated ledges
- Behind natural formations – Look around large rock formations and cliff faces
- In hard-to-reach locations – Check elevated areas that require climbing or careful jumping
- Near landmarks – Any significant geographical feature is worth investigating
The general rule: If you’ve found a new area or landmark that seems significant, search it completely before moving on. Chances are there’s a hidden storage box somewhere nearby.
Just like with dead bodies and settlements, these hidden boxes aren’t guaranteed to contain War Bonds, but they frequently do. And even when they don’t, you’ll usually walk away with something useful—materials, equipment, or items you can convert into Data Points.
Maximizing Your War Bond Income
Here’s my recommended strategy for farming War Bonds efficiently:
Early Game (Levels 1-4):
- Focus on corporation progression to unlock the Equipment Upgrade Station
- Gather basic building materials and set up production
- Start mapping dead body locations as you explore
Mid Game (Levels 4-7):
- Continue leveling the corporation to collect the 240 guaranteed War Bonds
- Make systematic looting runs to nearby dead bodies
- Begin exploring abandoned settlements
- Set up automated production to reduce time spent on resource gathering
Late Game (Level 7+):
- Thoroughly explore all settlements and landmarks
- Search cave systems for hidden storage boxes
- Make long-range expeditions to unexplored map regions
- Loot every dead body you haven’t already checked
Efficiency tips:
- Plan looting routes – Instead of random wandering, plan efficient routes that hit multiple dead bodies and settlements in one trip
- Mark discovered locations – Use your map to track which areas you’ve already looted
- Combine objectives – While out collecting War Bonds, also gather rare resources like Ignitium when opportunities arise
- Stay combat-ready – Always have weapons and healing items equipped when exploring dangerous areas
- Build forward bases – Consider placing additional Base Cores near resource-rich or loot-heavy regions to reduce travel time
How Many War Bonds Do You Actually Need?
Let’s do the math on what you’re working toward:
Weapons:
- MAR-9 “Phantom” Assault Rifle: 70 War Bonds
- SLAMS-12 Shotgun: 85 War Bonds
- M175 “GRIM”: 110 War Bonds
- Subtotal: 265 War Bonds
Weapon Attachments and Upgrades: The game also offers various attachments and upgrades for your weapons, each costing additional War Bonds. The exact costs vary, but you should expect to spend another 100-200+ War Bonds if you want to fully upgrade your preferred loadout.
Grand Total Estimate: 350-500+ War Bonds
With only 240 guaranteed from corporation levels, you’ll need to find at least 110 War Bonds through exploration just to unlock all the basic weapons—and significantly more if you want upgrades and attachments.
This is why thorough exploration is essential. You simply cannot progress your combat capabilities without getting out there and looting.
My Take on War Bond Farming
The War Bond system does a good job encouraging exploration without making it feel too grindy. Unlike some survival games where rare currency is purely RNG-based, StarRupture gives you that guaranteed 240 from corporation levels, which means you can at least unlock the assault rifle and shotgun through normal progression.
The exploration-based War Bonds feel like a reward for curiosity and thoroughness rather than a frustrating grind. Finding a hidden storage box with 15 War Bonds inside after solving a tricky platforming puzzle feels genuinely satisfying.
That said, I do wish the game was slightly more transparent about how many total War Bonds you’ll need. It’s easy to blow your first 70 bonds on the assault rifle, then realize you’re still far from affording the GRIM and its attachments.
My advice: Be strategic about your purchases. The assault rifle at 70 bonds is probably your best first buy for versatility, but don’t impulse-purchase attachments until you know you have enough bonds to unlock the other weapons you want.
War Bond Farming Checklist
✓ Reach corporation level 4 to unlock Equipment Upgrade Station
✓ Progress to level 5, 7, and 10 to collect 240 guaranteed War Bonds
✓ Unlock the map for efficient dead body location tracking
✓ Systematically loot all dead bodies shown on your map
✓ Explore every abandoned settlement thoroughly
✓ Search cave systems and landmarks for hidden storage boxes
✓ Check corners, elevated areas, and behind natural formations
✓ Plan efficient looting routes to maximize finds per expedition
✓ Save War Bonds for strategic weapon purchases
Frequently Asked Questions
What’s the fastest way to farm War Bonds in StarRupture?
The fastest method is combining corporation progression with systematic exploration. Push to corporation level 10 for the guaranteed 240 War Bonds while simultaneously making regular looting runs to dead bodies and settlements. Focus on areas you haven’t fully explored yet, as each new region typically has multiple loot sources. Setting up automated production frees up more time for exploration, which accelerates your War Bond income significantly.
Can War Bonds be used for anything other than weapons?
War Bonds are primarily currency for military equipment at the Equipment Upgrade Station. This includes the three main purchasable weapons (assault rifle, shotgun, and GRIM) as well as various weapon attachments and upgrades. You cannot use War Bonds for building materials, base upgrades, or other non-combat purchases. They’re a specialized currency specifically for improving your combat capabilities.
Do War Bonds respawn or can I run out permanently?
The 240 War Bonds from corporation levels are one-time rewards, but exploration-based War Bonds are finite per world. Each dead body, storage box, and settlement container can only be looted once. However, the world is large enough that you should be able to find well over 500 total War Bonds if you explore thoroughly. If you’re worried about running out, prioritize exploring new regions and checking every possible loot location before spending bonds on attachments.
Should I save War Bonds or spend them immediately?
Save them until you have a clear plan. While it’s tempting to buy the assault rifle immediately at 70 bonds, make sure you understand your total needs first. If you want all three weapons (265 bonds total), don’t spend on attachments until you’ve unlocked all the base weapons. The assault rifle is generally the best first purchase for its versatility, but the GRIM is the most powerful end-game weapon if you’re willing to save up 110 bonds for it.
War Bonds are your ticket to surviving the toughest challenges StarRupture throws at you. By combining steady corporation progression with thorough exploration, you’ll have enough bonds to unlock a full arsenal and dominate Arcadia-7’s hostile wildlife.
For more essential StarRupture guides, check out the official Steam page, learn about all playable characters, and don’t miss our beginner’s guide for new players.
Make sure you’ve got the basics covered too—know how to connect power for your expanding base, and learn how to destroy buildings and rails when you need to reorganize your layout.