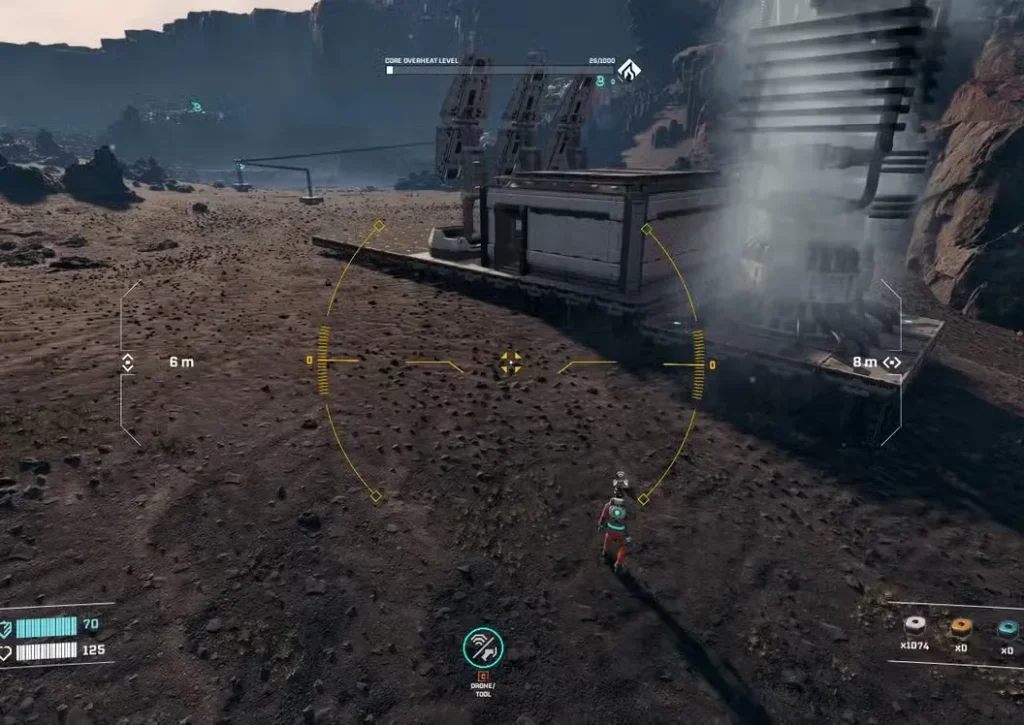
If you’ve been playing StarRupture and struggling with the default building perspective, I’ve got great news: the Building Drone is about to change everything. This is hands-down one of the most useful tools in the entire game, especially if you’re trying to construct those sprawling sci-fi factories that actually make sense.
The Building Drone gives you complete freedom of movement and a 360° perspective while building, which makes creating efficient production lines, multi-level structures, and complex rail systems infinitely easier. Whether you’re planning a simple basic building materials setup or an elaborate automated factory, this tool is essential.
Let me walk you through exactly how to unlock this incredible piece of equipment and master its controls.
How to Unlock the Building Drone in StarRupture?
Unlike some tools that you craft or find lying around, the Building Drone is a corporation reward that requires some grinding with a specific faction.
Unlock Requirements
Corporation: Clever Robotics
Required Level: Level 4
To reach Level 4 with Clever Robotics, you’ll need to deliver resources via two methods:
Method 1: Resource Delivery
- Wolfram Wire
- Wolfram Plate
- Delivered using the Orbital Launcher
If you haven’t worked with Wolfram yet, check out the guide on how to get Wolfram Powder to understand the production chain.
Method 2: Data Points
- Submit Data Points through the Corporate Terminal
Pro tip: Mixing both methods speeds up your progression significantly. Farm some Goliaths for massive Data Point drops (5,000 per kill) while simultaneously producing Wolfram products for deliveries.
Once you hit Level 4 with Clever Robotics, claim your reward from the corporation menu, and the Building Drone will be permanently unlocked for your character.

How to Activate the Building Drone
Using the drone is straightforward once you know the key bindings:
Step 1: Press B to activate Building Mode (this is the standard building interface)
Step 2: Press C to activate the Drone Camera
Boom — you’re now piloting the drone with full 360° freedom. The perspective shift might feel disorienting at first, but trust me, after a few minutes you’ll never want to go back to ground-level building.

Complete Building Drone Controls
Here’s the full control scheme you need to master. I’d recommend practicing in an open area before attempting complex builds:
Movement Controls
- WASD — Move the drone camera horizontally (forward, left, backward, right)
- Spacebar — Ascend (go up)
- CTRL — Descend (go down)
These basic movement controls give you complete freedom to position yourself anywhere in 3D space around your build area.
Building Controls
- B — Open the Building Menu from the drone’s perspective (lets you switch between different structures)
- F — Enter Deconstruction Mode (for destroying buildings/rails)
- RMB (Right Mouse Button) — Fix/place structures at the current position
- Mouse Wheel (Scroll) — Adjust height/position of structures before placement
- Y — Lock structures at a specific height (super useful for platforms and rails)
- R — Rotate the structure you’re placing
- Q — Cancel building and return to previous state
Advanced Placement Tips
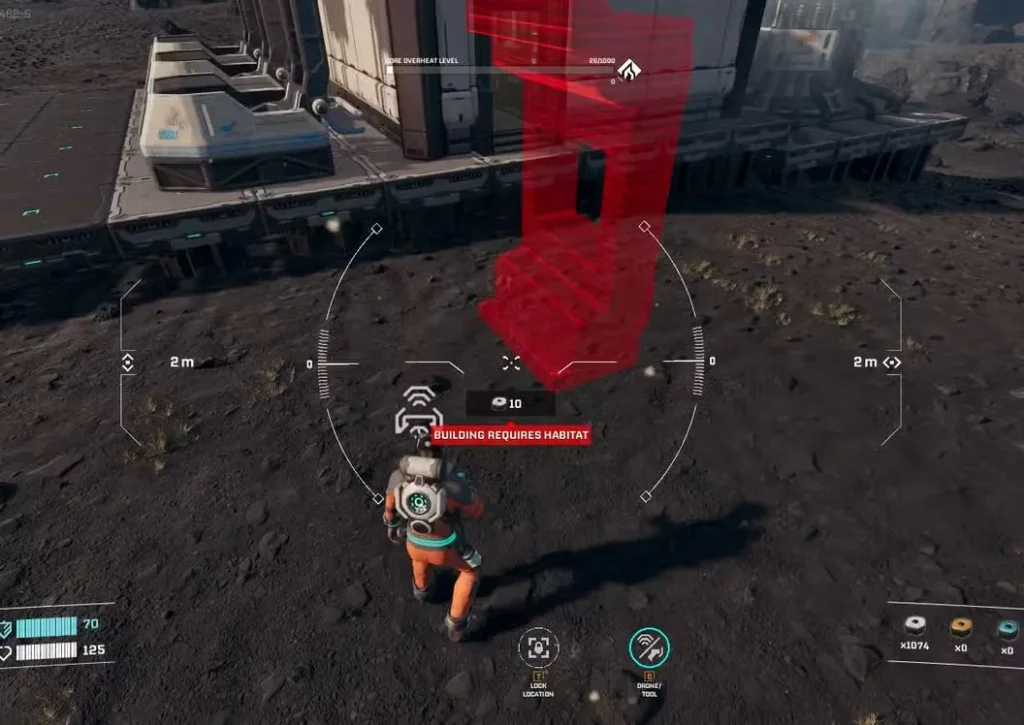
Color Coding System: The building interface uses color indicators to show placement validity:
- Normal/White — Valid placement, structure has adequate support
- Yellow — Warning: “Structure Has Not Enough Support” — needs more ground connections
- Red — Invalid placement, cannot build here at all
If you see yellow or red, try these fixes:
- Add more support pillars connecting to the ground
- Rotate the structure with R for better alignment
- Adjust height with the mouse wheel
- Connect to existing structures for additional support
Building Drone Limitations (Important)
The Building Drone is powerful, but it has some restrictions you need to understand:
1. Range Limitation
The drone has a limited area of effect from your character’s position. If you fly too far away, you’ll receive a warning message:
“It’s not possible to build too far from the original building spot.”
Solution: Move your character closer to the build area, then reactivate the drone. Think of your character as the “anchor point” for building operations.
2. Material Consumption
The drone consumes building materials directly from your inventory.
Before starting any building session:
- Check your inventory size capacity
- Stock up on necessary materials
- Consider setting up storage nearby for larger projects
Running out of materials mid-build is frustrating, especially when constructing elevated structures.
3. Ground Support Requirements
All structures need adequate support connections to the ground. If platforms don’t have enough support, you’ll see the yellow warning interface.
Support Building Strategy:
- Start with a solid foundation of pillars
- Work upward gradually, ensuring each level is properly supported
- Use multiple connection points for stability
- Don’t build out too far from support structures
Advanced Building Techniques with the Drone
Once you’ve mastered the basics, here are some pro-level strategies:
Multi-Level Rail Systems
One of the best uses for the Building Drone is creating elevated rail networks that don’t clutter your base:
Step 1: Stack Pillars to your desired height
Step 2: Use the drone to place horizontal platforms or directly attach rails
Step 3: Press Y to lock rails at consistent height
Step 4: Continue building outward, maintaining the elevation
This creates clean, organized transport lines that:
- Save massive amounts of ground space
- Prevent collisions with other structures
- Improve base aesthetics dramatically
- Make automating ore extraction cleaner and more efficient
3D Factory Planning
The drone excels at constructing vertical production chains:
- Place extractors at ground level
- Build processing stations on elevated platforms
- Use gravity-fed conveyors where possible
- Create separate “floors” for different production stages
This approach maximizes efficiency while keeping your base organized and visually impressive.
Power Grid Management
When connecting power across complex bases:
- Use the drone’s elevated view to trace power line paths
- Identify the most efficient connector placement
- Avoid tangled cable runs that cause confusion later
- Plan power distribution before building production structures
Practical Building Workflow
Here’s my recommended workflow for any significant construction project:
Phase 1: Planning
- Scout the area with the drone
- Mark out where major structures will go
- Plan support pillar placement
- Identify resource locations you’ll connect to
Phase 2: Foundation
- Build all ground-level support structures first
- Place pillars for elevated sections
- Establish the power grid backbone
- Create the primary storage area
Phase 3: Vertical Construction
- Use the drone to build upward
- Lock heights with Y for consistency
- Add platforms level by level
- Verify support at each stage
Phase 4: Systems Integration
- Connect conveyors and rails
- Route power connections
- Add stabilizers and other components
- Test material flow
Phase 5: Optimization
- Use the drone to spot bottlenecks
- Reorganize inefficient sections
- Add aesthetic touches
- Plan expansion areas
Common Building Drone Mistakes to Avoid
Mistake 1: Building Too Far from Your Character Always keep your character relatively close to your build site. Trying to build from maximum range leads to constant warning messages.
Mistake 2: Insufficient Material Stockpiling Running out of materials when you’re 50 meters in the air is painful. Always bring 2-3x what you think you’ll need.
Mistake 3: Ignoring Support Warnings That yellow warning exists for a reason. Address support issues immediately rather than continuing to build — unsupported structures can cause cascading failures.
Mistake 4: Not Using Height Locking (Y) Trying to manually keep rails or platforms at the same height is tedious and imprecise. Use Y to lock heights and maintain consistency.
Mistake 5: Overcomplicating Early Designs Start simple, especially while learning the controls. You can always expand and optimize later once you’re comfortable with the drone’s movement system.
Integration with Other Systems
The Building Drone becomes even more powerful when combined with other unlocked features:
- Rotors and mechanical components for advanced automation
- Crafting recipes that enable new structure types
- Weapon mods stations integrated into your base defense
- Helium and Ignitium processing facilities
For comprehensive base planning strategies, check out the StarRupture beginner’s guide.
Frequently Asked Questions
Can I use the Building Drone in combat situations or while being attacked?
While technically you can activate the drone during combat, it’s extremely risky. You’ll be controlling the drone camera while your character remains stationary and vulnerable. If Vermin are nearby, they’ll happily tear you apart while you’re distracted. Always clear the area first or build defensive structures before using the drone in dangerous regions.
Does the Building Drone consume power or have a battery that depletes?
No, the Building Drone is a permanent unlock that doesn’t require power, charging, or maintenance. Once unlocked from Clever Robotics Level 4, you can use it indefinitely without any resource costs beyond the building materials themselves. It’s purely a quality-of-life tool for construction.
Can I increase the range of the Building Drone?
Unfortunately, the drone’s range from your character position is fixed and cannot be extended through upgrades or progression. However, you can work around this by strategically repositioning your character as you build, essentially “leapfrogging” across your construction site to maintain coverage.
What happens if I exit the drone mid-construction?
Pressing Q or C will cancel building mode and return you to normal gameplay. Any structures you’ve already placed will remain, but any structure you were in the process of placing (but hadn’t confirmed with RMB) will be cancelled. Your materials won’t be consumed for unconfirmed placements, so there’s no penalty for exiting the drone.
The Building Drone is genuinely one of the most transformative unlocks in StarRupture. It takes your building capabilities from “functional but frustrating” to “limitless creative potential.” Whether you’re optimizing production efficiency, creating aesthetic masterpieces, or just trying to route some rails without losing your mind, this tool is absolutely essential.
Invest the time to reach Clever Robotics Level 4 early in your progression — you won’t regret it. Happy building out there on Arcadia-7!