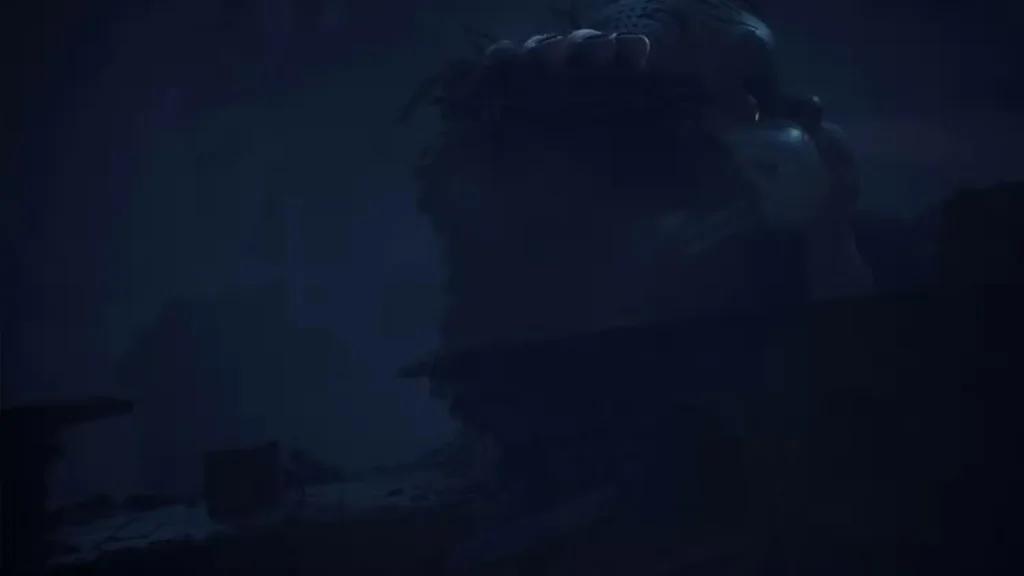
Welcome to The Spiral. Your first stop? The Necropolis—a crow-infested graveyard where a giant baby with a petrifying gaze roams freely, turning anything she looks at into stone. No pressure.
Chapter 1 serves as Little Nightmares 3‘s introduction to cooperative mechanics, puzzle-solving, and the signature atmospheric horror the series is known for. Whether you’re playing solo with AI or co-op with a friend, this guide will walk you through every puzzle, collectible location, and baby encounter in the Necropolis.
What you’ll find in this guide:
- Complete step-by-step walkthrough from start to finish
- All 5 Doll collectible locations
- How to find and shoot all 11 Crows (Birdbrained achievement)
- Puzzle solutions and platforming tips
- Baby encounter strategies (Peekaboo achievement guide)
- Achievement unlocking opportunities
Let’s dive into the depths of the Necropolis and make it out alive.
Starting the Necropolis: The Mirror Vision
Your journey begins with Low waking up from a strange mirror vision—a recurring motif you’ll see throughout Little Nightmares 3. This opening establishes the dreamlike, unsettling tone that defines the entire chapter.
First steps:
- After Low awakens, proceed forward through the initial area
- Look for a shoe on the ground (yes, really)
- Pick up the shoe and aim at the button mechanism ahead
- Throw the shoe at the button to unlock the bridge
Why this matters: This simple opening teaches you the throwing mechanic, which you’ll use throughout the game for switches, distractions, and puzzle-solving.
Pro tip: If you’re playing solo, watch how the AI companion automatically positions themselves. The game is teaching you cooperation patterns right from the start.
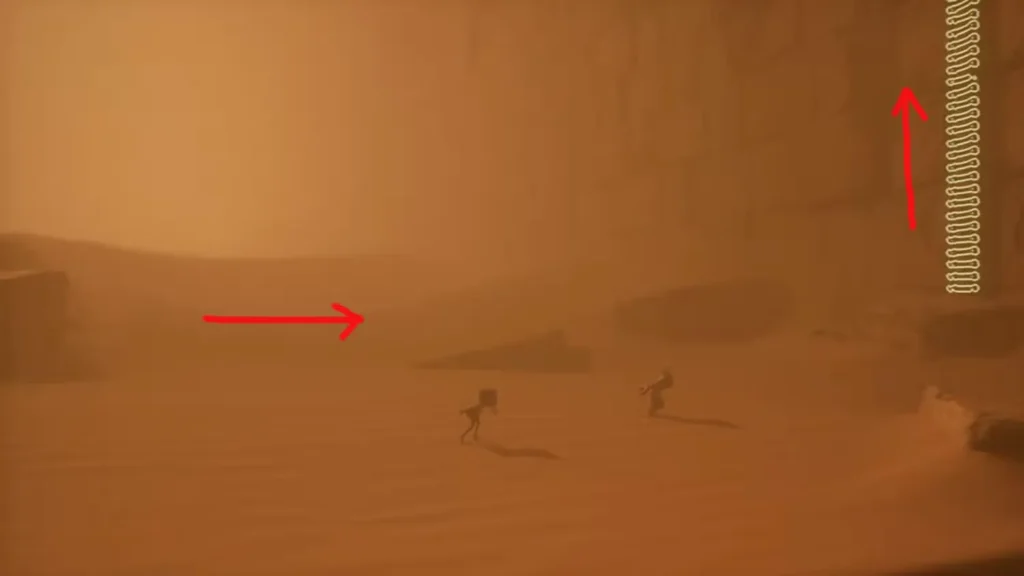
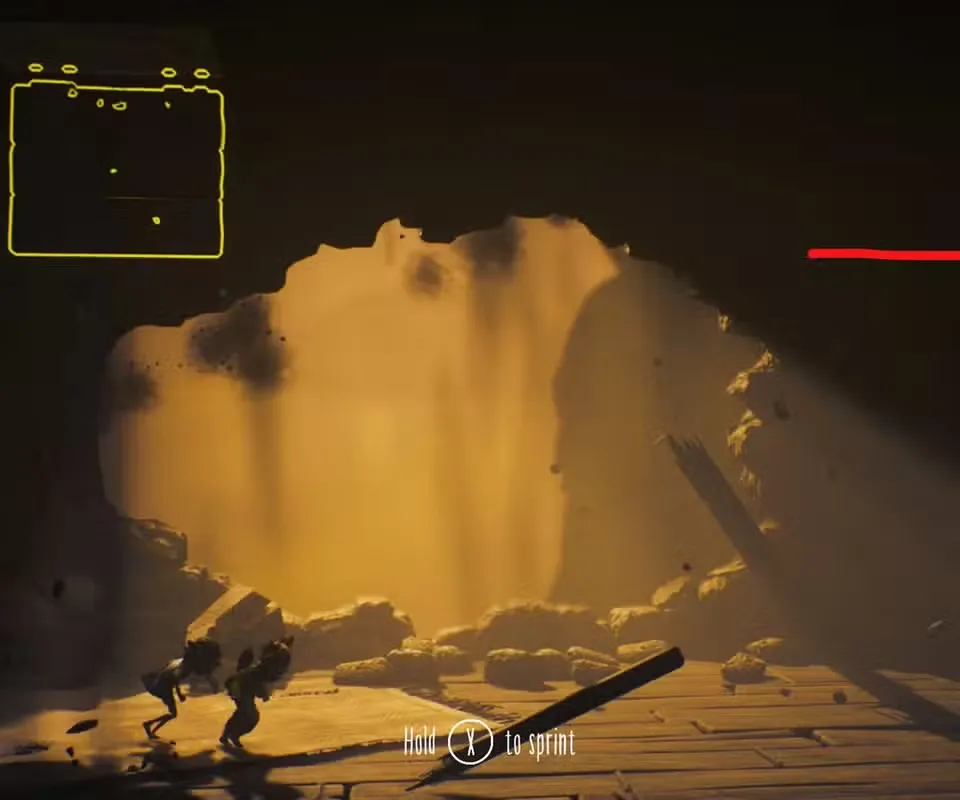
Crossing the Desert and Early Tunnels
After unlocking the bridge:
- Cross the bridge that extends over the chasm
- Jump down to the desert area below
- Climb the ladder on the far side
- At the end of the tunnel, switch to Alone (the wrench character)
- Use the wrench to destroy the rocks blocking your path
Environmental note: The desert landscape immediately establishes the Necropolis’s desolate, abandoned atmosphere. Crows circle overhead—foreshadowing the baby’s connection to these birds.
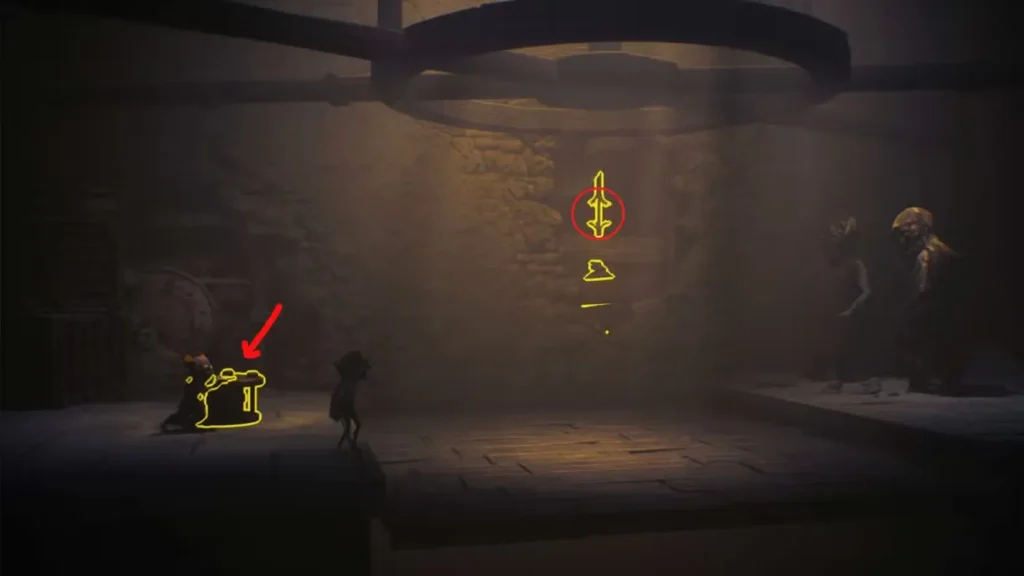
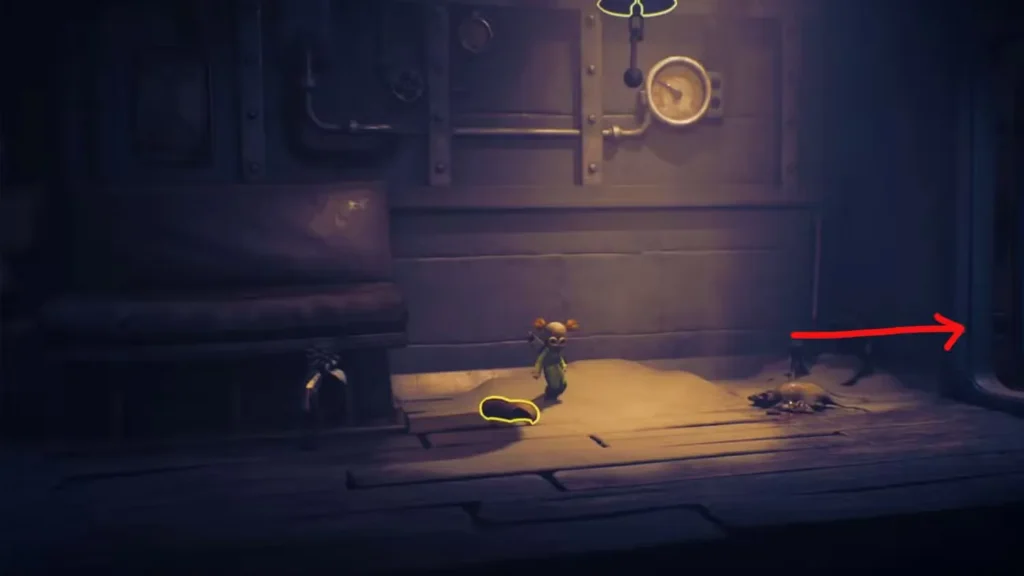
First Doll Collectible Location
Right after breaking through the rocks, you’ll encounter your first collectible opportunity.
How to get Doll #1:
- After Alone destroys the rocks, look for a box of organs (unsettling, yes)
- Grab and pull this box toward you
- Use it to squeeze through the gap in the wall
- The first Doll is in this hidden area
Collectible tip: The Necropolis contains 5 Dolls total. Finding all of them unlocks the Toybox Achievement. They’re easy to miss, so explore thoroughly.
The Crow Shooting Tutorial (Birdbrained Achievement)
As you progress through this section, you’ll notice crows perched throughout the environment.
Important achievement opportunity:
- There are 11 Crows total in the Necropolis chapter
- Use Low’s bow to shoot them as you encounter them
- Shooting all 11 unlocks the Birdbrained Achievement
- They don’t respawn, so don’t miss any

Where to find crows:
- Perched on ledges and railings
- Sitting on wooden beams
- Near puzzle areas (the game places them as optional challenges)
- Some are easy to spot; others require looking around carefully
Strategy: Make it a habit to scan the environment with Low’s bow before proceeding to new areas. The auto-lock will highlight interactive objects, including crows.
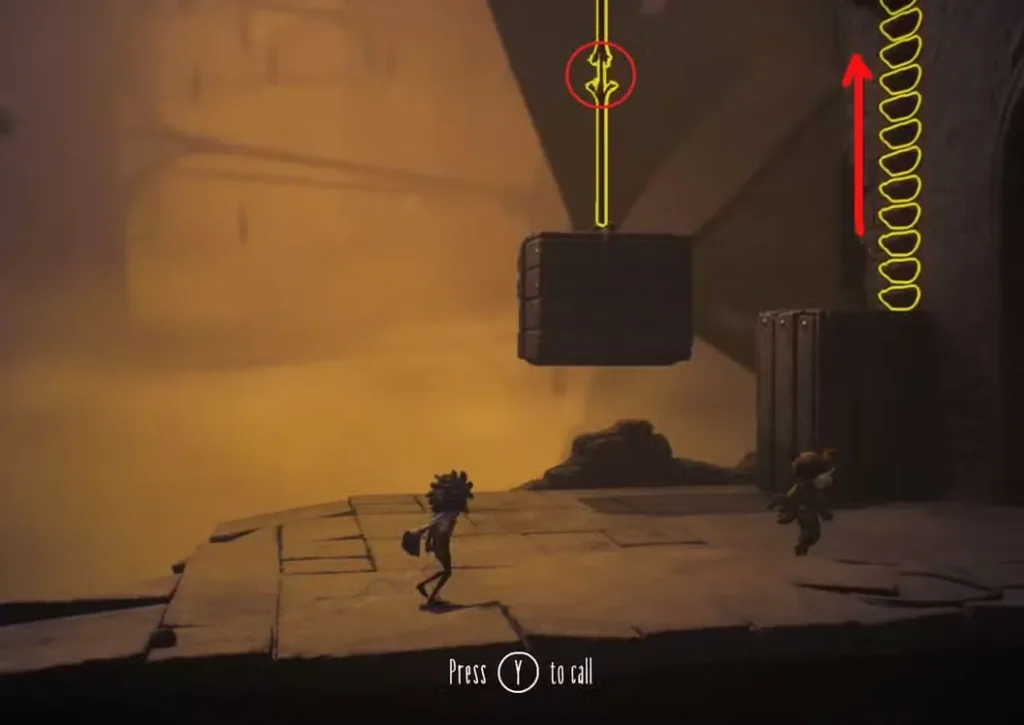
Plank Walking and Box Puzzle Section
This sequence introduces vertical traversal and Low’s ranged puzzle-solving.
Step-by-step:
- Walk across the wooden plank bridging the gap
- Switch to Low and aim at the rope above
- Shoot the rope to drop a box down
- Use the box to climb up to the higher platform
- Walk toward the end of this platform
- Shoot another rope to release a second box
- Use this box to jump through the small gap ahead
Puzzle logic: Little Nightmares 3 loves this pattern—use ranged attacks to drop platforms, then use melee to interact with mechanisms. Low and Alone’s abilities complement each other perfectly.
Platforming tip: The planks are narrow but forgiving. Take your time—there’s rarely a timer pushing you forward in puzzle sections.
Rotating Lever Coordination Puzzle
After navigating the planks and gaps, you’ll encounter your first real cooperation challenge.
How it works:
- Carefully walk on the planks to reach the lever area
- Go through another gap to access the mechanism
- Switch to Alone and position them at the lever
- Use the wrench to rotate the lever
- This creates a platform allowing Low to reach the other side
- Low then shoots a rope to complete the sequence
Co-op coordination: If playing with a friend, one person should focus on the lever while the other prepares to move. Communication is key here—call out when you’re rotating.
Solo play: The AI handles this beautifully. Just switch between characters and the companion will hold their position until needed.
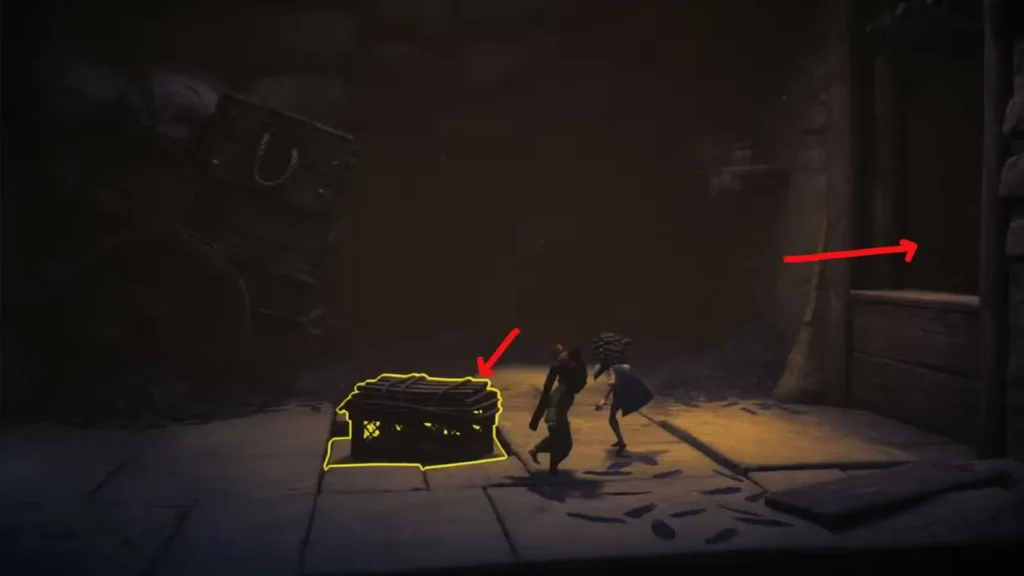
Pressure Plate and Cage Puzzle
Simple but effective:
- Move to the next area and locate the large cage
- Both characters should push the cage onto the pressure tile
- The pressure tile opens a pathway forward
Design note: This teaches you that some objects require both characters working together. Weight-based puzzles appear frequently throughout Chapter 1.
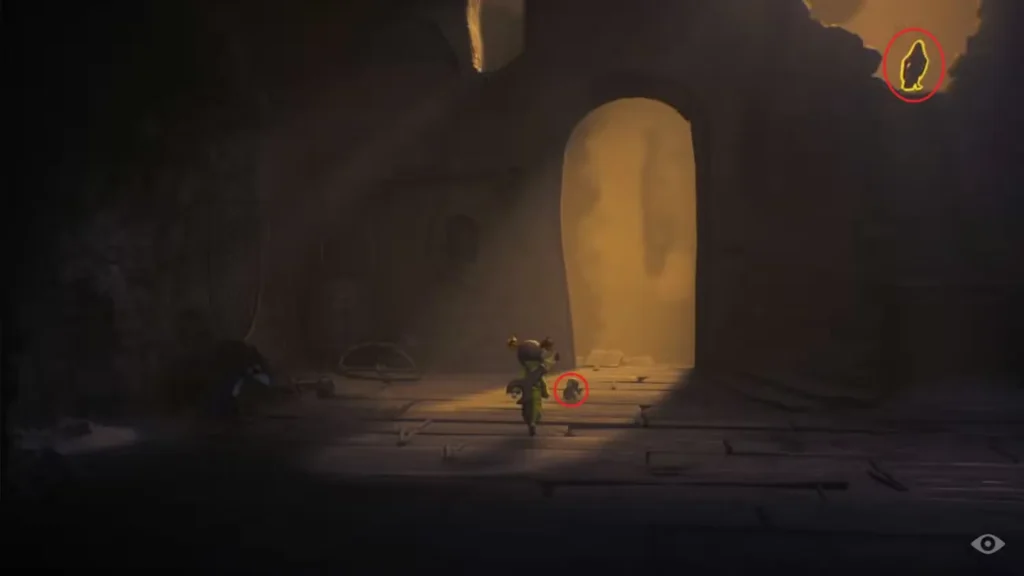
Ladder, Lever, and Key Puzzle Sequence
This multi-step puzzle combines climbing, lever mechanics, and Low’s bow.
Complete solution:
- Climb the ladder to the upper area
- Head left using the wooden planks
- One character rotates the lever (use Alone’s wrench)
- The other character stands on a box that rises
- The elevated character pulls a lever to lower a ladder
- Both characters work together to remove the wooden plank blocking the left path
- Switch to Low and look up for a crow holding a key
- Shoot the crow to make it drop the key
- Return to the bottom and collect the key
- Use the key to unlock the door ahead
Crow tip: This is one of the 11 Crows counting toward the Birdbrained achievement. Don’t forget to shoot it!
Why this puzzle is clever: It teaches vertical thinking. The key isn’t hidden in a chest—it’s held by an enemy you need to shoot down. Environmental awareness is crucial.
The Giant Arm Encounter and Feathery Umbrellas
Now things get more intense. The baby’s presence becomes known through her massive arm reaching into areas.
Navigating this section:
- Open the small door together (requires both characters)
- Wait for the giant arm to withdraw before proceeding
- Move forward past the air ducts quickly
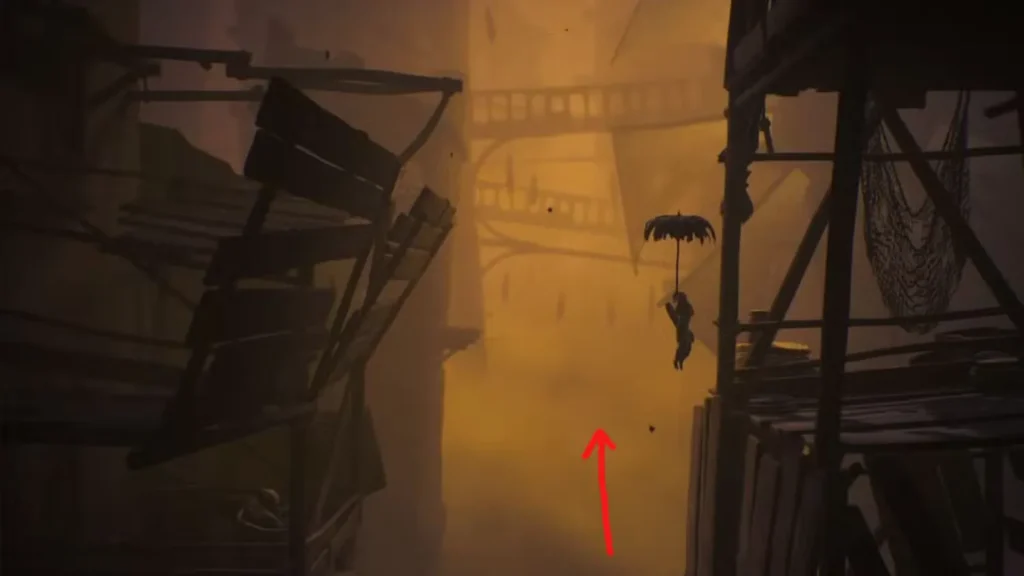
- Open a closet to find two feathery umbrellas
- Equip the umbrellas (both characters need one)
New mechanic unlocked: The feathery umbrellas allow you to glide and slow your fall, similar to the raincoat from Little Nightmares II. They’re essential for many upcoming platforming sections.
Umbrella Flight and Hatch Puzzle
Time to use those new umbrellas.
How to proceed:
- Return to the air ducts you passed earlier
- Open the umbrella near the ducts to fly upward on the air current
- Glide down using the rope on the other side
- Both characters jump simultaneously on the hatch to break through and fall down
The Windy City Achievement opportunity:
- Jump from a high place
- Open the umbrella at the last second before hitting the ground
- Time it right to earn this achievement
Umbrella controls: Hold the umbrella button to glide, release to fall faster. Mastering this timing is crucial for several upcoming sections.
Sprint, Glide, and Wall Breaking Sequence
The pacing picks up as the baby’s presence becomes more threatening.
Fast-paced section:
- After the giant hand retreats, sprint to the right
- Use the umbrella to glide upward on air currents
- Switch to Alone and break the wall with the wrench
- Equip the feathery umbrella again
- Glide down to reach a door
- Open the door together
Tension building: Notice how the game alternates between slow puzzle sections and faster movement challenges. This rhythm keeps the Necropolis from feeling repetitive.
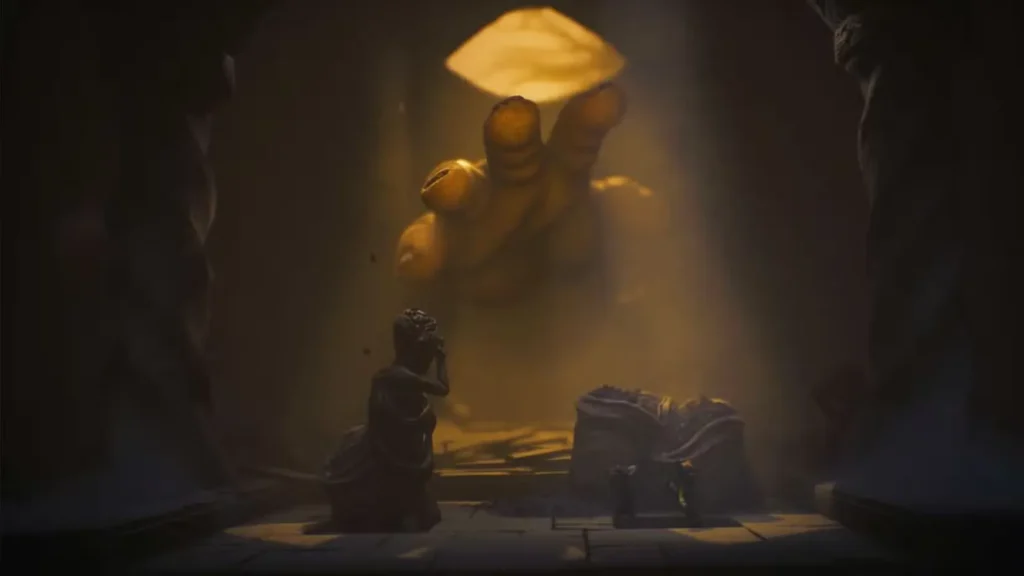
First Baby Gaze Encounter: The Petrification Room
Here’s where things get serious. The baby’s petrifying gaze is introduced as the chapter’s primary threat.
How the mechanic works:
- The baby’s gaze turns you to stone instantly if you’re exposed
- Line of sight is everything—if she can see you, you’re dead
- Hide behind columns, statues, and objects to break line of sight
- The baby moves in patterns—wait for her to look away before advancing
Surviving this room:
- Use the columns and statues to hide from the baby’s gaze
- Move only when she’s looking elsewhere
- Watch her head movements to predict when it’s safe
- At the end, stand still on the pressure tile
- The ground acts as an elevator, lowering you to safety
Strategy tip: Patience is key. Don’t rush. The baby’s movement patterns are consistent, so observe for a few seconds before committing to movement.
Doll #2 Location and Tunnel Progression
After escaping the baby:
- Destroy the rocks on the left using Alone’s wrench
- Grab Doll #2 from the revealed area
- Head through the left crack in the wall
- Proceed forward into the tunnel
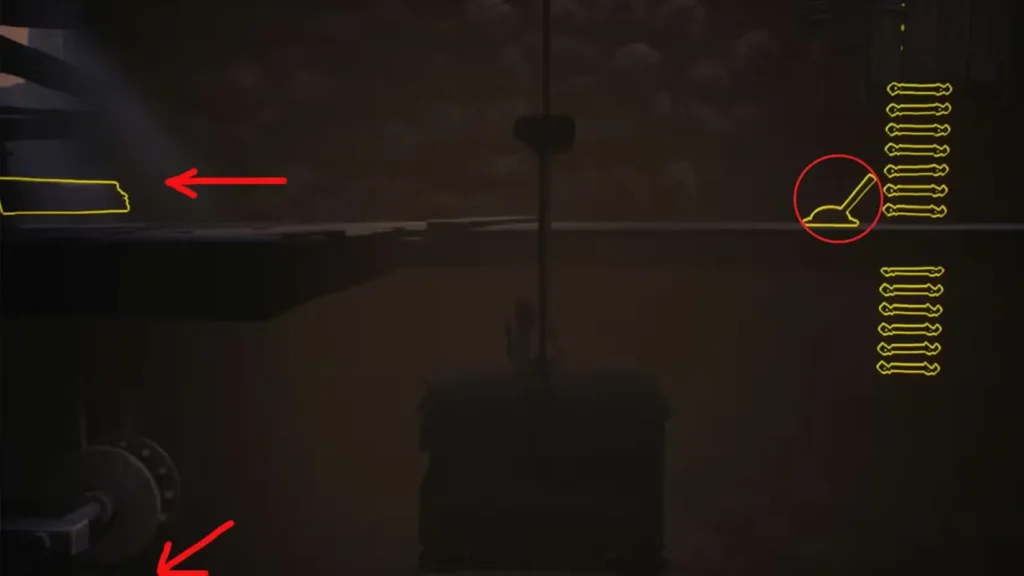
- Walk past the hanging bodies (creepy environmental storytelling)
- Find a small door at the end
Atmosphere note: The hanging bodies aren’t interactive, but they reinforce the Necropolis’s theme of death and abandonment. Pay attention to the environmental details—they tell a story.
Bug Combat Section
A new enemy type appears: swarms of aggressive bugs.
How to handle bugs:
- Use Low to shoot them from a distance (bow is effective)
- Switch to Alone to smash them with the wrench (close-range finishing)
- Clear all bugs before proceeding (they block your path)
Combat tip: This mirrors the enemy system in the rest of the game—Low initiates with ranged attacks, Alone finishes with melee. Bugs are practice for more dangerous enemies later.
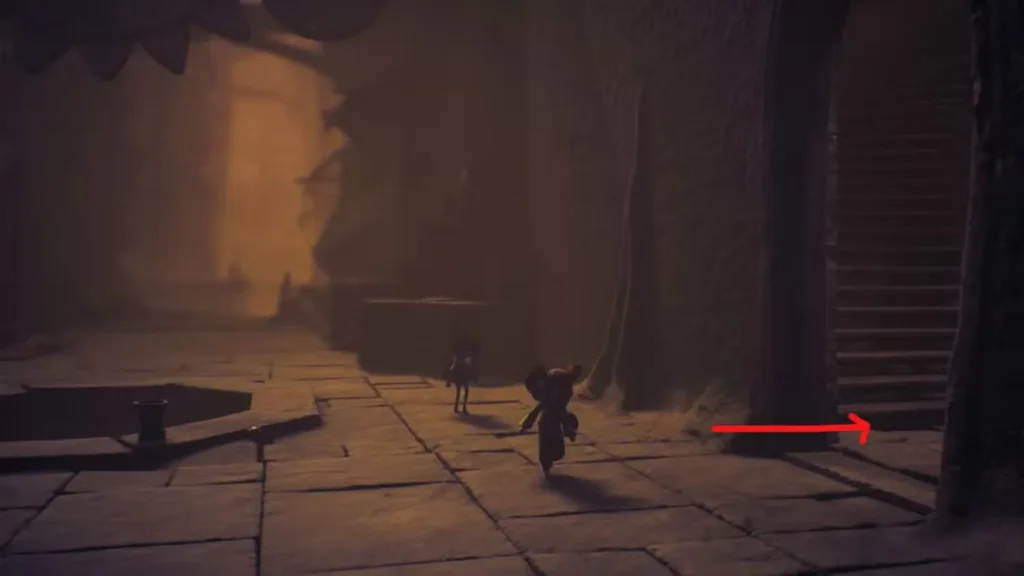
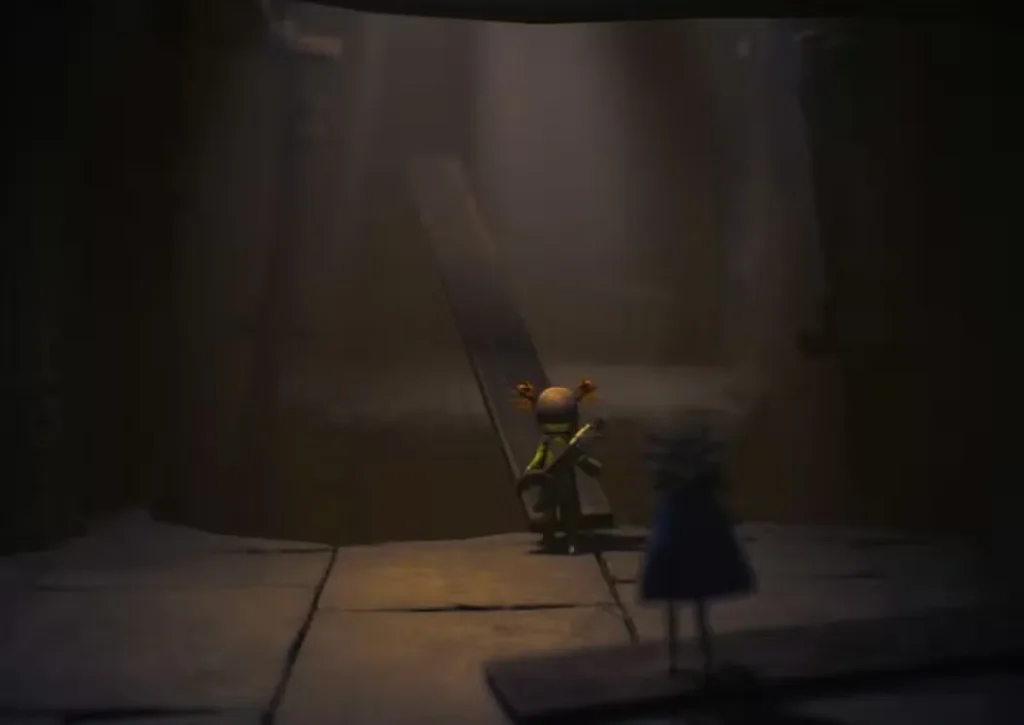
Climbing Planks and Baby Observation
Progression:
- Continue walking to find another tunnel
- Enter a room with planks on the wall
- Use the planks to climb upward
- Witness the baby walking around below (scripted sequence)
Design moment: This is pure atmospheric horror. You’re safe, but watching the baby patrol reinforces how dangerous she is. It’s a moment of dread-building before the next encounter.
Doll #3 Location and Platform Navigation
Finding the third Doll:
- Walk back toward the camera (reverse direction)
- Find a door to the right
- Go up the stairs
- Grab Doll #3
- Use the umbrella to reach the platform ahead
Platforming sequence:
- Keep the umbrella equipped
- Fly up to another platform using air currents
- Glide down this time by opening and quickly closing the umbrella
- Land on the lower platform (timing practice)
Umbrella mastery: This section tests your glide control. Opening and closing quickly allows for precise landings on smaller platforms.
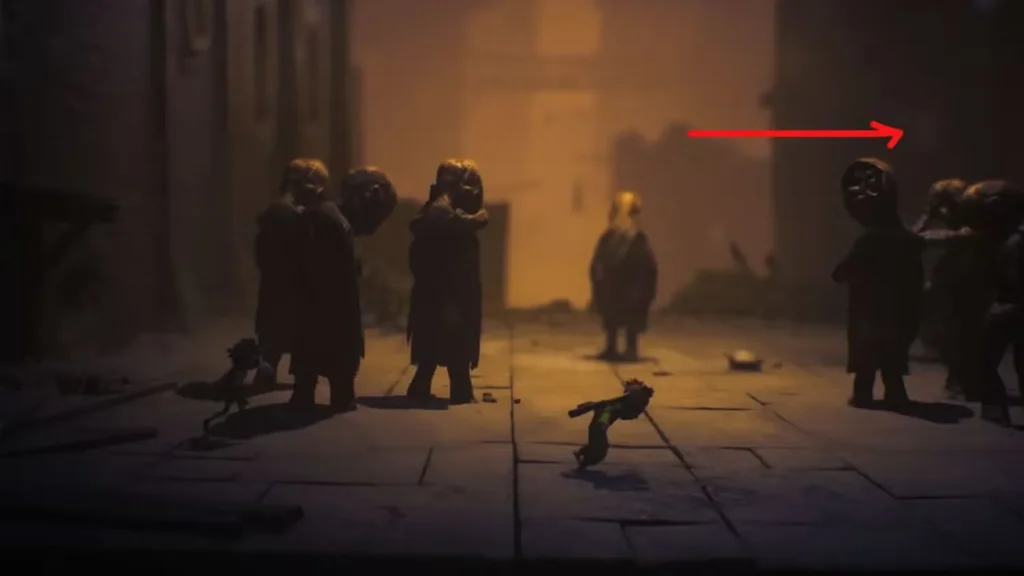
Baby Corridor Chase and Hidden Path
High-tension moment:
- Push the plank to create a bridge
- Cross to the other side
- Enter the long corridor
- IMMEDIATELY hide behind the box—the baby appears instantly
- Wait for the monster to leave
- Proceed down toward the camera to find a path to the right
Chase logic: The game gives you just enough warning. When entering long, exposed corridors in the Necropolis, always assume the baby is nearby.
Rattle Toy and Underground Progression
Sequence:
- The baby appears again and takes the giant rattle toy
- This leaves a hole in the ground
- Jump into the hole to proceed
- Progress through tunnels and past petrified bodies
- Use Alone to destroy wood blocking the path
Environmental storytelling: The petrified bodies show what happens to those caught by the baby’s gaze. The game doesn’t need to explain the danger—you see the consequences.
The Capture: Low’s Flashback
Story moment:
- The characters get caught by the giant baby (unavoidable cutscene)
- They wake up in a new area
- Low has a flashback (plot development moment)
Narrative significance: This capture isn’t a failure state—it’s scripted. The flashback hints at Low’s mysterious past and connection to The Nowhere. Pay attention to these mirror visions; they’re important to the overall story.
Doll #4 Location Post-Capture
After waking up:
- Head left through the gap first (don’t go right yet)
- Find and grab Doll #4
- Return and jump up the ledge to the right to continue
- Cross the planks
- Go down the spiral staircases
- Re-encounter the giant baby
Collectible progress: That’s 4 out of 5 Dolls found. One more remains in the Necropolis.
Toy Block Stealth Sequence
Another baby gaze puzzle, this time with different cover objects.
Strategy:
- Use toy blocks as cover to hide from the petrifying gaze
- Move from block to block when the baby looks away
- Reach the tiny door at the end
Pattern recognition: The baby’s gaze sweeps in predictable patterns. Wait behind each block until her head turns, then sprint to the next cover.
Box Movement and Wall Destruction Puzzle
Step-by-step:
- Move the box from under the stairs
- Use it to reach the higher platform
- Switch to Alone and destroy the wall with the wrench
- Climb up two ladders
- Reach a room with a petrified hanging body
Environmental clue: That hanging body isn’t just decoration—it’s part of the next puzzle.
Bell Ringing Distraction Puzzle
One of the Necropolis’s cleverest puzzle solutions.
How it works:
- Use Alone to destroy the petrified head with the wrench
- This releases a rope
- Switch to Low and shoot the rope
- Shooting the rope rings the bell
- The bell sound draws the baby’s attention away
- Quickly hide in the nearby box
- Wait for the baby to investigate and leave
Puzzle logic: You’re using the baby’s curiosity against her. Sound distracts her, giving you a window to move. This teaches environmental manipulation.
Wheel Crank and Airway Puzzle
Cooperation puzzle:
- Climb through the newly created path to the right
- Alone turns the wheel using the wrench
- This creates an airway/wind current
- Low uses the umbrella to fly up
- Low unlocks a ladder for Alone to climb
Why this works: Classic Little Nightmares cooperation. One character creates the path, the other benefits, then helps the first character catch up.
Doll #5 Location (Final Necropolis Doll)
Finding the last Doll for Toybox Achievement:
- Remove the plank from the door and continue
- Pass through a gap in the wall
- Slide down a roof and quickly equip umbrella to cross
- Enter the long corridor
- Walk up past the stalls
- Pick up Doll #5 (the final Doll in Necropolis)
- Crawl right to continue
Achievement unlocked: Collecting all 5 Dolls rewards the Toybox Achievement. Congratulations!
Rope Swing and Box Dragging Puzzle
Complex cooperation sequence:
- Low hoists Alone up to the higher platform
- Alone drags a box with a hanging rope closer to Low
- Low hangs from the rope
- Swing back and forth to build momentum
- Reach and pull the lever to unlock the door
Physics puzzle: The rope swinging requires timing. Build momentum gradually rather than spamming movement inputs.
Box Summoning Baby Encounter
Be prepared:
- In the next room, dragging the box from the left corner summons the baby (cutscene triggers)
- After the cutscene, continue dragging the box to reach the high platform
- Use boxes to hide from the baby’s gaze as before
Escalation: The baby encounters become more frequent and intense as you approach the chapter’s climax.
Final Box and Rope Puzzle
Last hiding sequence:
- Use boxes to hide from the baby’s gaze
- The final box is hanging from a rope
- Make Low shoot the rope to drop the box
- Use it for cover and proceed forward
Almost there: This is the final stealth section before the chapter’s conclusion.
Window Escape and Falling Debris
Action sequence:
- Jump through the window
- Keep moving forward
- Open a small door
- Immediately start running to the right (falling debris chase)
- Hide behind the big rattle toy
Timing critical: The falling debris will crush you if you hesitate. Sprint immediately after opening the door.
Final Baby Encounter: Shaking Room
The most intense baby encounter in the chapter.
Survival strategy:
- The baby casts her petrifying gaze into the room
- She shakes the room left and right, dropping a box
- Hide behind the rattle toy while she’s distracted
- When the box drops, quickly move behind it
- She will gaze at the rattle toy area again
- The box is your only safe cover for this second gaze
Peekaboo Achievement opportunity:
- If you’ve survived all baby encounters without dying throughout the entire chapter
- You unlock the Peekaboo Achievement
- This requires not getting caught even once by the baby’s gaze
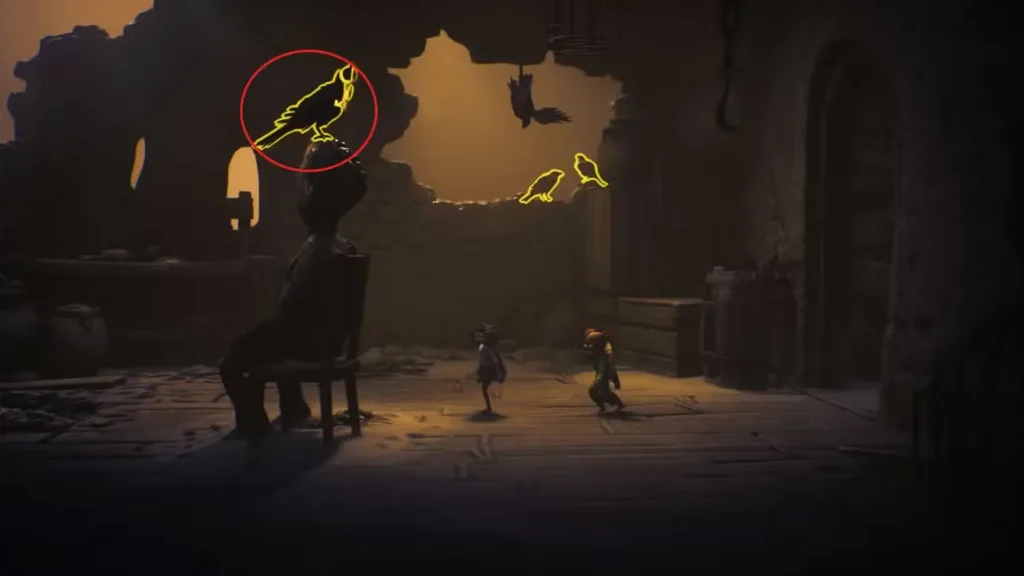
Final moment:
- Crows attack the baby as she reaches into the room (scripted event)
- The crows successfully distract her
- You’re now safe to proceed
Thematic payoff: The crows you’ve been shooting all chapter? Their flock saves you at the climax. Beautiful narrative symmetry.
Escaping the Necropolis
Final sequence:
- Follow the path to the right
- Use the umbrella to glide down through the hole
- Wait for Low to touch the mirror (story moment)
- Take Low’s hand to proceed
Achievement unlocked: Child’s Play Achievement for completing Chapter 1: Necropolis.
Story transition: The mirror touch is significant—these visions connect Low to The Nowhere’s deeper mysteries. Chapter 2: Candy Factory awaits.
Complete Necropolis Collectibles Checklist
5 Dolls (Toybox Achievement):
- ✓ Doll #1: After destroying rocks, pull organ box through gap
- ✓ Doll #2: Destroy rocks on left after first baby elevator encounter
- ✓ Doll #3: Walk back toward camera, door to right, up stairs
- ✓ Doll #4: After capture/flashback, head left through gap first
- ✓ Doll #5: Long corridor with stalls, walk up past them
11 Crows (Birdbrained Achievement):
- Scattered throughout entire chapter
- Use Low’s bow to shoot them
- Check ledges, beams, and puzzle areas
- Don’t miss any—they don’t respawn
Achievement Summary for Necropolis
Achievements you can earn in Chapter 1:
- Child’s Play – Complete the Necropolis chapter
- Toybox – Collect all 5 Dolls in Necropolis
- Birdbrained – Shoot all 11 Crows in Necropolis
- The Windy City – Open umbrella at last second before landing
- Peekaboo – Survive all baby encounters without dying once
Tips for Replaying Necropolis
If you missed collectibles or achievements:
- Use Chapter Select after completing the game
- Collectibles are tracked per chapter
- You don’t need to complete the entire chapter after grabbing missed items
- The Peekaboo achievement requires a no-death run specifically for baby encounters
Speedrun tips:
- Skip all Crow shooting unless going for Birdbrained
- Don’t grab Dolls if you already have Toybox
- Baby patterns are consistent—memorize them for faster runs
- Umbrella sections can be done faster with practice
Solo vs Co-Op: Necropolis Experience
Solo with AI:
- AI handles its role competently throughout
- Lever and box puzzles work smoothly
- Baby encounters are slightly easier (AI has assisted pathing)
- Collectible hunting is straightforward
Co-Op with friend:
- More fun discovering puzzles together
- Communication makes baby encounters more tense
- Easier to spot collectibles with two sets of eyes
- More memorable experience overall
Recommended approach: Choose whichever matches your preference. Both work excellently in the Necropolis.
What Comes After Necropolis?
You’ve conquered the crow-infested graveyard and survived the baby’s petrifying gaze. Chapter 2: The Candy Factory is next—trading cemetery horror for twisted industrial sweetness.
Preparation for Chapter 2:
- Review character abilities if you’re still unsure about Low vs Alone
- Ensure you have co-op set up properly if playing with friends
- The Candy Factory is faster-paced with more chase sequences
- Puzzle complexity increases from here
Total Necropolis completion time: About 1 hour for normal playthrough, 40 minutes if rushing. Check full game length breakdown.
Final Thoughts on the Necropolis
Chapter 1 is a masterclass in atmospheric horror and cooperative design. The baby’s petrifying gaze creates genuine tension, the environmental storytelling is superb, and the puzzles strike a perfect balance between challenging and fair.
What the Necropolis does well:
- Establishes tone and mechanics without overwhelming new players
- Introduces cooperation naturally through puzzle design
- Creates memorable horror moments (that final shaking room encounter!)
- Rewards exploration with collectibles and achievements
What surprised me: The baby encounters are genuinely nerve-wracking despite being pattern-based. The umbrella gliding mechanic is more versatile than expected. And those crows saving you at the end? Chef’s kiss for narrative payoff.
Now you’re fully prepared to conquer the Necropolis. The Spiral has many more nightmares waiting, but you’ve survived the first chapter. That’s something.
Official Resources
Need more Little Nightmares 3 help?
- Official Website: Bandai Namco Little Nightmares III
- Steam (PC): Little Nightmares III on Steam
- PlayStation: Little Nightmares 3 on PlayStation Store
- Xbox: Little Nightmares III on Xbox Store
Chapter 1 Checklist:
- ✓ Necropolis completed
- ✓ All 5 Dolls collected (Toybox Achievement)
- ✓ All 11 Crows shot (Birdbrained Achievement)
- ✓ Baby encounters survived (Peekaboo Achievement if no deaths)
- ✓ The Windy City Achievement earned
- ✓ Ready for Chapter 2: The Candy Factory
The cemetery is behind you. The factory awaits. And trust me—what happens in the Candy Factory makes the Necropolis look welcoming by comparison.