Getting Started: What You Need to Know About Chapter 1
So you’ve made it through the tutorial missions in Ninja Gaiden 4, and now you’re staring down the streets of Tokyo, wondering what carnage awaits. Good news: Chapter 1, “Bloodsoaked Tokyo,” is designed to ease you into the series’ trademark brutal combat while throwing enough challenges your way to keep things interesting.
Here’s the thing about Ninja Gaiden 4’s structure that newcomers should appreciate—each chapter works as its own self-contained mission. No sprawling open world, no endless backtracking. Just you, your weapons, and a linear path filled with enemies who absolutely want you dead. It’s refreshing in today’s gaming landscape, honestly.
Pro tip before we dive in: Get comfortable with the R3 button. Holding it reveals your destination marker, which is a lifesaver when you’re knee-deep in Tokyo’s alleyways and have no idea where to go next.
Also Check: Ninja Gaiden 4 Review – A Masterclass in Modern Action Gaming
Early Game: Finding Your Footing (And Your First Loot)
The Starting Courtyard
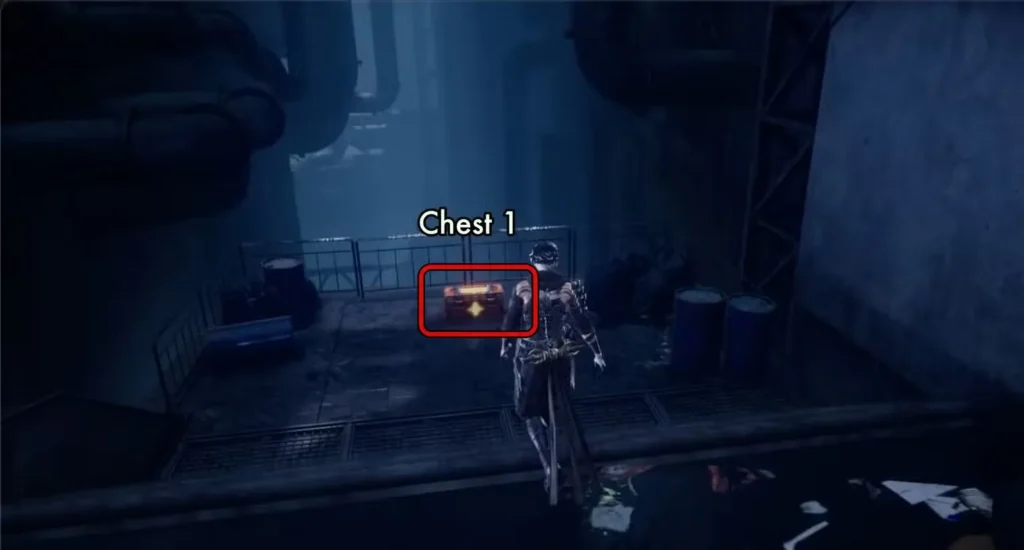
You’ll begin in a small courtyard with several tempting alleys. Ignore them for now—your first priority is loot. Head to the stairs and look for a large tarp-covered object. Behind it sits Chest 1 containing a Crimson Blood Balm. Not the most exciting find, but you’ll be grateful for healing items later.
Following the Main Path
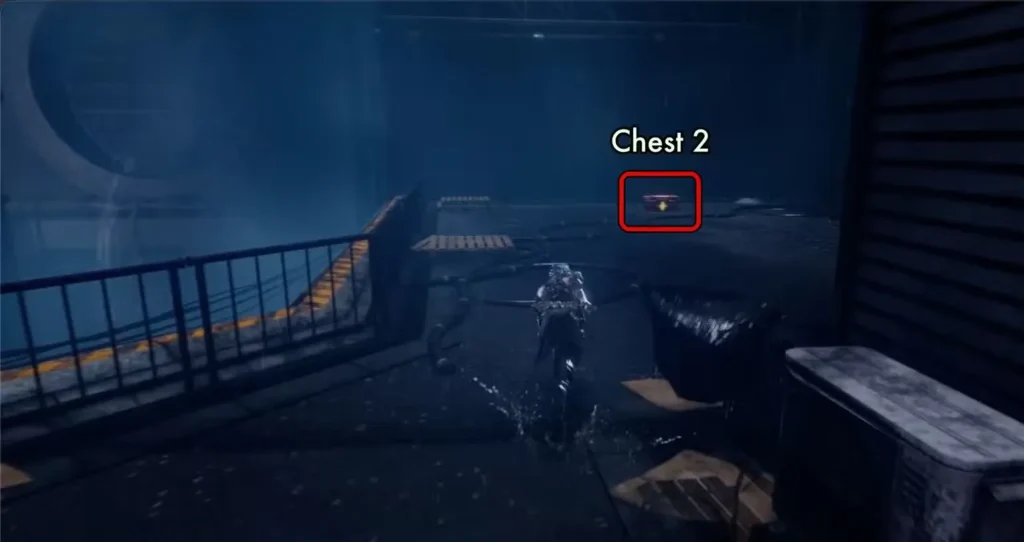
As you progress, you’ll hit a door with a metal screen. Don’t rush through it. Instead, hug the left wall and you’ll discover Chest 2 with a Senjin War Brew inside. This temporarily boosts your attack power—save it for tough encounters rather than burning it on regular enemies.
What I wish I’d known: The game loves hiding chests just off the main path. Train yourself to explore every corner before moving forward, or you’ll miss valuable resources.
Wall Running and Combat Basics
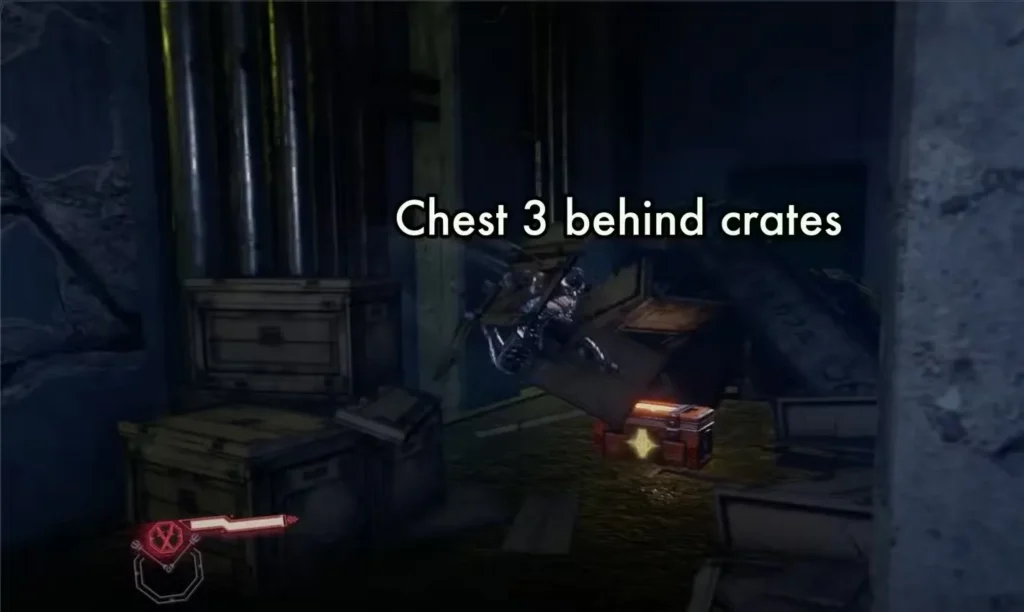
The path ahead introduces wall-running mechanics. After your first double wall-run, destroy the stack of crates blocking an alcove. Inside Chest 3 you’ll find a Life Elixir.
Right after this, you’ll encounter your first DarkNest Terminal—think of this as your one-stop shop for everything important in the game.
Understanding DarkNest Terminals: Your New Best Friend
These terminals are absolutely crucial to your progression. Here’s what they offer:
- Item Supply – Purchase consumables using NinjaCoin
- Mission Database – Accept and turn in side quests for rewards
- Bonus Content – Claim your Deluxe Edition and pre-order items (if applicable)
Available Side Missions in Chapter 1
The terminal will offer you several missions right off the bat:
- Execute the D.D.O. Distribution Officers (Reward: 2,500 NinjaCoin)
- Defeat 25 D.D.O. Soldiers (Reward: 2,000 NinjaCoin + Crimson Blood Pellets)
- Capture 1 Gourdy (Reward: 2,000 NinjaCoin)
- Find the Data Chip in Tokyo Sky City (Reward: Phantasmal Herb)
My advice: Prioritize the Data Chip mission. That Phantasmal Herb is essential for increasing your max health, which you’ll desperately need as enemies get tougher.
Meeting Tyran: Unlocking Combat Skills
After destroying your first pylon (a large pyramid structure), you’ll pass through a gate and encounter a raven with glowing red eyes. Approach it to summon Tyran, the Raven Clan’s combat master.
Tyran introduces you to Ninja Gaiden 4’s skill system, where you can purchase combat abilities using NinjaCoin. Skills start in the mid-hundreds and increase from there, so spend wisely early on.
Budget tip: Don’t blow all your NinjaCoin immediately. You’ll encounter Tyran multiple times throughout the chapter, and you’ll want flexibility to buy skills as your playstyle develops.
Right next to Tyran, you’ll find Chests 4 and 5, each containing a Life Elixir. Easy pickings.
The Daemon Shrine: When Things Get Weird
After riding an elevator up, the environment shifts dramatically—red flames appear, and the atmosphere becomes oppressive. This is your introduction to Daemon Shrines, mysterious locations that will play a bigger role as you progress through Ninja Gaiden 4.
Navigating the Shrine Area
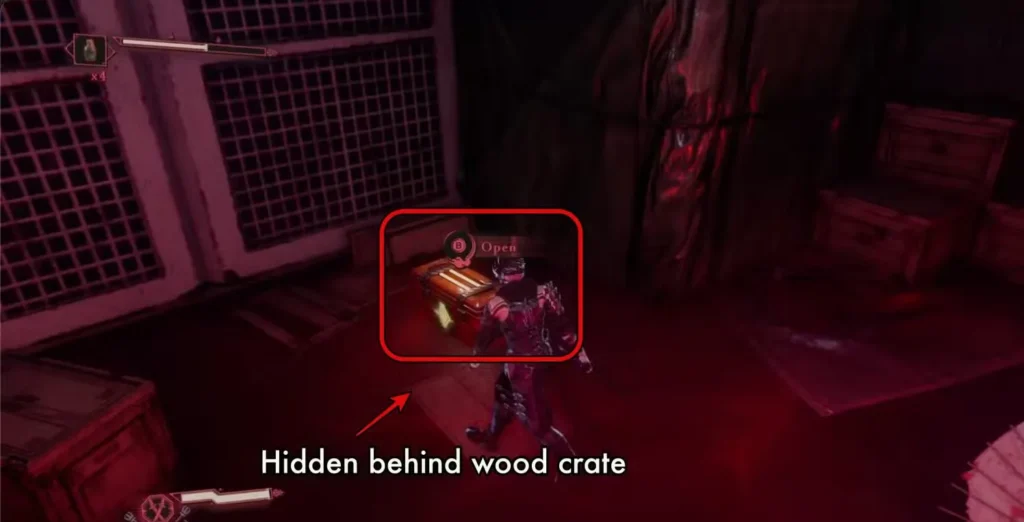
- Smash wooden crates to reveal Chest 6 (Incense of Rebirth) near a metal fence
- At the large cityscape vista, you can go right (for the D.D.O. Officer mission) or left (main path)
- Going left, fight through enemies to find Chest 7 (Life Elixir) against a wall
- Chest 8 appears shortly after along the right wall (another Incense of Rebirth)
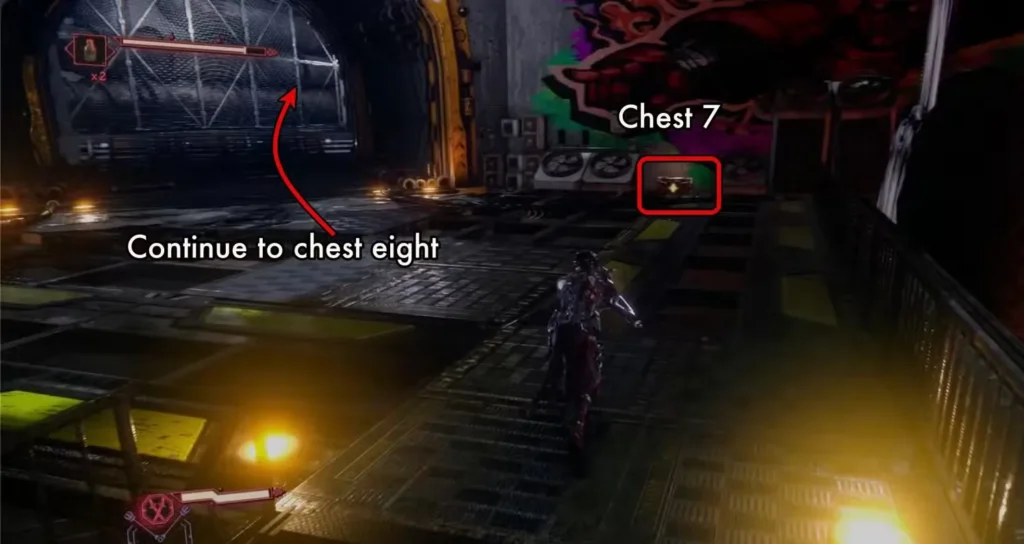
Important note: Incense of Rebirth items are your respawn tokens. Don’t waste them on easy sections—save them for boss fights and challenging encounters.
Weapon Skills: A Separate Progression System
After collecting Chest 8, you’ll face a large group of enemies. Clear them out and the game introduces Weapon Skills—a separate progression system from Combat Skills.
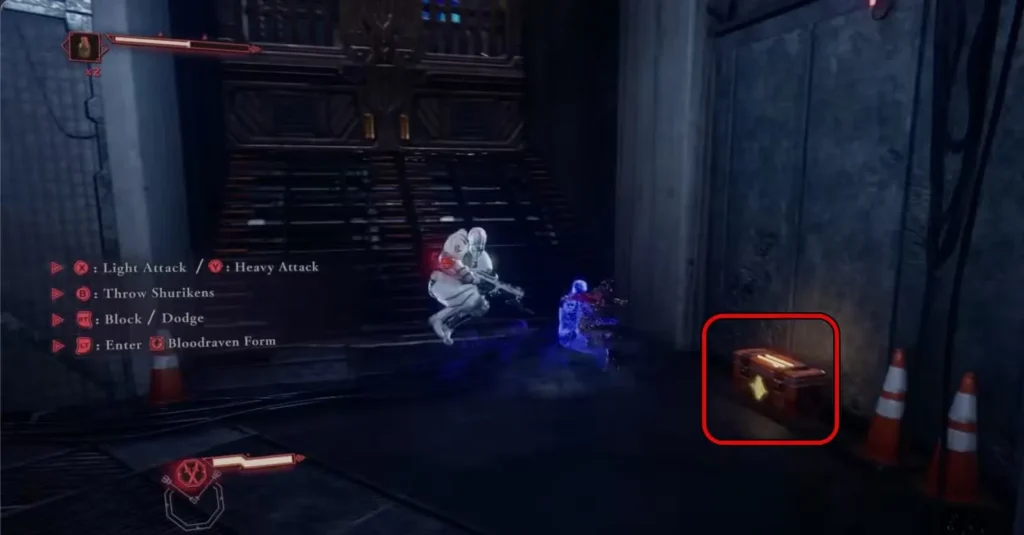
Key differences:
- Weapon Skills are purchased with Weapon EXP (not NinjaCoin)
- They apply only to your equipped weapon
- You earn Weapon EXP through combat performance
The better you fight (combos, perfect dodges, no damage taken), the more Weapon EXP you earn. This encourages aggressive, skillful play rather than defensive grinding.
Hidden Ladder Secret
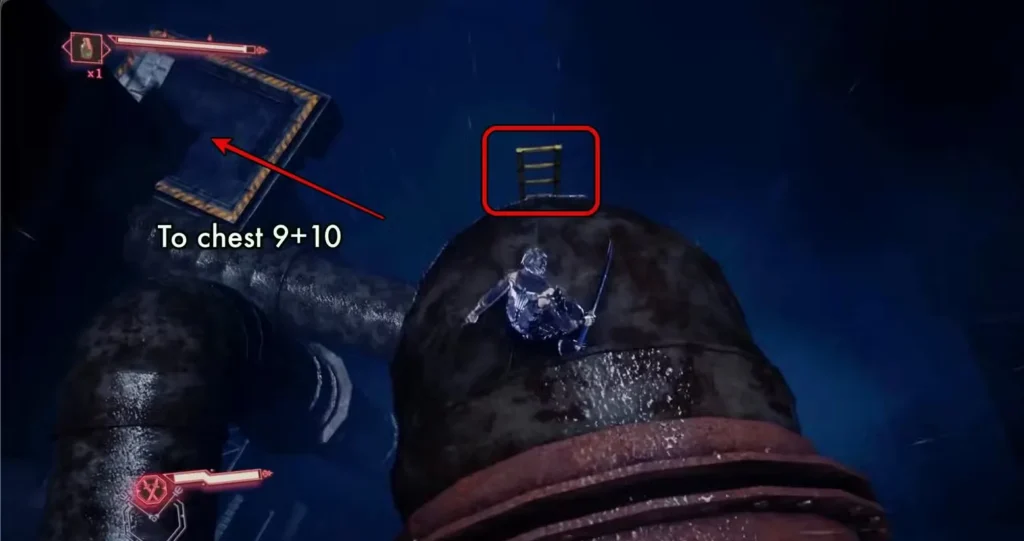
After the weapon skills tutorial, you’ll traverse large pipes. At the bend where pipes descend into darkness, look for a hidden ladder. Climb down and head left to find Chests 9 and 10—one has Life Elixir, the other contains Kongou Iron Brew (temporary defense boost).
Caddis Wire: Your New Traversal Tool
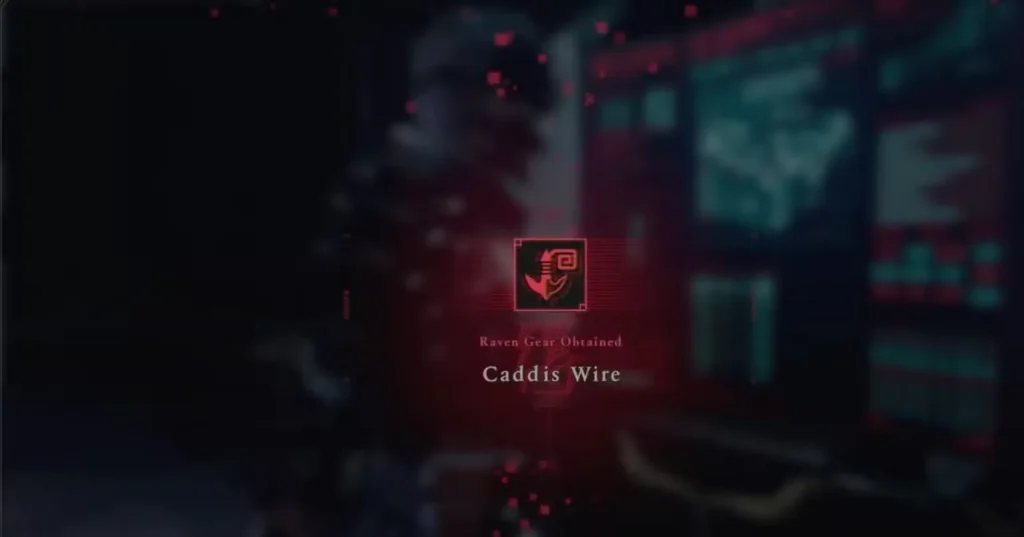
At the second DarkNest Terminal, Umi introduces the Caddis Wire—essentially a grappling hook that opens up vertical exploration. The game doesn’t explain it super clearly at first, but you’ll get the hang of it quickly.
Mission check: If you completed the D.D.O. Officer and soldier-killing missions, turn them in now. A fifth mission should unlock: “Use Takeminkata to defeat 50 enemies” (rewards a Bulwark God’s Orb).
Purgatory Gates Explained
After getting the Caddis Wire, cross two large chasms. After the second, you can turn left to find your first Purgatory Gate. These optional challenges reward NinjaCoin and Weapon EXP, but cost you a percentage of your max health to enter.
Should you do them? If you’re confident in your skills and want extra currency, absolutely. Otherwise, save them for subsequent playthroughs when you’re more comfortable with combat.
Finding the Gourdy (Yes, It’s a Thing)
After crossing the second chasm with your Caddis Wire, turn left instead of continuing forward. Near several crates, you’ll spot the Gourdy—a weird creature you need to capture for a side mission.
The capture mechanic varies per Gourdy. For this one, you’ll need to quickly input button prompts. It’s not difficult, but pay attention. After capturing it, return to any DarkNest Terminal to turn in the mission.
Fun fact: According to the Ninja Gaiden 4 wiki, Gourdies are collectible creatures scattered throughout the game, similar to Kappa in previous entries. Completionists will want to hunt down all of them.
Cobalt Ring: Your First Accessory
After the Gourdy, navigate through cargo containers and head in the opposite direction of the main destination marker (check with R3). You’ll find Chest 11 containing the Cobalt Ring—your first accessory.
Equip it immediately for a defensive boost. You’ll need it, because the game ambushes you right after opening the chest. Typical Ninja Gaiden move.
Third Terminal and Tyran Encounter
Continue to the main path, climb stairs, and perform Flying Bird Flips to reach the top. You’ll find Tyran again (stock up on Combat Skills if you have the coin) and the third DarkNest Terminal nearby.
Reminder: Turn in your Gourdy here. Doing so unlocks a new mission requiring five Gourdy captures across all areas.
The Data Chip and Treasure Haul
After the third terminal, you’ll overlook a courtyard with patrolling enemies and an overhead drone. You can approach stealthily or go in loud—your choice.
Once cleared, this area is a collectible goldmine:
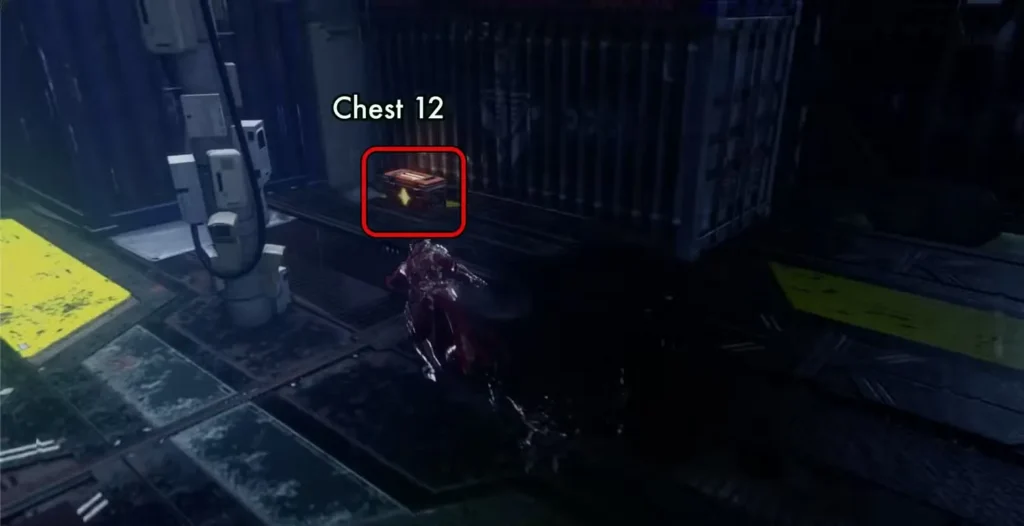
- Chest 12 – Crimson Blood Pellets (against one wall)
- Chests 13-15 – Three chests in a row (Divine Life Elixirs and Life Elixir)
- Data Chip – On the ground to the left of the three chests
The Data Chip is mission-critical. Completing this quest gives you a Phantasmal Herb, one of only two item types needed to increase your max health in Ninja Gaiden 4.

More Hidden Chests
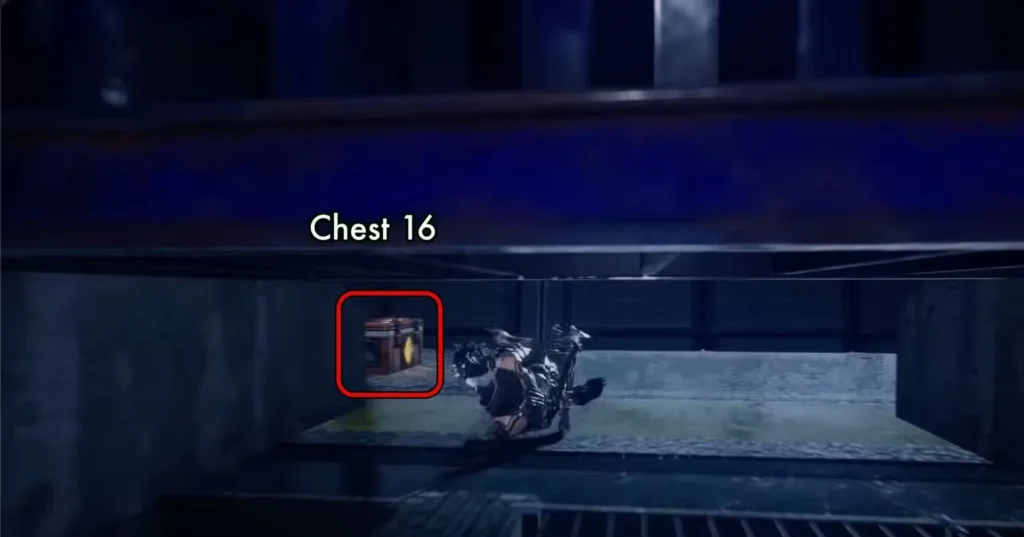
- Chest 16 – In the back corner of the well-lit platform (slide under or go around containers)
- Chests 17 & 18 – Climb the ladder next to Chest 16 to find these at the top
Pro completion tip: If you’re carrying max inventory of any item, collecting more automatically converts to NinjaCoin. It’s not a waste—it’s extra currency.
Berserk State: Unleashing Maximum Damage
After your treasure hunt, you’ll overlook another courtyard. Jump down and the game introduces Berserk State—a supercharged combat mode that lets Yakumo perform devastating Bloodbath Kills.
These attacks can literally cut enemies in half with one strike. The Berserk Gauge fills as you fight, so use it strategically on tough enemies rather than wasting it on fodder.
You’ll find Tyran’s third location and the fourth DarkNest Terminal after clearing this area. Turn in the Data Chip mission if you completed it.
Final Stretch: Last Collectibles Before the Boss
The Home Stretch
- Chest 19 – At the top of steps after leaving Tyran (Divine Life Elixir)
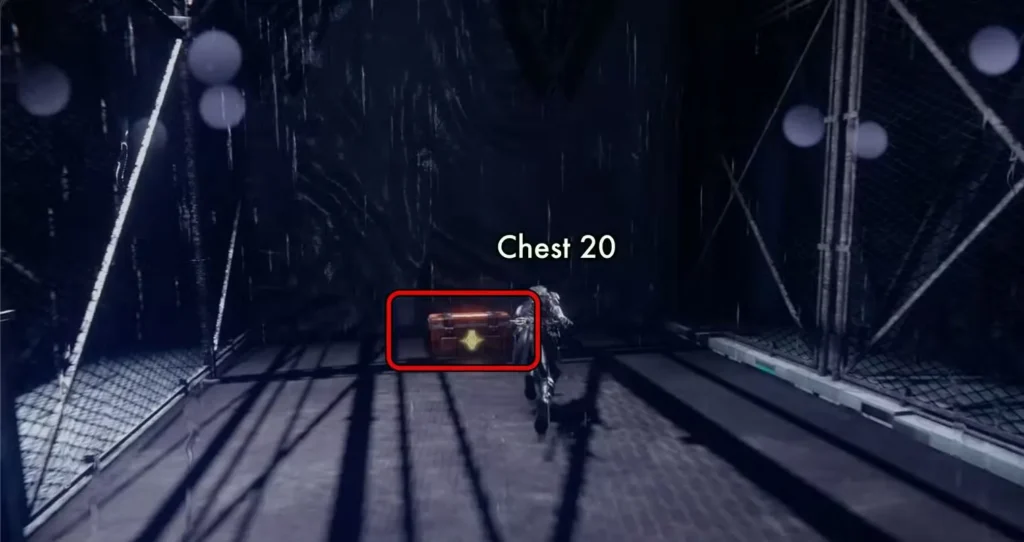
- Chest 20 – Among containers where the path splits—go left instead of following the destination marker (Incense of Rebirth)
You’ll encounter Tyran a fourth time and find the fifth (and final) DarkNest Terminal shortly after. Stock up on any items you need—the boss fight is coming.
- Chest 21 – One final chest on the left after the terminal (Divine Life Elixir)
Boss Fight: D.D.O. Commander Strategy
The chapter culminates with your first Formidable Enemy—the D.D.O. Commander. This boss absolutely deserves its intimidating title.
Key Strategies
Watch for red exclamation points: When the Commander winds up for a power attack (indicated by a red !), use your Bloodraven Form attacks. Hitting it during wind-up causes a stagger, giving you precious openings.
Manage your resources: The Commander has two full health bars. Don’t burn through all your healing items on the first bar—you’ll need them for phase two.
Use Berserk State wisely: Your Berserk Gauge can delete massive chunks of the boss’s health. Save it for moments when you have a clear opening rather than activating it randomly.
Stay aggressive but patient: Ninja Gaiden rewards aggressive play, but reckless button-mashing gets you killed. Learn the attack patterns, dodge efficiently, and strike during recovery windows.
After defeating the Commander, destroy the final Pylon to complete Chapter 1.
Chapter 1 Checklist: Did You Get Everything?
Before moving to Chapter 2, make sure you’ve collected:
✓ All 21 chests ✓ The Data Chip (for Phantasmal Herb reward) ✓ At least one Gourdy ✓ Completed available side missions at DarkNest Terminals ✓ Purchased essential Combat Skills from Tyran ✓ Invested Weapon EXP into useful Weapon Skills
Final thoughts: Chapter 1 does an excellent job teaching you Ninja Gaiden 4’s systems without holding your hand too much. The collectible placement rewards exploration, the boss fight demands you use everything you’ve learned, and the mission structure respects your time.
If you found this guide helpful, you’re now ready to tackle Chapter 2 with the skills and resources you’ve built up. The difficulty only ramps up from here, so master these fundamentals now.
Good luck, and may your blade stay sharp.
For more information about Ninja Gaiden 4, check out the official Steam page or visit the official PlayStation store.