Welcome to Haunted District: What to Expect
Chapter 2 of Ninja Gaiden 4 wastes zero time throwing you back into action. The moment Chapter 1 ends, Haunted District begins—no cutscene break, no breathing room. You’ve destroyed two of Sky City Tokyo’s four Pylons, and now it’s time to hunt down the third.
What makes this chapter stand out is its heavy emphasis on rail-grinding sequences and vertical combat arenas. If you struggled with the Caddis Wire in Chapter 1, you’re about to get a crash course in mastery. The good news? This chapter is shorter than the first, with only 5 chests compared to Chapter 1‘s 21. The bad news? One of those chests contains your first Black Scale—a critical item for increasing max health.
Quick heads-up: This chapter introduces grappling to combat drones during fights, which completely changes the flow of vertical battles. Get comfortable with this mechanic early, because it becomes essential for later chapters.
The Bridge Collapse: Your First Rail Sequence
When Good Bridges Go Bad
You start Haunted District on what looks like a perfectly safe bridge. Series veterans will immediately smell a trap, and sure enough, the bridge collapses beneath Yakumo mid-crossing. Classic Ninja Gaiden.
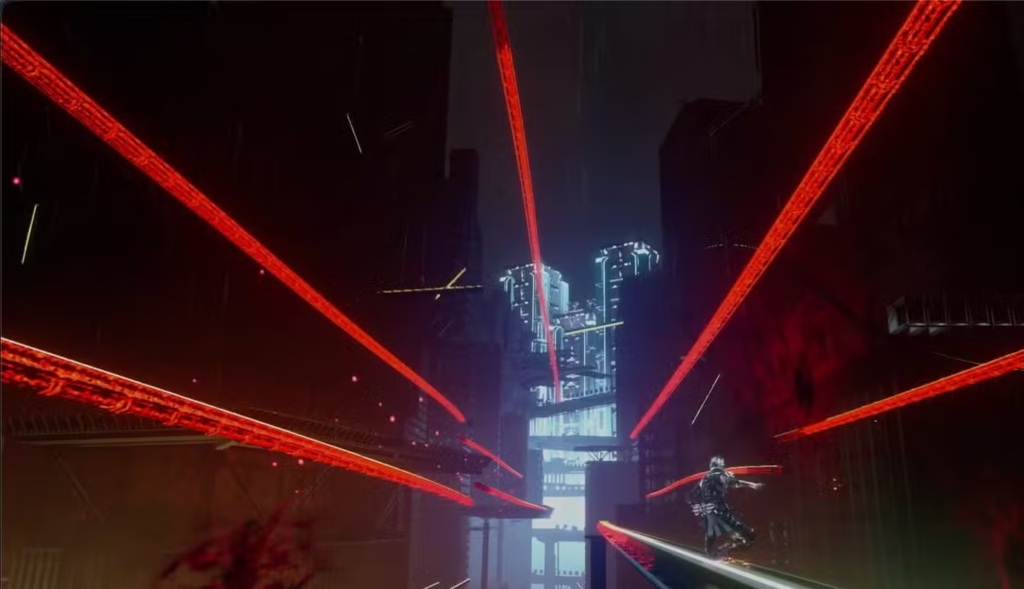
As you fall, the game prompts you to use the Caddis Wire to grapple onto a rail below. This triggers the chapter’s first rail-grinding sequence, complete with:
- Obstacles you need to jump over
- Oncoming trains that will flatten you
- Perfectly timed RB/R1 button prompts
Survival tip: Don’t panic and mash buttons. Wait for the prompt to appear, then press RB/R1 to jump between rails. The timing is generous, but hasty button-pressing will get you killed.
At the end of this sequence, you’ll fight a small group of enemies before reaching the chapter’s first DarkNest Terminal and Tyran’s raven.
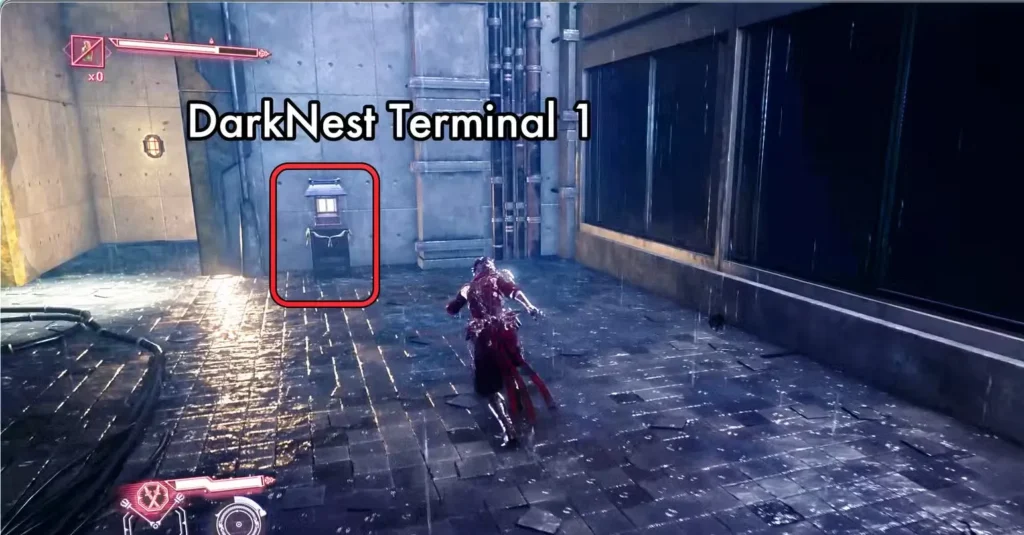
First Terminal: New Missions and Strategic Choices
What’s Available
Interacting with the first DarkNest Terminal unlocks two new high-reward missions:
- Execute the DDO Bodyguards – Reward: 3,500 NinjaCoin (Sky City Tokyo)
- Execute the Otherworldly Invaders – Reward: 4,500 NinjaCoin (Sky City Tokyo)
Mission check: If you accepted the “defeat 50 enemies with Takeminkata” mission back in Chapter 1, you can likely turn it in now. The reward is the Bulwark God’s Orb—an accessory that halves all ranged damage. Extremely useful for sections with drones and gunfire.
Finding Tyran’s Raven
Tyran’s first raven in this chapter is sneakily placed on a fence near the AC vents. It’s easy to miss if you’re rushing through. Look for the fence area near the terminal—the raven is perched there, slightly camouflaged against the industrial backdrop.
Currency strategy: By Chapter 2, you should be thinking strategically about NinjaCoin spending. Prioritize combat skills that complement your playstyle rather than buying everything available. You’ll need that currency for later chapters.
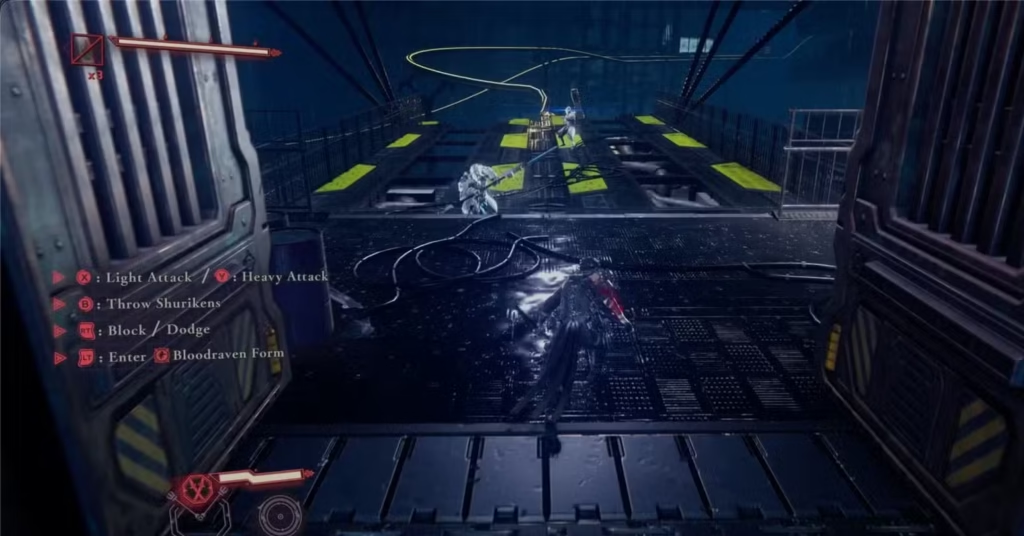
The Vertical Arena: Drone Grappling and Critical Collectibles
After leaving the first terminal, you enter a massive vertical combat area that teaches you to grapple to combat drones during fights. This mechanic is game-changing—it allows you to stay airborne, reposition instantly, and maintain aggressive pressure on enemies.
Ground Level Loot
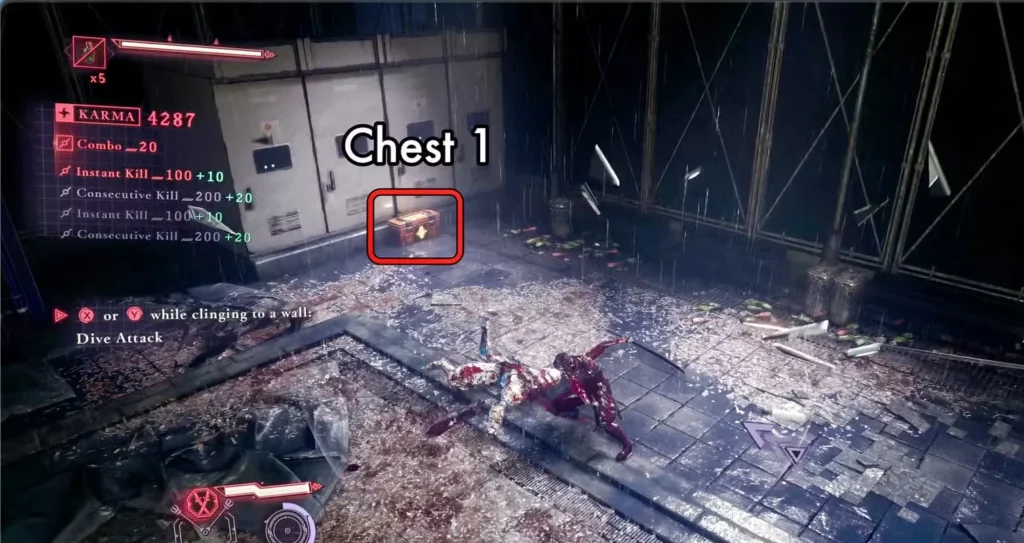
Chest 1 sits at ground level near a wall of electronic control panels. Inside you’ll find a Rejuvenation Elixir, which heals you over time rather than instantly. These are perfect for boss fights where you need sustained healing without stopping to chug potions.

Chest 2 is also technically at ground level, but you need to reach the area at the base of the yellow ladder. Look behind large blue containers to find it—another Rejuvenation Elixir awaits.
The Black Scale: Your First Health Upgrade
Climb the yellow ladder to the rooftops and you’ll encounter a wall-run section leading to a series of gaps you traverse by grappling to drones. At the top, you’ll fight elite DDO soldiers. During this fight, you’ll spot Chest 3 at the end of an alley.
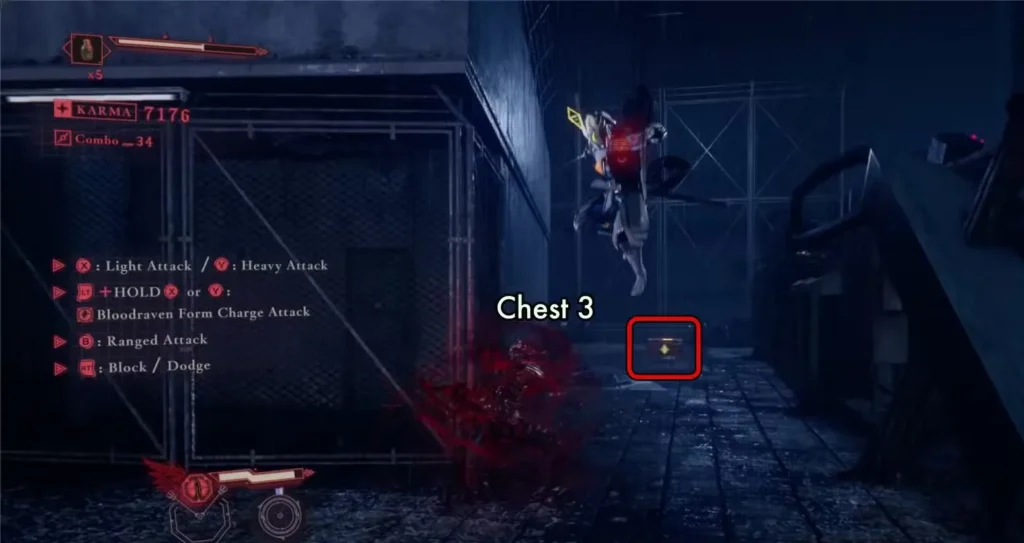
Inside Chest 3 is the Black Scale—and this is where things get interesting for character progression.
How max health increases work in Ninja Gaiden 4:
- Collect one Black Scale
- Collect one Phantasmal Herb (you should have one from Chapter 1’s Data Chip mission)
- The game automatically combines them into Dragon Lord’s Grace
- This item is consumed immediately, increasing Yakumo’s max health
If you skipped the Data Chip mission in Chapter 1, you’re missing out on a crucial health upgrade. Consider replaying that chapter or finding another Phantasmal Herb source before progressing too far.
Why this matters: Later chapters hit much harder. Every health increase you can squeeze out early makes a massive difference in survivability during boss fights.
Chapter 2’s Purgatory Gate: High Risk, High Reward
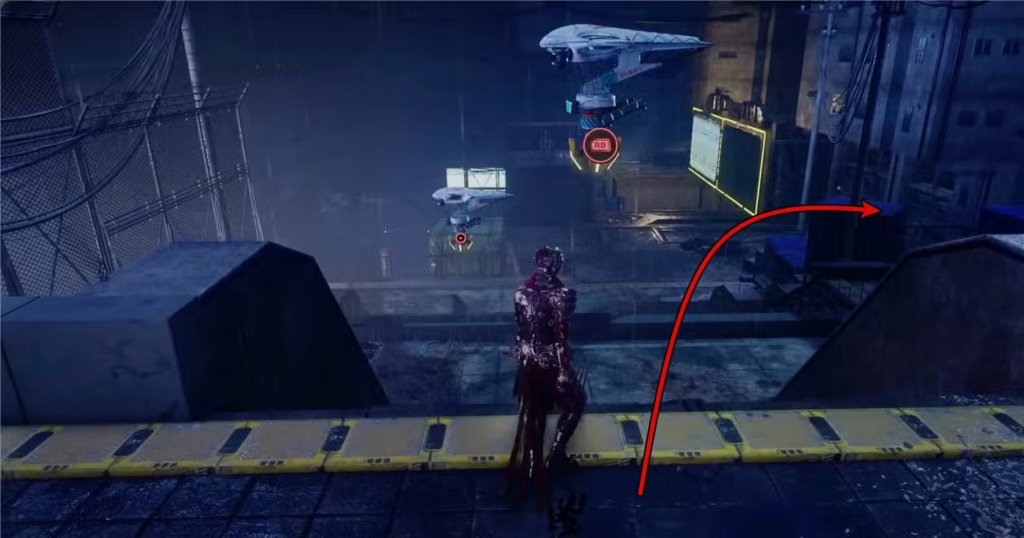
Before jumping on the rail immediately after collecting the Black Scale, you can detour to this chapter’s Purgatory Gate for optional challenges.
How to Find It
Instead of taking the rail forward:
- Turn around and head back to the top of the ledges
- At the first hovering drone, turn right
- Jump down to the lower rooftop with blue containers
- Look across the gap to see an old rail you can jump to
- Ride the rail to a new room, climb stairs, and follow the path to the gate
Risk vs. reward breakdown:
- More health sacrificed at the start = better rewards (NinjaCoin and Weapon EXP)
- You can only choose ONE challenge per Purgatory Gate
- Consider your current health item stock before committing
My recommendation: If you’re low on healing items or struggling with combat, skip it for now. These challenges will still be available on replay, and there’s no penalty for ignoring them.
Executing the DDO Bodyguards: Optional Mission Guide
Reaching the Second Terminal
After the Purgatory Gate (or skipping it), return to where Chests 1 and 2 were located. Head back up to the rooftop rail near Chest 3 and use RB/R1 to begin the next rail sequence.
This section features a long combat encounter on a single platform. Fight your way through, and a large red-and-black gate will open. Pass through to reach the second DarkNest Terminal and Tyran’s raven.
Finding the DDO Bodyguards
From the second terminal:
- Use Flying Bird Flip to reach the upper level
- Don’t go through the door at the top
- Turn around and jump across the gap to the opening on the opposite side
- Use the Caddis Wire to follow the path to the large arena
The “bodyguards” are just elite versions of regular DDO enemies you’ve fought before. The challenge comes from fighting multiple elites simultaneously. Use your Berserk State strategically, and don’t be afraid to create distance when overwhelmed.
Reward reminder: Completing this nets you 3,500 NinjaCoin—a significant chunk that can fund several Combat Skill purchases.
After defeating them, find the exit gate that loops you back to the second DarkNest Terminal.
The Journey to Terminal 3: Rails, Rockets, and Drones
From the second terminal, use Flying Bird Flip to climb up and head through the door (the opposite direction from the Bodyguard mission).
The Interactive Rail Sequence
Immediately after passing through the door, you’ll encounter two basic enemies. Clear them out, then jump on the rail for a more interactive sequence than before:
New obstacles:
- A ship fires rockets at you—jump to the next rail with RB/R1 when this happens
- Small drones drop obstacles onto the rail—either shoot them with Shurikens (B/Circle) or jump over the debris
Pro tip: Shooting the drones is more satisfying, but jumping is safer if your timing is off. Don’t try to be a hero if you’re struggling with the rhythm.
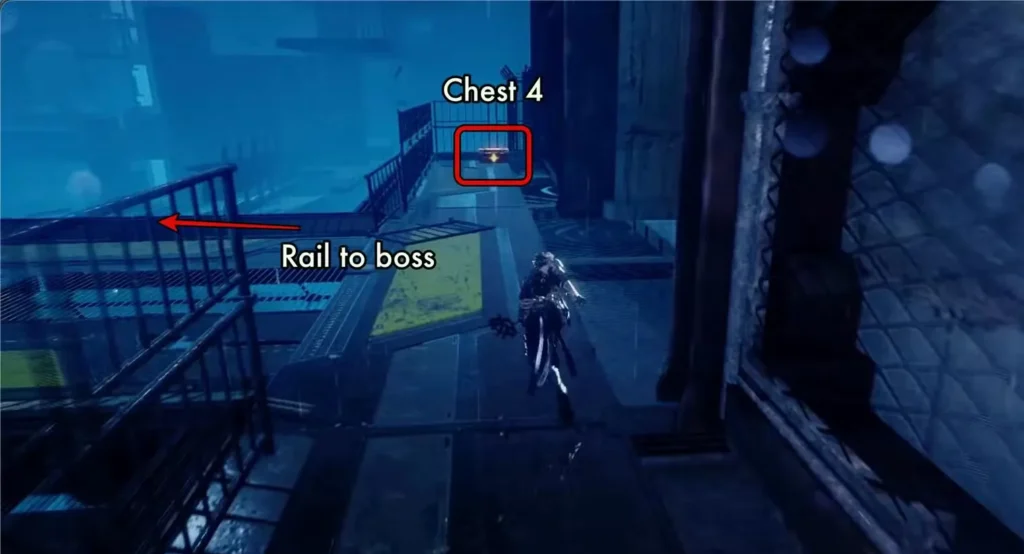
The rail deposits you directly into the chamber with the third DarkNest Terminal and Tyran’s raven. Don’t forget Chest 4 against the wall—it contains Kongou Iron Brew, which temporarily boosts your defense.
Final Preparations Before the Boss
From the third terminal, climb up and out of the chamber. Before jumping on the next rail, look right to find Chest 5, which contains an Incense of Rebirth.
Inventory check before the boss:
✓ At least 2-3 Life Elixirs ✓ 1-2 Rejuvenation Elixirs (for sustained healing) ✓ Incense of Rebirth equipped (in case things go wrong) ✓ Full Berserk Gauge if possible
Once you grab Chest 5, jump on the final rail. Simply follow the prompts, jumping from rail to rail until you land in the boss arena.
Boss Fight: DDO Proto-Goliath Strategy
Phase 1: Clear the Arena
The Proto-Goliath is surrounded by several regular enemies, including those annoying flying enemies attached to kite-like devices. Take them out first. Seriously—trying to fight the boss while dodging potshots from flying enemies is needlessly difficult.
Use your Berserk State on the trash mobs if necessary. It’s better to clear them quickly and face the boss with a partially filled gauge than to drag out the fight and risk getting overwhelmed.
Phase 2: The Boss Itself
Here’s the surprising truth about the Proto-Goliath: it’s actually easier than it looks. The massive size and intimidating appearance are psychological warfare, but the actual fight is manageable once you understand the pattern.
Key strategies:
- Perfect Dodge or Parry its slow club attacks – The telegraphing is generous, giving you plenty of time to react
- Watch for red exclamation points – When it charges a power attack, hit it with a Bloodraven-stance attack to stagger it
- Use Berserk State aggressively – Once you’ve learned the pattern, activating Berserk State will delete huge chunks of its health bar
Common mistake to avoid: Don’t get greedy with combos. The Proto-Goliath has long recovery windows after its attacks—use those for damage, not the brief moments when it’s winding up.
Healing strategy: Use Rejuvenation Elixirs early in the fight to establish sustained healing, then save your instant Life Elixirs for emergency situations when you’re about to get hit.
The Finisher: Bloodbath Slaughter
After defeating the Proto-Goliath, you’ll face a brief final encounter where the game unlocks Bloodbath Slaughter—a devastating sweeping attack that kills all enemies around you while in Berserk State.
This ability becomes essential in later chapters when you’re swarmed by multiple enemies. It’s essentially your “panic button” for crowd control.
Destroy the final Pylon after this encounter, and Chapter 2 concludes.
Chapter 2 Completion Checklist
Before moving to Chapter 3, verify you’ve completed:
✓ All 5 chests collected ✓ Black Scale obtained (should have combined with Phantasmal Herb for health upgrade) ✓ DDO Bodyguards mission completed (optional but recommended) ✓ Purgatory Gate challenge attempted (optional) ✓ Bloodbath Slaughter ability unlocked ✓ Any completed missions turned in at DarkNest Terminals
Key Takeaways for Chapter 3 Preparation
What you learned in Haunted District:
- Drone grappling during combat enables aggressive aerial play
- Rail sequences require attention to prompts, not button-mashing
- Black Scales + Phantasmal Herbs = max health increases
- Clearing trash enemies before bosses makes fights significantly easier
- Bloodbath Slaughter is your crowd control solution
Resource management tip: If you’re running low on healing items, spend some NinjaCoin at DarkNest Terminals before starting Chapter 3. The difficulty curve continues upward, and being caught without resources is painful.
Chapter 2 is shorter than Chapter 1, but it’s more mechanically demanding. The rail sequences test your reaction time, the vertical combat arenas require spatial awareness, and the boss fight punishes greedy play. If you made it through cleanly, you’re developing the skills needed for Ninja Gaiden 4’s later challenges.
Take what you’ve learned here into Chapter 3, and remember: aggression tempered with patience wins fights. Recklessness just gets you killed.
Good hunting, Yakumo.
For more Ninja Gaiden 4 content and updates, visit the official Xbox page or check out the Steam community hub.
Also Read: Ninja Gaiden 4 Review – A Masterclass in Modern Action Gaming