What Is ‘A Noble History’ and Why Should You Care?
Look, I’ll be honest: when I first stumbled upon this quiz terminal in The Outer Worlds 2, I thought it was just another throwaway environmental detail. Boy, was I wrong. Behind that locked armory door sits some of the best mid-game loot you can get your hands on—including a Rocket Pistol that absolutely shreds and a full set of high-tier Trooper armor.
The catch? You need to pass a Protectorate history Knowledge Evaluation. And unlike your high school history tests, you can’t just wing it or look up answers on your phone. The game forces you to actually hunt down clues scattered throughout Central Control, read them, and then recall that information when the armory terminal grills you.
Here’s what makes this quest interesting: It’s a completely optional Praetor side quest that’s easy to miss, but the rewards are substantial enough that skipping it would be a mistake, especially if you’re running a firearms-focused build. The Rocket Pistol alone makes the 15 minutes of detective work worthwhile—and you’ll also earn +2160 XP for completing it.
Starting the Quest: Finding the Quiz Terminal
You’ll trigger ‘A Noble History’ in one of two ways: by interacting with the armory terminal inside the armory building at Central Control in the Praetor region, or simply by picking up any one of the five clue documents scattered around the compound—either action adds the quest to your journal automatically.
You’ll most likely visit Central Control during one of two companion quests: Tristan’s “Listening for a Clue” or Aza’s “Stabbing at Shadows.” Both send you here, so it’s easy to knock out ‘A Noble History’ at the same time. The most efficient path into Central Control—especially if you’ve invested in the Observation skill—is through the hidden passage in the Tomb of the Matriarch.
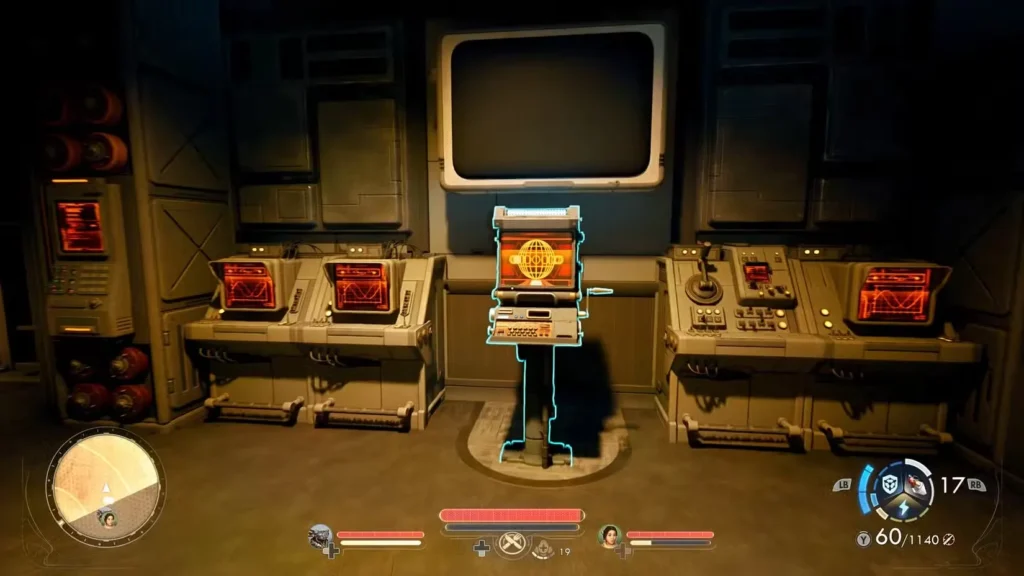
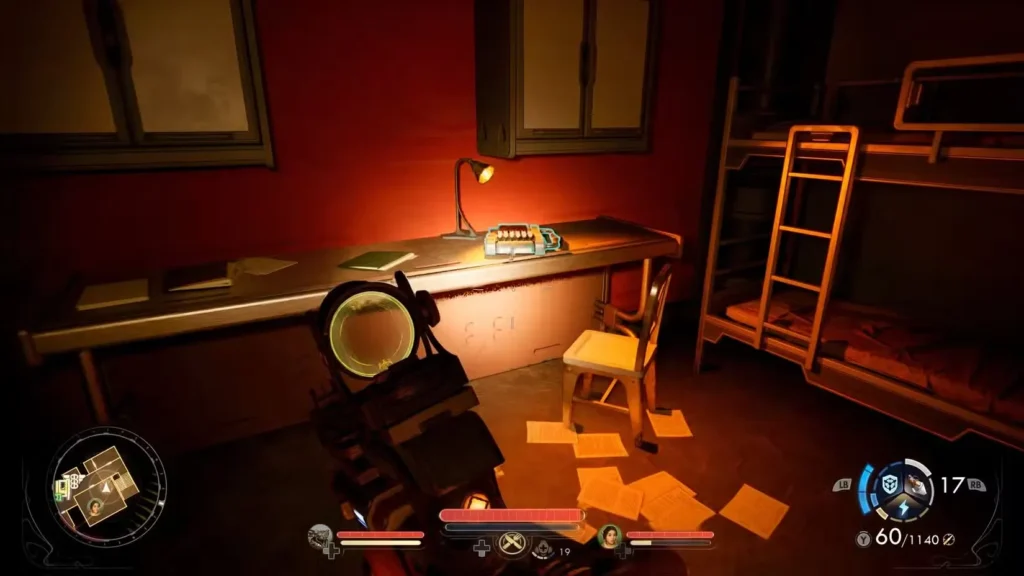
Once inside, head to the armory building on the west side of the area, near the gun range. Inside, you’ll find a Workbench, the armory terminal, and—worth noting—a unique weapon called the Multi-Launcher available in the terminal room even before you pass the quiz.
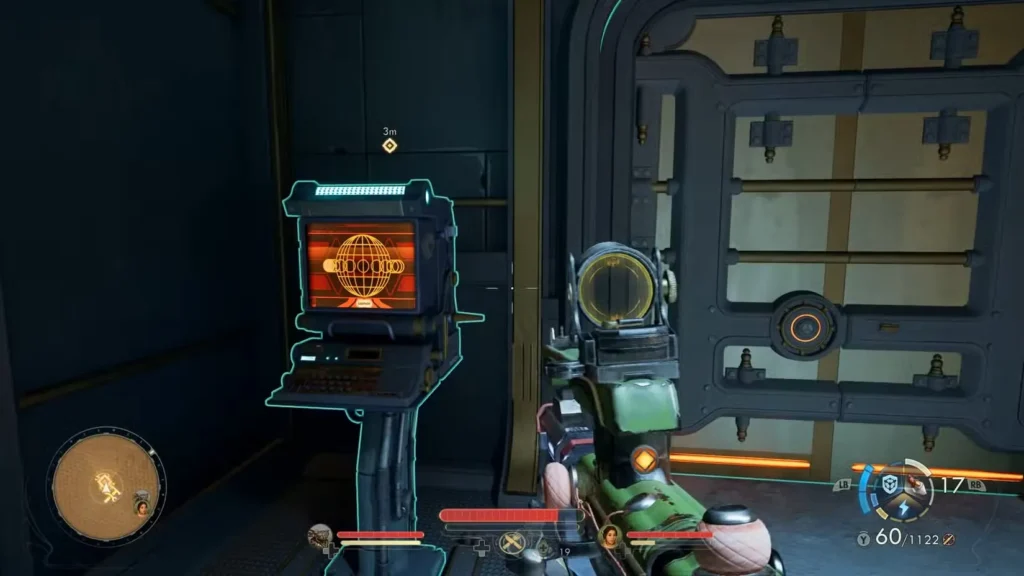
When you interact with the terminal and select [Knowledge Evaluation], you’ll immediately understand the situation:
- There’s a five-question quiz standing between you and the armory loot
- The correct answers only appear as options once you’ve found their corresponding clues
The game adds a search radius to your map showing where all five clues are located. Don’t ignore this—it keeps your search tightly contained within Central Control.
Pro tip: Before hunting for clues, clear hostiles from the area first. Nothing’s more annoying than trying to read a datapad while Protectorate Sentinels are shooting at you. Alternatively, if you’ve put 17 or more points into the Explosives skill, you can simply blow the armory door open and skip the quiz entirely.
All Five Clue Locations (Step-by-Step)
I’ve organized these clues in the most efficient collection order, minimizing backtracking. Follow this route and you’ll have all five clues in about 10 minutes.
Clue #1: Classified History of the Protectorate
Location: Desk just outside the firing range, inside the armory building
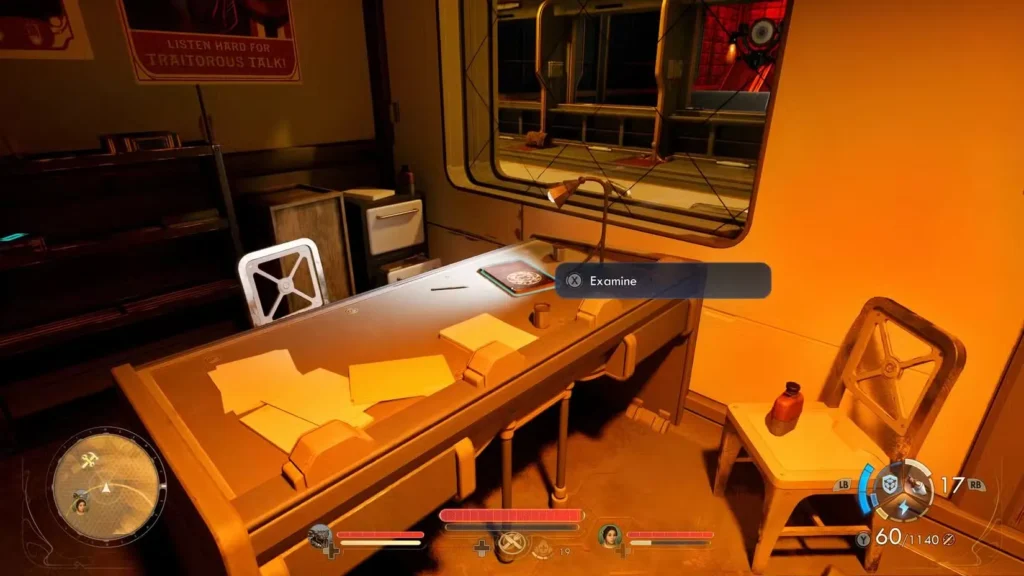
This is your gimme clue—it’s literally right next to where you start the quest. Look for the front office area adjacent to the firing range. On the desk, you’ll find a document titled Classified History of the Protectorate.
What you’ll learn: That Sovereign Reuben Varick passed away at the age of 115 years old. This directly answers the first quiz question, so note the exact age.
Visual landmark: The firing range is hard to miss—look for the shooting lanes and target practice area. The desk with the document is positioned so guards can oversee range activities.
Clue #2: Internal Memorandum – Department of Belief
Location: Terminal inside the Communication Exchange Hub, across the courtyard from the armory building
Exit the armory building and head directly across the open courtyard. Enter the Communication Exchange Hub (this is also the building where you spoke with Dagmar Sharpe during Aza’s companion quest, if you’ve been there). Find the terminal inside and read the Internal Memorandums.
What you’ll learn: That the newly established Department of Belief handles all matters related to the religious development of the Protectorate. This answers the fourth quiz question.
Important note: Make sure you read all entries on the terminal, not just the first one. The game tracks whether you’ve absorbed the relevant information before answers unlock on the quiz.
Clue #3: Annotated Map of Arcadia’s First Colonies
Location: Library on the Main Floor of the Academy building, mounted on the right-side wall
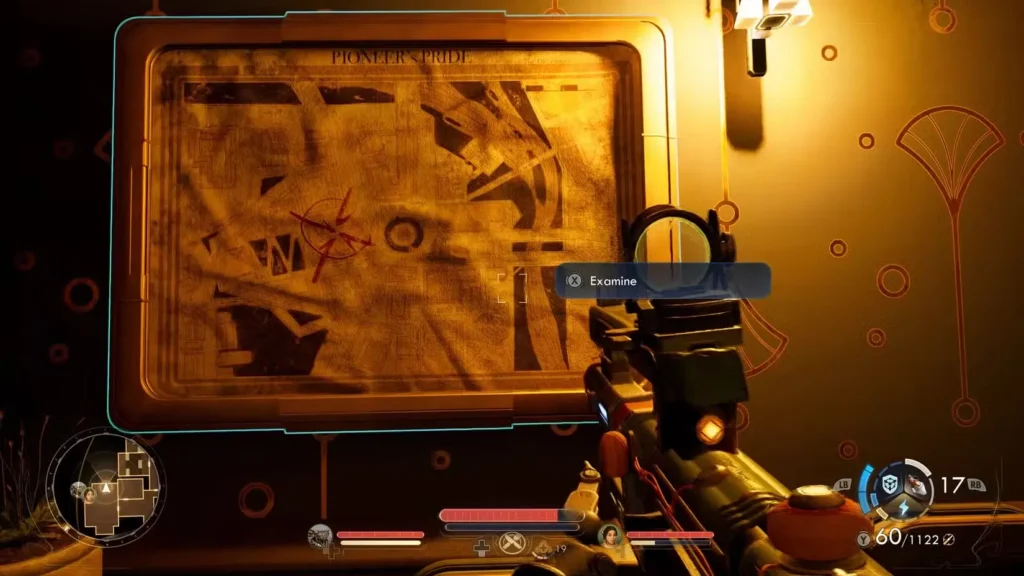
Head to the main Academy building (the large central structure of the compound). Enter through the main doors, continue into the library at the back, and look along the right-side wall for the map hanging there. If you entered Central Control via the Tomb of the Matriarch passage, you’ll walk right through this room.
What you’ll learn: That the original Articles of the Protectorate allowed colonies too much autonomy, and that stricter rules were later required. This feeds directly into the second quiz question about the Articles of Confederation.
Why this matters: The Protectorate’s obsession with controlling autonomy is a recurring theme in The Outer Worlds 2. Understanding their security philosophy helps contextualize a lot of the game’s political commentary.
Clue #4: Sentinel Correspondence
Location: Lecturer’s desk in the southernmost classroom, down the southeast hallway from the Academy’s main entrance
From the Academy’s main entrance hall, take the southeast hallway and go through the door on the left. You’ll enter a lecture room recognizable by its rows of desks and a podium at the front. The Sentinel Correspondence datapad sits on the lecturer’s desk at the podium.
What you’ll learn: That the different floors of the Sovereign’s flagship can only be accessed with floor-specific credentials—answering the third quiz question about deck access security.
Background context: The Outer Worlds series loves satirizing corporate and authoritarian control. The classroom filled with indoctrination materials is peak Obsidian worldbuilding.
Clue #5: Early Copy of the Protectorate Acumen Test
Location: Desk in the northernmost bunk room on the Academy’s Lower Floor (underground, orange-lit bunker room, southwest corner)
Head underground from the Academy’s right wing and enter the bunker room with orange lighting. In the southwest corner of the room, look for a desk positioned near bunk beds. The Early Copy of the Protectorate Acumen Test datapad is on that desk.
What you’ll learn: How the Protectorate evaluates its subjects—based on the Matriarch’s principles, with modifications from the Consul. This is essential for the fifth and final quiz question.
Atmosphere note: The barracks area really drives home the militaristic, regimented lifestyle of Protectorate soldiers. The propaganda materials scattered throughout feel appropriately oppressive.
Troubleshooting Clue Collection
“I can’t find one of the clues!”
Make sure your quest is set to active. The search radius indicator on your map will help narrow down the search area significantly. If you’re still stuck, try using your scanner—interactive objects will highlight. Note that you can re-read any clue you’ve already collected by checking your in-game Journal between quiz attempts.
“I found a bookshelf upstairs, but nothing happened.”
Yeah, I encountered this too. Some players report finding a clue by interacting with specific books on an upper floor accessible via elevator. However, this didn’t work in my playthrough, and it’s likely either:
- A misconception or misinformation spread online
- Content that was removed or changed in patches
- An alternate location for one of the five clues listed above
The five locations I’ve detailed above are confirmed and sufficient to complete the quest. If you’ve collected all five using my guide, you’re good to go.
“The terminal won’t show me an answer option.”
The correct answer for each question only appears as a selectable option once you’ve found and read its corresponding clue. Make sure you’ve fully interacted with all five documents—not just approached them.
All Quiz Answers (In Order)
Alright, moment of truth. You’ve collected all the clues, you’re standing in front of the armory terminal, and the door is tantalizingly close. Here are the exact questions and correct answers in the order they appear:
Question 1: What was the age of Sovereign Reuben Varick on the day of his passing?
Correct Answer: 115 Years Old
Source clue: Classified History of the Protectorate (desk outside the firing range). The Protectorate’s relative youth and the founding Sovereign’s legacy explain a lot about its aggressive expansionism and rigid control structures.
Question 2: In what ways were the original Articles of Confederation flawed?
Correct Answer: They naively allowed subjects too much autonomy. Citizens need rules to thrive.
Source clue: Annotated Map of Arcadia’s First Colonies (library wall). Classic authoritarian propaganda—the Protectorate justifies its iron grip by claiming previous governments failed due to excessive freedom.
Question 3: What security measure present on the Flagship of the Sovereign prevents unauthorized deck access?
Correct Answer: Users must present a deck-specific set of credentials to access any deck of the ship.
Source clue: Sentinel Correspondence (classroom lecturer’s desk). This worldbuilding also explains why you need keycards for certain areas throughout the game. If you’re struggling with locked areas, check out our Kaur’s War Chest keycard location guide.
Question 4: Who’s in charge of the Protectorate’s religious development?
Correct Answer: The Department of Belief.
Source clue: Internal Memorandum (Communication Exchange Hub terminal). Essentially the Ministry of Truth from 1984—Obsidian isn’t subtle about their criticisms of authoritarian thought control, and I appreciate that directness.
Question 5: By what criteria does the Protectorate Acumen Test truly place subjects?
Correct Answer: By Matriarch-ordained principles, built by the Consul’s able hand.
Source clue: Early Copy of the Protectorate Acumen Test (bunk room desk, lower floor). This reveals the Protectorate’s dual leadership model—religious/ideological authority (Matriarch) combined with executive administration (Consul). It’s a theocratic oligarchy with extra steps.
CRITICAL: Wrong Answers Deal Electric Damage
Here’s something that catches players off guard: if you select a wrong answer, the terminal deals an electric shock to your character that does a decent chunk of damage. After each wrong answer, that incorrect option gets greyed out so you can’t pick it again—you won’t fully restart the quiz from the beginning.
More importantly: you can check your Journal between quiz questions to review the clue summaries you’ve collected without losing progress. The quiz only resets if you physically leave the terminal mid-session. So if you need to double-check an answer, pause and open your journal—it won’t count as abandoning the evaluation.
My recommendation: Either screenshot the answers on your phone before starting the quiz, or simply reference this guide. There’s no achievement for doing it from memory, so save yourself the shock damage.
Armory Rewards: What’s Actually Worth It?
Once you ace the quiz, that armory door swings open. You also earn +2160 XP just for completing the quest. Here’s everything inside the armory and my honest take on each item:
Weapons
Rocket Pistol ⭐⭐⭐⭐⭐
- Why it’s amazing: Devastating damage output with explosive area effect. Scales excellently with Guns and Explosives skills.
- Best for: Mid-range combat, crowd control, stunning tougher enemies
- My take: Absolutely keep this. It’s viable through endgame if you invest in the right skills.
Shock Rifle ⭐⭐⭐
- Solid option: Good electrical damage with crowd control potential
- Best for: Robot-heavy areas, enemies with shields
- My take: Worth keeping if you have inventory space, but the Rocket Pistol outshines it
Shock Rods ⭐⭐
- Good melee backup option for close-quarters situations
- My take: Sell these unless you’re running a melee-hybrid build
Ammunition
Mini-Rockets, Heavy Rounds & Long Rounds
- The Mini-Rockets are essential for keeping your new Rocket Pistol fed
- Stock up because explosive ammo can be scarce early-to-mid game
- Pro tip: If you’re planning an explosives build, check out our complete flaws guide to optimize your character progression
Armor
Trooper Steel Helmet MK IV ⭐⭐⭐⭐
Trooper Plate Carrier MK IV ⭐⭐⭐⭐
- Why it’s great: Full matching armor set with strong defensive stats for this stage of the game
- Best for: Frontline combat, tanky builds, players who get hit often
- My take: Significant upgrade over most armor you’ll have at this point
Railgunner Monocle ⭐⭐⭐
Railgunner Cloak ⭐⭐⭐
Railgunner Armor ⭐⭐⭐
- Niche use: More specialized than the Trooper set
- Best for: Specific build types focused on precision and positioning
- My take: Good alternative if your playstyle doesn’t mesh with heavy armor
Consumables
Shock Grenades
- Always useful for emergency crowd control
- Particularly effective against mechanicals and shielded enemies
Build Synergies: Making the Most of Your Loot
The armory rewards favor certain playstyles more than others. Here’s how to maximize value based on your build:
For Explosives/Guns Hybrid Builds
The Rocket Pistol is literally designed for you. Invest heavily in both Guns and Explosives skills to maximize damage output. The weapon’s area damage makes up for any accuracy issues, and the stun effect on direct hits gives you breathing room in tough fights.
Recommended perks: Look for anything that boosts explosive damage, increases magazine size, or reduces reload times. Check our complete perks guide for specific recommendations.
For Tank/Frontline Builds
The Trooper armor set is your bread and butter. High damage resistance means you can wade into combat and control engagement distances. Pair this with companion builds that keep enemies focused on you while allies deal damage from range.
Companion tip: Our complete companions guide covers which allies work best for tank-focused strategies.
For Stealth/Tech Builds
Honestly? The rewards here aren’t optimized for your playstyle. The Shock Rifle might see some use for silent takedowns on mechanicals, but most of the loot leans toward direct combat.
Alternative value: Even if you won’t use the gear personally, it sells for excellent bits at vendors. Consider it a payday rather than an equipment upgrade.
Quest Timing: When to Complete ‘A Noble History’
Recommended completion window: Early-to-mid game, roughly around levels 8–15
Too Early (Levels 1–7): The rewards are excellent, but you might not have the skill points invested to fully utilize the Rocket Pistol or optimize the armor sets. That said, the gear is still strong enough to carry you forward.
Sweet Spot (Levels 8–15): Perfect timing. The Rocket Pistol becomes a legitimate endgame weapon if you invest in it, and the armor provides meaningful protection against increasingly dangerous enemies.
Too Late (Levels 16+): Still worth doing for the XP and completionism, but you’ve probably found comparable or better gear by this point. The Rocket Pistol remains useful, but the armor gets outclassed.
Difficulty consideration: On higher difficulties, grab this gear as soon as possible. The defensive boost from the Trooper armor can mean the difference between surviving encounters and constant save-scumming.
Lore Deep Dive: Understanding Protectorate Ideology
One thing I appreciate about The Outer Worlds 2 is how optional quests like this flesh out faction worldbuilding. The clues you collect paint a pretty clear picture of what the Protectorate represents:
Authoritarian Control Disguised as Paternalism
The Protectorate’s governing philosophy boils down to: “People need to be controlled for their own good.” It’s classic authoritarian thinking wrapped in protective language. The quiz answers reveal an organization that learned all the wrong lessons from history.
Theocratic Oligarchy
The Matriarch provides ideological legitimacy while the Consul handles day-to-day administration. It’s a power-sharing arrangement that prevents either figure from becoming too powerful individually while maintaining rigid control collectively.
Compartmentalization as Security
The deck-credential system isn’t just about security—it’s about limiting information flow. When citizens can’t freely move between areas or access different decks, organizing resistance becomes nearly impossible.
Thought Police
The Department of Belief is the most overtly dystopian element. An entire governmental department dedicated to monitoring and shaping citizens’ religious and ideological development? That’s nightmare fuel.
Why this matters for gameplay: Understanding Protectorate ideology helps inform dialogue choices, faction reputation decisions, and quest outcomes throughout the game. The more you understand their motivations, the better equipped you are to manipulate or oppose them.
Common Mistakes to Avoid
Mistake #1: Not Setting Quest as Active
The search radius indicator is crucial for efficient clue hunting. If you don’t activate the quest in your journal, you’re navigating blind and will waste significant time wandering.
Mistake #2: Skimming Documents Instead of Reading
Some clues are in terminals with multiple entries. Players often read the first entry, assume they’re done, and move on. Make sure you’ve exhausted all information at each clue location—the correct answer only unlocks once the game registers you’ve absorbed the relevant content.
Mistake #3: Fighting Your Way Through
This quest is much easier when the area is clear of hostiles. If you’re getting constantly interrupted by combat, consider using stealth or completing other objectives that clear the barracks first.
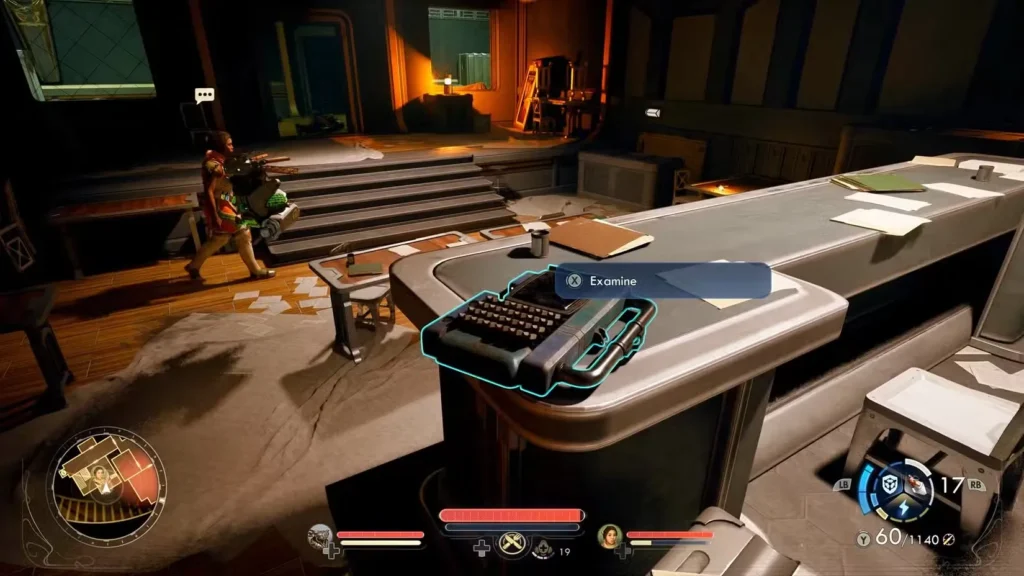
Mistake #4: Ignoring Companion Dialogue
Your companions sometimes comment on the propaganda you’re reading. While not essential for quest completion, these reactions provide interesting character insight and contextual commentary. Don’t skip through them.
Mistake #5: Selling the Rocket Pistol
I’ve legitimately watched players grab the armory loot, immediately sell everything for quick bits, and then regret it hours later when they realize the Rocket Pistol was actually phenomenal. Don’t be that person.
Mistake #6: Forgetting the Explosives Shortcut
If you have 17 or more points in the Explosives skill, you can skip the quiz entirely by blowing the armory door open. No one likes a pop quiz. This is a completely legitimate approach if your build supports it.
Advanced Tips & Optimization
Skill Investment Strategy
If you know you’re heading toward this quest soon, start investing skill points in Guns and Explosives to immediately capitalize on the Rocket Pistol. Even 2–3 levels of early investment dramatically improves the weapon’s effectiveness.
Companion Load Management
The armory has a lot of heavy items. Consider bringing companions with higher carrying capacity or equipping them with weight-reducing gear before looting everything. Nothing worse than being over-encumbered with amazing loot.
Stealth Approach Alternative
If you’re having trouble accessing Central Control legitimately, stealth builds can potentially bypass some security and access the quiz terminal through alternate routes. The hidden passage via the Tomb of the Matriarch is particularly useful here.
Photo Mode Documentation
If you’re the type who enjoys documenting playthroughs, the library map and classroom setup make for excellent photo mode opportunities. The propaganda materials are peak Outer Worlds satire.
Integration with Other Questlines
‘A Noble History’ exists independently but connects thematically and logistically to several other quests:
Companion Quest Tie-Ins: You’ll visit Central Control for both Tristan’s Listening for a Clue and Aza’s Stabbing at Shadows companion quests. Running ‘A Noble History’ at the same time is highly efficient—don’t make multiple trips.
Major Story Connections: Understanding Protectorate governance helps contextualize choices in major faction questlines. You’ll encounter similar propaganda and control structures throughout the game.
Related Side Quests:
- Several NPCs reference the Department of Belief in other quests
- The Consul appears or is mentioned in multiple storylines
- Protectorate security protocols factor into infiltration missions
For specific choice guidance:
Trophy/Achievement Considerations
While ‘A Noble History’ doesn’t have a dedicated achievement, completing it contributes to:
- Completionist runs: Counts toward side quest completion percentage
- Gear collection: Some weapons/armor track toward collection achievements
- Faction interactions: May affect reputation-based achievements
For comprehensive achievement hunting strategies, check our complete achievement guide.
Frequently Asked Questions
No. You can retry the Knowledge Evaluation as many times as needed. Wrong answers deal electric shock damage and grey out incorrect options, but you never permanently lose access to the quiz.
Nope. Once you’ve found a clue, it’s permanently recorded in your journal. You can’t lose progress, and you can re-read clues in your Journal at any time—even between quiz questions.
Yes—if you have 17 or more points in the Explosives skill, you can blow the armory door open entirely. Otherwise, not through legitimate means; the door is locked behind quiz completion. Some players report glitching through, but that’s unreliable and potentially game-breaking.
No. You can collect clues in any order. I’ve suggested an efficient route, but feel free to explore however you prefer. The quiz questions and their answers are fixed regardless of collection order.
Your character takes electric shock damage, and the incorrect answer gets greyed out so you can’t pick it again. You don’t restart from the beginning—just pick another answer for that same question.
Absolutely, especially if you invest in Guns and Explosives skills. It scales well and remains effective throughout the entire game with proper upgrades.
Completing the quest rewards +2160 XP, in addition to all the gear inside the armory.
The quest is available as soon as you reach Central Control in the Praetor region. You’ll naturally visit this area during Tristan’s ‘Listening for a Clue’ or Aza’s ‘Stabbing at Shadows’ companion quests.
Related Resources
Essential Guides:
Character Building:
Combat & Gear:
Official Resources:
- The Outer Worlds 2 Official Website
- Xbox Store Page
- Steam – The Outer Worlds
- Wikipedia: The Outer Worlds
Final Thoughts: Is It Worth Your Time?
Absolutely, yes. Fifteen minutes of exploration and quiz-taking nets you some of the best mid-game gear available, +2160 XP, and a Rocket Pistol that can carry you all the way to endgame. Even if you won’t use the equipment personally, the vendor value alone justifies the time investment—and if your Explosives skill is high enough, you don’t even need to take the quiz.
Beyond the practical rewards, this quest exemplifies what I love about The Outer Worlds 2’s approach to environmental storytelling. You’re not just collecting quest markers—you’re piecing together how an authoritarian society operates, reading their propaganda, and understanding their control mechanisms. It’s worldbuilding that respects player intelligence.
The Knowledge Evaluation itself is pure Obsidian: satirical, cynical, and darkly humorous. Answering questions designed to test Protectorate indoctrination while standing in their military compound hits different when you understand what you’re really doing.