A Philosophical Debate With Tangible Rewards
‘Imprisoned by the Riddles of Reality’ is one of those quintessentially Outer Worlds quests—wrapped in philosophical debate but ultimately decided by which loot you want most. Two Anchoresses trapped in their cell have been arguing about violence, war, and morality for who knows how long. They need books to settle their dispute, and you’re the errand runner who gets to play judge.
What makes this quest interesting: Unlike many side quests that feel disconnected from the world, this one takes place in Alexandra Monastery—a location you’ll visit naturally during the main story mission “On the Trail of the Traitor.” The quest integrates seamlessly with your primary objectives while offering meaningful rewards based on your philosophical choice (or pragmatic loot assessment).
The central question: Is violence sometimes justified as self-defense, or does it always perpetuate cycles of destruction? Your answer determines whether you walk away with protective gear that enhances mobility or heavy firepower.
Let’s break down where to find both books, how to navigate the monastery’s various skill gates, and which Anchoress deserves your agreement (or which reward deserves your attention).
Quest Overview: The Anchoresses’ Predicament
Location: Alexandra Monastery, Golden Ridge
Quest giver: Anchoress Brun and Anchoress Chao (two imprisoned scholars in the Anchorhold)
Availability: Only accessible during the main story mission “On the Trail of the Traitor”
The situation: Two Anchoresses have been locked away in a doorless cell called the Anchorhold—possibly for their own safety, possibly for punishment. They’ve been debating philosophical positions on violence and conflict, but they need specific texts to properly support their arguments.
Your role: Retrieve two books scattered throughout the monastery, return them to the Anchoresses via the Anchorite Drawer outside their cell, and then side with one position over the other in their debate.
Bonus tip: If you complete this quest before confronting Seer Wiley, you unlock a special dialogue line in your main quest conversation with him—a small but rewarding detail for thorough players.
Quest structure:
- Find Anchoress Brun and Chao in the Anchorhold; accept their quest
- Collect ‘The Essential History of Mechanized Doors’ from the Anchorite Drawer outside their cell
- Restore power via the Bathhouse Circuit Breaker
- Navigate monastery combat zones
- Find ‘Only Real Numbers: The Casualties of Appeasement’ (Book #1)
- Find ‘Conflict and Deescalation Theory: An Examination’ (Book #2)
- Return both books to the Anchoresses via the Anchorite Drawer
- Choose which philosophical position you support
- Receive rewards based on your choice
Initial Setup: Restoring Power
Before you can properly search the monastery for books, you need to handle the power situation.
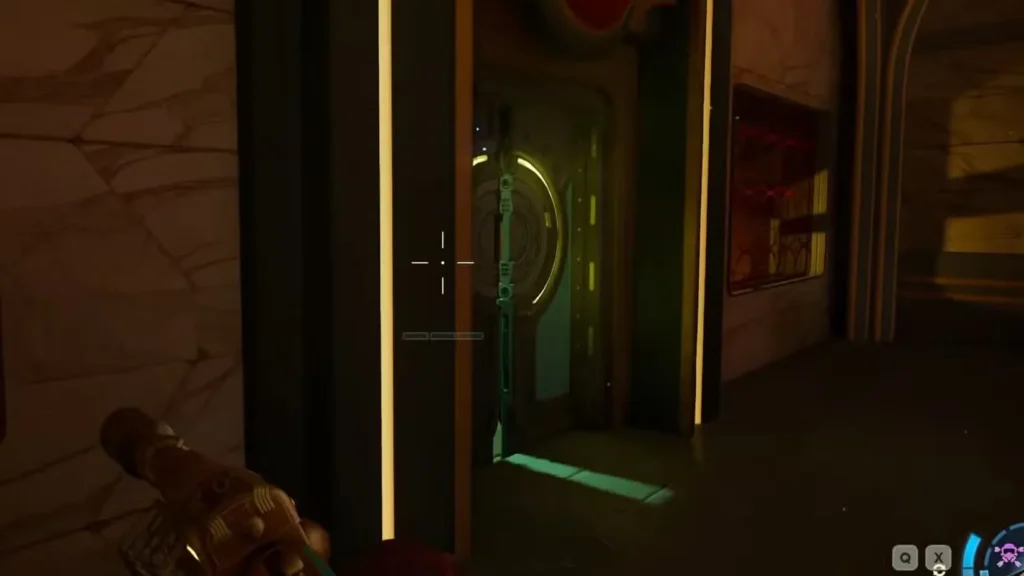
The mechanism: After speaking with the Anchoresses, interact with the Anchorite Drawer on the outside wall of their cell to collect the book ‘The Essential History of Mechanized Doors: How They Open, Close, and Everything in Between.’ This manual tells you how to operate the Bathhouse Circuit Breaker. Head past the large tree in the courtyard and through the hallway opposite the Anchorhold to reach the circuit breaker. Interact with it to restore power.
Why this matters: Power restoration illuminates areas, activates certain doors and systems, and unlocks access to the rest of the monastery. It’s a mandatory step before progressing deeper.
Once power is restored:
- Exit the Anchorhold and turn left
- Head up the stairs to the upper floors
- Prepare for enemy encounters—Rogue Order Disciples patrol the upper levels
- Navigate across a covered bridge
- Descend stairs leading to the basement areas where Seer Wiley and both books are located
Enemy types: Rogue Order Disciples throughout. Come prepared with appropriate weapons and healing supplies.
For optimal combat readiness, check our Rookie’s Reward guide for early weapon acquisition.
Book #1: ‘Only Real Numbers: The Casualties of Appeasement’ Location
This book is hidden behind a skill-gated door in the monastery’s library, which is filled with hostile forces.
Navigation to the Area
Starting from the basement level:
- Progress until you encounter Seer Wiley (main questline character)
- Look for a door marked ‘Be a Hero’
- Enter through this door
- Climb the stairs immediately ahead
The library:
- Enter the first door on your left after ascending the stairs
- You’ll enter a library area
- Clear out all Rogue Order enemies before exploring—this is a combat-heavy area
- Head up to the gallery level (upper floor of the library)
Accessing the Book: Two Methods
Method 1: Forced Entry (Brawny Trait or Engineering 5)
On the upper floor of the library you’ll find a malfunctioning (stuck) door.
Requirements:
- Brawny trait (selected during character creation)
- OR Engineering skill level 5
How it works:
- Brawny trait: Allows you to physically force the door open through raw strength
- Engineering 5: Lets you manipulate the door’s mechanical systems to bypass the lock
If you have either: Simply interact with the door, pass the check, and enter the room directly.
Method 2: Vent Crawling (No Skill Required)
For builds without Brawny or Engineering 5:
- Exit to the balcony area from the upper library floor
- Head all the way to the left—there is a vent at the dead end
- Interact with the vent to open it
- Crawl through the ventilation system
- You’ll emerge on the other side of the stuck door
Why this matters: The Outer Worlds 2 consistently provides multiple paths to objectives, respecting different build types. All builds can complete this quest regardless of trait or skill selection.
Claiming ‘Only Real Numbers’
Once inside the room (via door or vent), the book ‘Only Real Numbers: The Casualties of Appeasement (Second Edition)’ by Exemplar R. Kuang sits on a desk to your left, clearly visible.
Book collected: One down, one to go.
What this book represents: The subtitle—”The Casualties of Appeasement”—signals its argument: that refusing to use force has real, measurable costs. This is Anchoress Brun’s supporting text for her defensive-violence position.
Book #2: ‘Conflict and Deescalation Theory: An Examination’ Location
The second book requires some platforming to reach.
Navigation to the Area
Starting point: Return to the hostage room near where you encountered Seer Wiley.
The alternate path: This time, proceed through the ‘Betray Your Morals’ door (the second door on the left of the hostage room).
Don’t panic about the name: Despite the ominous labeling, going through this door doesn’t automatically make you evil or lock you out of content. It’s dramatic naming, not a binding moral contract.
Note on hostages: You can safely explore both the ‘Be a Hero’ and ‘Betray Your Morals’ rooms without triggering the hostage event, as long as you don’t enter the Observatory. Feel free to collect both books before dealing with the main quest objective.
After entering ‘Betray Your Morals’ door:
- Climb the stairs immediately ahead
- You’ll enter a large, open room
- Clear any remaining hostile enemies before platforming
The Climbing Sequence
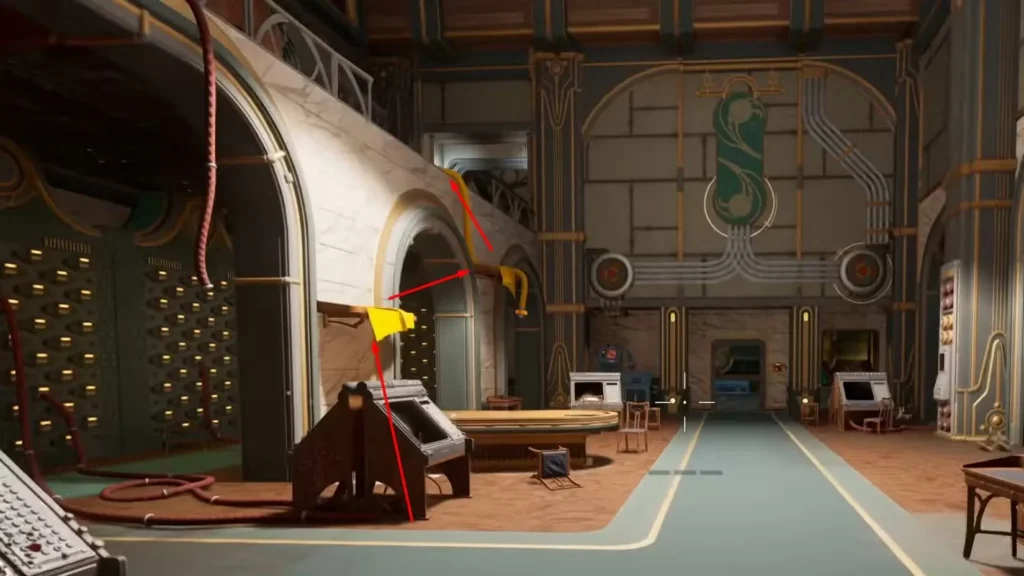
Finding the route: On the left side of the room, look for two platforms marked with yellow cloth on top—the game’s visual language for climbable surfaces.
The route:
- Approach the left side of the room
- Jump across the two yellow-cloth platforms to reach the upper level
- Once at the top, immediately turn left
Platforming tip: The sequence is short—just two jumps. Take your time to avoid falling and having to restart.
Claiming ‘Conflict and Deescalation Theory’
Once on the upper level:
- After turning left from the top of the platforms, look for a pair of tables
- ‘Conflict and Deescalation Theory: An Examination’ by Archivist A. Maler sits on the second table
Both books acquired!
What this book represents: The full title signals Anchoress Chao’s pacifist argument—that conflict can and should be de-escalated rather than met with force.
Returning to the Anchoresses
With both books in hand:
- Navigate back to the Anchorhold where Anchoress Brun and Anchoress Chao are imprisoned
- Approach the Anchorite Drawer on the outside wall of their cell
- Place both books in the drawer
- The Anchoresses can now access their requested texts
- Speak with them again to trigger the philosophical debate and make your choice
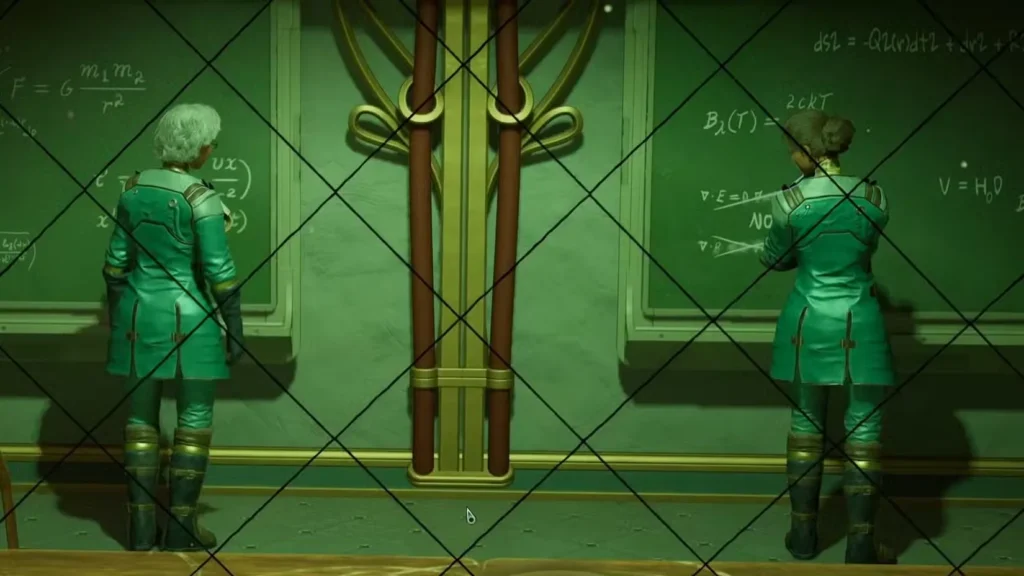
The Philosophical Debate: Brun vs Chao
Now comes the actual choice—which Anchoress has the more convincing argument about violence and conflict?
The Three Dialogue Options
When you return with the books, you’ll be presented with three responses:
Option 1: Side with Anchoress Chao
“Anchoress Chao is right about it being a loop. Violence only ever begets more violence.”
Position: Pacifist/cyclical violence perspective. Violence perpetuates itself—each act of aggression creates retaliation, infinitely. Breaking the cycle requires refusing to participate.
Philosophical framework: Similar to Buddhist or Jain non-violence principles, or Martin Luther King Jr.’s philosophy of non-violent resistance.
Reward: Repellent Awakened Seer Robes
Option 2: Side with Anchoress Brun
“Anchoress Brun gets it now. Going to war is sometimes an act of self-defense.”
Position: Just war theory/defensive violence perspective. While violence is regrettable, sometimes it’s necessary to protect innocent life or defend against aggression.
Philosophical framework: Similar to just war doctrine and self-defense ethics.
Reward: Sawed-Off Heavy Machine Gun
Option 3: Neutral/Dismissive
“What kind of crazy circular logic is that? I swear, you two just like to argue.”
Position: Rejecting the debate entirely—suggesting both Anchoresses are more interested in intellectual sparring than resolving anything.
Important note: This option does not yield either unique item reward. Only choose it if you’re deliberately roleplaying a character with no patience for philosophy.
Brun vs Chao: Reward Comparison
Here’s what each choice nets you.
Siding with Anchoress Brun: Sawed-Off Heavy Machine Gun
Weapon stats:
- Damage: 83 (x3 projectiles = 249 effective damage per trigger pull)
- Ammunition type: Heavy rounds
- Magazine size: 45 rounds
- Rate of fire: 2.5 shots per second
- Weak spot bonus: +45%
Analysis:
Damage output: This is a monster. The x3 projectile multiplier means each shot fires three projectiles, dealing 249 damage per pull—devastating against single targets or clustered groups.
Ammunition considerations: Heavy rounds are less common than standard ammo but not rare. You’ll need to manage supplies more carefully than with pistols or rifles, but the damage justifies the logistics.
Rate of fire: 2.5 shots/second is moderate—not a spray-and-pray weapon but fast enough for sustained fire in intense combat.
Magazine size: 45 rounds gives you solid capacity before a reload.
Weak spot bonus: +45% is excellent. Headshots and other vulnerable areas take massively increased damage, rewarding accuracy.
Optimal usage:
- Heavy armor enemies and automechanicals
- Boss encounters and mini-bosses
- Situations where raw damage output matters more than ammo efficiency
- Mid-to-close range combat
Build synergy: Pairs excellently with Guns skill investment, heavy weapons perks, and accuracy/weak spot bonuses. Check our complete perks guide for optimal perk pairings.
Who should choose this: Combat-focused builds, heavy weapons specialists, players prioritizing damage output.
Siding with Anchoress Chao: Repellent Awakened Seer Robes
Armor stats:
- Armor value: 10
- Evasion chance: +15%
- Damage resistance: +5%
- Combat sprint speed: +25%
Analysis:
Armor value: 10 is modest—this isn’t tank armor meant to absorb punishment. It’s light protective gear that complements evasion-focused gameplay.
Evasion chance: +15% is significant probability-based damage avoidance—roughly one in seven attacks will miss you entirely. Stacks with other evasion sources.
Damage resistance: +5% universal damage reduction applies to all damage types, making you slightly tankier across the board.
Combat sprint speed: +25% is the standout stat. Faster movement in combat dramatically improves positioning, kiting, and escape capabilities.
Overall value: The Robes are considered by many guides to be the stronger of the two quest rewards due to their unique combination of effects, and they’re a significant upgrade if you’ve only found Common-rarity armor up to this point in the game.
Optimal usage:
- Stealth builds that prefer avoiding damage over tanking it
- Mobile combat styles that rely on positioning and movement
- Glass cannon builds that need defensive options without sacrificing mobility
- Diplomatic/speech builds that occasionally face combat
Build synergy: Pairs with stealth skills, evasion perks, and mobility enhancements. The robes make you a harder-to-hit, faster-moving combatant rather than a damage sponge.
Who should choose this: Stealth builds, mobile combat styles, players prioritizing survivability and positioning over raw armor.
At a Glance: Reward Comparison
Sawed-Off Heavy Machine Gun (Brun):
- Offense-focused reward
- Immediate combat power increase
- Requires ammunition management
- Best for combat-primary builds
Repellent Awakened Seer Robes (Chao):
- Defense/mobility-focused reward
- Survivability and positioning enhancement
- No resource consumption
- Best for stealth/mobile builds; generally considered the more unique of the two rewards
Your build determines which has more value—but if you’re undecided, the Robes edge ahead for versatility.
Shared Rewards: What You Get Regardless of Choice
No matter which Anchoress you support, you’ll receive these baseline rewards:
Advanced Decryption Key: Used to open high-security lockboxes throughout the game. These lockboxes contain top-tier loot, making the key extremely valuable. See our Advanced Decryption Keys guide for optimal usage locations.
Crude Biomass: Crafting material for biological or organic-based upgrades and consumables.
Energy Canister: Gadget fuel or crafting component for energy-based equipment.
Foil: Crafting material for electronics or insulation applications.
Scrap Metal: Universal crafting material for weapons, armor, and mechanical repairs.
1,080 XP: Decent experience boost for a side quest.
Value assessment: The shared rewards alone justify completing the quest. The unique gear (weapon or robes) is a bonus on top of already worthwhile baseline rewards.
For context on experience and leveling, check our max level cap guide.
Decision Guide: Which Anchoress Should You Choose?
Choose Anchoress Brun (Heavy Machine Gun) If:
- You’re running a combat-focused build with Guns skill investment
- Heavy weapons fit your playstyle and loadout
- You need high single-target damage output
- You’re facing heavily armored enemies or bosses
- Your build can handle ammunition logistics
- You already have decent armor and need better weapons
Choose Anchoress Chao (Seer Robes) If:
- You’re running stealth or mobility-focused builds
- You lack adequate defensive gear
- Combat sprint speed significantly benefits your playstyle
- Evasion-based defense fits your build philosophy
- You already have strong weapons and need better armor
- You want survivability without sacrificing mobility
Choose Neither (Neutral Response) If:
- You’re strictly roleplaying a character who’s tired of philosophical debates
- You don’t care about either unique reward
Recommendation: Unless you’re strictly roleplaying, choose based on your build needs. Both unique rewards are excellent—let your character’s strengths and weaknesses guide you.
Thematic Analysis: The Violence Debate
Chao’s Pacifist Position
The argument: Violence creates cycles of retaliation. Your aggression justifies my counter-aggression, which justifies your counter-counter-aggression, infinitely. The only way to break the cycle is refusing to participate.
Real-world parallels: Gandhi’s non-violent resistance, MLK’s civil rights movement, Buddhist non-harm principles, Quaker pacifism.
Strengths: Prevents escalation, seeks root causes rather than symptoms, doesn’t perpetuate revenge cycles.
Weaknesses: Vulnerable to aggressors who don’t respect non-violence, potentially enables oppression if taken absolutely, assumes all parties are rational actors.
Brun’s Defensive Violence Position
The argument: While violence is regrettable, self-defense is morally distinct from aggression. Refusing to defend yourself or others enables evil to flourish. Context matters—defensive violence stops aggression rather than perpetuating it.
Real-world parallels: Just war theory, police/military defense doctrine, proportional self-defense laws.
Strengths: Protects innocent life, recognizes real-world threats, acknowledges moral difference between aggression and defense.
Weaknesses: “Self-defense” can be subjectively interpreted, creates justifications for pre-emptive violence, assumes you can distinguish defense from aggression.
The Outer Worlds 2’s Commentary
By making this a quest with tangible rewards, Obsidian is saying something meta: philosophical positions have practical consequences. Your beliefs about violence inform how you approach the game world—combat vs. stealth, aggressive vs. defensive tactics.
Neither position is portrayed as obviously correct. Both Anchoresses have legitimate arguments, and the game respects whichever you choose.
Integration with Main Story
Optimal Quest Flow
- Enter monastery during “On the Trail of the Traitor”
- Find Brun and Chao in the Anchorhold; accept their quest
- Restore power via the Bathhouse Circuit Breaker as part of normal progression
- Clear monastery combat encounters for the main story
- Collect both books opportunistically as you explore—they’re along paths you’ll traverse anyway
- Complete this quest before entering Wiley’s Observatory to unlock a bonus dialogue line with Wiley in the main story
- Return to Anchoresses before leaving the area
- Make your choice and collect rewards
Relationship to Other Quests
Seer Wiley’s puzzle: You can complete Wiley’s puzzle and free the two hostages while also collecting the books—just don’t enter the Observatory until you’re ready to trigger the main quest event. Finishing this side quest first unlocks a special dialogue line with Wiley.
Main story progression: The monastery is central to late-game story development. Completing side content here enriches your understanding of The Order’s beliefs and internal conflicts.
Common Mistakes & How to Avoid Them
Mistake #1: Missing the Vent for Book #1
The error: Lacking Brawny or Engineering 5, players try to force the door open, fail, then assume the book is inaccessible and abandon the quest.
Solution: Exit to the balcony and check the dead end to the left—the vent is there and requires no skill check whatsoever.
Mistake #2: Choosing Based on Philosophy Instead of Build
The error: Players select the philosophical position they personally agree with, ignoring whether the reward suits their character build.
Solution: Unless strictly roleplaying, choose based on which unique reward benefits your build most.
Mistake #3: Taking the Neutral Option Accidentally
The error: Players think the neutral/dismissive response is a joke option but accidentally select it, missing out on unique rewards.
Solution: Read dialogue carefully. The neutral option is clearly dismissive and offers no unique gear. Only choose it intentionally.
Mistake #4: Not Completing Before Leaving Monastery
The error: Leaving the monastery without finishing the quest, then having to return later—wasting fast travel time.
Solution: Complete the quest before leaving since you’re already there with both books. You’ll also miss the bonus Wiley dialogue if you complete it after the main story beat.
Mistake #5: Poor Build-Reward Matching
The error: Stealth builds taking the heavy machine gun, or combat builds taking the robes, because they rushed the choice.
Solution: Take a moment to evaluate which reward genuinely benefits your character. The machine gun is worthless if you never use heavy weapons; the robes are wasted on characters who don’t dodge or sprint.
Advanced Tips & Optimization
Multi-Playthrough Planning
- First playthrough: Choose the reward matching your build
- Second playthrough: Choose the other option to experience both rewards
- Third playthrough: Experiment with the neutral option if curious
Save Before Final Dialogue
Create a save before making your final choice between Brun and Chao. This allows you to:
- See both outcomes without replaying the entire quest
- Change your mind if the reward doesn’t match expectations
- Test how each unique item performs in combat
Companion Opinions
Pay attention to companion reactions during the philosophical debate. They may comment on your choice, providing character development and relationship depth. Some companions might approve of pacifism, others of defensive violence.
For more on companion relationships, see our complete companions guide.
Frequently Asked Questions
Can you get both unique rewards?
Not in a single playthrough. You must choose one Anchoress, receiving only that reward. Multiple playthroughs required for both.
Does the choice affect story outcomes?
Not significantly. This is primarily a loot-based decision rather than a story-branching choice. Your philosophical alignment doesn’t drastically alter the narrative.
Can you change your mind after choosing?
No. Once you select an Anchoress and receive rewards, the choice is permanent for that playthrough. Load your pre-dialogue save if you want to change.
Are the skill requirements for Book #1 door mandatory?
No. The vent provides a skill-free alternative. All builds can complete this quest regardless of trait or skill selection.
Is the neutral option worth it?
No. You miss both unique gear rewards for essentially no benefit beyond expressing your character’s personality. Only choose it if deliberately roleplaying.
Do companions react to your choice?
Potentially. Companions may comment on your philosophical alignment, though it’s unlikely to significantly impact relationships compared to major story choices.
Is there any benefit to finishing this quest before fighting Seer Wiley?
Yes. Completing ‘Imprisoned by the Riddles of Reality’ before entering Wiley’s Observatory unlocks a special bonus dialogue line in your main quest conversation with him.
Related Guides & Resources
Major Story Quests:
- An Equitable Arrangement – Negotiations Guide
- Auntie’s Choice vs Order Ascendant
- Kaur vs Milverstreet Choice
Weapon & Gear Guides:
Character Building:
Progression & Loot:
Monastery Related:
Final Thoughts: Philosophy Meets Pragmatism
‘Imprisoned by the Riddles of Reality’ exemplifies The Outer Worlds 2’s design philosophy: wrap meaningful choices in accessible packaging. You’re not just collecting books and picking dialogue—you’re engaging with genuine ethical questions about violence, defense, and moral responsibility.
But let’s be real: Most players will choose based on whether they need evasion-boosting armor or a devastating heavy weapon. And that’s fine. Obsidian knows you’re playing a video game, not attending a philosophy seminar.
The beauty is having both options. You can engage deeply with the thematic content if you want, or you can pragmatically assess which reward benefits your build. Both approaches are valid, and the quest accommodates either mindset.
Personal recommendation: Choose based on build needs during your first playthrough, but take a moment to actually read the Anchoresses’ arguments. Obsidian’s writers put thought into these debates—they deserve at least cursory engagement beyond “which loot do I want?”
Now get out there, collect those books, and decide whether violence is ever justified. The Anchoresses are waiting, and they’ve been arguing for far too long without resolution.
External Resources
Official Outer Worlds Information: