Inez’s companion quest “A Most Extraordinary Specimen” throws one of those classic RPG moral dilemmas at you: Do you let your companion take revenge on someone who arguably deserves it, or do you convince them to take the pragmatic route that might lead to greater good down the line?
Doctor Giles Rasmussen isn’t exactly sympathetic. You’ve just fought through his secret grafting lab on Cloister, discovered evidence of horrific experiments on unwilling patients, and now he’s standing there trying to justify it all with the “greater good” defense. Inez wants him dead for what happened to her friend Trooper Ortiz, who died when his body rejected the illegal grafting procedure. You have the power to let that happen—or stop it.
Here’s the kicker: This isn’t just about roleplaying morality. Your choice here has tangible mechanical consequences that affect Inez’s combat effectiveness, unlocks different grafting upgrades, and determines which follow-up questline you receive afterward.
Let’s break down both outcomes so you can make an informed decision.
The Setup: Finding Doctor Rasmussen in the Hidden Lab
Before we dive into the choice itself, here’s the context:
After receiving a message from Inez’s former squadmate Trooper Ortiz—who is dying after an illegal grafting procedure went wrong—you’re sent to investigate a secret grafting laboratory in the Frozen Maw ice caves on Cloister. As you explore, the full horror of what’s been happening here becomes clear—this wasn’t just medical research. Rasmussen has been conducting unauthorized, dangerous experiments on patients and creatures who had no say in the matter.
When you finally confront him, he doesn’t deny what he’s done. Instead, he tries to rationalize it: the sacrifices these people made were necessary to advance grafting technology that will save countless lives in the future. It’s utilitarian ethics at its most morally bankrupt.
Inez, understandably, wants to put a bullet in him. The question is whether you’ll let her.
Important note: Before speaking with Inez in the specimen tank room, read all the records on the terminal inside—particularly the Grafting Lab Files. This unlocks critical “Required Info” dialogue options that make the confrontation with Rasmussen go much smoother, regardless of which outcome you’re going for. If you rushed past it, backtrack before triggering the confrontation.
Save tip: Create a manual save just before entering Rasmussen’s office. There’s a known bug where Rasmussen won’t interact with the display cases after being spared, which blocks access to the grafting parts. If this happens, reload the save and try again.
Outcome 1: Killing Doctor Rasmussen (The Revenge Route)
If you side with Inez’s desire for vengeance and let her kill Rasmussen, here’s what happens:
What You Get:
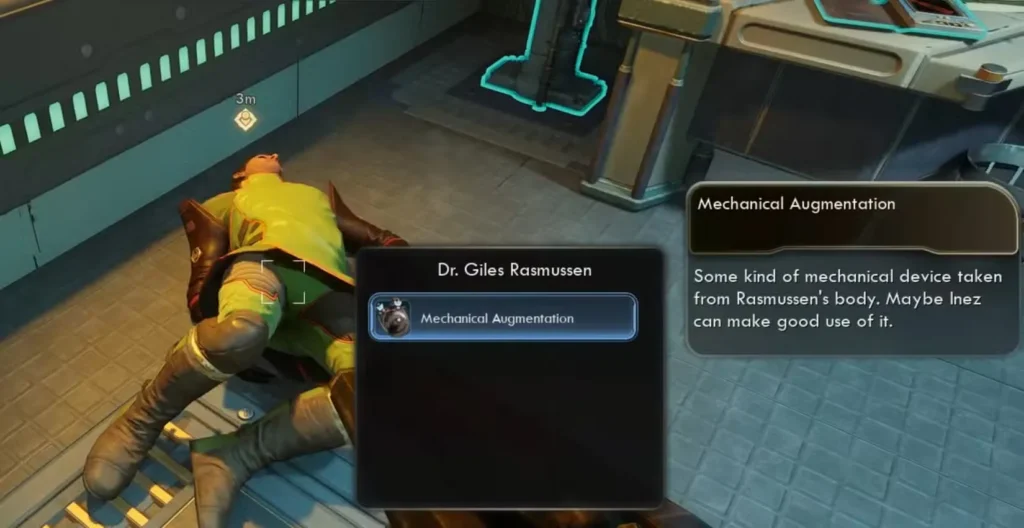
Mechanical Augmentation for Inez:
- Grants Inez a second ability charge, so she can use her companion ability twice before it needs to recharge
- Particularly powerful if you rely on Inez’s healing or team-buffing abilities in extended fights
- A meaningful upgrade that some players consider the strongest option for support-focused Inez builds
Doctor Rasmussen’s Keycard:
- Looted from Rasmussen’s body
- Grants access to previously locked areas of the lab
- Lets you collect any remaining loot and research materials
“Full Measures” Follow-Up Quest:
- Killing Rasmussen does NOT end Inez’s storyline—it unlocks a different follow-up quest called “Full Measures”
- Konnen gives you a keycard to access the ACS tram’s Back Deck Steerage area
- After surviving an ambush, you help Inez dig up dirt on Konnen by searching his office and a connected lab
- Inez ultimately broadcasts Konnen’s crimes to publicly ruin him
Inez’s reaction: She’s satisfied with the outcome and feels closure for what happened to Ortiz.
The Drawbacks:
You miss out on the two superior grafting parts (Ursopod and Mantiqueen) and instead receive only the single Mechanical Augmentation. You also get a different follow-up quest path—not no content at all, but a different story direction than players who spare Rasmussen.
Is the Mechanical Augmentation actually weak? This is genuinely contested. The extra ability charge is straightforward and consistently useful—especially if Inez is your primary healer or buffer. If you’re optimizing for those roles, some players argue this upgrade punches above its weight compared to the situational alternatives. The “kill” route is a legitimate build choice, not strictly inferior.
When This Choice Makes Sense:
- You’re roleplaying a character who values justice over pragmatism
- You rely heavily on Inez’s healing or buffing ability and want the extra charge
- You want Inez to have emotional closure for Ortiz
- You want to experience the “Full Measures” questline
Outcome 2: Sparing Doctor Rasmussen (The Pragmatic Route)
Convincing Inez to spare Rasmussen requires more work, but the graft rewards give you more options.
Debunking the Speech Check Myth:
Despite what some guides claim, you do NOT need Speech level 17 to spare Rasmussen. There’s a specific dialogue path that lets you achieve this outcome without any skill checks at all, as long as you’ve read the terminal in the specimen tank room before the confrontation.
The Exact Dialogue Path (No Speech Check Required):
Follow these responses in order during the confrontation:
- “Nice try. We found records that prove he underwent surgery here.”
- (Only appears if you read the terminal with the Grafting Lab Files before the confrontation)
- “What were you trying to do with Ortiz and the others?”
- “Got any proof of that?”
- “Enough about you. Show me one good thing you’ve done for other people.”
- “Do you have a graft that could help Inez?”
- “This could be your way to prove yourself.”
- “His research could help so many others. The good might just outweigh the bad.”
- “This is a personal choice, Inez. I’ll stand by whatever you decide.”
Critical: If you deviate from this dialogue sequence, Inez may kill Rasmussen regardless. The Speech 17 check on the final option is a fallback if you’ve gone off-script—but if you follow the steps above, you don’t need it.
What You Get for Sparing Rasmussen:
Two Superior Grafting Parts (choose one to install):
- Ursopod Grafting Part
- Reduces incoming damage when Inez’s ability is active
- Defensive upgrade that improves survivability
- Best for players who use Inez as a tank or frontline fighter
- Considered the safer pick by many guides due to passive reliability
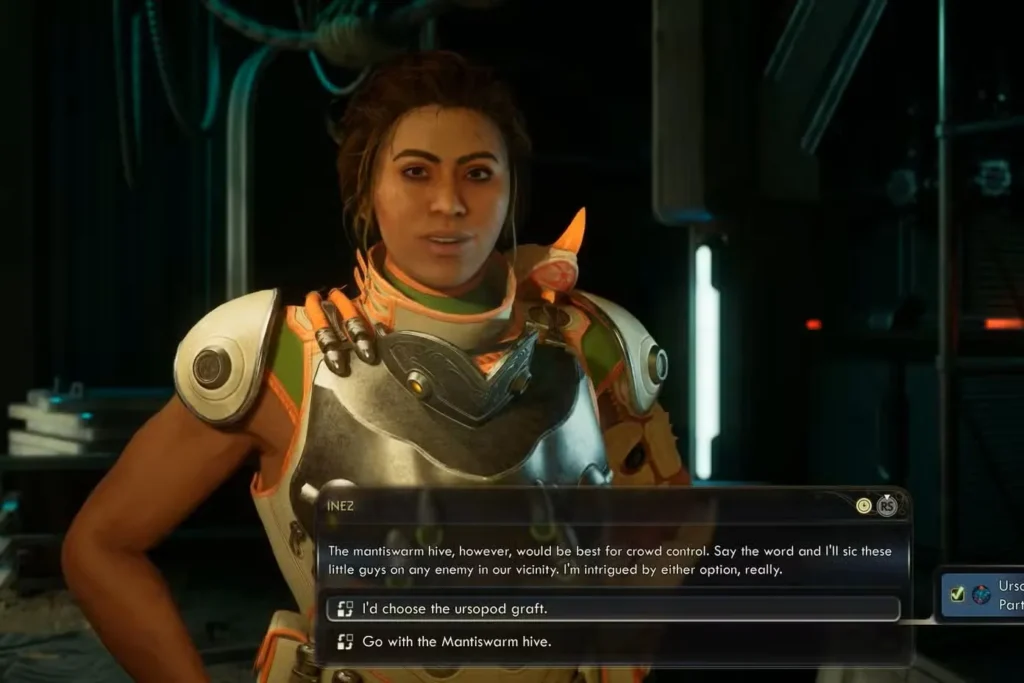
- Mantiqueen Grafting Part
- Summons a Mantiswarm hive for crowd control
- Excellent for dealing with groups of enemies
- Best for players facing multiple opponents regularly
- AoE crowd control that isn’t a stun can be situational—position carefully
You get to choose one of these when you return to Ethel’s Lab in Fairfield. Unlike the Mechanical Augmentation, both of these upgrades meaningfully change how Inez functions in active combat scenarios.
“Half-Truths in Advertising” Follow-Up Quest:
After fitting the graft, Ethel Tinsley reveals that Willard Konnen, VP of Experimental Operations at Auntie’s Choice, wants to speak with you. She gives you her calling card to access the Head Office Tower’s third floor on the ACS Undisputed Claim.
When you meet Konnen, he grants you the quest “Half-Truths in Advertising,” which sends you to Praetor’s blockade—the high wall dividing the region’s eastern and western sectors—to eliminate Protectorate soldiers and lower the wall.
Additional Context:
Ethel also clarifies that she would have never approved of Rasmussen’s methods, distancing herself from his unethical practices while acknowledging the potential value of his research when conducted properly. This conversation adds nuance to the faction politics between Auntie’s Choice and independent researchers. True to his word, Rasmussen returns to Ethel’s Lab and shifts focus toward making grafting an ethical and accessible program.
Which Grafting Part Should You Choose for Inez?
If you spare Rasmussen, you’ll need to decide between the two grafting upgrades. This choice is permanent, so pick carefully:
Ursopod Grafting Part (Defensive):
Choose this if:
- You frequently send Inez into direct combat
- You’re playing on higher difficulties where damage mitigation matters
- Your own character is ranged and you need Inez to hold aggro
- You want reliable, passive protection rather than situational offense
Mantiqueen Grafting Part (Offensive):
Choose this if:
- You face large groups of enemies regularly
- You value crowd control over raw survivability
- Your playstyle involves dealing with multiple threats simultaneously
- You’re comfortable managing positioning for AoE effects
Most guides lean toward the Ursopod as the safer and more consistently useful pick of the two spare-route options. Crowd control from the Mantiqueen can be finicky since it isn’t a stun effect. That said, if you’re regularly fighting large enemy groups, the Mantiswarm hive earns its keep.
For more thoughts on optimizing your entire party composition, check out the complete companions guide.
The Recommended Choice: Spare Doctor Rasmussen (For Most Players)
From a content and flexibility perspective, sparing Rasmussen gives you more options—two grafting parts to choose from, and the “Half-Truths in Advertising” follow-up questline. However, the kill route is not a dead end: you get the Mechanical Augmentation (which is genuinely strong for support builds) and the entirely separate “Full Measures” questline.
Why most players prefer sparing:
✅ More upgrade flexibility — Choose between Ursopod or Mantiqueen based on your combat style
✅ Different quest content — “Half-Truths in Advertising” takes you to Praetor for a mission briefing
✅ Positive story resolution — Rasmussen reforms and works ethically alongside Ethel Tinsley
✅ Faction implications — Keeps Rasmussen alive to work with Ethel, which has minor reputation effects
✅ Content completionism — Each path leads to different content; plan your playthrough accordingly when aiming for 100% achievement completion
Why some players prefer killing: The Mechanical Augmentation’s extra ability charge is consistently strong, especially if you use Inez as a healer. And the “Full Measures” quest, while different in tone, is equally developed story content. Neither route is objectively wrong.
Common Questions & Troubleshooting
“I can’t get the first dialogue option about records. What did I miss?”
You need to read all the records on the terminal inside the specimen tank room—specifically the Grafting Lab Files—before speaking to Inez. If you skipped it, backtrack before triggering the confrontation with Rasmussen. If you’ve already started the confrontation, you may need to reload a save.
“Inez killed him even though I followed the dialogue path. What happened?”
Make sure you’re following the EXACT sequence listed above. Even small deviations can result in Inez choosing violence. If you skipped any steps or chose different options earlier in the conversation, it can lock you out of the peaceful resolution.
“Rasmussen won’t interact with the display cases after I spared him.”
This is a known bug. Reload the save you made before entering his office and work through the confrontation again. This is why creating a manual save beforehand is strongly recommended.
“Is the Speech 17 check easier than the dialogue path?”
No. The Speech check requires significant skill point investment in a social stat. The dialogue path works regardless of your build, making it the more accessible option for most players.
“Can I change my mind about which graft to choose later?”
No. Once you select a grafting part at Ethel’s Lab, you’re locked into that choice for the playthrough. Choose carefully based on your combat style.
“Does killing Rasmussen lock me out of all follow-up content?”
No—this is a common misconception. Killing Rasmussen unlocks the “Full Measures” questline, while sparing him leads to “Half-Truths in Advertising.” Both are fully developed follow-up quests; they just go in completely different directions.
Related Companion & Quest Guides
Since “A Most Extraordinary Specimen” is a companion quest with faction ties, these resources will help you navigate related content:
Companion Guides:
- All Companions Recruitment Guide – Locations & Abilities
- Pets Guide – How to Get, Unlock & Change Companions
Choice & Faction Guides:
- Inez Graft Choice – Raptidon Skeleton vs Crabble
- Aunties Choice vs Order Ascendant – Trust Guide
- All Factions Guide – How to Join & Reputation
- Kaur vs Milverstreet Choice – Fairfield Decision
Other Major Choices:
- Pinching Pupa – Wentworth vs Bradford Choice
- Vox Relay Choice – Fairfield vs Westport Space
- Savannah’s Journal Location & Uses Guide
Character Build & Progression Resources
If you’re thinking about the Speech skill investment or optimizing your character for dialogue checks:
- Best Starting Builds Guide
- Best Traits Ranked – Complete Tier List
- All Perks Complete List & Requirements
- All Backgrounds & Traits Guide
- Negative Traits Guide – Best & Worst
Final Thoughts: Revenge vs. Results
“A Most Extraordinary Specimen” is one of those companion quests that really tests your priorities as a player. Do you value immediate emotional payoff over long-term strategic advantage? Are you willing to work with morally compromised individuals if it leads to better outcomes?
The game doesn’t judge you either way, but it does reward thorough exploration and careful dialogue navigation. If you took the time to read all the terminals in the lab before the confrontation, you’re rewarded with the information needed to steer the outcome in any direction you choose. If you’ve invested in social skills, you get a safety net in case you deviate from the dialogue sequence.
What I appreciate about this quest is that both choices lead to meaningfully different content. Killing Rasmussen is emotionally satisfying and morally defensible—he’s a monster who tortured people in the name of progress—and the “Full Measures” questline gives Inez a satisfying alternative arc. Sparing him unlocks two flexible graft options and a different follow-up story where Rasmussen genuinely reforms.
For most players, especially those who want more upgrade flexibility or are playing a support-light build, sparing Rasmussen is the smart play. But if you rely heavily on Inez’s active ability and want that extra charge, the kill route has a legitimate mechanical case behind it.
Either way—make sure you read those terminals first, save before the confrontation, and choose the graft that actually matches how you play. The quest is well worth experiencing on both paths if you’re doing multiple playthroughs.
More Outer Worlds 2 Quest Guides:
- Otto’s Lock Puzzle Solution – Free Market Station
- Order Initiate Scavenger Hunt Puzzle Solution
- Commander’s Safe Key Location – How to Open
- Kaur’s War Chest Location & Keycard Guide
Collectibles & Exploration:
- Science Adventures Quarterly Magazine Locations
- Cloister Excogitation Logs & Sojourners Chapel Locations
- Golden Ridge Mural Locations – Tramicular Stations
- Praetor Lightning Towers – Grounding Stations Locations
Beginner Resources: